


Being two music-production powerhouses, the debate for which DAW is better between Ableton Live and Logic Pro X is an endless whirlwind of positive comparisons, with seldom a downside between them.
Ableton Live cornered its namesake in the live performance realm, garnering people producing and performing all types of electronic music. Logic Pro was always considered the bedroom musician, Pro Tools. Cheaper but fully functional, pro studio quality, and feature-rich DAW. Used more in conjunction with producing full tracks to later be played live with CDJ's or the like.
Fast-forward down the line for both of them, and the features of each started to become closely related...though each still has its differences. Both of them serve as unique tools in the audio manipulation and MIDI programming paradigm.
In this article we will be comparing Ableton Live 11 Suite Version and Logic Pro 10.7.3, each the most current at the time of this writing. We will be looking at the features, stock instruments, workflows, processing and effect plug-ins, UI/UX, etc. Basically, anything a user needs to know about creating one's music as effectively as possible in each of the DAWs. Both music production powerhouses qualify as viable tools. Although Live can be used on Windows, for this article we will focus on both mac versions.
Arrangement View
The linear workflow of a DAW is spent in the arrangement view. While every function has its window or sub-menu, this is your global view of your entire composition.
Apple's Logic Pro has a more traditional linear view, and one in which you have full access to a single selected channel strip on the left side of the screen. This is nice for organization and making quick changes to your mix while arranging your clips, audio tracks, and MIDI tracks on the timeline. You also have access to inserts, instruments, audio units midi fx, dynamics, and time-based effects, and sends to effects on auxiliary buses. If you wanted to, you could do an entire mix from the arrangement view.
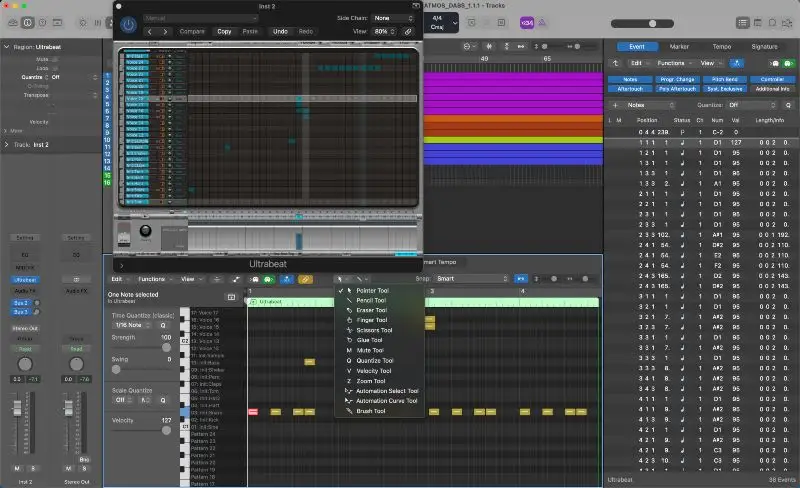
Mouse pointer editing tools are also contained in the session view (another name for arrangement view). Logic has a wealth of tools for selecting, slicing, fading, erasing, gluing, zooming, automating, and warping. Each of them can also be assigned to a single key command, so you can speed up workflows that you end up executing often. If you're a key command person, Logic is incredibly versatile.
Double-clicking audio clips and MIDI clips from session view will subsequently bring up audio editor and piano roll editor windows respectively, letting you further oversee your entire composition from this multi-faceted space.
Ableton Live's session view is very similar to Logic's, as are most arrange views in any digital audio workstation. The differences are subtle but do make enough of an impact on the workflows.
The layout of Ableton's arrange window has the insert section in its area on the bottom of the screen. It also doesn't utilize traditional vertical insert slots, but instead a horizontal space where you can drag and drop, plug-ins, instruments, and even just plain audio files. Audio dropped there will immediately get converted into a sampler instrument, making the sampling workflow extremely fast.
Ableton Live has a much more condensed set of mouse pointer editing tools than Logic Pro X. They are also not activated by key commands, and instead utilize different parts of the clip or timeline to change functionality.
For instance, hovering the mouse in the time ruler will show a magnifying glass. This is your zoom tool so you can zoom in and out and make edits accordingly to your clips. Hovering your mouse just under the time ruler will result in a speaker icon, allowing you to click and play from that point in time. Placing your mouse at the edge of a clip will activate trimming, clicking in the area above the waveform will bring up a hand and allow you to move clips around, and clicking in the waveform area itself will let you make selections to cut audio and move it around accordingly.
Of course, the editing itself is done with command + E, and consolidating edits, command + J. Fades show up when you reach a certain zoom level and have UI for curves and fade length. Create Fades on Clip Edges is a preference you can turn on and off in the preferences and comes in handy for saving time when editing audio.
The key differences in the edit window of each DAW make for very different workflows. Key command users would prefer Logic Pro X, and appreciators of the what-you-see-is-what-get variety, Ableton Live excels.
MIDI: Editing, Effects, Software Instruments, Controllers
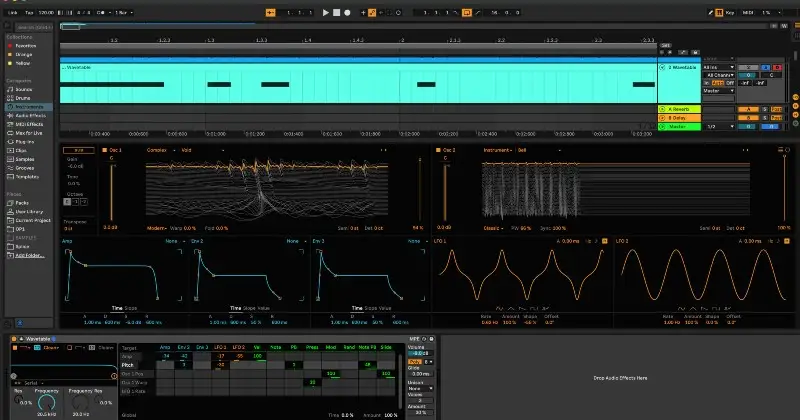
Ableton has an immensely useful collection of MIDI instruments, such as the extremely versatile and user-friendly, Wavetable Synth. With 2 oscillators, it's not overpowering, yet it has a wide variety of wavetables to choose from, the routing matrix is easy to get used to, and the tonality can closely resemble an analog synth.
Live also has an equally as powerful midi environment. MIDI data can be entered using the qwerty keyboard by enabling the keyboard icon in the top right. Just turn it on and your keyboard is not able to send MIDI signals. Just slightly quicker than Logic Pro's command + K key command. As with the changing mouse tool in the arrange view, most things in Live are right there in front of you and do not require key commands or sub-menus.

Editing using the piano roll is quick and often activated like every digital audio workstation, by simply clicking the MIDI clip. Logic Pro's process is more or less identical. Each DAW also has plenty of MIDI effects that can be inserted on the desired MIDI track, turning each DAW into a very advanced MIDI sequencer. Live's MIDI sound is largely unique due to the amazing suite of MIDI effects and how easy they are to use. Slim to zero sub-menus are contained and interesting sounds come are conjured up in an instant while creating organic sounding music.
Logic's long development history has made it a MIDI titan in the digital world. Ableton Live does pale in comparison to it. For starters, the toolset is greater and, because key commands can be used, is much snappier once you get used to them. Also, the event list editor displays handy inspector-based MIDI in an easy-to-read manner, allowing you to edit all of the MIDI data that's been entered. MIDI editing can become quite a granular process if you'd like it to be.
Recording MIDI loops in Logic Pro X has its own set of features, in which you can choose between creating a folder of takes to later comb through and comp, merging all the takes into a single MIDI file, overlap notes, a combination of overlapping and merging, or creating a completely new track.
Logic may have my favorite DAW-based drum sequencer. However, Logic's retro synth, Ultrabeat drum machine, though slightly old in its UI design, is an incredible piece of music technology. As one of the most trusted MIDI stock plugins Logic has to offer, it has withstood the test of time from a functionality standpoint.
It contains an easy to use the step-input sequencer, the ability to assign multiple outputs, a built-in synth engine, velocity/gate sliders (that uniquely slide up/down for velocity and right/left for long/short gate), swing, accent, and functionality that allows the user to drag the created patterns to the arrange view. A full kit contains 25 MIDI voices, the 25th moving up a chromatic scale, becoming a nice bonus sampler, and potentially one less sampler track that you'll need in your session, saving another MIDI voice.
Logic's MIDI architecture also shines in the environment, where you can further route MIDI effects and MIDI devices in, out, and around each other. It's like Logic's very own Max MSP JR. All of this, and still the Logic layout for MIDI is very easy to comprehend.
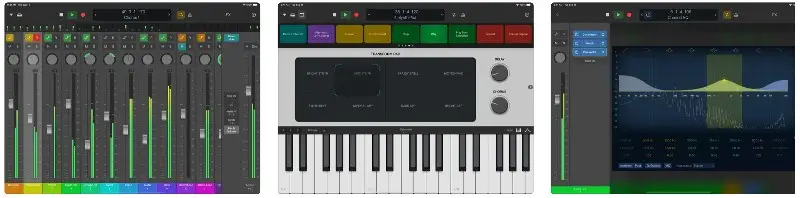
Apple has also created the Logic Remote app, which allows fully integrated control of Logic Pro and Garageband via iPad or iPhone. Users who are comfortable with performing with an iPad will surely appreciate the usability and portability of the remote app. Good old-fashioned button pushers and knob twisters may want something a little more tangible.
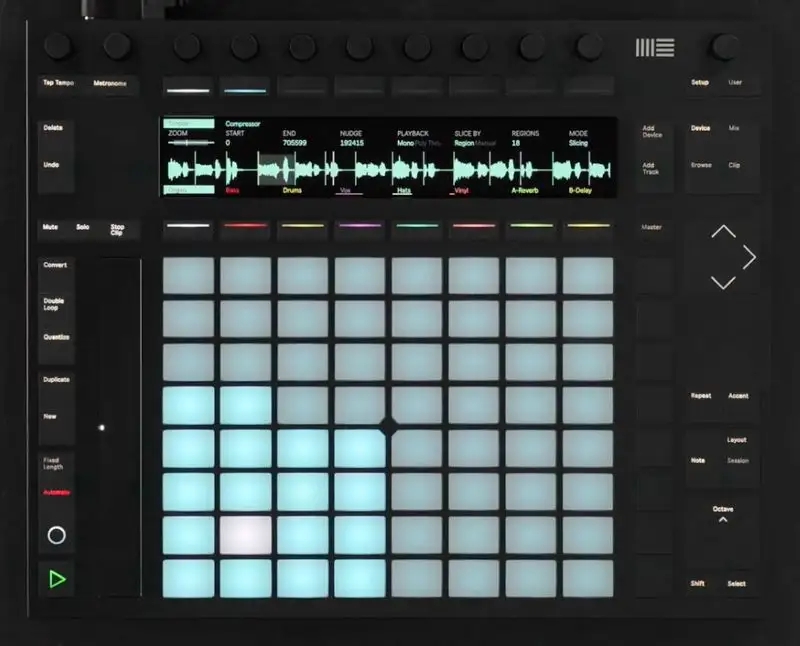
I think it's safe to say that Ableton Live takes the cake for controller integration. Apple Logic Pro supports most of the same MIDI controllers, but not quite on the same level. The Push 2 integrates into Ableton so much so, that you don't even have to touch the computer at all when you're using it.
You can move through menus, select sounds, instruments, warp, slice to 64 pads, play chords, scales, modes, make MIDI loops, and launch clips. If you're looking to perform live with a controller specifically and are trying to decide between Ableton Live vs. Logic Pro, trust the namesake.
Audio Recording, Editing, and Mixing
When it comes to audio recording, Logic Pro X is equipped with enough features to execute both small format and large format projects. Whether you're at home using your live instruments, or in a professional recording studio executing a multitrack recording of a 28-player brass band, Logic Pro X is an effective tool. Live performers will also appreciate the low latency mode it has so that they can record with a very minimal delay so as not to get distracted while overdubbing.
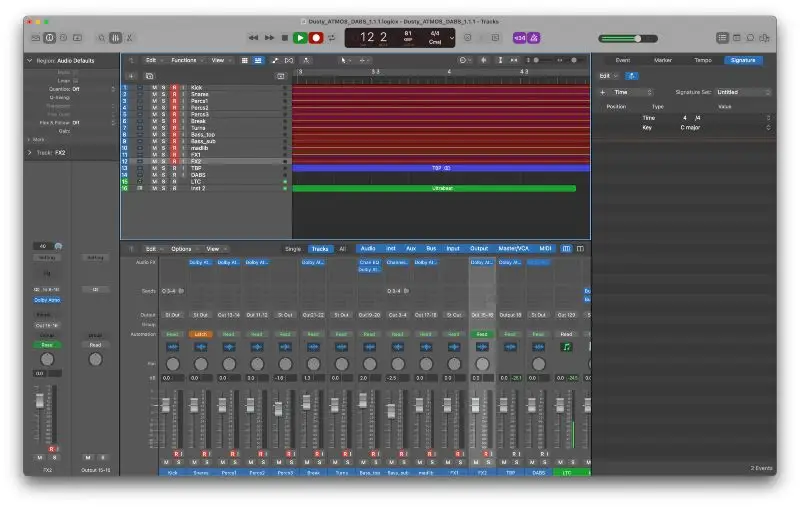
Grouping, an age-old recording concept, has also been enhanced by Logic Pro X. If you need to send multiple sources to one place, i.e. taking your mono recordings from your multiple drum mics and sending them to a stereo bus for compression and whatnot, Logic's track stacks make creating subgroups very easy. You can also choose whether you'd like to sub-mix them or simply make folders for organizational purposes during your mix.

Since around Logic 10.5, Logic has proudly supported 1000 audio and/or MIDI tracks. For music, you'd be hard-pressed to use that many, but you never know.
If you do get to the point where your system is starting to become sluggish due to high DSP usage, you can initiate CPU-saving track freezing. Track freezing will freeze the desired tracks, along with all of their processing, and disable everything on the given track.
This feature is simply not possible in Ableton Live. So if you're planning on large format recording and mixing, that is something to consider.
Logic and Live each support any Mac OS interface, or third-party plugins of your choice, and you can assign multiple devices if you want to have separate input and output for any reason (something that Pro Tools cannot do). You can also set up hardware inserts and use your outboard gear as external plugins.
Logic's deeper editing makes for quick and easy decision-making. As explained in the session view section, there is an in-depth toolset that you can slice, fade, loop, select, pencil in automation with, mute clips, solo clips, and the list goes on. You can quickly come up with whichever combination works for you and your use case, and commit it to muscle memory so you can fly through editing projects.
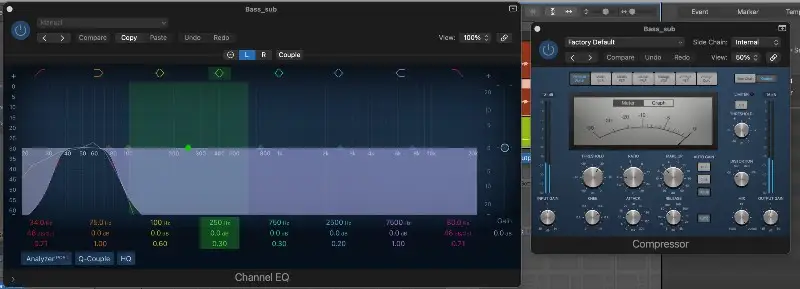
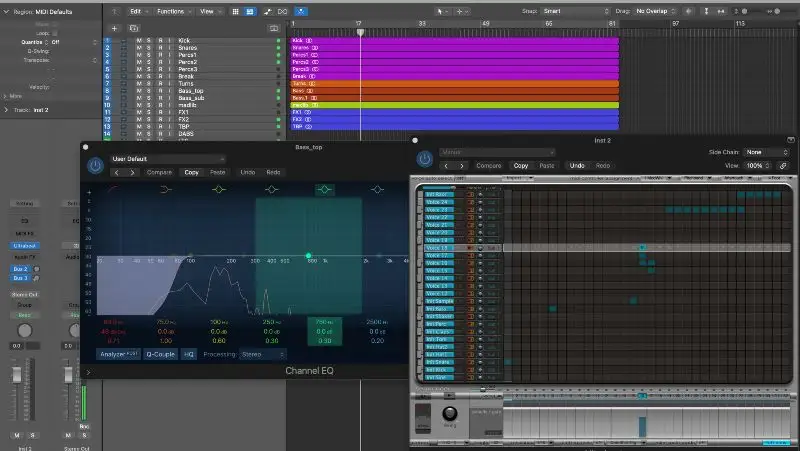
Through Logic's audio effects menus, Logic Pro boasts a wide range of excellent sounding dynamics plugins, integrated channel EQ with sonic visualizer, and time-based processors, such as reverbs, delays, flangers, phasers, etc. All of which can stand their ground with any popular third-party plugin manufacturers. Another thing to consider when you're factoring things into your budget.
So, in the Ableton vs. Logic conversation for recording software, Logic is quite obviously a more fully-featured product.
However, if you're needs are not as vast as explained above, Ableton Live can do the trick. Maybe you're just recording one thing at a time, just making loops and simple overdubs as you put your composition together.
Maybe there's no need to record and play multiple instruments at large track counts. Of course, if you're recording and live to loop, Ableton Live's quick and simplistic approach might be more desired.
Effects
Logic Pro X commandeered Camel Audio, and along with it, the beloved Camel Phat, Camel Space, and Camel Audio Alchemy. The effect plugins don't sound the same, and I've yet to do a shootout with the originals vs. the Apple versions, but Logic's Multi-Effect versions, sound great, are easy to use, and come stock with Logic Pro X.
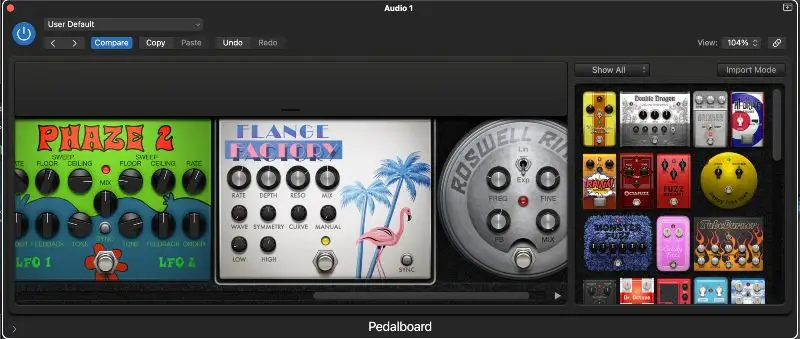
If you're a guitar player and do a lot of recording, instead of micing an amp and recording the distortion, EQ, and compression right into the audio file, you can record dry and affect the signal later with these, pretty genuine sounding, guitar pedal plugin effects. Useful for any instruments, samples, percussion sounds, vocals, really anything that you need to get a bit dirty, distorted, phased, or alien with a ring modulator.
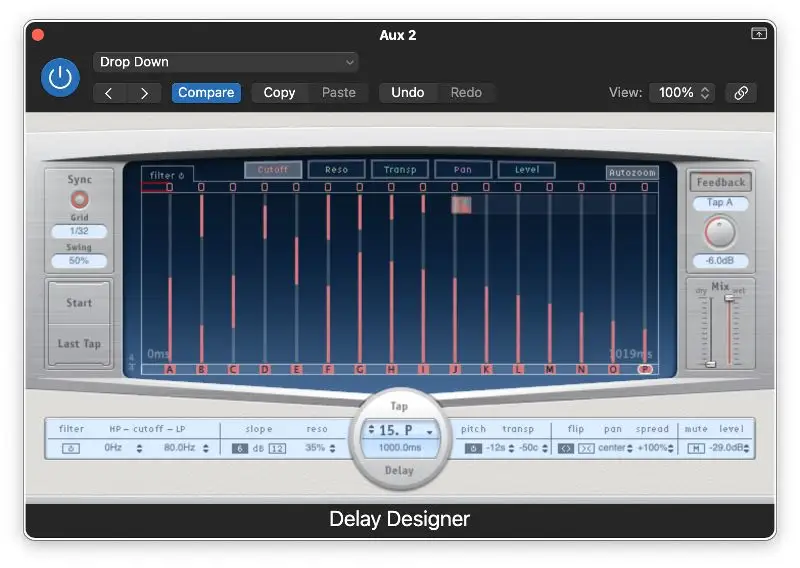
Logic also of course has the classic Delay Designer, Tape Delay, and Space Designer reverb - older plug-ins that have withstood the test of time because of how well they were made. You can trust Logic's long development history and one thing they've always done exceptionally well; made time-based processing plug-in effects.
The Tape Delay, another stalwart, sounds realistic and warm, akin to the classic Roland RE-20, which they most likely were going for in the development process. The Space Designer stays true to its namesake and allows you to design artificial space via impulse responses that you can record using the IR Utility app that gets launched via Space Designer itself.
If you're trying to create a specific reverb sound, impulse responses can sometimes be your best bet. The IR Utility app is a little flustering at first, and something I wish they'd have just integrated into Logic Pro (why go outside of a recording app to record?), but very useful.

If you're looking to mangle sounds into oblivion - but maintain a great sonic aesthetic, Ableton Live will not disappoint. Sure they have time-based processing effects like Logic Pro, but they also have great effects that can twist, stutter, warp, and stretch. They have unique effects, like Spectral Time, which is a mix between a looper and a delay and creates these nice "spectral smearing" sounds that are good for transitions or just to experiment with.

Experimentation and Max MSP go hand in hand. The fact that Max MSP is built into Live gives it a leg up in the innovation department. Whereas Logic Pro X does have everything you need to create from scratch and polish up an amazing song. Max for Live is the type of tool that helps artists and producers create new genres. Take Sonic Faction's Probability pack for instance (which is free, by the way).
The special thing about this suite of sequencer effect plugins is the fact that you can alter the probability of which different events and parameters occur. You can choose between melodic probability, rhythmic probability, probability of arpeggios, or just plain chaos, where melodies get created at random. Tools like these make tinkering for new sounds enjoyable...and probable.
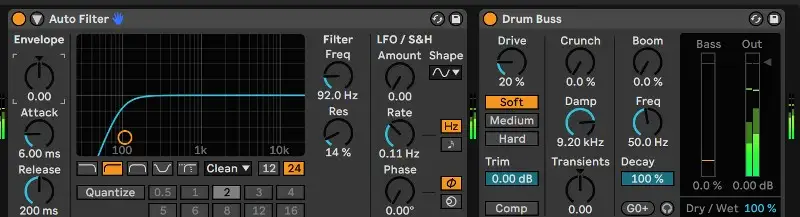
On the functional side, Live also sports audio effects like the age-old Auto Filter. Every digital audio workstation probably has something similar, a filter attached to an LFO that you can set to automatically modulate as desired.
Though simple in theory, it's a very effective tool and sounds great on vocals, guitars, keys, strings, drums, basically anything that needs just a hint of movement but should remain subtle. Drum Buss, a newly added plugin since Ableton Live 10 Suite (not available in Ableton Live Standard or Ableton Live Lite), is a swiss army knife of dynamics. It's a compressor, saturator, exciter, transient designer, and sub-harmonic enhancer, all in one.
I find it to be one of the most useful tools on drums and have found a use for it elsewhere on vocals, pads, and string samples. You can use it on anything that you want to stand out in the mix. It certainly goes to bat with renowned third-party plugin manufacturers like Waves, Izotope, SoundToys, etc. Like all of Ableton Live's stock plugins, it also uses low CPU at high instance counts.
Live Loop View
When it comes to a live performance DAW and "clip-launch" functionality, Ableton vs. Logic was never a conversation. Ableton was the only DAW that executed that workflow in the same way that a DJ would cue songs and mix in and out using smooth transitions.
Sure, you could hook your computer up to a mixer with a multitrack of a bunch of songs, but that's clunky and very prone to error on stage. With Live, the ease of layout and workflow was a game-changer.
The concepts are simple; load songs onto a single track vertically and clicking play on subsequent tracks will count in, then stop the previous track. Or, create a new track and load up songs that will play simultaneously as other tracks that are playing. Each space on a track is a stop button for the currently playing clip on that track. That's it. A fail-proof auto-cue system that made everyone who had a laptop and Ableton Live a DJ.
However, the clip-launch functionality has been more or less the same since it was released. Inevitably another DAW would catch up...
Now, Ableton vs. Logic is the conversation we're having due to Logic Pro really upping their game and implementing a very well-done clip-launch view.
They copied Ableton Live verbatim but did it in their polished, friendly-for-all, UI. It might as well be Garageband Live. They also made the live looping functionality utilize Logic's traditional composition view track format, so Logic live performers can easily use both the grid view and a view that's familiar to them.
So, Ableton vs. Logic when it comes to live performance? Both do it well and have near-identical functionality. The only leg-up that Ableton has is the integration of dedicated controllers like Push 2 fr live performers to us on stage.
Warping Audio

In this day and age, elastic audio algorithms have resulted in natural-sounding pitch correction across the digital audio workstation continuum. One of the most common and well done is "Elastique", made by a company called zplane.
Ableton Live has had zplane's time-stretching since the early days, which is why it was such a renowned warping tool from the start. Companies such as Steinberg, Image-Line (FL Studios), IK-Multimedia, MOTU, Native Instruments, Sony, Spotify, and a lot more, all use zplane's technology.
As Apple always does, they rolled their own for Logic Pro. The warping was horrific up until around Logic 9, then finally became something usable for making music across the board; from fixing drums in rock songs to full-fledged warping of entire songs for electronic music remixes.
So, Ableton vs. Logic in the warping workflow. Each of them utilizes warp markers, as does most every app in the digital world these days. The differences between Ableton vs. Logic are only slight, but depending on your workflow, you may prefer one over the other.
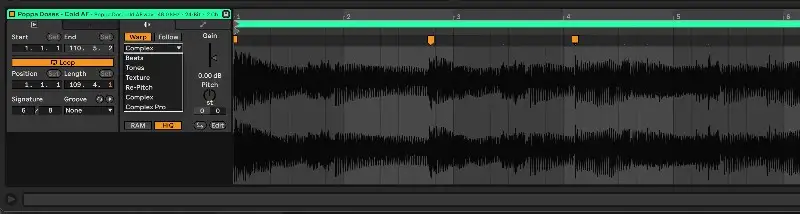
Ableton does its warping in a dedicated window that shows up when you double click an audio file. Some people may not like the "disconnected" arrangement timeline and audio editing timeline, others may appreciate the fact that you can get all your warping done in a dedicated space, then move back to your composition.
Live also splits the warp algorithms into Beats for drums and percussion, Tones for vocals, Texture for pads and atmospheric type sounds, Re-Pitch to change speed with your warping, and Complex/Complex Pro for warping songs in their entirety.
The Pro version is slightly more advanced thus using more CPU. All of them sound fantastic and allow a broad enough selection to get any type of music done you like.
Logic does its warping on the composition timeline in a special "Flex" mode, accessible via key command.
After that, it uses warp markers just like Live, although it has a few different algorithms; Polyphonic for multitrack clips/songs, Monophonic for vocals and guitars, Slicing for auto-cutting the audio at transients, Rhythmic for drums and percussion, Speed to change pitch as you warp, and Tempophone to emulate old school tape effects.
Once you start digging into what's available, it can become quite a granular process. Ableton doesn't have anything like the Slice setting, which allows you to not only slice at transients automatically, saving time if you're making those types of edits, but you can choose to fill gaps automatically, choose a decay time between slices, and alter the slice length.
Tempophone also has a few features that don't exist in Live and lets the user change grain size and crossfade. Live users spend less time warping, but there are also not as many options as Logic. It depends on what your desired outcome is. Each of them is incredibly effective.
Conclusion
We've established that Logic's deeper editing allows it to shine brighter in the audio recording and editing realm, due to its snappy customizable key command functionality and support for insanely high track counts. We've also highlighted why Ableton most likely holds the trophy for best live performance DAW, in its long-standing clip-launching functionality and integration with great hardware devices such as Push 2.
If you're trying to make a decision based on price, each DAW is fairly inexpensive, although fully featured Logic Pro is hard to beat at a measly $199. Ableton Live Lite is always an option as well if you're intrigued by Live, but want to try it before you buy. You may find that the experimental nature of it is exactly what you've been looking for.
Logic Ableton, Ableton Logic...It's hard to choose between two amazing tools for music creation. The thing about DAWs these days is that they all do everything, technically. What makes it useful is what you need it for, and those needs vary from producer to musician, to mixer, to composer, to someone editing dialog, to someone making sound effects, the list of use cases goes on and on. Find your workflow, then find your DAW.


