

In today’s world, every guitarist should know how to record their own guitar. Whether you're working on a new track, building your Instagram portfolio, or just experimenting with different sounds, having the ability to record at home has never been more important. Not only does it give you the flexibility to capture your ideas whenever they hit, but it also means you’re in complete control of your sound.
You never have to wait for studio time or rely on others to bring your vision to life.
The good news is, it’s actually much easier than most people think.
With a few basic tools, you can record a high-quality guitar tone from the comfort of your own space. If you already have a computer and an electric guitar, you’re nearly there. The rest is simply about knowing how to put everything together.
In this guide, I’ll walk you through everything you need to know to start recording your guitar at home.
The Basics of Recording Electric Guitar
Recording guitar is only as complicated as you choose to make it.
All you need is a guitar, a way to get that sound into your computer, and software to record and process it. Get yourself a basic audio interface and some free recording software, and you’re set to lay down guitar tracks that sound good enough for most situations.
But, of course, if you want to go all out, the possibilities are endless.
You can dive into a world of high-end preamps, mic setups, racks full of gear, and professional-grade recording software, like Pro Tools or Logic.
And sure, all that stuff can improve your sound. Still, the difference between a basic setup and a fully-loaded studio is often a matter of fine-tuning that only gets noticed if you’re listening intently in a highly controlled environment. For most of us, the basics will get the job done just fine.
To keep it simple, all you really need is:
- Your guitar
- An audio interface (which connects your guitar to your computer)
- Recording software (also known as a DAW, or digital audio workstation)
For mixing and playback, you’ll want something decent to hear what you’re working on. Get yourself a good pair of headphones or a set of monitors (speakers) to get an accurate sense of how your guitar sounds in the mix.
Headphones are a great choice if you're on a budget or working in a small space.
Different Ways to Record Electric Guitar
Record Direct with an Audio Interface
The easiest way to get started is by going 'direct' with an audio interface. The beauty of this setup is how simple it is. All you need is your guitar, a guitar cable, an audio interface, and your computer. That’s it.
So, what exactly is an audio interface?
In a nutshell, it’s the device that acts as a bridge between your guitar and your computer. It takes the analog signal from your guitar, converts it into a digital signal that your computer can understand, and lets you record it in your digital audio workstation.
The downside is that recording directly like this will only give you the sound of a dry, unprocessed electric guitar. You’ll need software (plugins and effects) to bring that raw sound to life. I recommend taking a look at amp simulators (AmpliTube, Guitar Rig, Bias FX) and effects processors (reverb, delay, chorus, etc.) to turn your clean, dry guitar signal into a full-bodied guitar sound.
The great part about recording direct, though, is that you're free to experiment and alter that sound after the fact. If you don't like the amp tone you have, change it. Want a different reverb? Just adjust it in your DAW.
Going Direct Out of an Amplifier
If you love the sound of your amp but can’t be bothered with miking it up, going direct out of your amplifier is a fantastic option.
This setup is pretty simple. All you need to do is plug your guitar into your amp as usual, then take the line output from your amp and plug it into the line input of your audio interface.
I always recommend this method for home recordists who don't want to disturb the neighbors or have to get their room perfectly soundproofed. Going direct gives you that familiar amp tone without all the extra noise or complications.
To get the best sound out of this setup, you’ll want to make sure your amp’s line out is set up for optimal signal. Some amps have a dedicated line out with built-in cab simulation, which makes things super easy because you don’t have to worry about missing that cabinet sound.
If your amp doesn’t have cab simulation, you’ll need to use a software plugin that simulates the speaker cabinet sound. Most amp sims in your DAW (like the ones we talked about in the previous section) can easily cover this for you.
You’ll also want to keep your amp's output levels in check, especially if you're running a high-gain sound. Too much output might cause clipping or distortion that doesn’t sound as clean as you’d want. Adjust your amp's master volume and tone settings to get a balanced, clean guitar signal before it hits the interface, and you’re good to go.
Use a Hardware Amp Simulator
If you're after that iconic amp tone but want to keep things simple, I recommend using a hardware amp simulator.
With the right one, you can get the rich, dynamic sound of a real amp without the need for a physical amplifier or mic setup. Hardware amp sims work similarly to software amp sims by simulating the sound of a guitar amp and cabinet. However, they're more tangible, giving you a variety of amp models and effects literally right at your fingertips.
Some of the most popular hardware amp sims include:
- Line 6 HX Stomp
- Kemper Profiling Amp
- Fractal Audio Axe-Fx series.
Setting one up is easy, too. All you need to do is connect your guitar to the input of the amp simulator, then run the output from the simulator into your audio interface, just like you would with an amp. You can adjust the settings on the simulator to choose different amp models, effects, and cab simulations.
One of the main benefits is that these things are super convenient. You get professional-grade amp and cab simulations without the need for a physical amp or microphone. You can get a wide range of tones from clean to high-gain, all in one device.
Plus, because everything is digital, it's a great option for recording in smaller spaces or at late hours without disturbing anyone. Many hardware amp simulators also have built-in effects, so you don't have to load up a bunch of plugins or additional gear.
The downside is that they can get pricey, especially if you’re eyeing high-end models like the Kemper or Fractal. Also, while they do a great job of emulating the sound of a real amp, there's still something about the feel of a real amp that I've never been able to capture with an amp sim.
Record Your Amp with a Microphone
If it's the classic, tried-and-true approach you want to take, you can't go wrong with recording your amp using a microphone. This is how some of your favorite guitar tones on your favorite records were recorded, and there's still no method like it for capturing an authentic, full-bodied amp tone, assuming you’ve got the right space and tools.
When setting up a mic for your amp, the possibilities are endless. There’s no one-size-fits-all method here. Mic placement, for example, can completely change how your guitar sounds, and that’s part of the fun.
Typically, you’ll place the mic close to the speaker cone (the center for a bright, focused tone, or off-center for a warmer, more natural sound). From there, you can experiment with distance to get the balance of air and punch that you’re after. Try positioning it at a slight angle, or even putting the mic off-axis for the best of both worlds. Trial and error is your best friend here.
Now, as for mics, the two most popular types of microphones for recording guitar amps are dynamic and condenser microphones.
Dynamic mics (like the legendary Shure SM57) are often the go-to for guitar recording. They handle high SPL (sound pressure levels) without distorting, which is great for loud amps. Plus, they also tend to give you a punchy, midrange-heavy sound, which works great for rock, metal, and anything that needs a bit of aggression.
On the other hand, condenser mics are more sensitive and capture a broader frequency range, making them great for more detailed or airy tones. They can pick up subtle nuances better, which can be great if you want a fuller, more polished sound. However, in some cases, they can be a little too sensitive for very loud amps or distorted sounds.
You could even combine both mics for a multi-mic setup. For example, use a dynamic mic close to the speaker for a direct, punchy sound and a condenser mic further away to capture the room’s acoustics and get a larger room tone.
The main thing here is flexibility. Microphone placement and mic choice can make a huge difference in your sound, and it’s up to you to find what works best for your setup.
Recording Acoustic Guitar to PC
If you want to record your acoustic guitar instead, the process will change a bit. Just like recording electric guitar, there are a few different ways you can go about it.
Recording Acoustic Guitar with a Microphone
Recording acoustic guitar with a mic is by far one of the most rewarding methods of recording I can think of. Of course, it's also one of the most difficult to get right, as it requires a few very important steps.
Capturing the full richness of an acoustic guitar demands a little more attention to detail than just plugging the guitar directly into an interface.
Finding the Right Space
Before anything else, you’ll want to find a good space to record. If you're working from a desktop PC, you might need to get a little creative, but if you have a laptop, it’s a lot easier to move around and experiment with different spots in your room or home.
Ideally, find a place that’s not too cramped and is away from any heavy traffic or distractions. Your microphone will likely pick up a lot of background noise, so a quiet, relaxed setting is key.
If possible, try to avoid rooms with lots of reflective surfaces like tile floors or bare walls. Carpets, curtains, or even throwing blankets over hard surfaces can help absorb sound and give you a cleaner recording. But if you’re stuck with a less-than-ideal space, don’t worry too much. You can always work with the sound during mixing .
Choose the Right Microphone
Once you have the perfect space, it’s time to pick the right mic. There are a few types of microphones to consider:
- Large Diaphragm Condenser (LDC): These mics are fantastic for acoustic guitars, especially if you want a warm, full-bodied tone. They’re great at picking up all the detail and nuances of your playing, which is why they’re often used in professional recordings. If you have a budget for one mic and want something versatile, an LDC is a solid choice.
- Small Diaphragm Condenser (SDC) : I personally use SDCs most of the time when recording acoustic, as they're a lot more focused and precise. They're great for capturing the bright, detailed high end of an acoustic guitar, and they tend to pick up less room noise, giving you a "tighter" sound.
- Dynamic Microphone : While dynamic mics (like the Shure SM57) are typically used for electric guitar amps, they can also work for acoustic guitars, especially if you’re looking for a punchier, more focused sound. They don’t capture as much detail as condensers, but they’re less sensitive to background noise and room imperfections, so they’re a good option if you’re in a less-than-perfect environment.
Single Mic vs. Multiple Mics
Since you’re just getting started, it’s usually best to start with a single mic to get a feel for the process.
As for where to place your mic, you’ll want to experiment a bit, but a great starting point is about 6–12 inches away from the sound hole, aimed slightly off-center. If you want more detail, try moving the mic closer to the neck, where you can capture more of the fingerpicking or strumming sound.
If you’re feeling adventurous later on, you can add more mics. Using two mics, for example, one near the sound hole and the other further up near the neck, can give you a wider sound and more flexibility when mixing. But for now, don’t stress about multiple mics. Focus on getting that single mic placement dialed in first.
Connecting Your Mic to Your Audio Interface
Now, remember, you’ll need to plug your mic into your audio interface to get the signal into your computer. Most studio mics use an XLR cable, so make sure you have a compatible interface with an XLR input.
If you’re looking for a simpler setup and don’t mind sacrificing some flexibility, you could opt for a USB microphone , which plugs directly into your computer. This gets rid of the need for an audio interface.
Recording Acoustic Guitar Directly
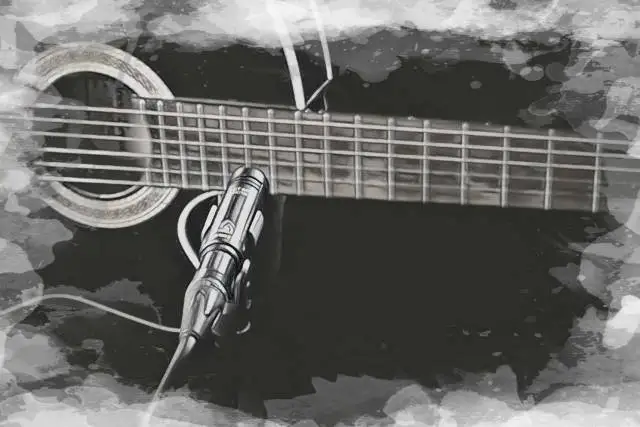
If your acoustic has a 1/4" output, you could skip the mic setup altogether and go the direct route by plugging your guitar straight into your audio interface with a regular guitar cable. It's a quick and easy way to record, and it's an option many people overlook when they're just starting out.
There are a few pros and cons to this approach worth noting.
In terms of the pros, beyond the fact that this approach is incredibly simple, you also get the pure uncolored sound of your guitar's pickups, which can be interesting depending on the vibe you're going for.
As for the cons, you miss out on the natural room sound or body resonance that make acoustic guitars so great in the first place. These recordings tend to feel clinical, harsh, and, honestly, not very exciting. That doesn't mean you can't work some magic in post and get a decent sound!
First off, don’t be afraid to use an amp sim or effects plugins to give your DI acoustic tone warmth and depth to your signal. Amplitube has some excellent acoustic amp simulators in the regular bundle!
Reverb is going to be your best friend here as well, as it'll help your direct recording sound more natural. I recommend using a convolution or algorithmic reverb, such as Fabfilter Pro-R2 or Altiverb 8, to put your guitar in a realistic "space."
Recording a DI in Parallel with a Mic'd Recording
If you’re feeling extra creative (or want a bit more flexibility during the mixing phase), you can record a direct signal alongside your mic’d recording to get the best of both worlds. You get a pure, clean tone from the direct recording, plus all the warmth and room ambiance from the mic’d signal.
This parallel DI recording is also perfect for editing. Because the direct signal is free of any room noise or mic bleed, it gives you a clean waveform with clear peaks, making it easy to slice, adjust, or edit. You can also add processing later on if you find that the mic’d signal wasn't quite what you were looking for.
Having a DI track to work with can also help bring out detail in your mix. Maybe the mic’d recording missed a subtle fingerpicking part or a soft strum, but the DI track caught it all perfectly. With a blend of the two, you can get a bit of extra detail that would be difficult to capture using only a mic.
Wrapping It Up
As with anything, the more you record, the better you'll get at it!
Write down the things that work for you (mic types, room selection, DI vs. microphone, etc.) and take time to experiment with things you're unsure of. As you continue your recording journey, you'll start to hear things differently and find unique ways to capture your own sound.
Most importantly, remember that there is no right or wrong way to approach recording. So have fun, and don't stress!


