

The acoustic guitar can be traced back thousands of years, and though we've mastered the ability to play it, it's still one of the most troublesome instruments to get right in the mix. Most of the time, amateur engineers and recordists either end up with muddy, boomy acoustic guitar recordings that mask the low-end or thin, harsh tracks that cover up leads and vocals.
However, when you mix acoustic guitar the right way, your get a natural warmth and shimmer that sounds great in any mix!
To help get you there, I've compiled a step-by-step guide on mixing acoustic guitar. Continue reading to learn all about how to EQ and compress acoustic guitars, as well as add effects like saturation and reverb.
Getting the Recording Right

If you also have control over the recording process, take time making sure you get the right sound at the source. Many people have a "fix it in the mix" mentality these days. Unfortunately, with a natural instrument like acoustic guitar, if you don't get a good starting point to work with, it can be nearly impossible to make it work.
While tracking, do your best to find a sweet spot. If something doesn't sound right, consider adjusting some variables.
Maybe the microphone you're using isn't the right one, or maybe it's positioned poorly.
Maybe the recording room isn't treated and the reflections are too prominent.
Maybe you need to change the strings to get rid of unwanted squeaks and noises.
It's a hundred times easier to make an acoustic guitar sound good in a mix if it sounds good at the source.
Considering the Role of the Acoustic Guitar
Before we get into the mixing process, I want to quickly talk about one crucial aspect that many producers forget about - deciding on the purpose of each element in the mix.
You need to decide why the acoustic guitar is there in the first place.
Is it supposed to be the main element in the track, or should it play more of a supporting role, adding harmonic or rhythmic complexity?
With this question, you can decide right off the bat how you want to record AND mix it before you even start.
How to Mic an Acoustic Guitar
There are a few key variables you'll want to take note of when recording acoustic guitar. I don't want to get too much into stereo recording with two microphones, as that's an entirely different beast, so for this example, let's pretend you're recording with a single microphone.
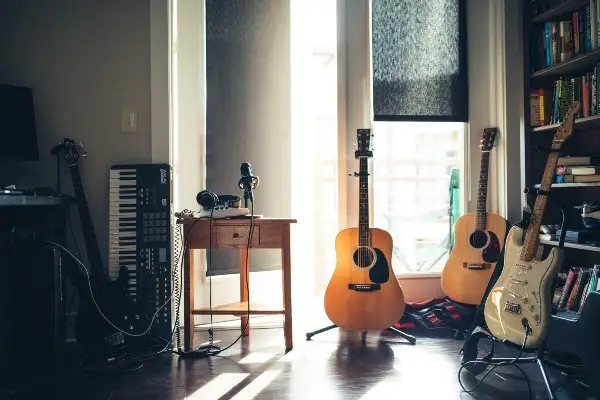
- Find the Right Room: Pick the right room to record in and you'll save yourself an endless amount of headache down the line. If you don't have a treated studio to record in, I'd recommend recording in rooms with lots of soft furnishings, as they can absorb unwanted reflections.
- Experiment with Mic Placement in the Room: When placing your microphone in the room, try to stay away from the exact center, or next to the walls, to avoid standing waves and strong reflections. The best sound can usually be found slightly off center.
- Experiment with Mic Distance: Finding a balance between overwhelming proximity effect and loss of power comes from getting the right distance between the mic capsule and the acoustic guitar. I often like to start by placing it an arm's length away and adjusting from there.
- Play Around with the Angle: The height and direction of the microphone can impact your guitar recording pretty significantly as well. It's often a good idea to stay away from the sound hole to avoid boominess. I typically start by angling my microphone at the 12th fret with the height just above the sound hole.
Finding Your Balance

Before you even touch any mixing plugins, you'll want to make sure your acoustic guitar is balanced in your mix. This means getting the volume right relevant to other instruments in the mix. I can't stress the importance of this step enough.
No matter how much EQ, compression, or effects you use, if you don't have a balanced mix, it won't sound right.
One good exercise I like to use is mixing acoustic guitar and pretending I don't have any plugins to mix it with. That way, I'm limited to using volume to get it to sound the best I can. You'd be surprised how far you can get with just a fader.
Lock In Your Timing
Once you've balanced your acoustic guitars, make sure they're timed right to the rest of the track. This means cutting, stretching, and adjusting your recordings so that they're on beat and in the pocket.
It always surprises me how much cleaning up timing can seat my guitar in the mix. While you're at it, get rid of extraneous noise during breaks in the recording so that the track isn't taking up space when the acoustic guitar isn't playing.
My Starter Signal Chain
When mixing acoustic guitar, I typically use a simple chain to start. That chain consists of four main elements:
- Subtractive EQ : Getting rid of problematic frequencies
- Compression: Providing dynamic control
- Additive EQ : Shaping the tone
- Reverb: Adding ambience (especially if recorded in a dead environment)
I'll sometimes add saturation and other effects if the song calls for it, though these four elements are what you'll find on just about every one of my acoustic guitar mixes.
Subtractive EQ
The first thing I do when I mix acoustic guitar is get rid of what I call the "problem frequencies."
These can include:
- Muddy low-end
- Nasty room tone
- Low-mid resonance
- Exorbitant string noise
- A combination of the above
It's always a good idea to remove these issues as soon as you can so that any additional processing you use is working with a clear and balanced recorded sound.
I'll often start by listening to how the acoustic guitar sound is interacting with the entire mix, focusing on certain frequencies, such as the lows, mids, and highs. Don't make EQ decisions out of context. Although you might be able to make your acoustic guitar sound great with subtractive EQ on its own, it does not mean it'll sound good in the context of the mix.
Getting your ear attuned to frequencies can take some time. However, you'll likely begin noticing issues in these frequencies, depending on the acoustic guitar recording.
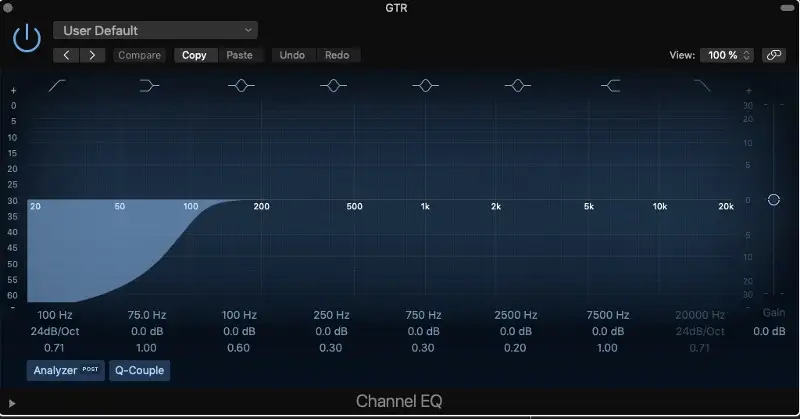
Boomy Low-End
If you're dealing with boomy low frequencies, it's likely due to body resonance, poor room sound, or the proximity effect, which is a heightened bass response as the result of your acoustic guitar being recorded too close to the mic.
The easiest way to tame these issues is with a moderate high-pass filter around 80-100Hz.
Muddy Low-Mids
More often than not, mud in the low-mids comes from unwanted resonances in the room. It can sometimes be difficult to EQ these frequencies out, as they're often the same as the frequencies you actually want to maintain a warm acoustic guitar tone.
The idea here is finding a balance .
I often like to look between 150-300Hz when making cuts for mud and between 300-1kHz when making cuts for gross overtones and room sound. If there are ultra-specific frequencies causing you issues in this range, you can use a narrow Q value to eliminate them.
If you find that these unwanted low-mid frequencies are intermittent, I recommend using a dynamic EQ instead, so that you only reduce them when necessary and leave them intact otherwise to maintain a warmer sound.
Harsh Mid-Range
Depending on the mic you use and the age of your strings, you might pick up harshness from string squeaks that overpower your guitar. If this is the case, you can use subtle cuts with a dynamic EQ to get rid of the string noise when it appears. I often like to aim between 2-5kHz, as this is where squeaks are most prominent.
Tinny High Frequencies
Again, depending on the guitar and the mic used to record it, you may end up with some high frequencies that have an unpleasant tinny or metallic tone. When getting rid of these, however, you have to be careful, as you can scrap too much of the important highs that give the acoustic guitar dimension.
I usually opt for a gentle shelf or low-pass filter from 12kHz and up.
Compression
Compression is key for any modern acoustic guitar recording, as it evens out the dynamics and locks the guitar into place.
Of course, some styles of music call for more or less compression than others. The way an acoustic guitar sounds in folk music is far different than the way it sounds in pop music, and a lot of that has to do with how it's compressed.
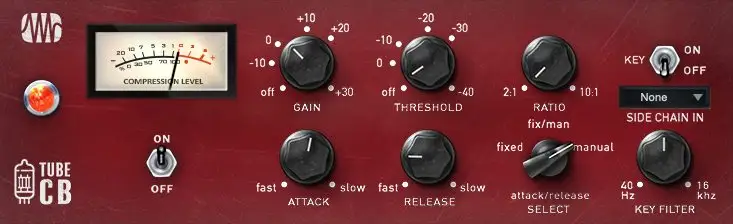
If you want your acoustic guitar to sound natural, you can use a slower attack time and faster release time, as this will help bring out picks or plucks for a more percussive sound. On the other hand, if you want to control transients and push the acoustic guitar back in the mix, you can use a faster attack time and a slower release.
The threshold and ratio can then be used to determine how much compression you're getting.
My absolute favorite style of acoustic guitar compression is what I like to call 'warm hug' compression. It uses a low ratio (2-3:1), a slower attack, a faster release, and gain reduction anywhere from 2-5dB.
This is great for consistent fingerpicking or strumming.
If you have any additional peaks that are popping, you can engage an additional compressor with a faster attack time, a faster release time, and a higher ratio. I often find myself needing to use a second compressor with fingerpicked acoustic guitars, as some notes tend to stand out more than others.
Additive EQ
While it'd be easy to give you a "secret" list of boosts that work for acoustic guitars, the reality is, all acoustic guitars are different and some sound better in certain ranges than others. With that said, I often find myself adding a small top-shelf boost from 10kHz and up to give it a bit of "sparkle" and "air."
If 10kHz sounds too tinny, you can go as high as 12-15kHz. Just use your ears to determine what sounds right.
On the other hand, I sometimes find myself boosting between 150 and 250Hz to give my recording more warmth and fullness. This can be especially useful in a sparse arrangement.
Range Allocation
One technique I like to use when mixing acoustic guitar (or any instrument, for that matter) is allocating a range for it to live in. In doing so, you can make sure that none of your instruments are fighting with one another for space.
In this case, you can decide where you want your acoustic guitar to live frequency-wise and boost it in that range. Just make sure you haven't given that range to any other instruments in your mix, so they aren't battling with each other for attention.
You can take this idea one step further by making small cuts in other instruments in that same range.
Saturation
If additive EQ alone isn't cutting it, you might consider using saturation to add some pleasing harmonics to your signal.
Tape saturation is one of my favorite tools for acoustic guitars, as it adds a slight bit of warmth and density for a vintage vibe. Some saturation plugins even add a bit of compression too, rounding off peaks and unwanted harshness.
Adding Ambience
Once your acoustic guitar is sounding clean, polished, and balanced in your mix, you can use reverb to give it space.
While some professional recording engineers will set up room microphones to capture the sound of the room during the recording process, most home studio producers don't have that kind of luxury. Often, they get recordings that sound a bit flat or one-dimensional without the essence of space.
The question is, how do we use reverb on the acoustic guitar to make it sound better?
The answer to that question depends on your mix. A subtle stereo room reverb can be great for creating a sense of physical space around an acoustic guitar, similar to what you might hear if you were playing it in an empty room.
Room and chamber reverbs are great for more natural sounds, while hall and plate reverbs are great for more dramatic sounds.
From there, you can adjust the length of the reverb tail to make it sound either closer or further away. I also recommend using pre-delay to keep the dry sound up front and the reverb sound in the back.
EQing Your Reverb
The best part of using a reverb send rather than placing reverb directly on your acoustic guitar track is that you can EQ your wet signal to cut out any unwanted frequencies. For example, you might want to put a low-pass and high-pass filter on your reverb send to keep it from sounding muddy or tinny, focusing more on the mids.
Panning Acoustic Guitars
Panning will affect how your acoustic guitars are placed within the stereo image.
Many engineers who double acoustic guitars will pan them hard left and hard right to get the widest sound. However, this approach doesn't work for every mix, and in some instances, it can feel a bit disconnected.
I recommend using a nice pair of headphones to listen to reference tracks with acoustic guitars playing to see where in the stereo field they're panned. You can then use the reference to make decisions in your own mix.
Nailing Down the Best Acoustic Guitar Sound
Though the acoustic guitar is a relatively simple instrument, there's so much to consider when it comes to mixing. However, by applying the techniques above, you'll be able to get a sound that resembles mixes from the top engineers and producers.
Have fun mixing and never be afraid to experiment!


