


The beauty of learning how to mix music is that you can come up with your own unique formula: a sonic signature that'll identify you as an artist or audio engineer and help you craft a sonic palette that'll make you stand out. But before all this, there are certain rules in audio mixing that, although not set in stone, will definitely help you achieve a more professional sound.
Some tips are designed to help you streamline your workflow, and others to ensure your music will sound great across all playback systems. What all these recommendations have in common is that they act as a reality check while you mix, guiding you as you make adjustments and helping you make conscious decisions, whether you work on your own music or other artists' works.
Every sound engineer will have their own theories on what's crucial and what's not when mixing audio, yet below, you'll find what I believe are the rules to follow when you want to create a professional mix, regardless of your style, genre, and experience.
Understanding the Genre
If you’re mixing your own music, I’d just assume that you’re familiar with the music genre you’re producing. However, things might be different if you’re an audio engineer working with multiple artists across genres.
Metal, hip-hop, pop, classical music: each genre has its own rules and expected sound. You might decide not to follow them blindly, but you should be at least aware of them. A guitar solo will sound completely different whether it's part of a pop, soul, disco, or heavy metal song; the same goes for every other element of a song, from drums to vocals and synths.
With rock and metal, balancing levels across the midrange can be a long and demanding task; in pop music, the lead vocal is usually the most important element; in hip-hop and techno, the kick drum should be the main driving force of your beat. We could go on forever discussing how every genre has its own distinctive signatures, but it's up to you to understand and identify what's crucial in your mix and enhance it accordingly.
The ultimate goal is always to create a cohesive sound that's in line with what the audience envisions, and the final mix you'll send to the mastering engineer should already feature the characteristics of the genre you're working on.
Mix Organization
Organizing your workflow when mixing means you’ll be able to save time, achieve consistent results, and create a recognizable sound you can tailor to multiple projects without starting from scratch every time.
There are several ways to prep your session, and some of the most common ones include grouping, color coding, naming tracks, using track folders, and using busses.
If you group similar tracks together, such as string sections and drums, it'll be easier to make adjustments to levels and effects of those tracks. It's also a great way to visualize your project and see separate tracks as part of a unique element.
Using color coding can be a game changer when working on large projects: you can use it to differentiate elements in your mix and can help locate tracks easily. For example, you might use one color for the synth, another for the guitar, and another for the vocals. Once again, this will give you a visual representation of what’s going on at a glance, which is crucial if you’re a sound engineer working on multiple projects.
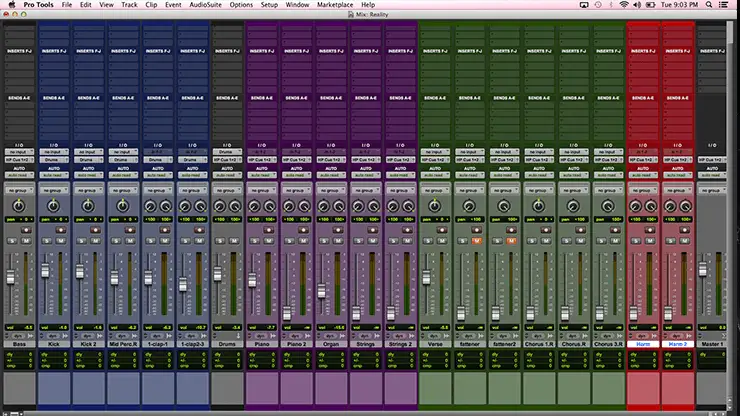
In some DAWs you can create track folders, which is a way to group tracks together in a hierarchical way, and this can help you keep your mix elements organized and tidy.
Finally, don't forget the importance of mix busses, the virtual channels that allow you to group multiple tracks together and apply effects to them collectively. Using them will not only save you a huge amount of time but also have a positive impact on your mix's consistency.
Reference Tracks
This is perhaps the most crucial aspect when you want to produce a good-quality mix. Choosing a reference track that's not only in line with the genre you're working on but also your client's desires, your taste, and the tools at your disposal is no trivial task, yet necessary.
When working with a client on a music mix, it's always a good idea to ask them for previous songs as a reference, which will give you a clearer idea of the type of balance they are looking for in their mix. By knowing exactly what you or your clients are looking for, you can create a mix that’s in line with what they envision.
Spend some time exploring the relevant genre, artists, and music to save time in the mixing process. You don’t have to make your mix sound like everyone else’s, but it’s good practice to know what the audience is accustomed to before starting the mixing process.
Where To Start
When it’s time to start mixing, you might be wondering which musical instrument you should tackle first. Once again, there’s no univocal answer to this question, but as a rule of thumb, I’d recommend you start with the bass and drums.
That's the solid foundation of your song, and having it balanced will help you make informed decisions as to where the main elements of your mix (guitars, synth, vocals) should sit.
Plus, drums encompass the whole frequency spectrum, which can give you a “preview” of how frequencies behave in your mix.
If you do start with the drums, then the best option is to focus on the snare and kick drum first. The snare should be one of the loudest elements of your mix: it’s the backbone of your track, and it defines its groove: every other element of the drums should revolve around it.
The kick drum is almost as important. It should be loud, but not too much, as it might overshadow the snare's transients or the lead instruments.
Everything else (toms, cymbals, percussions) will come after snare and kick. You should give them the appropriate space in your mix, ensure they’re clearly audible without outshining what guides the groove in your mix.
As you move on to the other elements in your mix, focus on how you can improve the mix depth and fine-tune all the musical instruments involved. The more elements you add to your mix, the more the balancing process will require minor adjustments to sound good. It might feel overwhelming at first, but over time, it'll become a fun and engaging process, and you'll start seeing your unique sonic signature in every track you mix.
Volumes First, Effects After (Static Mixes)
The static mix should be your first step in the mixing process. When done right, it'll give you a rough mix that'll make it much easier to achieve mix glue through post-production effects.
Try to achieve a balanced mix using only the volume faders and pan controls without the help of dynamic processing, effects, or automation. This basic balance will help you create balance and a rough stereo image in your track, which you can enhance with effects later on.
Start by setting all the volume levels to zero and then slowly bring each track into the mix one by one. Adjust the volume faders to ensure that each element sits well in the mix, focusing on how they interact with each other. Use panning to place elements within the stereo field, giving each its own space while avoiding frequency masking.
The final static mix should sound like a raw version of the album you’ll release: all the volumes should be perfectly balanced, and each instrument should have its own space on the soundstage.
Chances are you’ll have to make adjustments once you start applying EQs, faders, and compression. Nevertheless, this basic mix will be a crucial starting point to start sculpting your sound through effects.
Forget The “Solo” Button
Mixing is all about achieving balance and harmony between all elements of a track, so it shouldn’t come as a surprise that a holistic view when working on a track will bring the best results to life.
Frequency adjustments made in solo mode can make your mix lose clarity: EQ tweaks made in such a way might cause a track to “invade” the frequency space of another, or compression settings that seemed ideal alone might compromise the mix's dynamics.
Once again, my recommendation is to use volume and panning adjustments as the main tools for resolving mix issues and enhancing dynamic balance. Noise removal or minor EQ adjustments might require soloing, but consider these exceptions, not the rule.
Leaving Headroom
Headroom is the space between the peak levels of an audio signal and the maximum limit of a digital system.
This space protects against clipping but also defines the quality and texture of your sound, especially when using plugins. This is because digital plugins respond differently depending on the input levels: lower input levels usually result in a more responsive dynamic interaction within the plugin and a more transparent and effective application of the effect.
Finally, by having enough headroom, you’ll prevent clipping and unwanted artifacts of digital distortion and enhance the track’s dynamicity. As a rule of thumb, you should leave between 3 and 6dB of headroom when mixing.
Quiet Listening
When we listen to music at low volumes, our ears are less sensitive to extreme lows and highs of the frequency spectrum. As the playback volume increases, we start hearing high and low frequencies evenly. Try to listen to a pop song at very low volume: have you noticed that you can still hear the vocals clearly, but the bass line is barely audible?
So, if a mix can achieve a sense of fullness and clarity at low volumes, it is well-balanced. On the other hand, if a mix sounds balanced at higher volumes but loses clarity and cohesion when the volume is reduced, it means something’s not right with the interaction of elements within the mix.
Last but not least, listening at low volumes is also important when you want to create a great mix that works well across all payback systems, preserving its dynamic range and expressiveness.
The Importance of Mono
A mix that maintains clarity and balance in mono, where all elements are summed to a single channel, is one that doesn’t need further level adjustments. My recommendation is always to check how a mix sounds in mono, as it’s the best way to identify and deal with frequency issues.
In a stereo mix, different elements can be panned and spread out across the stereo field to create separation and space. However, when these elements are collapsed into mono, any issues with phase cancellation can become way more evident. In the same way, frequency masking issues can be identified more easily when listening in mono.
Finally, a mix that performs well in mono is likely to be more consistent across a wide range of playback systems, from high-end audiophile systems to single-speaker devices, which is precisely what you’re looking for when mixing music.
Know The Best Tools, But Work with What You Have
I know from experience that it's easy to get caught up in the idea that expensive plugins and gear are necessary for professional sound. In this day and age, that’s no longer the case.
Most digital audio workstations come with a variety of built-in plugins that can deliver professional results; you can start by learning to master these tools, which is a more reasonable solution than getting a large number of third-party plugins you’ll probably never use.
I’m not saying you shouldn’t be aware of or get high-quality plugins and gear for your projects, but becoming obsessed with them will distract from the more crucial aspects of mixing, which is to hone your skills, trust your ears, and use the resources you have available to create the best possible mix.
Final Thoughts
In audio production, nothing is set in stone. And that's part of what makes it such an engaging and creative experience.
Nevertheless, careful volume balancing is what can ultimately turn your mix into a successful hit: spend time understanding each instrument featured in your track and its ideal position on the soundstage. Don't focus on single elements but rather on the sonic experience as a whole, one that the listener can connect with and feel its emotional impact.
I can’t stress enough the importance of testing your mix on various playback systems to ensure it plays as you envision it across all devices. A song might sound great in a studio environment and terrible in your car audio system, and you don't want that to happen. Use professional headphones and studio monitors, but also check your mixes on your cheap earphones: it should sound well regardless of how you experience it.
Good luck, and stay creative!


