

As a mixing engineer, it's your job to get your songs to sound good on any playback device listeners are using. Therefore, knowing how to EQ music depending on the genre and the instrument is super important. An excellent place to start is looking at the best equalizer settings for different genres and instruments.
Come dive in with us as we explore the best EQ settings for various genres and instruments!
What Is EQ?
Before we dive in, we want to ensure you have a basic understanding of EQ.
An equalizer (EQ) is there to modify the volume of different audio frequencies in a signal. These audio frequencies sit between 20 and 20,000 Hz , which is the range of human hearing.
If you want to learn more about EQ and how to use it in mixing, check out our article here.
Best Equalizer Settings for Different Genres
Understanding the frequency ranges is crucial for utilizing the EQ settings we're about to discuss. Here's a quick breakdown of the different frequency ranges:
- Sub Bass (20-60Hz) - These are the bass frequencies found in kick drums and sub-bass. You need a decent pair of headphones or a subwoofer to hear these frequencies.
- Low-Mids (60-250Hz) - These are the low frequencies that provide fullness and warmth in a mix. You'll find bass and kick in this frequency range, as well as the lower frequencies in guitars, vocals, synths, and keyboards.
- Mids (250Hz-1.5kHz) - Most instruments sit in the mid-range frequencies, including guitars, pianos, and vocals. Mid-range frequencies can fill up a mix and add necessary meat.
- Upper Mids (1.5-6.6kHz) - The human ear picks up upper-midrange frequencies more than anywhere else, so taking care of them requires delicacy. They're necessary for presence, though they can easily sound harsh if there are too many of them.
- Highs (6.6-20kHz) - Here, you'll find the shimmering brilliance found on the tops of vocals, cymbals, acoustic guitars, and much more. While brightness is important in any mix, it also requires care, as too much can sound harsh.
Acoustic/Folk Music
When working with acoustic music, it's a good idea to give the bass instruments a small push to help fill out the sound and create a solid foundation. I typically like to boost anywhere from 32 to 125 Hz .
I also often like to boost the upper mids to give vocals a bit of presence, as well as the high-end to give any acoustic instruments in the mix a bit of air and shimmer.
One range to be careful with when mixing acoustic music is the low-mids. While acoustic tracks require low-mids for fullness and warmth, too much of them can build up and leave you with a muddy, murky mess. Always check for mud between 250 and 500Hz and adjust to taste.
PRO TIP : Because acoustic and folk music is supposed to sound as natural as possible, I recommend going easy with your equalizer settings.
Hip Hop Music
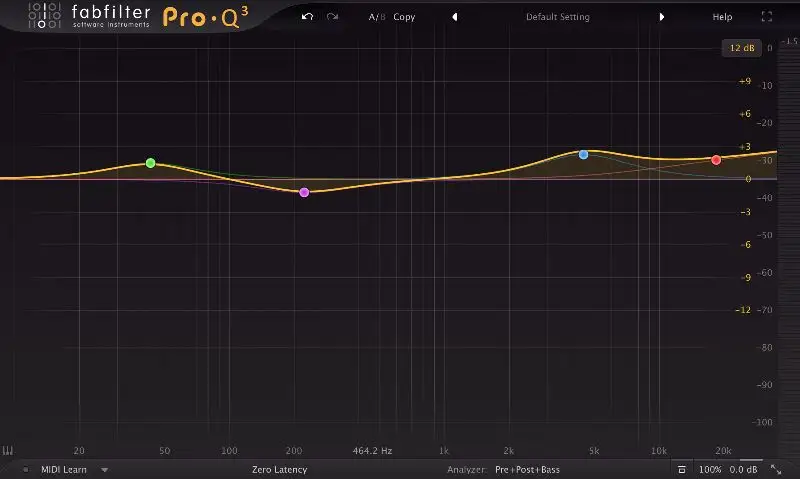
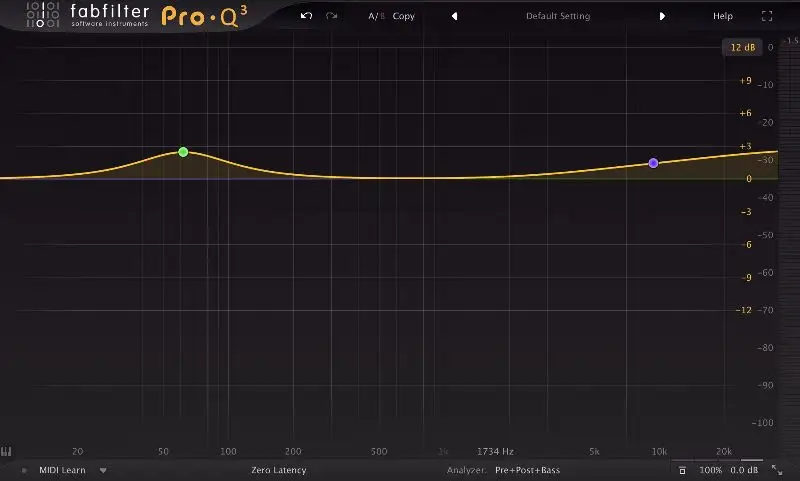
Hip-hop has changed greatly over the past few decades, though the one thing that remains the same is the need for trunk-rattling low-end. The best equalizer settings for hip-hop include boosts in the 64Hz region, especially if you want to make the kick stand out.
Lyrics are also very important in hip-hop, which is why I recommend boosting anywhere from 1-2kHz as well. As for high-end, not many hip-hop songs rely on it, so I would typically leave it in a neutral setting.
Electronic Music
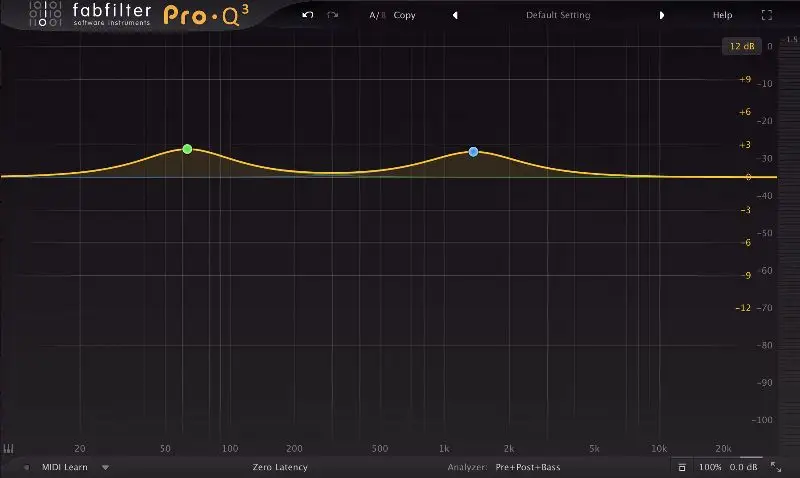
Anyone who listens to electronic music knows how important the bass sound is. Getting the best equalizer settings for bass right is crucial , which is why I pay a lot of attention to boosts in the 32 to 125Hz range.
I typically like to give lead lines a bit of a boost in the 1 to 3kHz region to make them more present for the listener. High-frequency sounds are equally as important as they create the necessary spread to make your mix sound wide. It's typically a good idea to boost those up as well.
As for cutting, I often like to look in the mid-range from around 250 to 500Hz , especially if I have tons of tracks stacked up, creating mud in this region.
Classical Music
If you know anything about classical music, you know that the sounds come from recordings. Therefore, it's essential to keep everything as flat as possible to allow the natural sounds of the recordings to come through.
Of course, this means that the best EQ settings depend on your listening device and your listening environment. If you want to experiment a little bit, I recommend boosting the lows from 32 to 250 Hz and the highs from 4 to 16kHz+ .
Pop Music
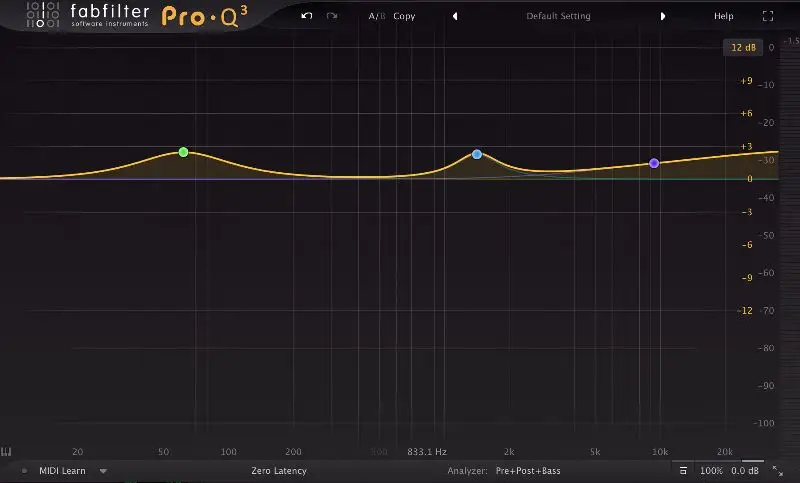
Pop music is ALL about the vocals, meaning you need to make room for them to stick out. Of course, pop music changes all the time, so the audio settings truly depend on the song itself. Most pop music nowadays has hyped-up lows and highs, so it's good to boost anywhere from 60 to 200Hz and 8 to 16kHz to accentuate those lows and highs.
I recommend looking in the 1 to 3kHz range to push the vocal a bit more.
Rock Music
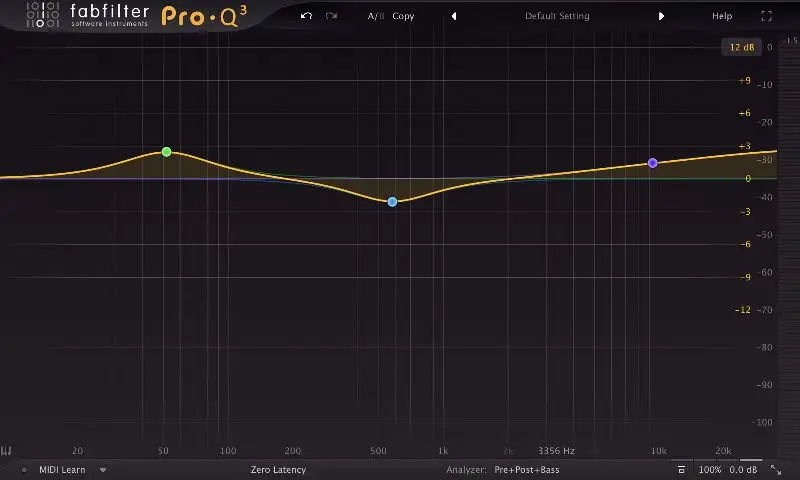
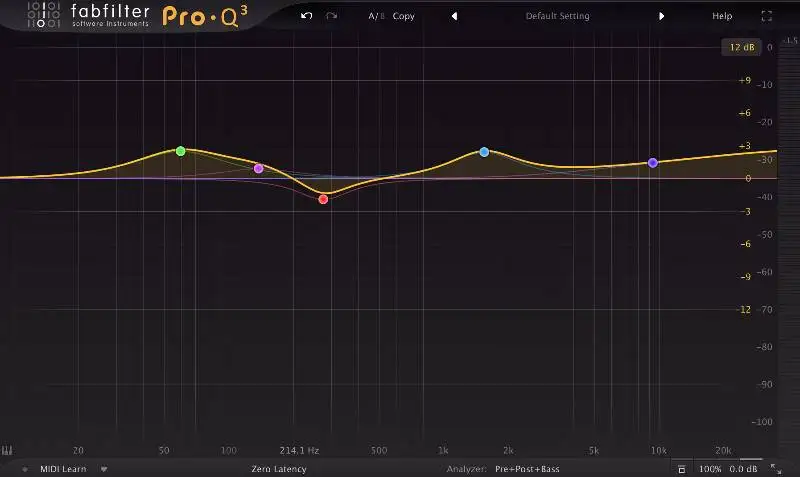
Rock music is all about the lows and highs as well, and I typically like to use a slight smile EQ to give it the power it needs without any added honk or mud. So essentially, I'll start by trying a boost on everything about the mid-frequencies. Check the rock music equalizer settings below to better understand what I'm talking about.
Best Equalizer Settings for Different Instruments
Drums
Kick Drums
- Sub Bass (40-60Hz) - You'll find the tone or the shell reverberation. Live kick drums can often have a lot of rumble down here, so approach this range with caution.
- Thump (60-100Hz) - This is the range where the kick will punch you in the chest.
- Body (100-200Hz) - You can get a bit of meat from the kick drum here, though be careful that it doesn't interfere with the bass or other low-end instruments.
- Ring (200Hz-2kHz) - You'll often find a lot of mud, ring, or boxiness in this range. I recommend sweeping for places to cut to make room for other instruments.
Beater (2-4kHz) - If you need to get more of a 'thwack' on your kick drum and enhance the beater, look to make small boosts here.
Snare Drums
- Bottom/Body (200-400Hz) - Most snares have fundamental frequencies in this range, so boosting here can give your snare the body it needs.
- Hollowness (400-800Hz) - This range is where you'll find the hollow ring heard in many live snares. You might consider scooping a small bit out of this range, though don't cut too much, as you'll lose the life of your snare.
- Attack (2-4kHz) - The crack of the snare or the sound of the stick hitting the head can be found here.
Toms
- Bottom/Body (100-300Gz) - The fundamental frequency will depend on the size and tuning of the tom, though this range is a good place to look if you need to add a bit more "boom" to your sound.
- Attack (3-4kHz) - To get more of the stick hitting the head of your toms, you can add a bit of attack in this range.
Cymbals
- Clank (200-300Hz) - You'll find the body or "chink" sound of the signal in this range. This is especially true in hi-hats. You can usually attenuate this range in busier mixes, though sparser mixes sometimes ask for more.
- Shimmer/Sizzle (6kHz+) - To accentuate your cymbals' "tsss" sound, you can brighten them up with a high-shelf at 6kHz or higher. Doing so can add a nice bit of air to any cymbal. Just be careful not to boost too much unless you want to make your listener's ears bleed.
Bass
- Bottom End (40-80Hz) - The lowest frequencies found on bass guitars is anywhere from 32 to 40 Hz depending on the tuning of the bass. Take care that this range doesn't mask the low-end of your kick.
- Fundamentals (80-200Hz) - You'll usually want to boost in this range to bring out the fundamentals of your bass. However, if you find that your bass is too boomy, consider cutting anywhere from 180 to 200Hz .
- Overtones (200-600Hz) - If you're having a hard time getting your bass to cut through your mix, or if you want your bass to cut through on smaller speakers, you'll want to make boosts in this range.
- Growl (800Hz-1.6kHz) - I like to look in this frequency range to accentuate the growl and attack, especially in rock music.
- String Noise (2-5kHz) - A slight boost in this range can be good to help your bass cut through the mix or to give it more realism.
Electric Guitars
- Mud (90Hz and Below) - IF you're dealing with a busy mix, you can typically use a high-pass filter to cut out anything beneath this range. You won't find anything very useful down here except for noise and rumble.
- Thickness (150-200Hz) - You'll find the thickness and the meat of electric guitars in this range. While you can certainly automate this region to beef up solos or leads, you might consider taming it to give the bass some room to breathe.
- Life (300Hz-1kHz) - This is where you'll find the lifeblood of the electric guitar. You can attenuate the lower end of this range if it's fighting with other low-mid instruments, though you should allow it to take over the higher end of this range in your mixes.
- Honk (1-2kHz) - If your electric guitar is sounding harsh or honky, we recommend smoothing out this range with a wide, small cut.
- Brilliance and Presence (3-8kHz) - To help your electric guitar cut through the mix, try and use a slight boost in this range. However, make sure your electric guitar doesn't get in the way of your vocals. I often recommend trying to use a low-pass filter above this range if your guitars are using distortion, as anything above 8kHz is often fizz and noise.
Acoustic Guitars
- Body and Boom (100-200Hz) - You'll often find a lot of boomy frequencies in this range that you can attenuate if they're taking over your mix, which is common with poorly recorded acoustic guitars. However, if you're dealing with a solo acoustic guitar, it's a good idea to boost a bit in this range to give it fullness and warmth.
- Woodiness (200-400Hz) - You'll find a fair amount of thickness and body in this range. Try not to make too many cuts here, as you'll quickly lose the life of your acoustic guitar.
- Harshness and Definition (2kHz) - Dealing with this range in acoustic guitars can be difficult, as too much can make it aggressive or harsh, though too little can take away the necessary attack and presence to hear slight intricacies in picking and chords.
- Sparkle (7kHz+) Using a slight high-shelf here can open up your acoustic guitar and give it the air it needs to rise above the mix.
Piano/Keyboards
There are many variations of pianos and keyboards out there, which can have completely different tonal qualities. A grand piano has a different sound quality than an upright piano, which has a different sound quality than a Rhodes keyboard, and so on.
It's incredibly important to take care with these full-frequency range instruments if you want them to fill your mix without overcrowding.
- Boom and Bottom (100-200Hz) - If you're dealing with a solo piano or keyboard, adding a bit of bottom-end here can provide warmth. However, if you're EQing a piano or keyboard in a busy mix, it's a good idea to get rid of some girth here.
- Presence (3kHz+) - If your piano or keyboard is feeling a bit dark, you can brighten them up using this frequency range. Of course, as always, with this range, make sure that you proceed with caution. Too much of this range can bring out the dampers, giving you an unwanted hammering noise.
Vocals
- Rumble (20 to 100Hz) - You won't really find any useful information for vocals below 100Hz. Most of it is air conditioner noise, floor vibrations, or rumble. Use a high-pass filter to get rid of it.
- Boom (100-250Hz) - You'll often find that boomy "head cold" sound in this frequency range. For males, you'll find it on the lower end, though look a bit higher for female voices.
- Nasality and Clarity (800Hz-1.5kHz) - If your vocals aren't very intelligible, consider boosting in this range. However, if you have too much of this range, things will start sounding very nasally.
- Presence (2-4kHz) - If you need to make your vocal sound more upfront and give it the energy it needs to sit atop the mix, boosting in this range is a good idea. However, too much of this range can be very pokey, causing listener fatigue very quickly.
- Sibilance (4-8kHz) - You'll often want to stick a de-esser here to tame any harsh sibilance, though you can use automated EQ to tame it as well!
- Air (10kHz+) - If you want to open your vocal up and give it that "expensive" sound, add a high-shelf around 10kHz and up. Just be careful not to go overboard, as it's easy to make things sound harsh!
Final Thoughts - Using These Equalizer Settings In Your Music
Now that you have the best equalizer settings at your disposal, it's time to go experiment! Make sure to test these EQ settings on multiple playback systems to see what works best. The moment you learn what EQ settings work best for your particular setup and your ears, we guarantee you'll enjoy making music even more!


