


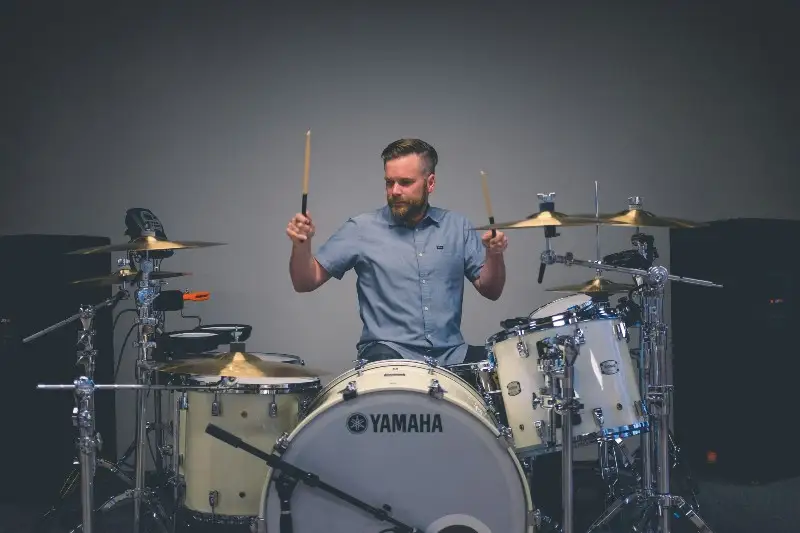
Next to EQ, compression is one tool that just about any modern mix couldn't live without. With the correct settings, it can breathe life into flat, boring, and disjointed drum mixes. From hard-hitting, 1980s arena rock-style drums to crispy, mellow, in the pocket neo soul drums, most of what we love about a good drum sound comes from compression.
However, compressing drums like the pros isn't as easy as it might seem. In fact, throughout my long learning process, it was probably one of the last things in mixing that I felt comfortable with, as there are tons of pieces involved.
With that said, my aim with this guide is to simplify the process for you so you can dial in the perfect drum sound, no matter the style you're after.
A Basic Overview of Compression
You're probably familiar with the basic parameters found on a standard compressor. However, a little recap never hurt, so let's quickly go over the different controls and what they do.
- Threshold: You'll first start by setting the threshold. When the incoming audio signal exceeds this threshold, the signal will automatically reduce.
- Ratio: The ratio controls the amount of gain reduction based on the dB above the threshold level. Let's say you have a compressor with a 4:1 ratio. This means that for every 4 decibels (dB) above the threshold, the compressor will only allow 1 dB to pass through. The higher the ratio, the more aggressive the compression effect will be.
- Attack Time: The attack time determines how quickly the compressor engages and starts reducing the gain when the input signal exceeds the threshold. Slow attack times will allow transients to pass through before compressing, while fast attack times will clamp down on transients right away.
- Release Time: The release time controls how quickly the compressor recovers and stops compressing the signal after it falls below the threshold. Short release settings make for snappier compression, while slower release settings make for more natural and transparent compression.
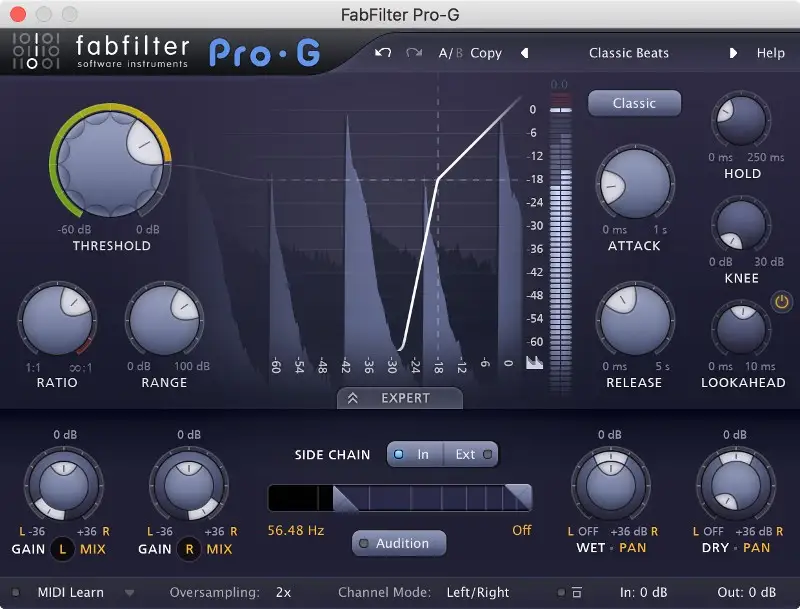
It's worth noting that some compressors have fixed attack and release times, while others offer even more controls, such as knee, look-ahead, and sidechain.
Why Do We Use Compression on Drums?
Why go through all the trouble to compress drums, to begin with? Here are a few scenarios where I believe it's necessary:
- Evening out the dynamics of a single drum element or the entire group
- Strengthening or altering the current groove
- Adding a sense of glue to make the tracks sound more cohesive
- Adding punch and forwardness or pushing certain elements back in the mix
- Adding character to lifeless drums
Now, just because you have drums in your mix doesn't mean you need to compress them. Some drum tracks sound perfectly fine on their own without any compression at all!
Of course, this wholly depends on the style of music, how they were played, and how they were tracked. A recording engineer may have printed a boatload of compression on the way in, so there might not be any reason to compress them more.
Learning to use your ears to be discerning is key to any great mix, and the same goes for mixing drums.
Compressing Drums - A Step-by-Step Guide
1. Get Rid of Bleed
Before I get in the compression zone, I like to make sure my individual drum tracks are as clean as they can be. That way, I can process each element individually without impacting the others.
If you've ever recorded or mixed live drums, you know that the recordings often contain background noise . This can be anything from room ambience to microphone bleed from other elements of the kit.
With a gate , you can attenuate or eliminate this noise altogether, depending on how clean you want your mix to be. I'll typically use a gate when I want to isolate individual drum hits, such as a snare. Its pretty common to get hi-hat bleed in your snare mic due to their close proximity to one another. However, with a gate engaged, you can knock out bleed from your hi-hat to hone in on the snare.
Set your gate so that only the snare drum level that rises above the specified threshold can pass through while tamping down all of the other extraneous noise. In the end, you get a focused snare sound that you can compress further without bringing up any other noise.
If there are certain drum tracks that don't have much information on them for a decent portion of the song, you can go through and manually edit to make precise cuts around the desired elements. I pretty commonly use this approach on toms. A player might only perform a tom fill here or there, so there's really no need to keep the microphone bleed in the mix the whole time.
For this process, I'll just zoom into the waveform, identify the individual tom hits, and use the editing tool to make precise cuts at the beginning and end of each fill or tom hit to isolate them.
2. Compressing Individual Drum Tracks
Some mixing engineers like the top-down approach where they send all of their recorded drum elements to a bus and process them there before going back and focusing on individual processing.
I am not one of those engineers, so for this guide, I'll start by diving into each of the common recorded drum elements (kick, snare, hi-hat, toms, overheads, room mics) and how I apply compression to each to get the sound that I want.
Kick Drum Compression
Depending on the genre you're working on, the kick drum might be the most critical element in your mix. With compression, you can help tame its dynamic range, so that it sits well in the mix without being too loud or too quiet and gives you a consistent low-end foundation.
Before adjusting any settings and pulling down the threshold, I like to determine what the issue is first and go from there.
Adding Punch to a Kick Drum
If you're dealing with a floppy, sloppy kick drum sound that needs some punch, compression is often the key.
Your focus here should be on the transient or the initial attack of the drum.
A relatively slow attack time will be your best friend here, as it'll allow the initial attack of the kick through before clamping down on it. In this instance, I like to set a fast release time so that the compressor doesn't hold onto the kick and a moderate ratio of around 4:1. The amount of gain reduction will depend on the sound of the kick.
You can also use a transient shaper to add more punch if compression alone isn't working as you'd like it. Simply load up a transient shaper plugin and increase the attack to emphasize the initial hit of the kick.
Taming a Poky Kick Drum
Some kick drums can be a bit too poky . If you find that your kick's transient is starting to interfere with other elements of your mix or standing out in an unpleasant way, you can use a fast attack and release with lower ratio around 2:1 to tame it.
Bring down the threshold quite a bit here to shave off the initial attack.
Adding Character
Compression goes beyond taming transients and controlling the dynamic range. Sometimes, you just want to give your drums a unique vibe.
There are certain compressors that impart unique sound characteristics, such as 1176-style compressors , which have an aggressive or explosive sound. Another favorite of mine on kick drums is the DBX-160 VCA compressor, which adds a silky punch and snap.
The more and more you use these character-rich compressors, the more you'll start to recognize when you're hearing them on your favorite records. Eventually, you'll be able to say, "Ah, yes, I want that VCA kick sound."
Snare Drum Compression
There are a couple of reasons we compress the snare drum, most all of which are similar to the kick.
For starters, compressing the snare helps even out its dynamic range. Not many players can hit each snare with even volume, though because the snare drum is such an important element in many genres, we want to make sure that it remains consistent and present in the mix.
Start with a 4:1 ratio and slower attack and release times. Unless you're dealing a heavily detuned kick drum, most snares have more ring than your average kick. This ring is what gives a snare its tone. For general compression, we want to retain this ring with a slightly slower release.
Adding Punch to a Snare Drum
As with the kick, getting a punchy snare drum means amplifying the transient. To do this, you can use a slow attack and a relatively fast release time to emphasize that first 'crack.' As you pull your threshold down, make sure that it's only impacting each individual hit and not holding until the next hit.
If the compressor is holding down too long, you might speed up the release time even more.
Again, you can also use a transient shaper to get more punch out of your snare drum by cranking up the attack.
I won't get too deep into taming a poky snare drum, as it's pretty much the same process as taming a poky kick. You can also use the same styles of compressors, which I'll dive deeper into near the end of this article.
Hi-Hat Compression

Hi-hats can be wildly dynamic, depending on the piece and how they were played. The volume differences between an open and closed hi-hat can be quite stark as well, which is where dialing in the right compression settings can be helpful.
You can use the same relative settings as you would with the snare and kick, though approach it more gently. Too much compression on a hi-hat can leave it sounding spitty, and no one wants that.
Typically, the goal is to tighten up the performance and lock it in with the groove. A slightly slower attack will allow the initial transient, while a fast release will make sure each hit comes through evenly.
Altering the Groove with Sidechain Compression
Oftentimes, I'll use compression on a hi-hat to help it groove more with the rest of the drums. To do so, I'll send kick and snare to a bus that does not have an output. For the sake of learning, let's say you send your kick and snare to Bus 10.
You'll then stick a compressor on your hi-hat and assign the sidechain input (which sometimes looks like a key) to Bus 10. Now, whenever the kick or snare hits, they will duck the overall volume of the hi-hat, helping it move in time with the foundational groove. You can be as subtle or aggressive about this as you want, though I usually find that subtlety is the best remedy for a natural sound.
The sidechain compressor should have a relatively fast attack and release to duck the hi-hat as soon as the other drums hit. A few dB off the top of each hit should do the trick, turning an otherwise prim and proper hi-hat part into something with more attitude.
As a bonus, this will also help you tighten up unwanted snare bleed in your hi-hat mic.
Tom Compression
Toms are the main troublemakers of most drum sets. If they aren't tuned and mic'ed properly, getting a decent sound out of them can be incredibly difficult (without adding samples, of course).
To lock them in place, I'll usually start with similar settings to my kick or snare - a medium to slow attack, a medium release, and a relatively moderate ratio, such as 4:1. I often find that I want more punch from my toms, especially on fills. To achieve this, I'll either dial in a slower attack to let the initial transient through or push the attack on a transient shaper to add a bit more thwack .
Gluing Your Toms
If your toms are feeling a bit disconnected and you want them to act more as a single unit, I'd recommend using a VCA compressor, such as a DBX-160 emulation, on a toms bus. Dial in a slow attack, a fast attack release, and a gentle ratio - 2:1 should do the trick.
Slowly pull the threshold down until you're getting a few dB of compression at most. This should pull the toms together with a bit of that ooey gooey glue we all love.
Overhead Compression

Compressing overhead mics might be one of the most difficult aspects of drum compression. There were so many times early in my career that I over-compressed my overheads. The result was usually a messy, washy, disarray of cymbal noise.
Listening back to some of my old mixes, I could hear the compressor clamp down on the crash in the chorus, completely destroying the impact of the downbeats and messing with the overall image of the kit.
The thing I ultimately learned was to ease up on dynamic compression for overhead mics and think more in the realm of character compression .
If your overheads need a bit of glue, I'd recommend going for a natural, vibey compressor like a VCA, vari-mu, or optical plugin. On the other hand, if they need more punch, you could go for a diode-bridge compressor module or a classic FET like the 1176.
Once in a while, I'll take a hint from my hi-hat compression playbook and add a sidechain compressor to the overheads that's keyed to the kick. This way, each time the kick hits, the overheads will duck slightly, solidifying the overall rhythm.
Before we dig into room mics, I just want to throw out there that if you feel like your overheads have decent sound already, you may consider not adding any compression at all. Poorly compressed overheads are a clear sign of an amateur mix, as they can reveal all the unpleasant nuances of an inadequate drum recording.
If you really need some control on your overheads, you can dial in parallel compression, which we'll discuss here in a little bit.
Room Mic Compression
Read through just about any forum or article about rock drum mixing, and someone will no doubt tell you to obliterate your room mics with compression. If you've heard this before, then I apologize in advance for sounding like a broken record.
However, the reason engineers do this so often is that it sounds incredible. Not only can it help add sustain and character to your dry drums, but it can also help them sound larger than life. Listen to just about any rock or pop mix with live drums and listen for the room sound. You'll likely hear the aggression on the decay and sustain.
With heavy compression settings, you can also make your drums sound like they were recorded in a much larger room rather than your buddy's garage.
I usually like to start with a 4:1 to 8:1 ratio, a medium to fast attack time, a medium release, and a whole lot of gain reduction.
Note that compressing the room mics will also accentuate the characteristics of the room, so if the room on its own doesn't sound very good, you may consider muting the mic altogether and creating a fake room mic by sending all of your individual drum tracks to an aux track with a room reverb on it, then blending to taste.
3. Compressing the Drum Bus
At this point, each element of your kick should be in the ballpark of where you want it.
Next, you'll want to ensure all of your individual drum tracks are routed to a single bus for further processing.
Before we dive into settings, let me first start off by saying there is no one-size-fits-all approach to drum bus compression. Every element you use will change depending on the genre, the way the drums were recorded, and the rest of the mix. There is no "perfect drum bus chain."
The important thing to keep in mind, however, is that every move you make will also affect every previous move you made when processing the individual drums. On the bright side, processing the drum bus will allow you to control every drum element as a single unit. After all, drums ARE a single instrument, and this is where we add a bit of extra shimmer to make them sound like one.
Before adding a compressor to my drum bus, I like to keep my initial goal in mind.
Am I trying to add glue, enhance the sustain to make my drums feel larger than life, tighten up the tails for a funkier sound, or simply smooth out the overall dynamics?
From there, I can pick the best compressor plugin and settings. Usually, I like to take a subtler approach here and focus more on glue compression than anything. The drums should already sound pretty dynamically consistent, thanks to the individual treatment you gave them earlier.
Essentially, no matter which compression techniques I employ, I only want to shave off a few dB and adjust the make up gain to bring it back to the original volume.
So, what kind of compressor should you use?
If you want a punchier, snappier sound, I'd recommend going for a VCA compressor, such as a DBX-160 or an SSL G-Master Buss compressor . On the other hand, if you want a bit more pump or aggression, an 1176 might be more suitable.
4. Playing with Parallel Compression
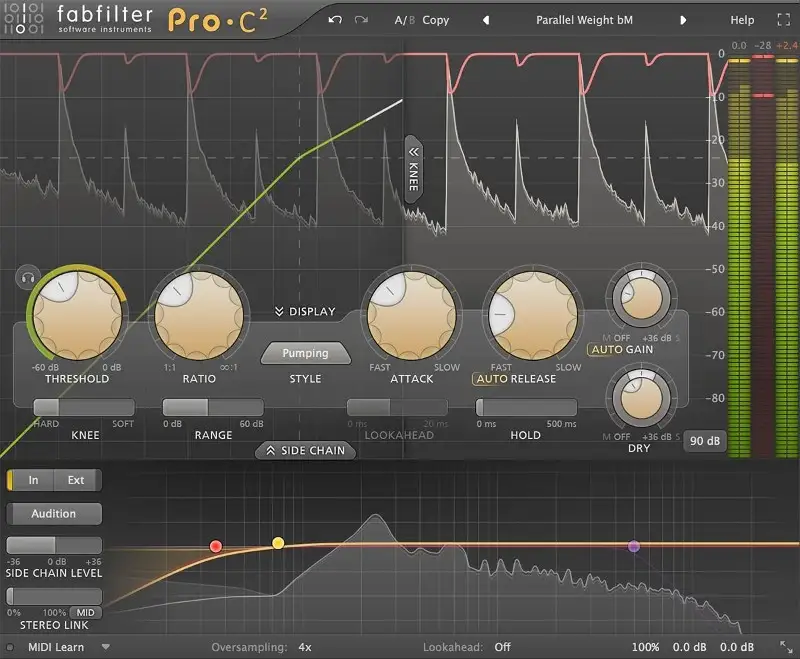
When mixing drums, I employ parallel compression quite a bit. This is especially true if I've dialed in my individual and buss compressors to the point where I have a good drum sound, though when listening to the mix, I want a bit more control without going back and altering my settings.
With parallel compression, you essentially duplicate a signal, heavily compress the duplicate, and mix it in with the 'dry' signal. In the end, you get the best of both worlds - tons of punch and aggression with the natural dynamics of an uncompressed drum sound.
It's a great way to keep your mix from sounding overdone too.
While you can use parallel compression on any of the individual drum elements listed above, it's most commonly employed on the drum bus.
To set it up, you can create a new auxiliary track, slap a compressor on it, and send your drum bus to it. The way in which you dial in the settings on your parallel compressor will depend on the style you're trying to achieve, though more often than not, I'm going for pretty heavy settings.
A fast attack time is great for shaving off transients that can sound a bit too snappy when compressed heavily, while a medium-fast release time can add a bit more aggression and sustain. As for the ratio, go big or go home. 10:1 is a good starting point, though don't be afraid to experiment with 20:1 or higher with plenty of gain reduction.
Some compressor plugins come with mix knobs, which you can use to dial in parallel compression on your mix bus. Don't be afraid to do this if you like the way the parallel compression with the mix knob sounds.
PRO TIP: I often find that when I send my entire drum bus to a parallel compression aux, it doesn't respond very well to cymbals. If you just want a bit more aggression from your shells (kick, snare, toms), I'd recommend sending those to a parallel bus alone and mixing them in to taste.
Best Drum Compressors
Waves SSL G-Master Buss Compressor
This legendary buss compressor originally came from the SSL G Series console. Many engineers love it for its unique ability to glue a kit together.
While there are several emulations of this compressor on the market, I've happily used the Waves version for many years and it sounds incredible. For a bit of punch, I'll dial in a slow attack time and take advantage of the program-dependent release if I don't need it to be lightning-fast.
UAD DBX-160
If you need a bit of extra snap from your drums, look no further than the UAD DBX-160. It's great for taming low end on kicks at heavier doses and adds a ton of punch on the front end to tighten things up. It's also one of my favorite compressors to run in parallel.
Waves CLA76 Black Compressor
For individual drums, I often find myself gravitating toward the Waves version of the original 1176. It has a rich, colorful sound with plenty of punch and aggression. Compared to the DBX-160, it maintains a tight low end without too much distortion, and is great for taming the pokiness that can sometimes sit on the transients of certain drum recordings.
UAD API 2500
I've long been a fan of the API drum sound. With this buss compressor, you can adjust the right amount of squash while retaining the original integrity of your natural drums. The distortion profile is a bit lower than the SSL G-Master Buss Compressor, offering a beautifully balanced sound for drums that need a fair amount of glue without imparting a ton of additional character.
Final Thoughts
As you can see, even a beginner's guide on how to compress drums contains quite a bit of information. As you might expect, this is just the tip of the iceberg. However, even with this relatively limited information, you should be able to dial in compression settings knowledgeably to get a better overall drum sound.
If you're having trouble figuring out what kind of moves to make when compressing individual drum hits, don't shy away from presets. They can provide a good starting point and get you in the ballpark of the right sound, no matter the mixing situation.


