


Today, I want to dive in and explore a plugin that's had a massive impact on the music production scene over the past few years Image-Line's Gross Beat . This plugin has shaken up the industry more than most, and has become a staple in the toolbox of producers worldwide.
But just how has Gross Beat stood out in a market flooded with plugins?
For starters, Gross Beat isn't just your average effect plugin. It’s a powerful tool for real-time audio manipulation, allowing you to create mind-blowing time and volume-based effects, all within the confines of a single interface. With Gross Beat, you can create stutters, glitches, and even reverse effects that give your tracks a unique edge. You could say it’s "grossly" underrated for what it can achieve.
At first glance, Gross Beat might look a bit complex and intimidating. But don’t worry, I'm here to help. I've compiled a guide to help you harness the full power of Gross Beat like a pro, using nothing more than your current setup. Let’s get started!
What Is Gross Beat?
Gross Beat is a true force of nature when it comes to real-time audio manipulation.
You can warp the pitch, timing, and volume of any sound source on the fly. More specifically, however, Gross Beat lets you create dynamic effects like stutters, glitches, vinyl scratches, and even intricate volume gating effects.
You could essentially take a simple loop and transform it into something entirely new and exciting, all in a matter of seconds.
While Gross Beat is a native plugin for FL Studio, you’re not limited to using it within FL Studio. If you purchase the plugin separately, you can integrate it into any DAW of your choice, making it a super versatile tool for any producer.
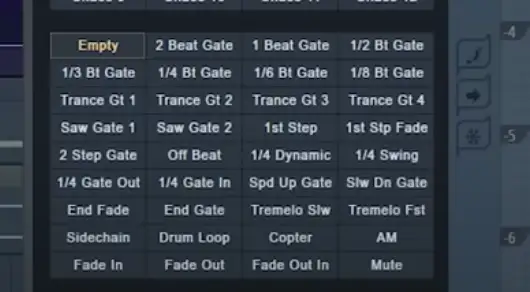
One of the standout features of Gross Beat is its 72 preset slots , which are divided into two main categories: 36 slots for time manipulation and 36 slots for volume manipulation.
Each slot has a dedicated editing window, allowing you to customize and tweak your effects to perfection.
Getting Started with the Gross Beat Interface
Alright, let’s dive into the Gross Beat interface and get you comfortable with its layout and features. At first glance, it might seem a bit overwhelming, but once you get the hang of it, you’ll see it’s pretty intuitive.
The Main Interface
To start, you'll want to load Gross Beat onto your mixer.
When you first open Gross Beat, you’ll notice it’s divided into several sections.
The main areas you’ll be working with are the Time/Pitch Settings and Slots, the Volume Settings and Slots, and the Mapping Envelopes Editing Window.
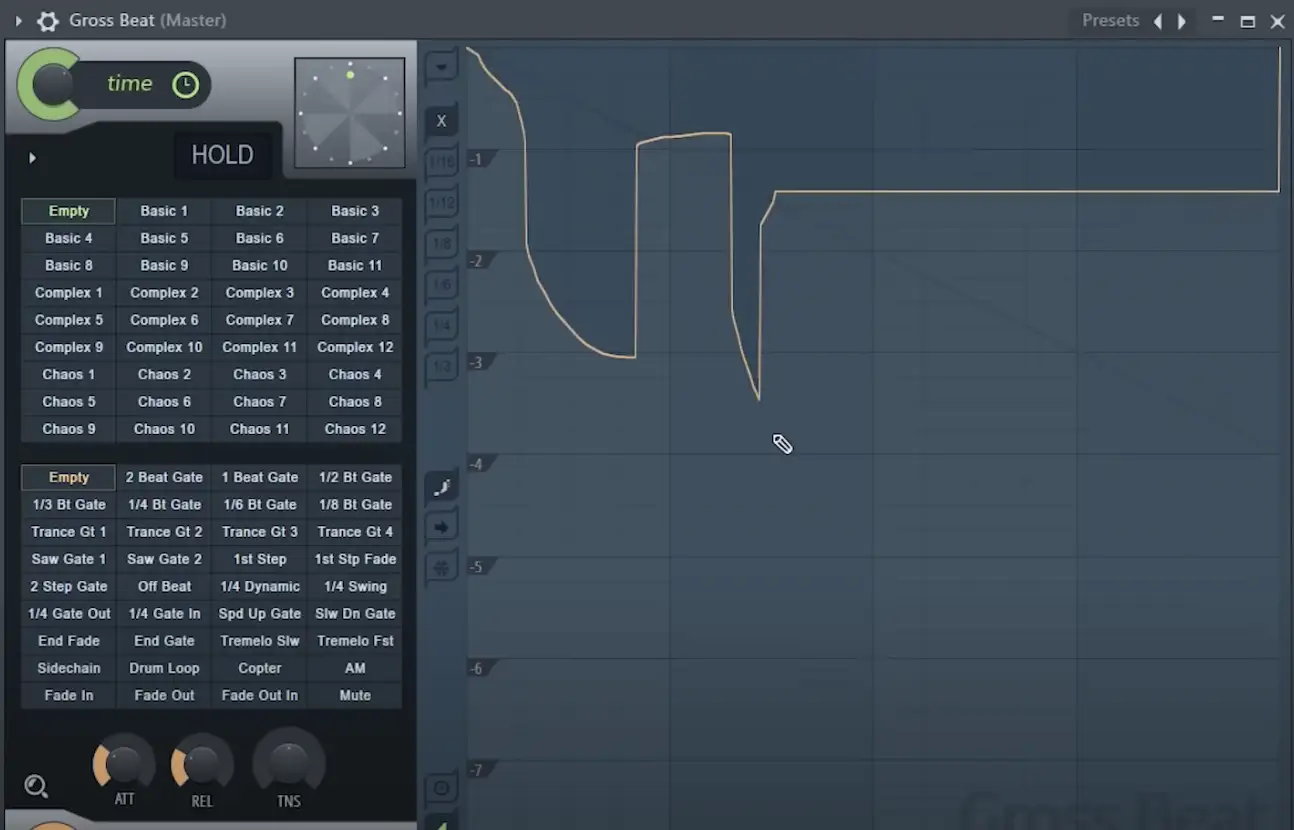
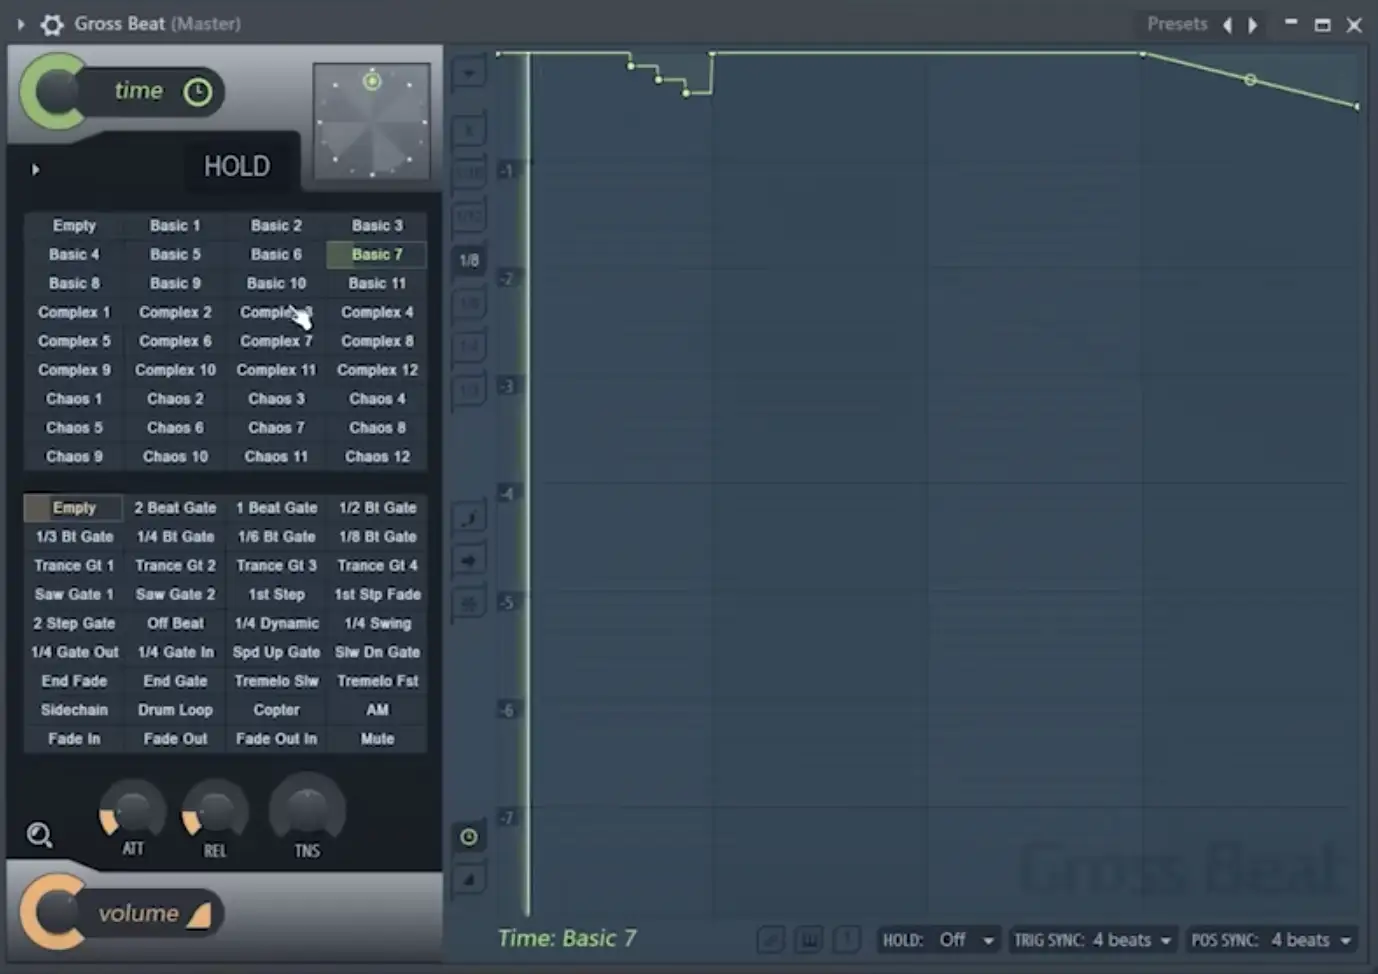
The Time/Pitch settings in Gross Beat are where you can manipulate the timing and pitch of your audio in real-time. This section allows you to create effects such as stutters, glitches, scratches, and even reverse effects. There are 32 slots for time manipulate storage, and they've even included a unique scratching clock , so you can manually scratch out patterns.
Next, we have the Volume Setting and Slots section. These settings in Gross Beat allow you to control the overall dynamics of your input audio, with the main Volume knob at the bottom controlling the dry/wet amount. You can create volume gating effects, volume swells, and other dynamic changes that add depth and movement to your sound.
Similar to the time slots, Gross Beat offers 32 preset slots dedicated to volume manipulation. You can customize each slot with your own volume curves, including Attack, Release, and Tension, which adjusts the slope of the attack and release times.
Lastly, we have the Mapping Envelopes Editing Window , which is where the magic happens. I like to think of this as the main workspace in Gross Beat, where you draw and edit your time and volume automation curves.
Diving Deeper Into the Volume Manipulation Possibilities
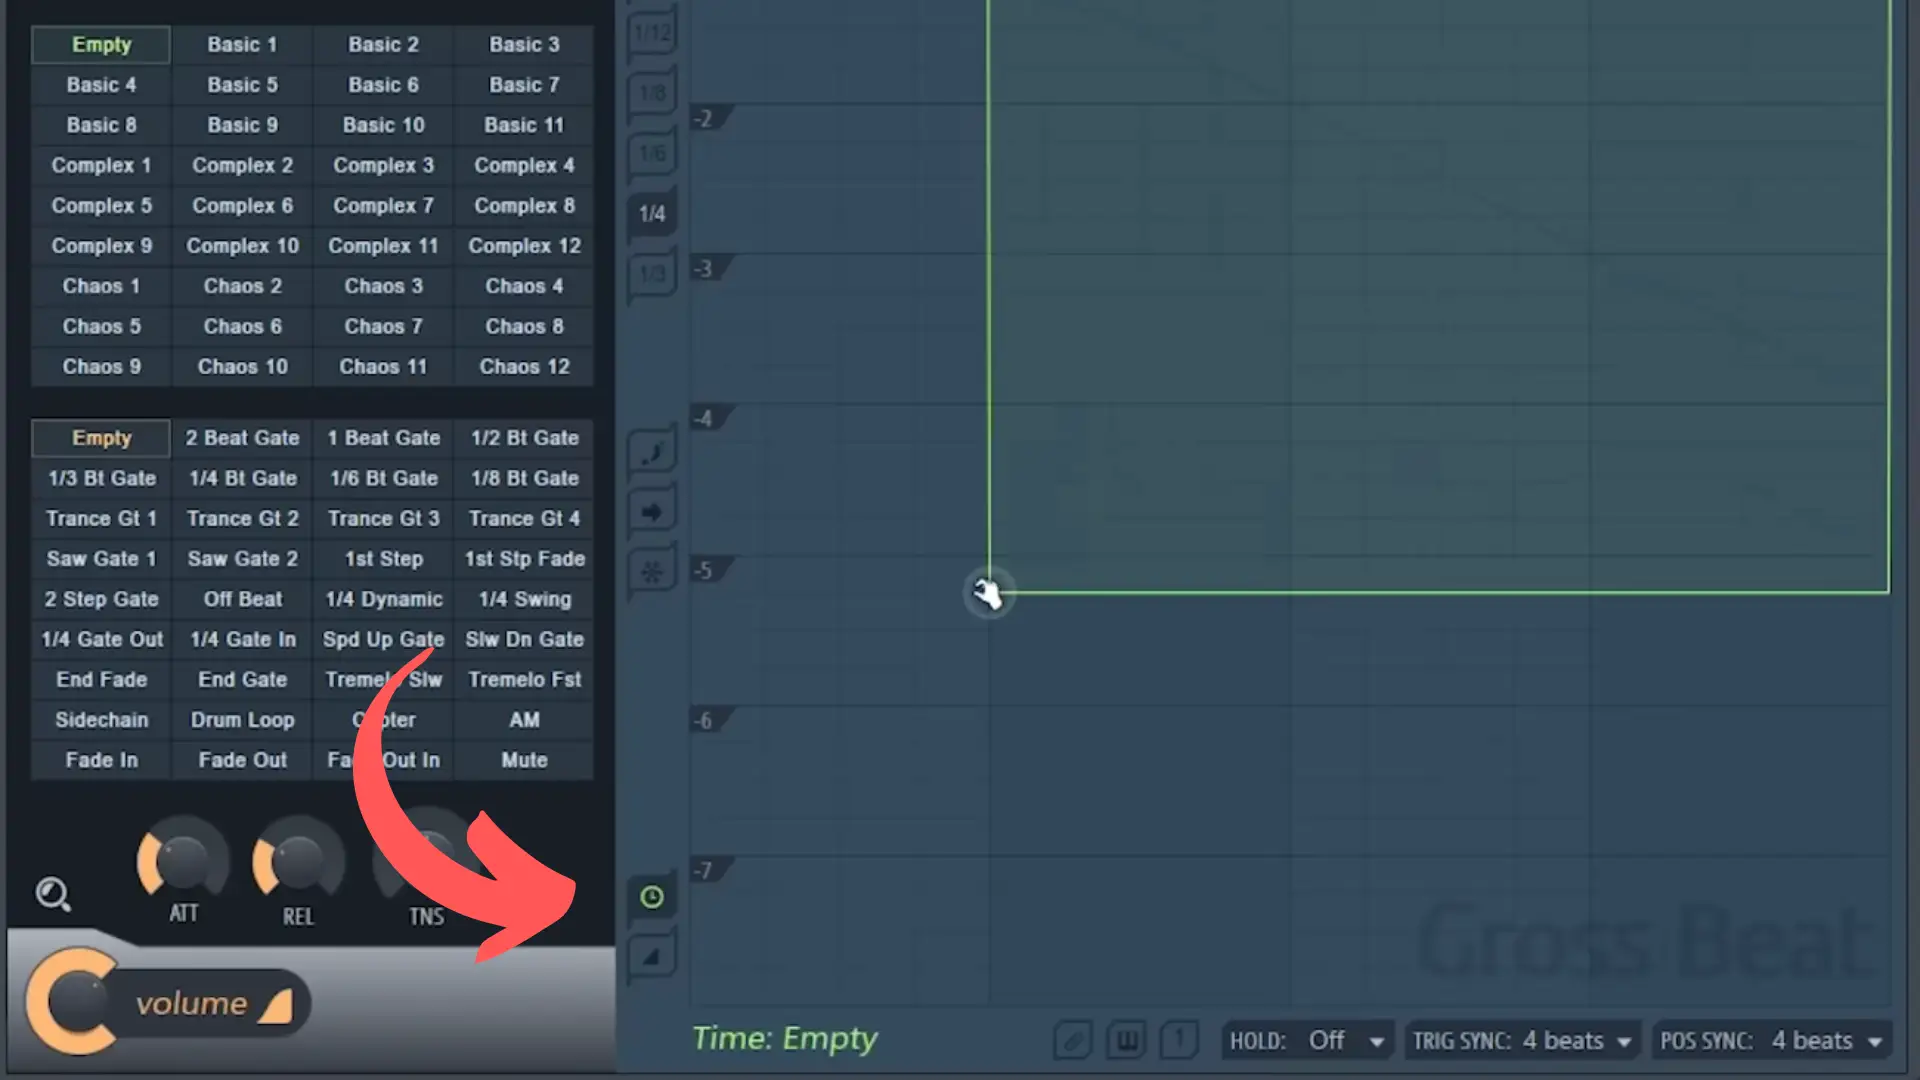
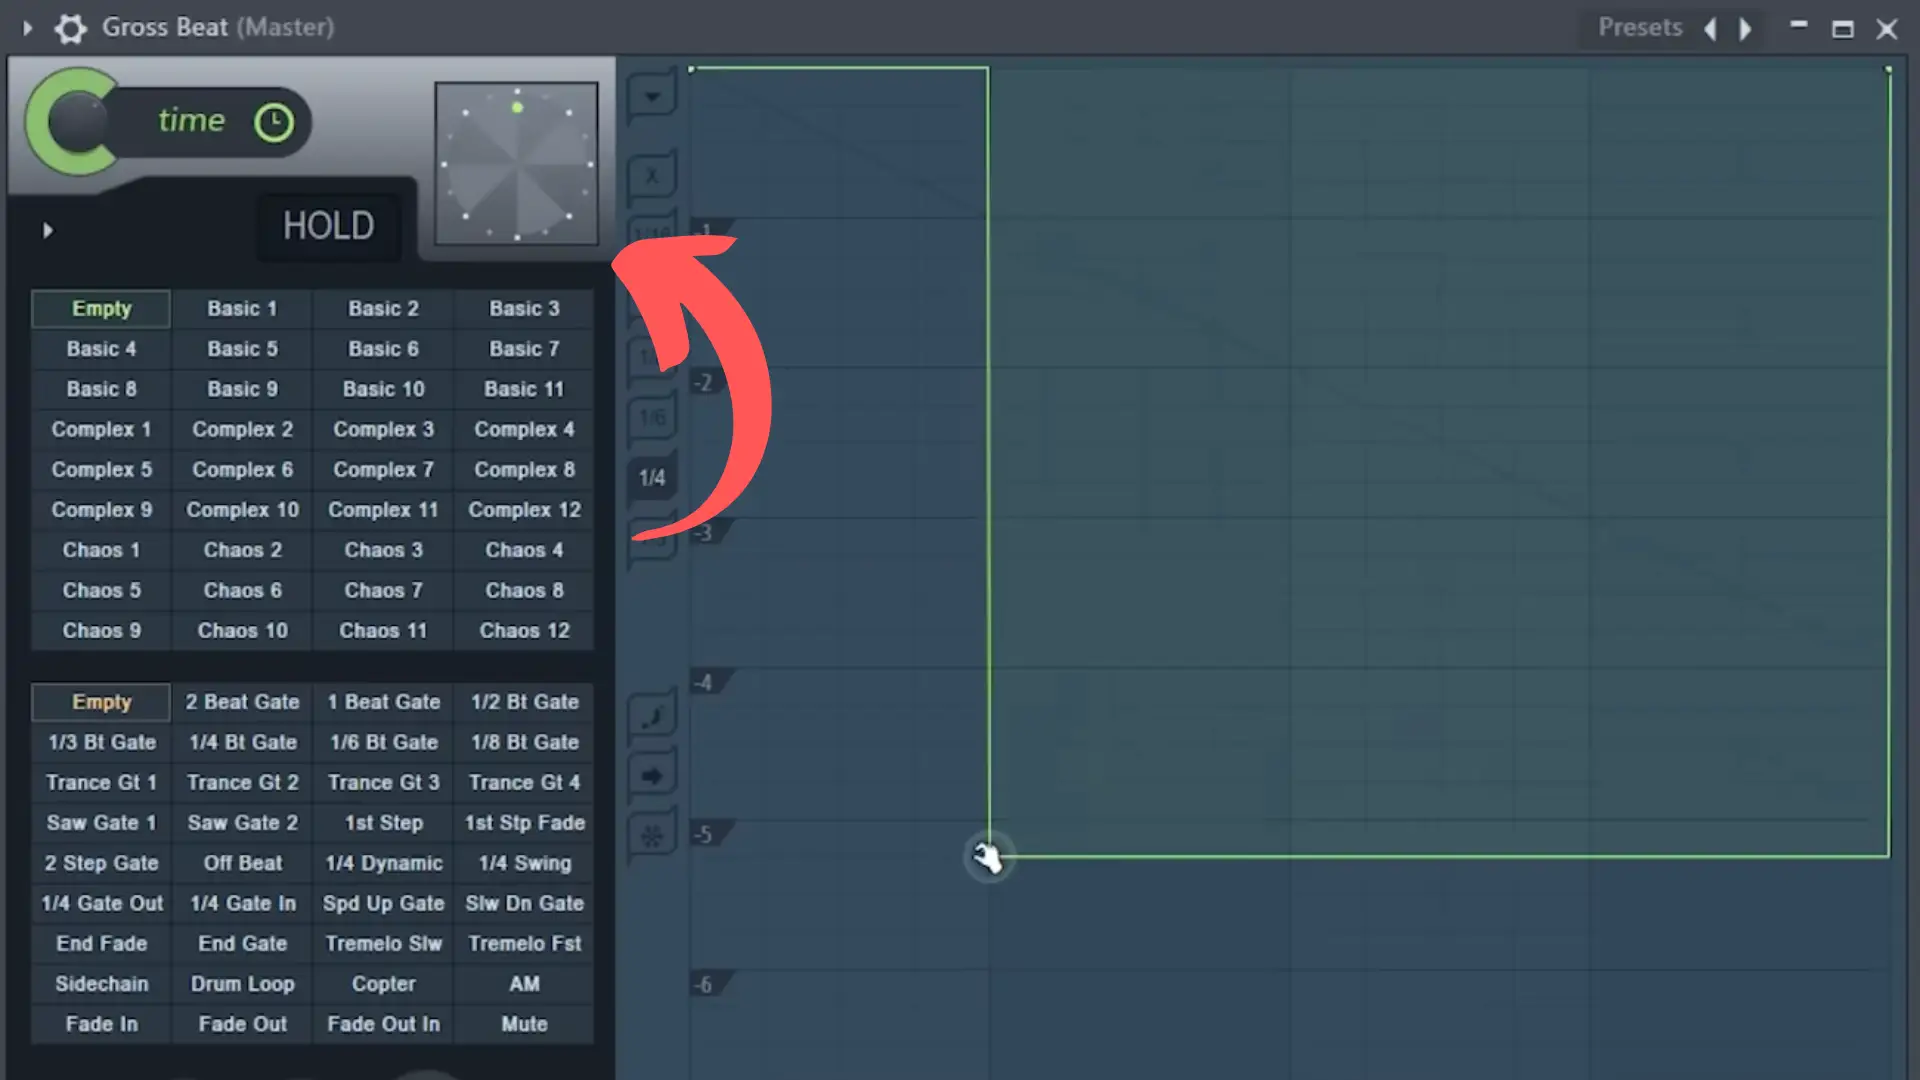
If you start by selecting an empty slot in the volume manipulation, you'll get the initial patch on Gross Beat with the envelope line at the top, meaning there's nothing happening.
If you were to press play and let your sample or loop play through the plugin, you'd get the dry sound of that sample or loop.
However, if you select a different volume manipulation effect, such as the 2-Beat Gate effect, a shape would appear on the visualizer, changing the dynamic shape of your incoming signal.
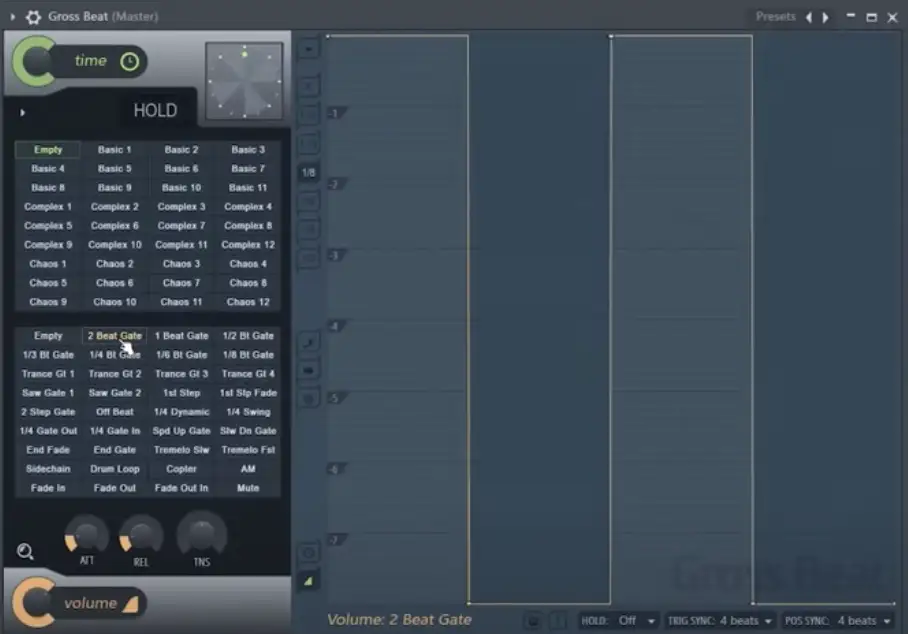
The way it works is that when the graph line is at the very top of the graph, the entire volume of your signal will get through. However, when it's at the very bottom, none of the signal gets through.
You can edit the different points on the graph by left-clicking them and dragging them to get different dynamic patterns.
If you're someone who doesn't like to get in the weeds and doesn't mind not exploring the advanced details of Gross Beat, you could simply click through each of these patches with your audio playback to see if you create any effect that sounds good or musical.
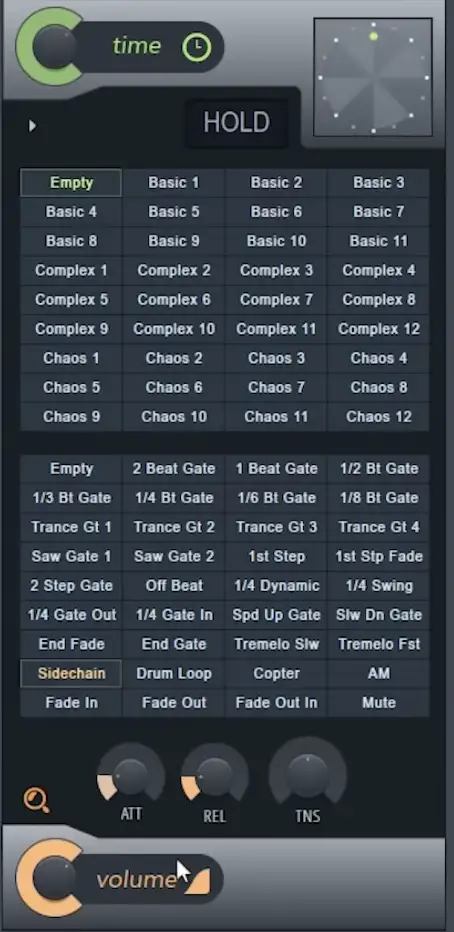
For example, the Trance Gate 2 effect is one of my favorites. You can run a simple sine wave bass sound through it and get a trance-style bass pattern on the other side. There's also an excellent side-chaining pattern, perfect for when you have a sound that you'd like to get out of the way of your bass or add a pumping effect to.
It's also worth noting that they included a handy little magnifying glass icon , which you can click to toggle the graph on and off, allowing you to focus more on the presets than the rest of the plugin.
At the bottom left hand side of the plugin, you'll find the main volume knob, which, as I mentioned before, acts like a wet/dry dial for the volume. It tells you how much of your signal will pass through unaffected.
I often find myself dialing this back when I like an effect, though I don't want it to be as apparent.
Getting Rid of Clicks
One of the most prominent complaints I see about Gross Beat is that it creates clicks in the audio depending on the effect.
At the bottom of the plugin, right above the Volume knob, you'll find a few Attack, Release, and Tension knobs, which are great for effectively 'de-clicking' your audio.
I like to start by taking the attack and release control points all the way down. From there, you'll notice a ton of clicking, as the volume is coming in and being taken away too quickly and drastically. To mitigate this, you can adjust the attack to ensure the click doesn't happen at the start of the sound and adjust the release to ensure it doesn't happen at the end.
While your sound is playing, slowly adjust these parameters until you're getting a smooth sound.
You can also adjust the Tension to change how the curve rises up. The best way to get the hang of this control is to start using it.
Editing Your Own Envelope
If you want to tweak and manipulate your own envelopes outside of the given presets, that's where Gross Beat truly excels.
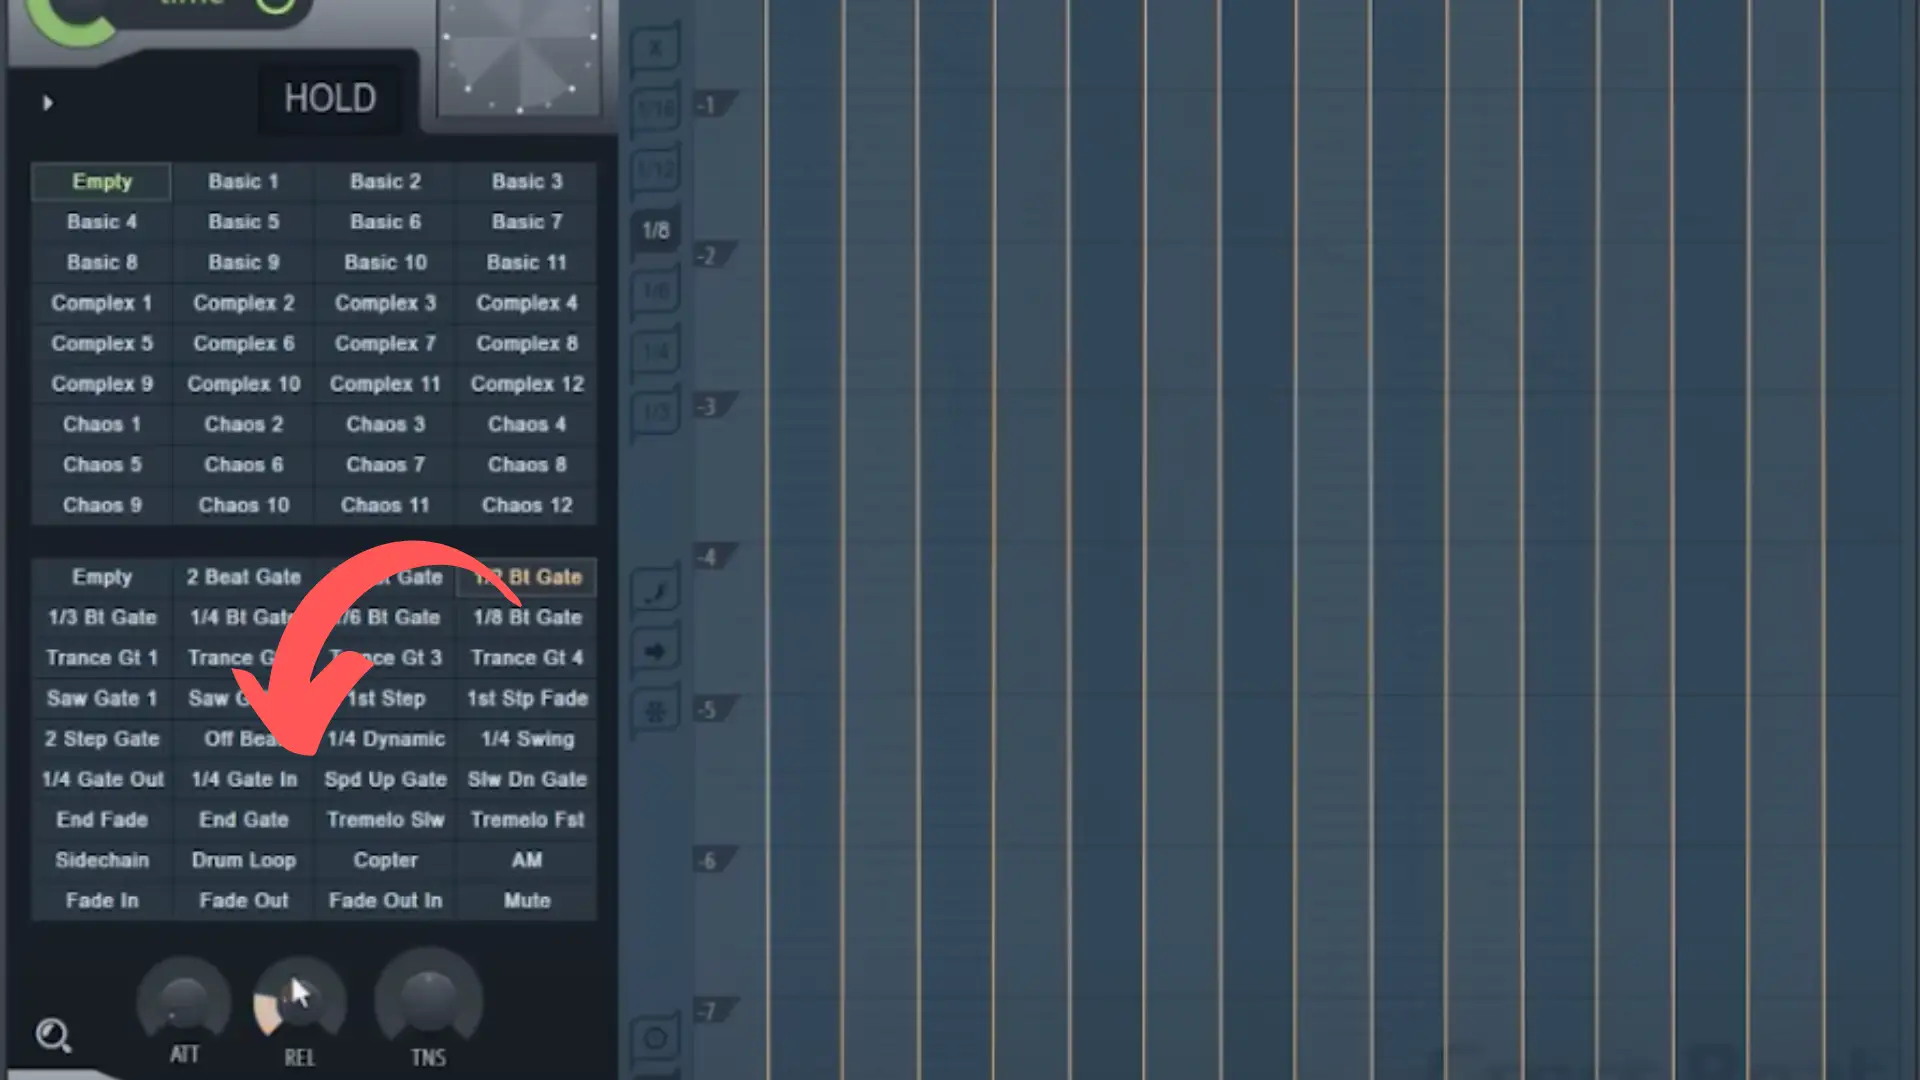
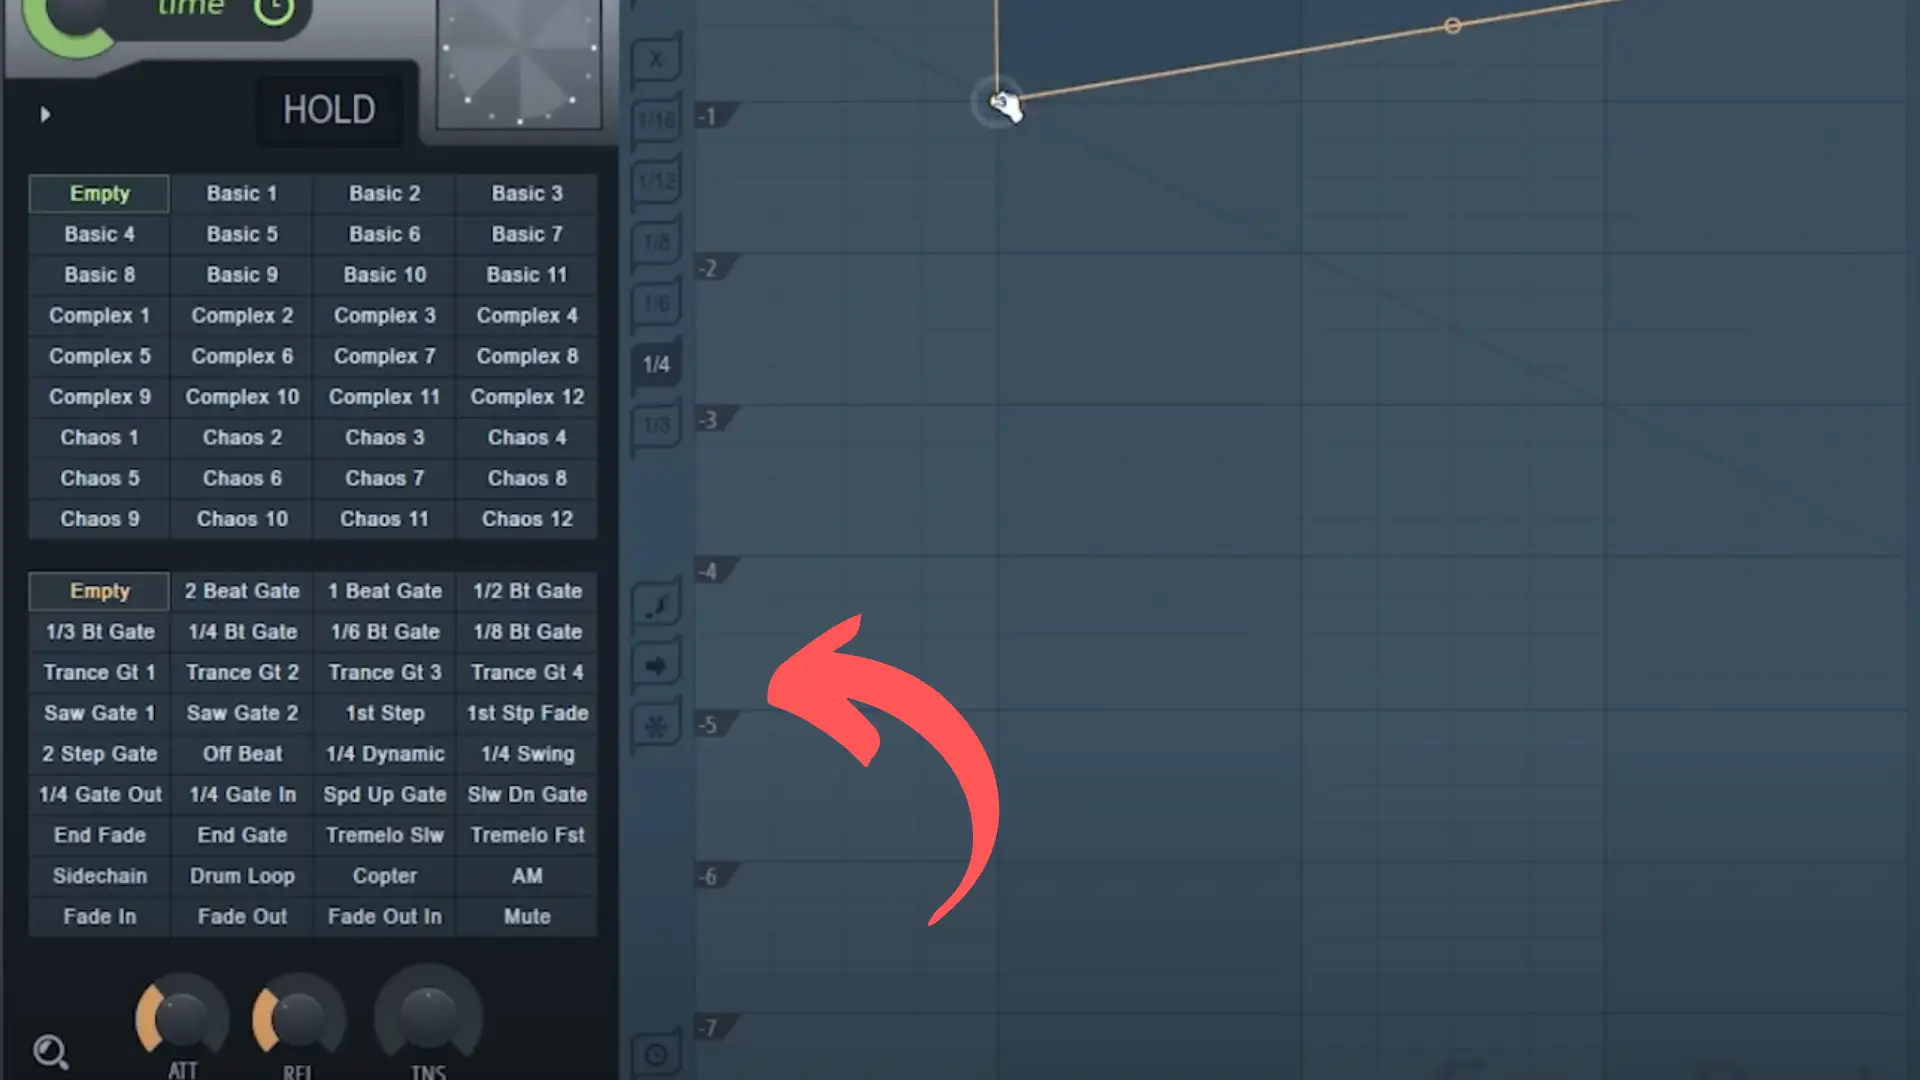
You can add a point on your graph by right clicking and move that point by left clicking.
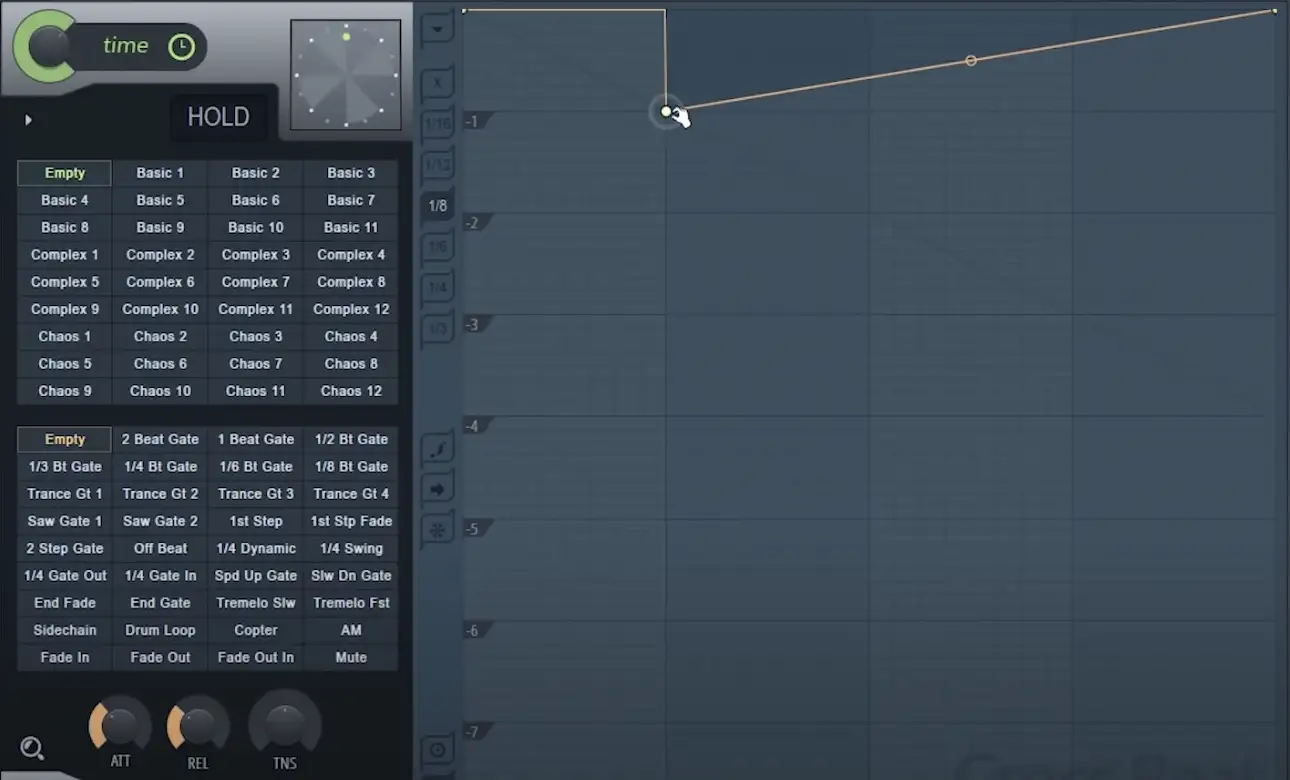
As you move the point around on the graph, you'll notice that it pops into place on the grid in a given division (the first time you open the plugin, it'll be 1/8 division). If you click on the division options on the left-side of the graph, you can change how it snaps on the grid.

If you left-click your point while holding Alt or Option on Mac, you can move the point around freely without having it snap to the grid at all, and if you left-click while pressing Ctrl or Command on Mac, you can lock in the point so that you can only move it vertically on the graph. Lastly, if you left-click and press Shift, you can lock in the point so that you can only move it horizontally on the graph.
These additional controls can be super handy when you're trying to get your volume levels to be as precise as possible.
If you were to just keep left-clicking and adding in points, you could create some pretty incredible patterns.
Editing Your Points
Beyond using a right-click to create points, you can also right-click your current points to get the same menu that your automation clips get in FL Studio.
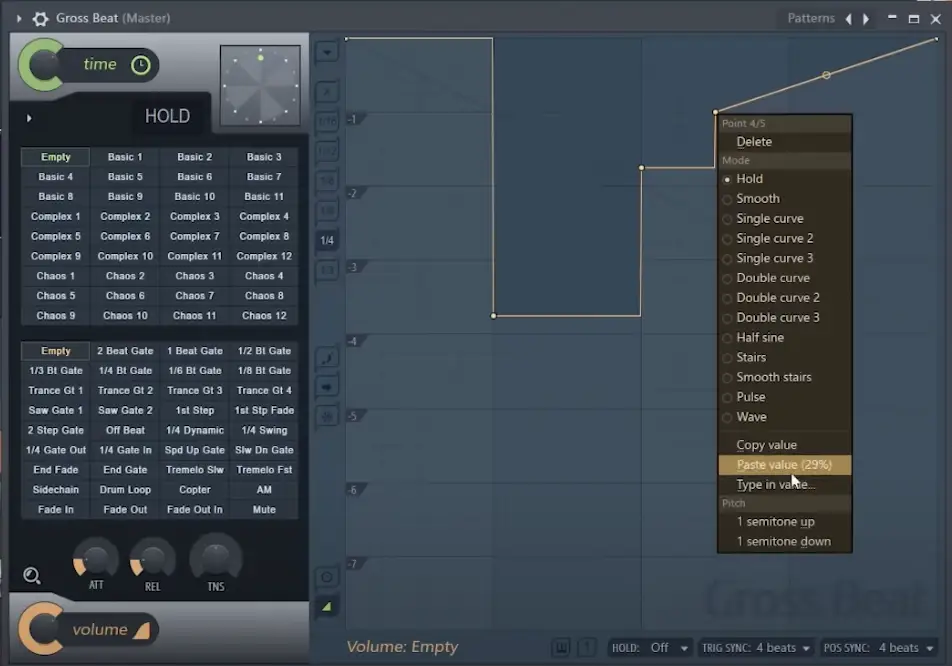
In the "Mode" portion of the menu, you can change the curve type or copy and paste different values.
If I were to select "Double Curve" and manipulate it, I could get some really interesting sounds.
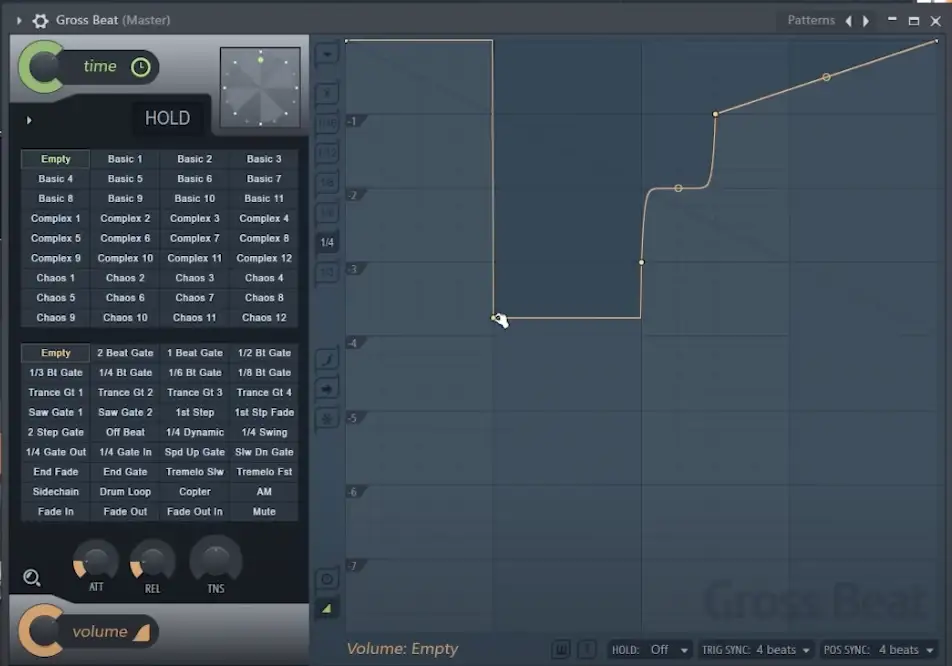
Step Editing
Next, let's go to the left side of the graph again, just below the snap values, where we'll find the step editing features.
If I were to click on the top button with the "F" shape, I could drag the pencil tool around the graph to create steps.

The steps will snap to the grid depending on the snap value setting you set before. If you're currently on 1/8, for example, and you press 1/16, you'll get smaller steps.
If you really want to get creative, you can turn off your snap values altogether and use the cursor to draw in steps freely, which will give you more freedom in your shapes. It's a wonderful way to draw in steps that would otherwise be difficult to program manually.
Slide Remaining Points
Just below the step button, you'll find an option called "slide remaining points," which is quite unique.
Typically, if you select a point and try to move it, it'll move side to side without any other points around adjusting to that movement. However, if you select this button, you can select a point by left-clicking and move multiple nodes at once.
Note that only the nodes to the right of the point you've selected will move.
Freeze Editing
Right below the "slide remaining points" control is the Freeze Editing control.
If you press this, the graph will freeze, so that you can't edit it until you click it again. It's a great control to make sure your envelopes are locked in.
Switching Between Envelopes
Lastly, if you go down to the two buttons at the bottom, you can switch between the volume and time envelopes. The time envelope is in green and the volume envelope is in orange . We'll look at these controls more in-depth in the next section.
Automating Gross Beat
Where the plugin really comes to life is when we start automating between patterns.
For examples, let's say we wanted to start our pattern on the 2-Beat Gate volume envelope pattern that we talked about earlier, though we eventually wanted to automate it to move to the Trance Gate volume envelope and then back.
Every pattern in Gross Beat is toggled via MIDI switches, so you can either move between them using your MIDI keyboard or an automation clip.
If you right-click on your first pattern, you can copy the value of that pattern. Then right-click again and create an automation clip, which you can then drag beneath your incoming audio.
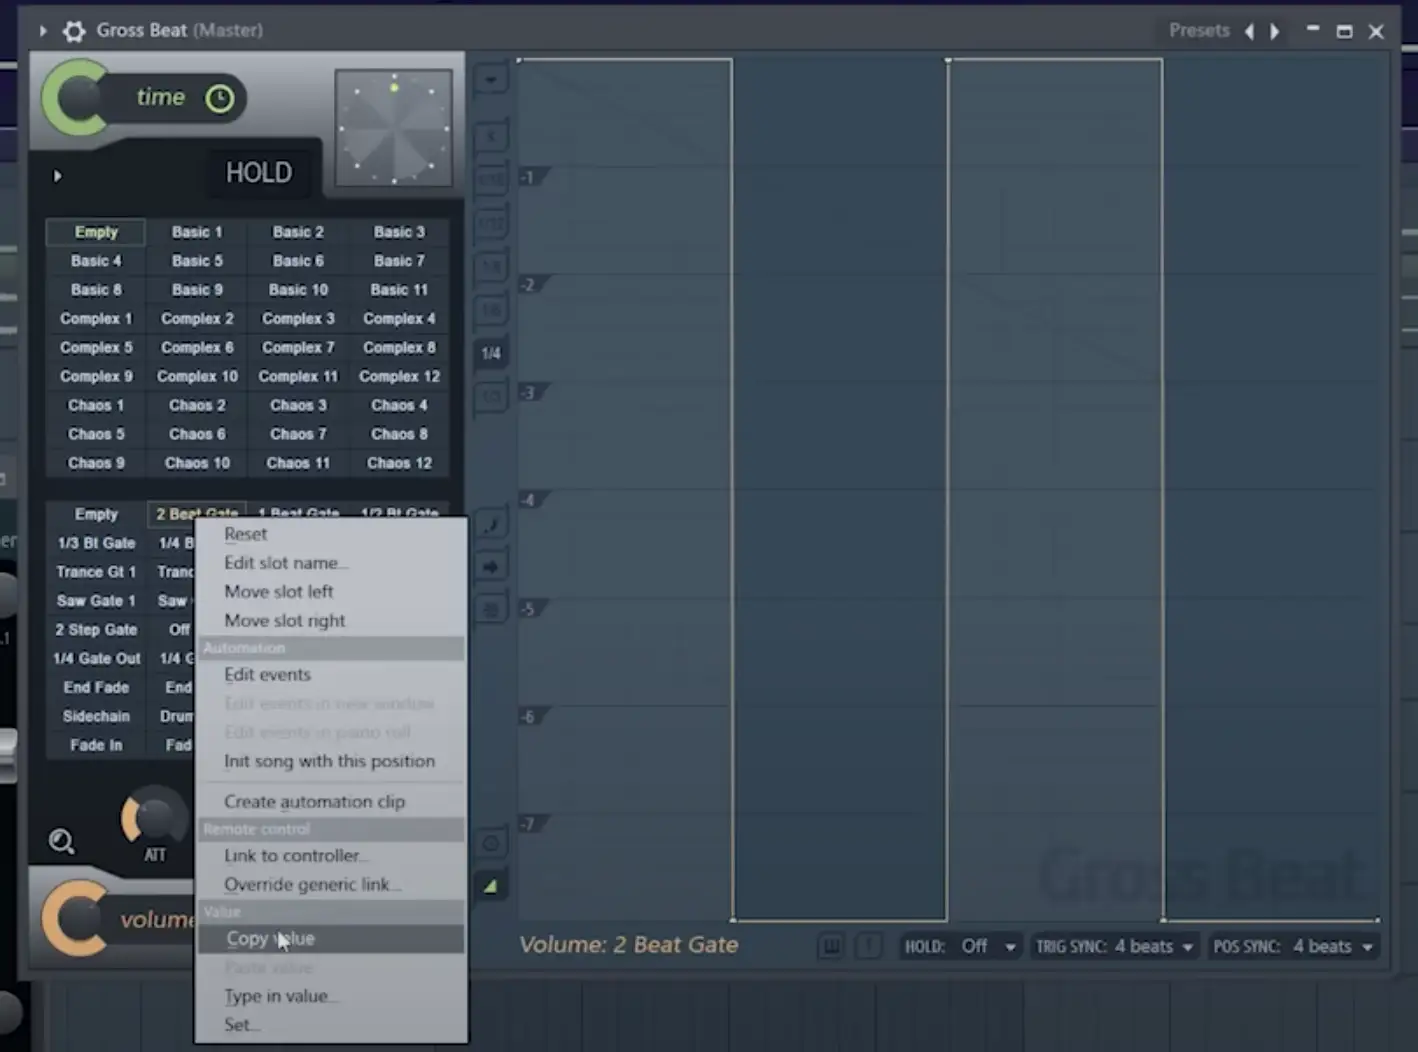
From there, you can right-click on that automation clip and select a "Hold" point, then left-click and hit "Paste Value."
Now, your clip should start at the given pattern (in this case, it's the 2-Beat Gate).
To move to a different pattern, we'll repeat the same process as above by copying the value of the next pattern and pasting it at the point of the track where you want it. From there, you can continue that same process with both your volume and time-based effects, jumping between them.
Volume Envelope Presets
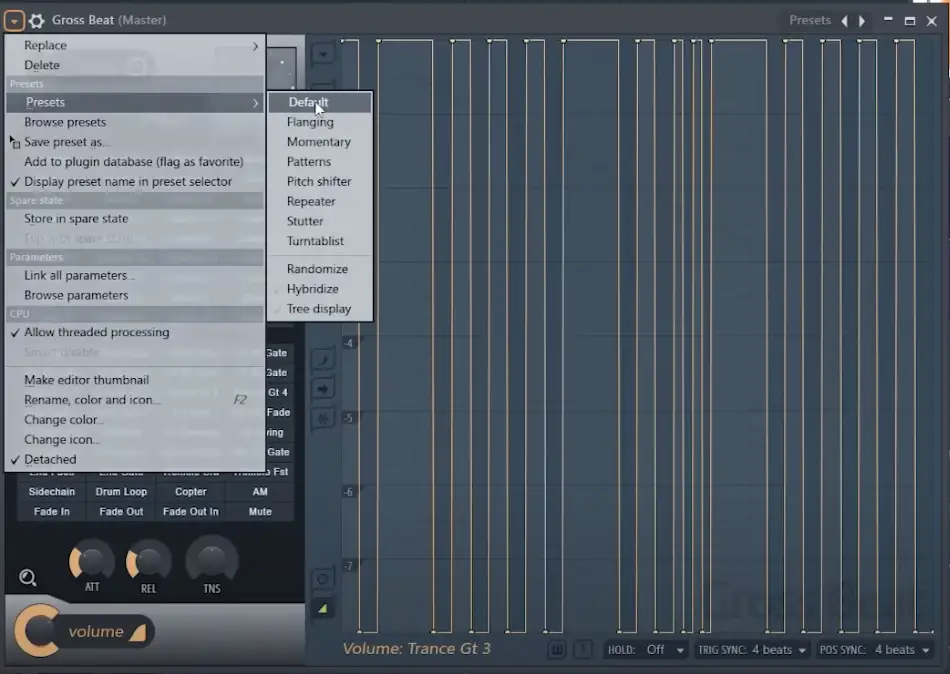
One other thing I'd like to talk about regarding the volume envelope is that there are presets you can play around with. The plugin comes up with the default preset, though you can experiment with the different presets, which range from pitch-shifting to stutters and flanging to patterns.
There's even a unique turntablist preset that gives you a scratching effect.
All of these presets give you the same flexibility as the default preset, meaning you can edit them as you see fit.
Time-Based Effects in Gross Beat
While the volume effects in Gross Beat are great, the true magic of this plugin lies in its time-based effects.
Of course, the best way to get a grip on how they work is to load the plugin up and flip through the presets on your own.
You get everything from note repeats to pitch changes to DJ scratching sounds and tape stops.
When the green line on the graph is 100% forward or horizontal, your audio will move as normal. When it's diagonal, the audio stream playback will stop. However, as you continue moving it further down than diagonal, the audio will start moving backwards in time.
That's how you're able to get a unique scratching effect that moves forward and backward.
You can make a number of crazy and complicated patterns using the time-based effects, though the beauty of the plugin is that you don't need to get super technical with it. Simply select one of the the patterns and manipulate the points from there to create unique patterns.
Just like the volume manipulation effect, you can use the "Time" knob at the top to dial in the wet/dry amount of the effect.
At the very top of the effect, you'll find a time-scratching clock, which you can use to scratch out your own patterns. I rarely find myself using it but it's a cool feature to have available
Hold Control
Lastly, we have a "Hold" control, which is to the bottom-left of the scratching clock. You can use this control to keep the plugin moving around the first portion of your pattern, essentially looping the audio you're putting through it.
Advanced Effects
As you start going through time-based presets, you'll find even more options for manipulating your audio.
If we go into the "Pitch Shifter" preset, for example, we'll see numbers on the side that indicate how far up or down in half-steps the plugin will take your incoming audio.
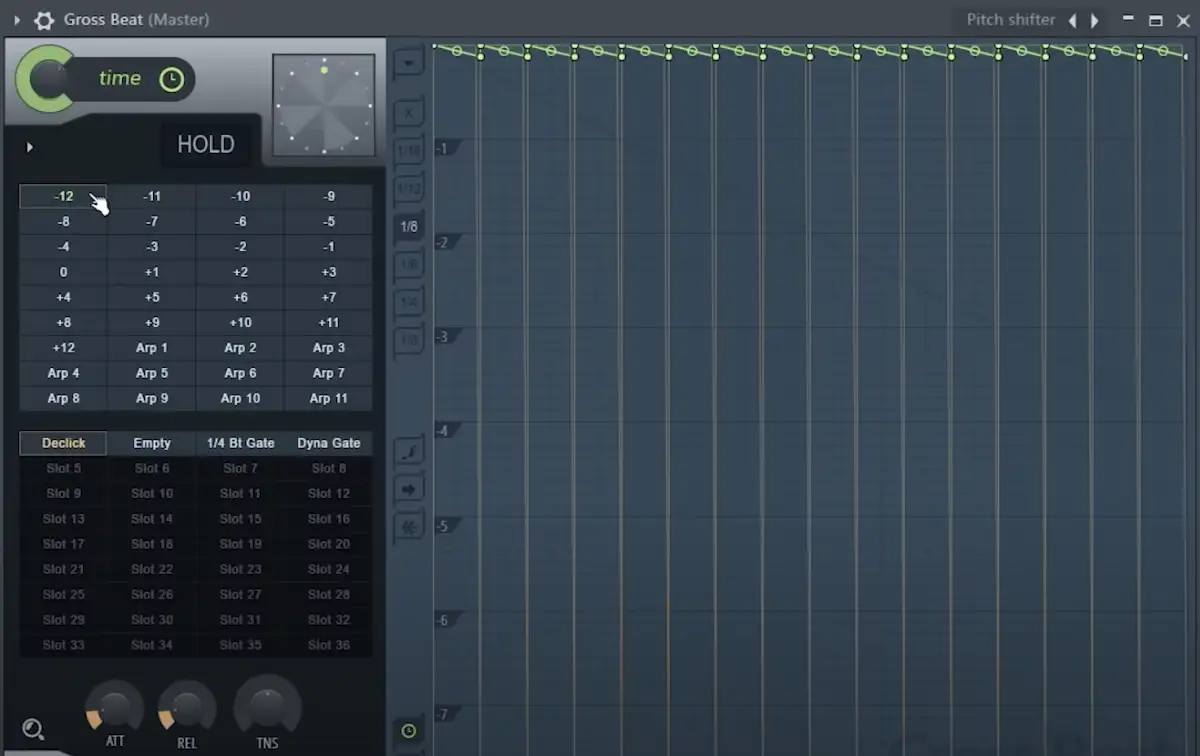
There are also a few Arp options in the Pitch Shifter menu, which you can use to completely reimagine the melody you have flowing through the plugin.
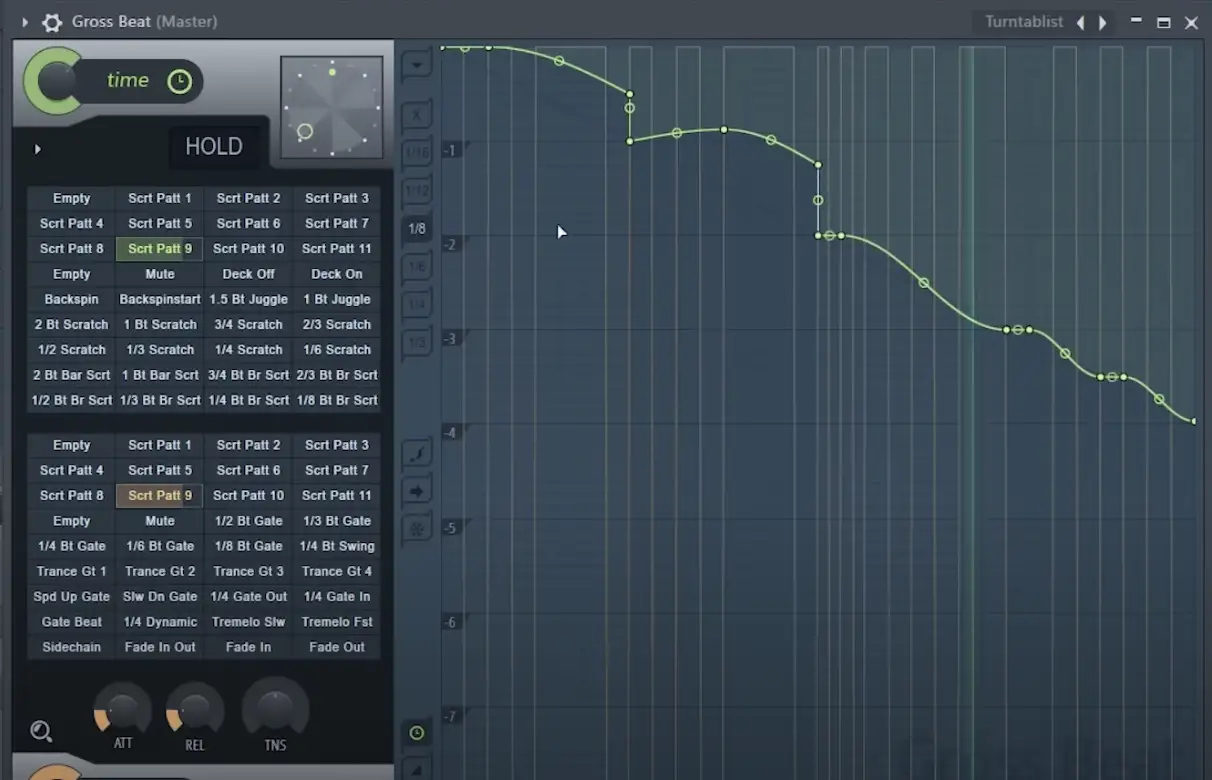
We could also navigate into the "Turntablist" preset, where we'll find a number of unique scratching patterns. I love putting this preset over my entire mix to get those old-school, Joe Hahn-style scratches.
Creative Ways to Use Gross Beat In Your Mix
So, now that you you have a better idea of the ins and outs of Gross Beat, let's look at a few creative ways you can start implementing it in your tracks.
Create Brand New Ideas
Most of the time, when I'm breaking at Gross Beat, I like to use it from the very start of my tracks. I'll often take a sample that I really like, run it through Gross Beat, and play around with the various time and volume envelopes until I get something that sounds good to me.
From there, you can play around with the wet/dry knobs if the effects are feeling too intense.
PRO TIP: Gross Beat's Stutter presets are great for chopping up drum loops and getting new patterns.
Make Crazy Delays
Another interesting way to use Gross Beat is by creating crazy delays.
So, for example, let's say I have the Stutter Effect on but I just dial in a slight amount using the wet/dry knob. Anything from that stutter will appear as a delay, rather than an effect painted over the entire signal.
Tape Stops
The tape stop presets in Gross Beat are great. They essentially take the current playback speed of the incoming audio and slow it down to a full stop based on the shape of your curve. I'll use this a lot in hip-hop or glitch tracks.
Tremolo Effect
One of the more outside-of-the-box ways to use Gross Beat is by engaging different gates with the wet/dry knob turned down to around 50%. At this point, the effect you get is more a tremolo than a gate. It's an excellent way to give otherwise boring melodies a bit more life and rhythm.
Final Thoughts
At one time, Gross Beat was only available for FL Studio users. However, thanks to the fact that you can now use Gross Beat no matter what DAW you have access to, it's certainly plugin worth exploring. There are ENDLESS ways to incorporate it into your tracks, and I hope you're able to have fun with it!
If you decide that Gross Beat isn't the plugin for you, yet you want to be able to dial in similar effects, there are a few other great plugins that I'd recommend, including Cableguys TimeShaper and VolumeShaper, Xfer Records LFOtool, or iZotope Stutter Edit.


