


Part of becoming an Ableton Live wizard is learning as many quick keys and important controls by heart as possible. Understanding your quantize settings is certainly a part of that process. Quantizing MIDI notes can make it easier for you to create cohesive compositions, transpose keys in Ableton Live and correct any timing issues you might have recorded into the MIDI editor.
Below, we'll walk you through how to quantize in Ableton so that you can get back to building beats.
TLDR: How to Quantize in Ableton
Quantizing in Ableton Live can be done with a single quick key. Ableton Live's quick or hot key for quantization is Cmd + U for Mac users and Crtl + U for Windows users.
Keep in mind that you'll want to have the MIDI clip notes highlighted before pressing this hot key to enact change. With default settings, the highlighted notes will quantize based on the current grid size.
For more precision while quantizing, you can open the quantization settings dialog box by using the Mac keyboard shortcut Cmd + Shift + U or Windows Ctrl + Shift + U. This will open up a window that looks like the following:
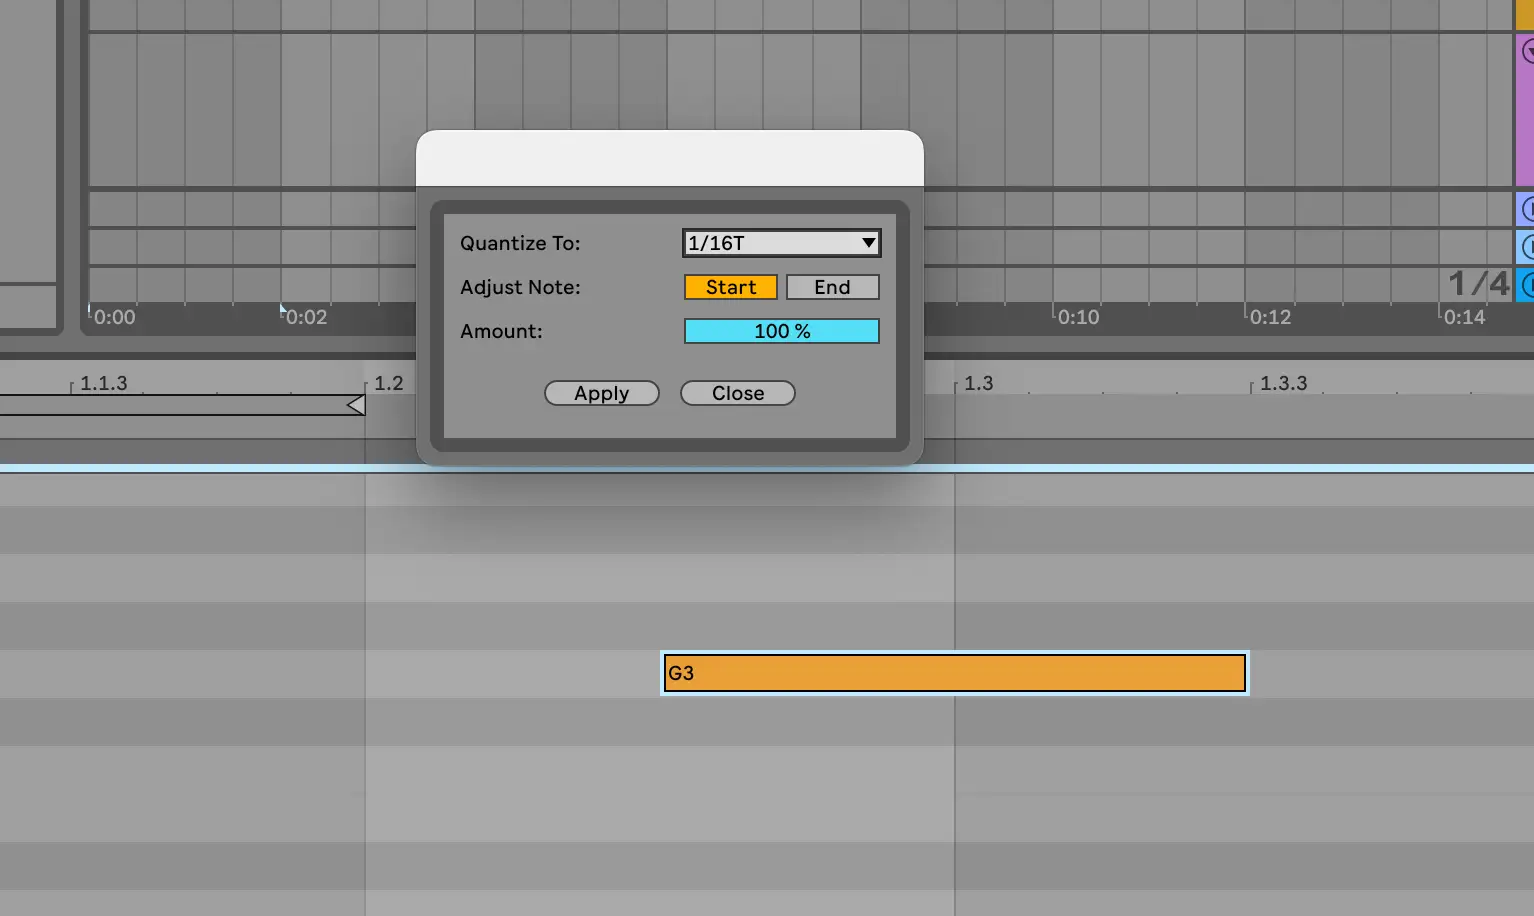
This way, you can select which grid you'd like to quantize using the drop down menu as well as whether you'd like to adjust the start or end of the note in terms of shifting movement. You can also select a quantization percentage, incase you don't want absolute perfect timing - sometimes you can overdo it with quantize settings, leading your composition to feel stale.
Note that in Ableton Live, the fractions 1/4, 1/8/ 1/16 and so on are referring to the note values assigned to visible grid lines. So, quarter notes are represented as 1/4, eighth notes as 1/8, and sixteenth notes at 1/16. The "T" following the end of a note value refers to a "triplet".
What is Quantization?
In the world of music production, quantization simply refers to restoring perfect timing to note values. We often quantize notes since as humans, we don't always have perfect timing whenever recording audio or performing to a MIDI clip.
Quantization is a quick way to match your notes to the time signature of your piece. Instead of going to adjust note by note manually, you can instead highlight all keys (Cmd or Ctrl A) within a MIDI clip, and then use Cmd + U or Ctrl + U to magically align your notes with a single click. Simple and easy.
For more control over your set quantization value, you can open the quantization dialog box with Cmd or Ctrl + Shift + U.
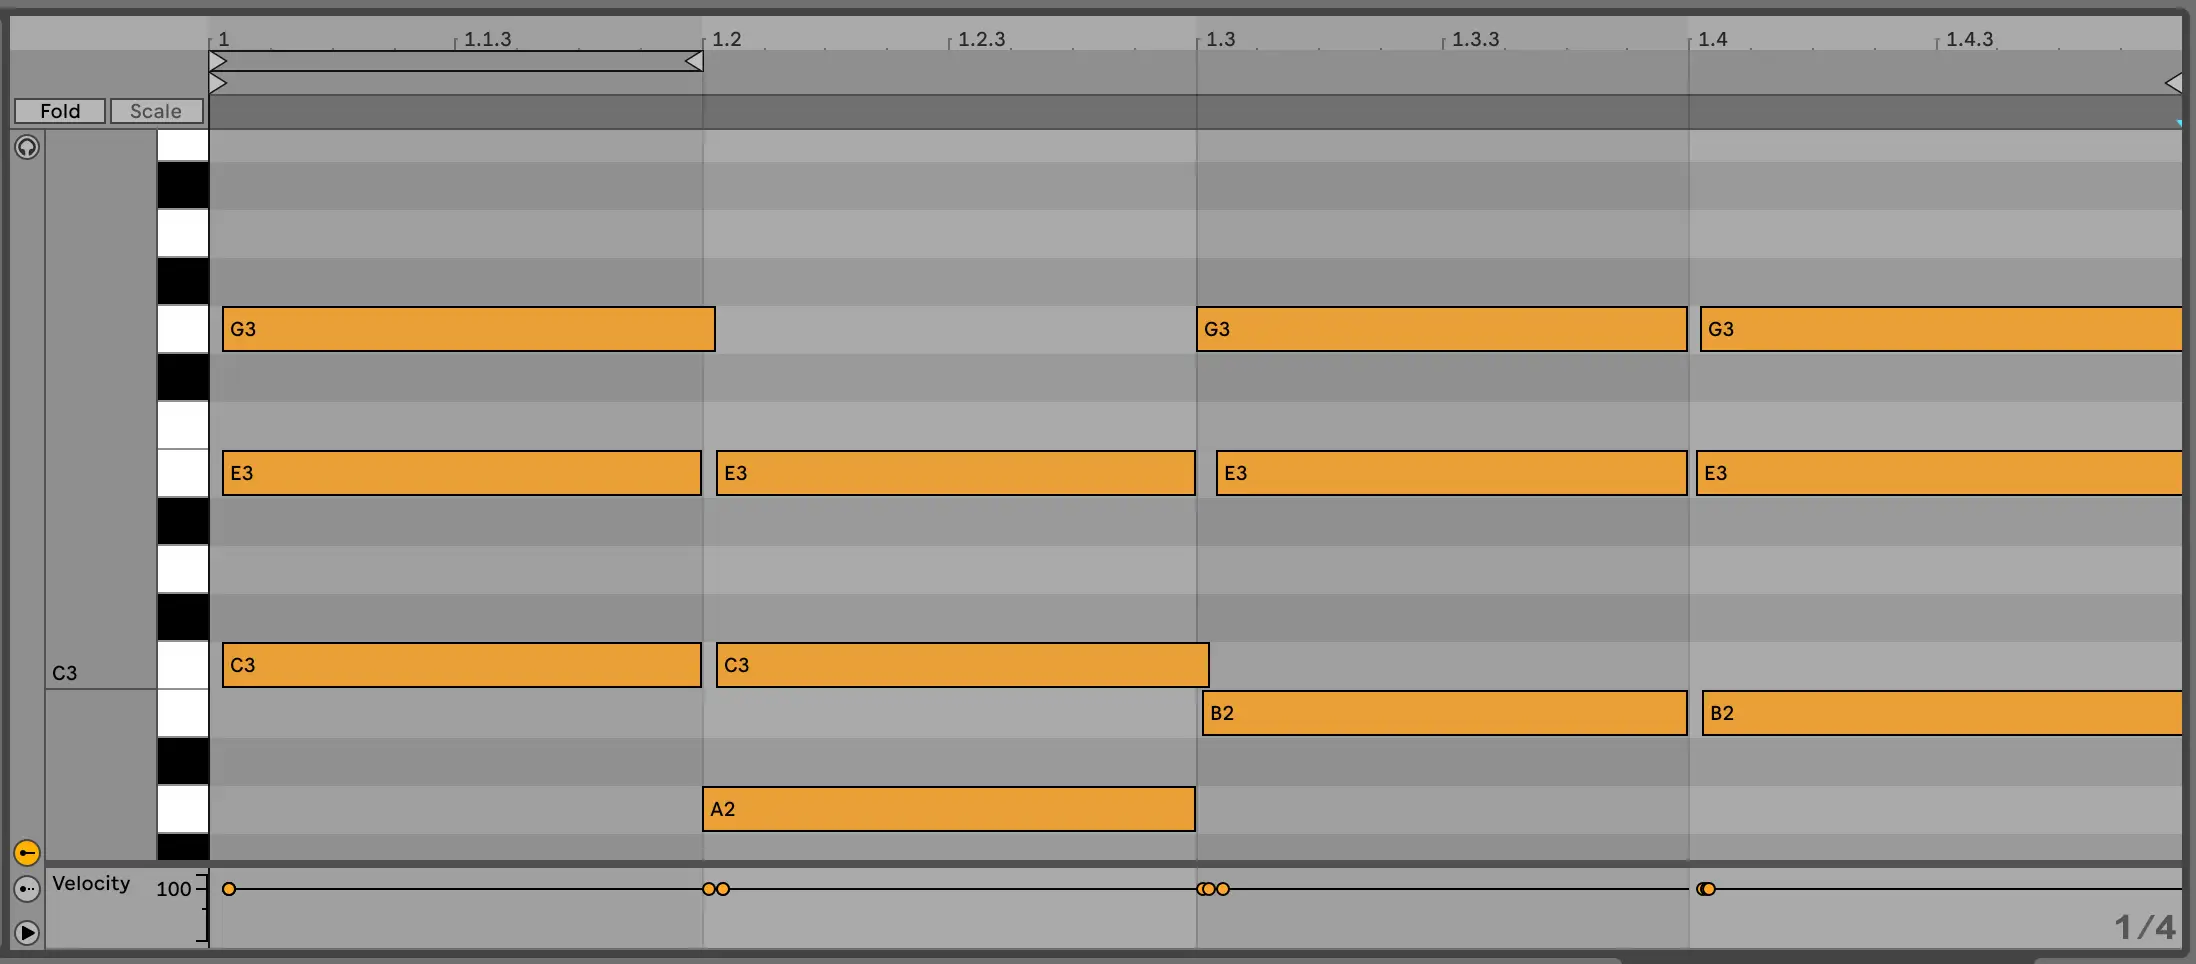
Take a look at what an example MIDI clip looks like before and after quantization:
Before
As you can see, these chord notes are ever so slightly off grid. Only the G3 in the third chord aligns perfectly with the quarter notes of this 1/4 grid.
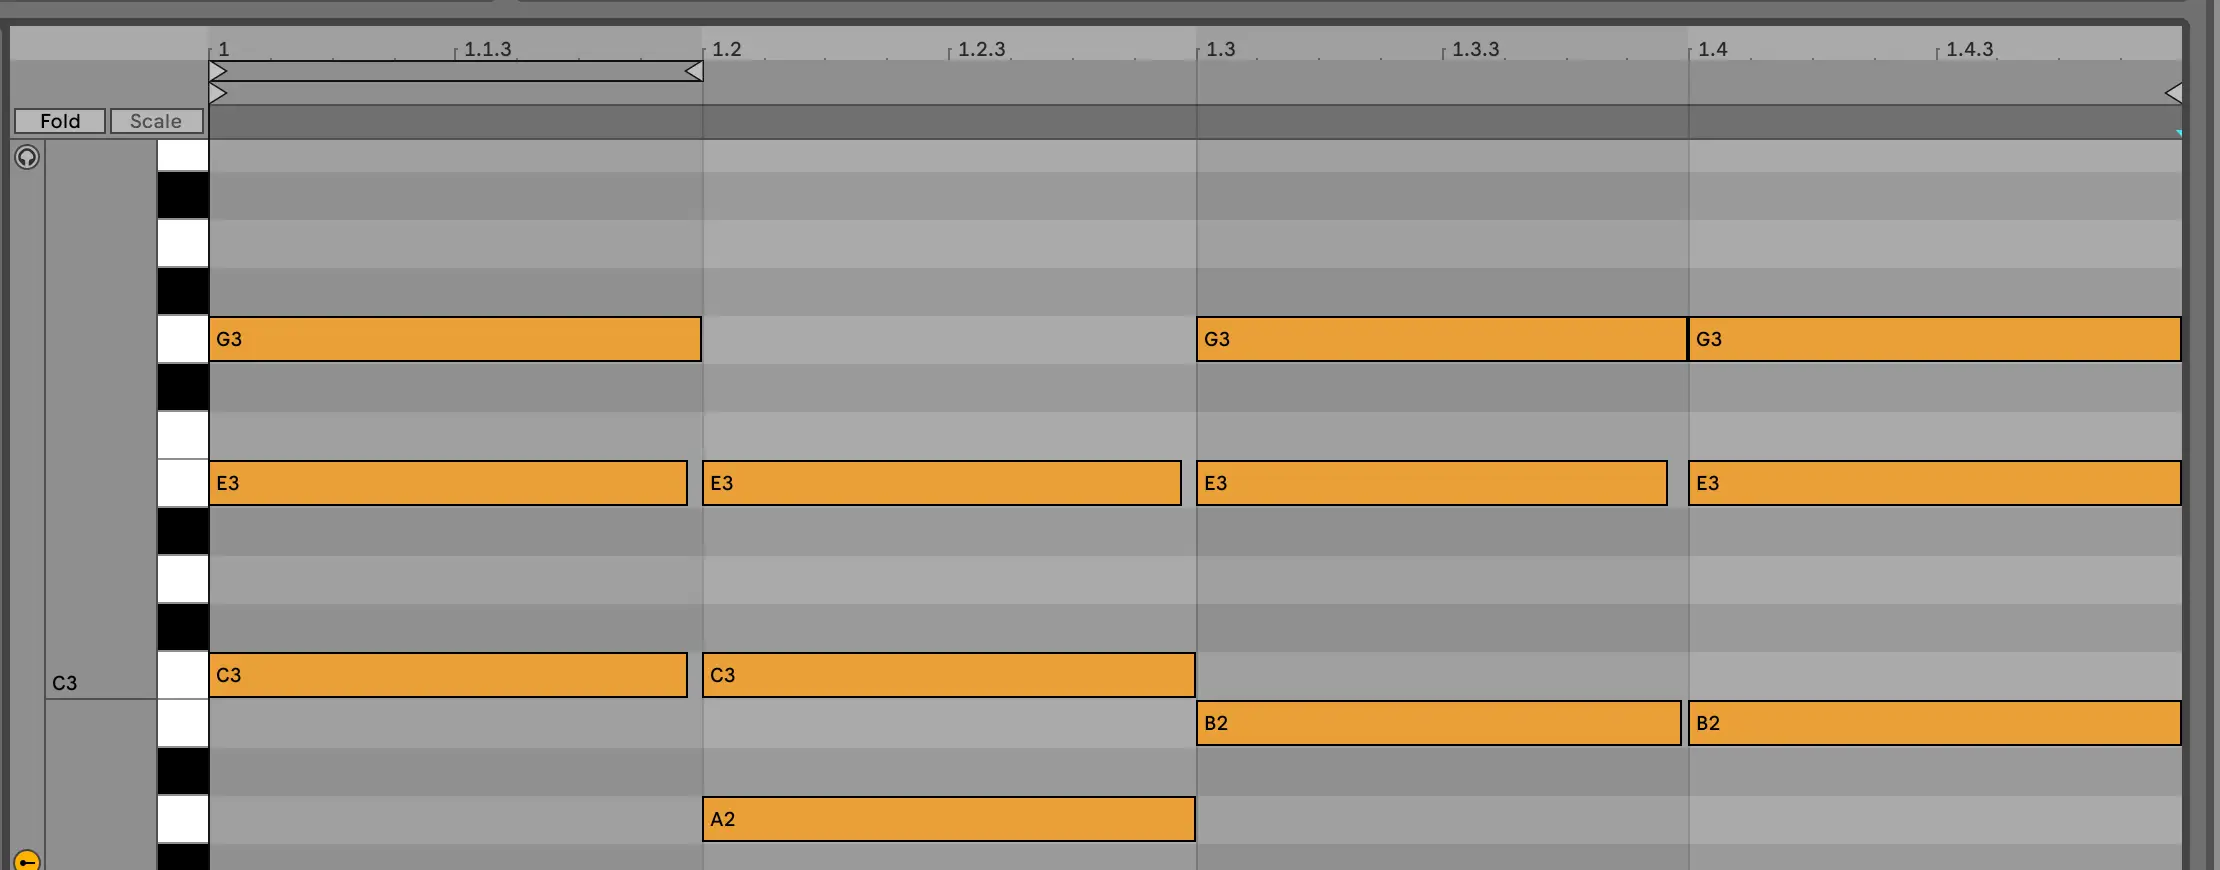
However, if we highlight all of these notes and prompt Cmd or Ctrl + U, we get the following result:
After
Notice how all of the notes now start perfectly at the beginning of each quarter note in our measure. Quantization automates this rhythmic alignment process so that we don't have to adjust individual notes by hand.
How to Adjust Quantization Settings
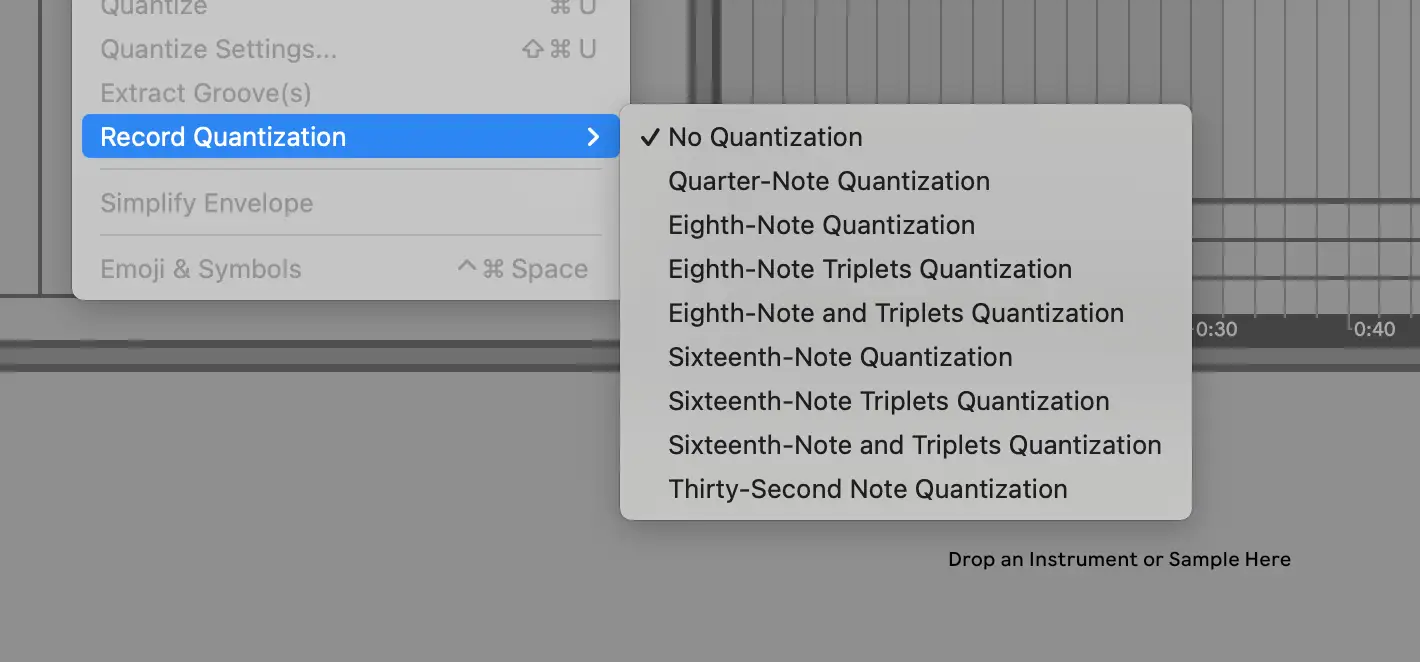
If you want additional control over your quantize settings, press Ctrl or Cmd + Shift + U. If you need to adjust recording quantize settings, navigate to edit in the top toolbar, and then to Record Quantization.
Toggling this setting on will ensure that your recorded notes are programmed into the selected grid, which can be especially helpful for live performances and devices. Just make sure to turn this setting off if you're trying to capture groove or syncopation of your audio clips.
3 Strategies to Spice Up Your MIDI Notes Expression
Remember that quantization is not the only way to adjust the expression of your MIDI notes. Here are a couple of additional ways you might consider building up your MIDI clips:
Adjust Velocity Parameters
Whenever you're programming MIDI in Ableton, you also want to play with note expressions. In the case of velocity, this refers to how hard or soft a note is played. You can adjust the velocity by looking at the parameters below the piano roll in your MIDI clip window. Creating variation across these levels can build necessary variation across your audio.
You can also adjust velocity of several notes or individual notes by selecting a note and moving up or down like so:
Using Directly Recorded MIDI Notes
Sometimes, human imperfection is all you need to produce a lively beat. Experiment with programming sounds versus performing them with a MIDI controller to get some of that natural, offbeat energy.
Working with the Groove Pool
One of the challenges of choosing to automatically quantize selected notes is that you can lose some of the dynamic rhythmic patterns that come with live performance or groove. Fortunately, Ableton Live provides a groove pool! Simply select a groove that you enjoy, then drag and drop it onto the clip to hear the transformation.
Watch this video to learn more about how the groove pool operates. You can almost think of it as somewhat opposite to the quantize command, or quantizing notes to provide a level of syncopation:
How to Quantize Audio in Ableton Live
Quantizing audio clips is a little different than quantizing MIDI clips in Ableton Live. Instead of using the quantize settings, you'll be using Ableton's warping features paired with the Ctrl or Cmd + U control like so:
Essentially, adjust your grip so that the warp markers are not too stark when you set your audio clips into warp mode. Once you're satisfied, highlight that audio clip and engage quantization to allow Ableton to warp the audio so that it aligns with those warp markers within the sample editor.
Quantizing Audio in Ableton Live is Easy
Fortunately, quantizing MIDI notes and audio within Ableton Live is super easy. Use these quick keys to help you sync live devices and bring back notes to the grid post-recording. While you can't change the default settings of Ableton Live shortcuts, remember that you can map any setting to an external controller, in case the baseline quantization tools don't align with your workflow. Have fun putting these new strategies to the test!


