

Back in the '80s, drum machines exploded onto the scene and changed the music game forever. Analog drum machines like the Roland TR-808 and TR-909 brought electronic drums to the forefront and gave artists and producers a whole new world of drum sounds to work with. Whether you like it or not, no longer was a live drummer required to lay down live drums for a track.
Fast forward to today, and even with the rise of software synths and drum plugins, drum machines are still holding their own, especially in hip-hop and electronic music.
In this guide, I want to give you a solid breakdown of pro tips for using a drum machine, which will be especially helpful if you want to use one but never have before. But first...
A History of Drum Machines
Though the 80s were arguably the biggest advocate for drum machines, they had actually been around for decades, slowly evolving from clunky, awkward machines.
The first true drum machine was the Wurlitzer Sideman , which came out in 1959. This bulky beast was one of the first commercially available drum machines, though it wasn’t exactly user-friendly.
However, it set the stage for what was to come.
Before I go on, I do want to make a point to those who will argue with me and say the Chamberlin Rhythmate from 1949 was the first drum machine.
While it had a similar goal of creating rhythms without a live drummer, it used tape loops rather than customizable hands-on control. The sound quality, though cool for people who like that vintage vibe, was often described as “questionable” at best.
Even so, it was an early attempt at marrying electronic and mechanical sounds.
Now, back to our scheduled programming.
As the decades rolled on, drum machines began to find a place in more sophisticated instruments , like electronic organs. These early models allowed musicians to add programmed rhythms to their performances, but the sounds still weren’t exactly top-tier. It wasn’t until the late 1970s and early 1980s, with the rise of digital sampling technology , that drum machines really found their groove.
The Roland TR-808 and TR-909 are the prime examples. These drum machines gave artists control over every part of their drum patterns, and the world of music was never the same again.
FUN FACT: The TR-909 was the first Roland drum machine to use MIDI
Fast forward to today, and drum machines have evolved into sophisticated, compact devices capable of just about everything rhythm-wise, both in hardware and software form.
Now that you’ve got a taste of the history, let’s jump into how you can use you basic drum machines in your tracks:
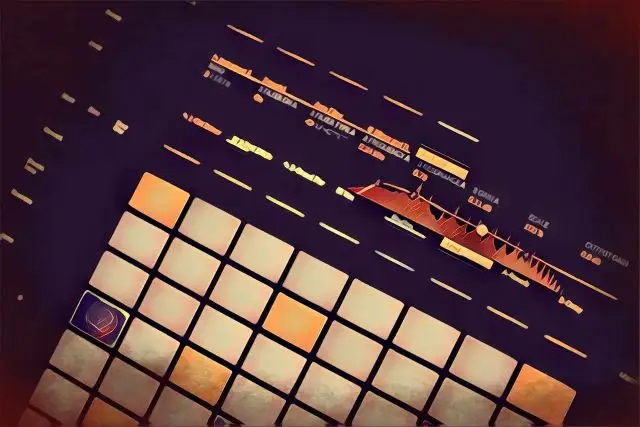
Tip #1: Know Your Drum Machine Basics
Before you start making beats with your drum machine, I urge you to get comfortable with its layout and basic functions. Think of your drum machine like a car. You wouldn’t try to drive it without knowing where the pedals and gears are, right?
Getting Familiar with the Interface
Most drum machines have a few key components:
- Pads: where you’ll trigger sounds. Each pad corresponds to a specific drum sound, like kicks, snares, claps, or hi-hats.
- Knobs: usually control parameters like volume , tone , filter , or decay - things that shape how your sounds behave.
- Screen (more so for modern drum machines) : displays settings, sound parameters, and sequence data, so you can easily adjust your sounds and patterns on the fly.
- Sequencer: where you'll arrange your drums and program your rhythms step by step.
Setting Up Your Drum Machine
Once you’ve got a feel for the layout, plug it in, connect it to your speakers (or audio interface, if you’re using one), and turn it on. Most drum machines have a simple power button - sometimes you’ll need to set it to a certain mode (e.g., performance or production mode) to start making music.
Check your output levels too to make sure you don't fry your eardrums!
Essential Functions
Now, the fun stuff - making music.
First, you’ll want to select your drum sounds. Depending on your drum machine, you may have a bank of pre-loaded sounds to choose from, or you might be able to load your own.
Whenever I'm playing around with a new drum machine, I like to start with the basics: kick drum , snare , hi-hat . For each sound, you can usually adjust its volume , tone , and pitch using the knobs.
Next, you can start creating patterns . A pattern is basically a sequence of sounds that plays over and over again. Drum machines let you program these patterns step by step, usually with a 16-step grid (sometimes 8 or 32, depending on the machine). With the grid, you can essentially place a sound on each step to create a full rhythm. For example, place a kick on steps 1, 5, and 13, and a snare on 9 and 16. Hit play , and your pattern loops!
PRO TIP: Yes, I’m about to get all "dad-like" on you, but please, read the manual. I know, I know, manuals are not exactly the most exciting reading material, but trust me, they’re packed with info that will help you avoid frustration down the line. Plus, you'll get to know your drum machine inside and out, which will make it more fun to use.
Tip #2: Master Your Sequencer
At the heart of any great drum machine is the sequencer. Without it, you have a beat pad.
In a typical drum machine, your sequencer will appear as a grid of steps . Each step represents a slice of time, and each time that slice comes around, your drum machine will play whatever sound you’ve assigned to that step.
Most drum machines use 16 steps in a pattern, but some models offer 8 or even 32 . The more steps you have, the more detailed your pattern can be.
When you hit play, the sequencer will loop through those steps and play your programmed sounds in order.
Where things get interesting is when you begin changing individual steps at random to alter the feel of your rhythm. For example, if you lay down a simple kick-snare-kick-snare pattern, the beat might sound solid, but it'll also sound predictable.
But if you shift a kick to step 3, a snare on step 15, and a cowbell on 5, 10, and 16 (someone let me know how this sounds) for example, suddenly, you’ve got a groove with some bounce. You can even make the rhythm speed up or slow down by adjusting the tempo or playing with the timing of your steps.
Tip #3: Sound Selection & Layering
Knowing your sequencer is one thing, but knowing how to select the right sounds is another. It's arguably one of the most exciting (and sometimes overwhelming) parts of using a drum machine.
Most modern drum machines will greet you with a range of drum sounds , such as kick drums , snares , hi-hats , claps , and maybe some extras like toms or percussion instruments. The first step is deciding what kind of sound you want based on the genre or vibe you’re going for.
For example, if you're making hip-hop , you'll want punchy, deep kicks and snares that crack (TR-808, anyone?). On the other hand, if you're making house or techno , you might lean towards synthy, electronic kicks and sharper hi-hats with a bit more body (the TR-909 is the king in this instance).
Layering Drums
Once you have your sounds, it’s time to get creative. One of the best ways to add texture and depth to any drum machine rhythm is by layering sounds . This means stacking two or more similar sounds on top of each other to create a more complex result. For example, layering two different kicks (such as a low, boomy 808-style kick and a clicky acoustic kick) can make your drums sound more interesting.
With that said, layering is an art. It’s important to choose sounds that complement each other. You wouldn’t want two snares with the exact same tone. That would just add unnecessary clutter.
Instead, layer a punchy snare with a clap or an alternative snare that has more reverb or texture for a wider sound.
From there, you can start shaping your drums. Drum machines often let you manipulate parameters for each element like pitch , filtering , and envelopes .
I like to start with tuning . If you want your kick to hit harder, for example, you can lower its pitch slightly. For snares, you might want to raise the pitch for more bite, or tune them to fit in better with the overall key of your track.
Then, you can adjust the filter cutoff to make an element sound more muted or brighten it up (I love an analog-y low-pass filter on a snare, especially for lo-fi beats).
Lastly, you can play around with the envelopes to control how a sound behaves over time. Decay is especially important for snares, as a shorter decay will give your snare a snappy, tight sound, while a longer decay can make it feel more drawn out.
Tip #4: Get Creative with Effects
Effects are where the magic happens. Whether you add reverb, delay, distortion, bitcrushing, or all of the above; effects can give your drum sounds a whole new life.
Of course, there are infinite ways to use effects, so I just want to take you through my basic thoughts on using them.
Many drum machines come with a range of onboard effects , though some of the most common ones you'll see include reverb , delay , distortion , and bitcrushing .
The key with effects is subtlety. It’s easy to go overboard and throw a bunch of effects on everything, but often less is more . A small amount of reverb on your snare can give it space without making it sound like it’s in a tunnel, and a bit of delay on your hats can make them more dynamic.
However, you can also route the outputs of certain drum sounds separately onto their own tracks in your DAW (similar to how you'd record a drum set) and use third-party effects plugins, like I did in the example below.
To give you an example, I took this dry drum groove:
and add reverb to the rim shot and a subtle room reverb to everything else:
Notice how it fills out the space more, yet doesn't overwhelm the sound of the kit.
Here, I decided to take it one step further by adding some subtle bitcrushing to the entire groove, post-reverb, giving me a fatter, more characterful drum sound:
Tip #5: Syncing with Other Gear
Speaking of recording into your DAW, let's talk about syncing drum machines up with other gear. Whether you’re working with a DAW, other drum machines, or external synths and samplers, syncing everything properly will help keep your rhythm tight and your workflow smooth. Here’s how you can get it all locked in.
Syncing Drum Machines with DAWs
If you’re integrating a drum machine with your DAW, the first thing you’ll need is a solid connection. There are several ways to sync hardware drum machines with your DAW, and the method you choose depends on your gear.
- MIDI Sync : This is the most common method. MIDI allows your drum machine to receive timing information from your DAW. This means that when you press play in your DAW, your drum machine will follow along in perfect sync. If your drum machine supports MIDI, you’ll need to connect a MIDI cable from your DAW (or your MIDI interface) to your drum machine. Once connected, make sure your drum machine is set to slave mode , meaning it’ll follow the clock sent by the DAW.
- USB Sync : Some modern drum machines have USB connections that can be used for both MIDI and audio. You can send timing info through a USB connection, and some devices even let you sync multiple pieces of gear via a single USB cable.
- DIN Sync : If you're using older hardware or specific drum machines like the Roland TR-series , you might run into DIN Sync , a 24-pulse-per-quarter-note timing system used by vintage drum machines. While not as common in modern setups, some gear still uses DIN Sync, so make sure to check your manual for compatibility.
External Gear Integration
If you’ve got a few external pieces of gear like synths , samplers , or even another drum machine, syncing is a little more involved. Most gear will allow you to send MIDI clock signals to keep everything on the same rhythm. For example, if you're using a synth or sampler alongside your drum machine, you can connect it via MIDI to your drum machine or DAW, sending the clock signal and keeping everything synced.
Here's a great video of how to use a drum machine as a external hardware sequencer:
Tip #6: Create Unique Grooves with Probability
If you’ve been using your drum machine to simply program tight, predictable patterns, you might be missing out on one of the most exciting features: probability-based sequencing .
This technique allows you to randomize or make unpredictable decisions within your drum patterns. It’s great for quirky, off-the-beaten-path beats.
For example, you could program a kick drum to hit on every 2nd or 3rd beat, creating a rhythm that’s a little less predictable. Instead of the usual straight 4/4 beat , you could allow the machine to make random choices about where the snare or hi-hat lands within the grid. Think of it as initiating controlled chaos .
These subtle randomizations might seem small at first, but they can drastically alter the overall groove, making it feel less mechanical and more human-like. For instance, you could have your snare hit in a consistent pattern most of the time but occasionally miss a step or land earlier than expected. This will add some “imperfection” that’s hard to replicate with traditional programming.
If you want to make your beats feel less robotic, you can also randomize the velocities . Instead of every hit having the same velocity (volume), you can set slight variations from one hit to the next. A slightly louder snare here or a softer kick there gives your track a more organic, live feel , all with the precision you wouldn't get with a live drum kit.
You can also randomize things like timing or swing , to give your drums a more human touch .
Marvin Gaye's "Sexual Healing" is arguably one of the most famous examples of a Roland TR-808 drum machine in use. Listen to how it incorporates a decent amount of swing:
Conclusion: Master Your Drum Machine, Make It Yours
At the end of the day, the best way to get used to making music on either software or hardware drum machines (or drum machine apps) is to play around with them. Get comfortable with making mistakes. Try things that feel wrong at first and see where they lead you. Drum machines are tools for exploration and experimentation, and there are no wrong ways to go about using them!


