Back in the day (without sounding too nostalgic), crafting a killer guitar tone was a bit of an art form and, for many people, myself included, a financial black hole. You needed a good amp, a decent selection of pedals, some good microphones, and, if you were recording, a space that didn’t sound like a bathroom stall. It was all part of the process, and while it was fun (and still is!), it required a mix of gear, time, and effort to get things just right.
Fast forward to now, and guitar plugins can do a lot of the heavy work that was once exclusive to hardware. While amps, pedals, and all-encompassing gear are still worth their weight in gold, especially for a more tactile, hands-on experience, plugins have gotten so good that they can recreate a lot of what those setups bring to the table. And the best part is that they fit neatly on your computer and don’t require a second mortgage.
So, who can benefit from guitar plugins? Honestly, just about anyone. Whether you’re a beginner guitarist who wants to enjoy testing out a vast range of amps and effects without breaking the bank, a seasoned player who wants to record without waking the neighbors, or an audio engineer who loves tools that can keep up with high standards, there’s a plugin (or ten) that’ll work for you.
In this article, we’ll go through how you can start using guitar plugins, no matter what your ultimate goal is.
The Journey Beyond the Amplifier
Let’s start with a universal truth: amps are awesome. There’s something about standing in front of a roaring 5150, feeling the rumble in your chest, and knowing that your tone could melt faces. Amps have personality, quirks, and that indescribable “mojo” that we guitarists chase like the Holy Grail.
However, amps can also be a colossal hassle. They’re heavy, loud, and not exactly apartment-friendly. Want to record? Now you’re looking at proper mics, a treated room, and enough patience to deal with mic placement until you’re in the mood to punch a hole in the wall.
And then, we have maintenance.
When was the last time you changed the tubes in your amp?
Thankfully, we live in a time when technology has gotten so good that, in many cases, guitar amp simulators are nearly indistinguishable from their analog counterparts. Companies have designed these plugins to recreate everything we love about amps, from the tone to the dynamics and the feel.
They also open up a whole new world of possibilities, including setups that would be totally impractical, if not flat-out impossible, in the real world.
Want to run a chain of ten amps with different effects on each one? Go for it. Dreaming of playing a boutique amp you’d need to sell a kidney to afford? You can probably find a plugin that replicates it to a tee.
The creative potential is endless.
What are Guitar Plugins and How Do They Work?
Guitar plugins, or more specifically amp sims, are basically virtual versions of specific amps or amp collections packed into your computer.
They’re designed to emulate the tone, response, and overall vibe of real amps, cabs, and effects pedals.
Most DAWs these days come with a stock amp sim that’s good enough to get you started. But if you’re looking for more specific tones or want to geek out on details, there’s a massive market for third-party options. Brands like Neural DSP, IK Multimedia, and Positive Grid offer plugins that rival real-world hardware in tone and feel.
So, how does this sorcery work? It’s pretty simple. Here’s the basic setup:
- Connect Your Guitar : Plug your guitar into an audio interface (check out a list of our favorite audio interfaces ). Your interface will act as the middleman between your guitar and your computer.
- Load the Plugin : Open your DAW of choice, create an audio track, and load up your guitar plugin. Most plugins come with presets, so you can start making noise in seconds.
- Tweak Away : Adjust amp settings, swap out cabs, and add effects.
- Play : That’s it! You’re ready to jam, practice, or record!
Next, I’ll break down the key components of your typical guitar plugin.
The Main Components of a Guitar Plugin
When you first open a guitar plugin, you usually see a virtual amp front and center, surrounded by controls, menus, and what looks like enough options to build a spaceship. While this all might seem confusing at first, once you understand the basics, it’s pretty intuitive.
Now, it's worth noting that every guitar plugin is different, though most follow a similar structure. Once you get a handle on how one plugin works, you’ll have a pretty good sense of how others do, too.
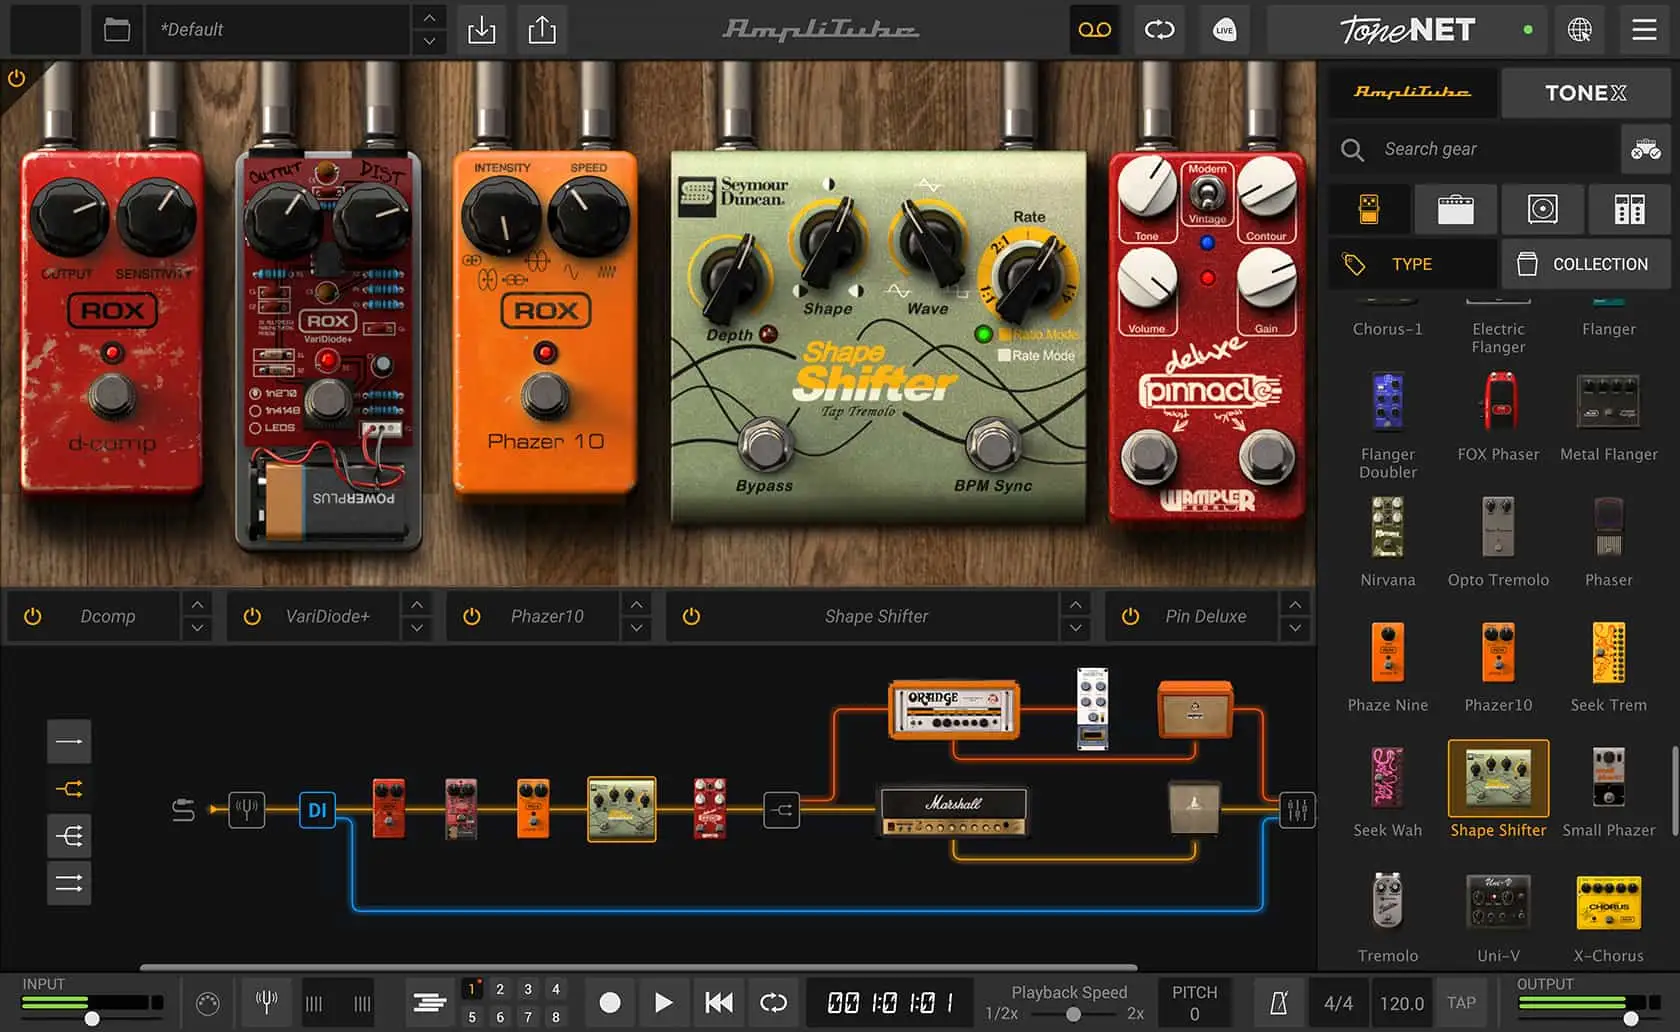
For this walkthrough, we’ll focus on Amplitube 5 , as it's one of my most used guitar amp sims.
Pre-Amp Section
The first stop on the tone train is the "pre-amp" section, not to be confused with a "preamp."
In Amplitube 5 (and most guitar plugins), this section includes a tuner and a lineup of digital stompboxes, including overdrive, distortion, modulation, compression, EQ, reverb, delay, and more.
The pre-amp section basically sets the stage for what will go into the amp.
Amp Section
Next is the heart of any guitar amp plugin, the amp section. In most guitar plugins, including Amplitube 5 , this section replicates the look and feel of a real amp, complete with all the onboard knobs and switches.
The amp in the photo above is meant to model the Roland JC-120, so you have all of the tone-shaping controls like EQ, gain, and volume, plus extras like distortion, reverb, chorus, and vibrato. These controls are all modeled to behave like the real thing, so if you’ve spent any time dialing in physical amps, you’ll feel right at home here.
One thing to keep in mind here is proper gain staging . Just like with physical gear, you need to manage the signal level going into the amp model to get the best results. If your input signal is too hot, you’ll end up with an overly compressed, harsh sound. Too weak, and it might feel lifeless. Most plugins have a simple input meter, so you can aim for a strong, but not clipping, signal.
Cab Section
While amps get most of the glory, the cabinet and speaker setup play a massive role in shaping the final sound as well.
In most guitar plugins, you’ll find a ton of options to play with here. In Amplitube, you can select different types of speakers , like vintage Celestions for a classic rock vibe or modern high-power speakers for tight, punchy metal tones.
Then there’s the cab configuration , like a single 12-inch speaker for a more focused sound or a 4x12 for wall-of-sound energy.
From there, you can get into different mic choices and placement. Many plugins also include room emulation, letting you adjust how much natural ambiance you want in your tone.
The beauty of the cab section is how much control you have over the final tone. In the real world, experimenting with all these options would mean hauling gear around and spending hours adjusting mic stands. Here, it’s just a few clicks.
Post Effects Section
And finally, the last stop in your virtual signal chain: the post effects section. Since these effects come after the amp and cab, they impact the entire sound of your rig.
So, what kind of effects are we talking about here?
Well, it could be anything from reverb and delay to EQ and compression. I love having access to a post-effects section inside a guitar amp plugin, as it lets you experiment without the need for any additional third-party plugins or post-processing.
Once you’ve got this part dialed in, you're pretty much good to go!
How to Use Guitar Plugins for Live Performances
More and more guitarists are making the leap to virtual amps for live performances as well. More so than ever before, virtual amps hold their weight in terms of on-stage reliability, versatility, and sound quality.
So, how do we set them up to get a professional sound?
Audio Interface and Laptop
Your audio interface and laptop are where your setup will start.
While you certainly don't need a fancy audio interface for playing live, I would recommend looking for one with low-latency performance, stable drivers, and durability, as, after all, this thing will be traveling with you.
As for the laptop, you just want to have something that can handle multiple instances of your guitar plugin. Make sure you have a solid processor, plenty of RAM (8GB minimum, 16GB preferred), and an SSD for faster loading times. Don’t forget to optimize your laptop for playing live by disabling any unnecessary background processes and testing your setup thoroughly before you get to the venue.
DAW
Next, we have your DAW, which is where your virtual amp plugins, effects, and routing will live.
My personal favorite for playing live is Ableton Live , as you can easily order your rigs from song to song in different "scenes."
Within the DAW, you’ll load your amp sim plugin and set up separate tracks or patches for different tones or song-specific setups. Most DAWs also allow you to map effects and parameter changes to a MIDI controller or footswitch, making it easy to toggle between sounds in real-time, which brings me to my next point.
MIDI Controller
With a MIDI controller or footswitch, you get hands-free control over your virtual rig, just like you would with a pedalboard. With the right device, you can switch between patches, toggle effects on and off, or attack it from a micro level and control different parameters like reverb or delay, all without taking your hands off the guitar.
There are SO many different options out there for controllers, though some I'd recommend looking into include the Behringer FCB1010, Line 6 FBV, or MIDI Maestro.
Once you have your controller plugged in, you’ll need to map the buttons or pedals on your controller to specific functions in your DAW or plugin. For example, you might assign one button to toggle a lead boost, another to switch amps, and a third to control your delay tap tempo.
Once everything’s mapped, practice using the controller in rehearsal so you’re comfortable during the show.
FOH Connection
The last step in setting up your live rig is getting your sound to the front-of-house system, otherwise known as "FOH." With a virtual amp setup, this is usually done via the direct output on your audio interface. The beauty here is that you’re sending a clean, consistent signal straight to the mixing board, while bypassing the many complications of mic’ing an amp on stage.
For best results, work with the sound engineer to make sure your output levels are balanced and EQ’d for the room. Most plugins and interfaces also allow you to split your signal, so you can send a full processed tone to FOH while keeping a dry or backup track for safety.
If you’re using in-ear monitors, you can even set up a custom mix for yourself using a different output in your interface.
Best Guitar Plugins
While we already have an article that covers the best guitar amp sims in-depth, I wanted to at least go over a few of my favorites so you guys have somewhere to start.
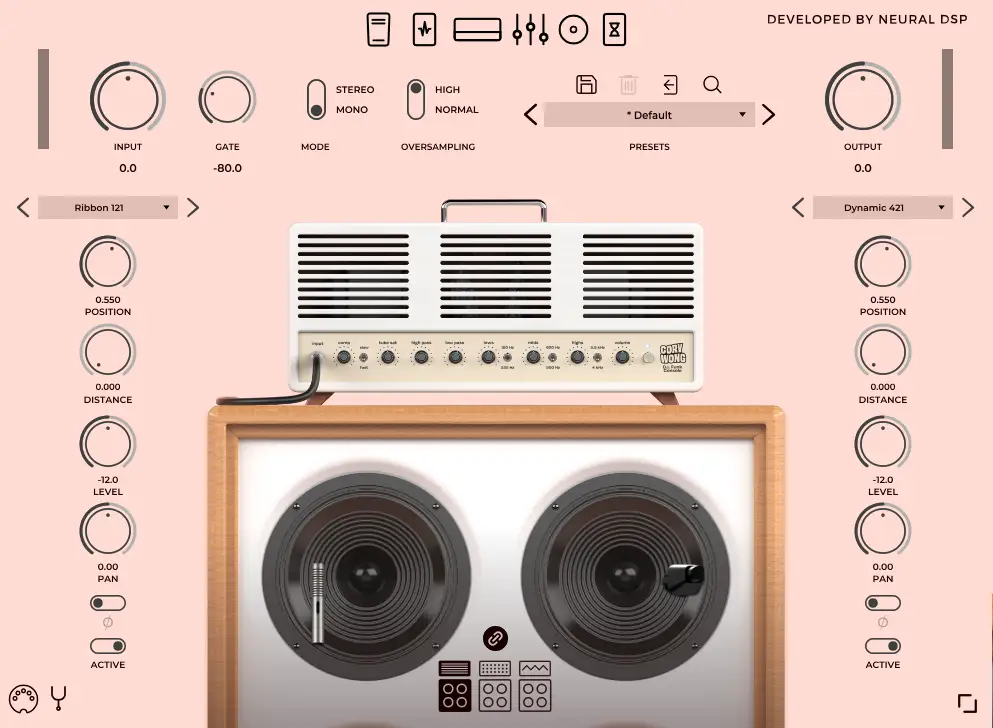
Neural DSP Archetype Corey Wong

If you mainly play clean or funky tones, Neural DSP Archetype Corey Wong is the first plugin I’d recommend you try. This thing has some of the best clean tones I’ve ever heard from software. The Clean Machine amp model is particularly remarkable for bright, bell-like clarity, yet it also has a beautifully warm top-end.
What I like most about this particular Neural DSP plugin, however, is the attention to detail in its pre-amp section. You get Wong-specific pedals like The Big Rig Overdrive for a saturated fuzz and The Postal Service envelope filter, giving you tons of tonal options right off the bat. The 4th Position Compressor is awesome for a punchy, squashed guitar sound that's excellent for modern funk, and the Tuber boost pedal is an absolute blast if you love classic tube amp tones.
With that all said, Neural DSP’s entire Archetype series is worth checking out. Each one was made with a different artist in mind, so whether you’re after high-gain mayhem or pristine cleans, there’s a plugin for you.
IK Multimedia AmpliTube 5 Max

AmpliTube has been one of the most popular amp sims around for years. In fact, it was the plugin that personally blew Guitar Rig out of the water for me many moons ago.
AmpliTube 5 Max is better than ever, offering over 400 models of amps, cabinets, pedals, mics, and rack effects. You’ve got everything from the classic Fender Twin and Vibroverb to the high-gain MESA/Boogie Dual Rectifier and the Marshall Plexi , and everything in between. There are a ton of boutique amps that you won’t find in other plugins, so if you're a gear nerd like me, you'll love the endless possibilities.
One of the best things about AmpliTube 5 Max is its advanced mixing and mapping functions . You can load multiple amps and cabinets simultaneously, create complex signal chains, and even adjust mic placement in any way you deem fit. The dual signal path feature allows you to split your tone into two separate chains and process each one differently, which is great for making more complex, layered tones.
Plus, the drag-and-drop interface makes it super easy to create and modify rigs on the fly.
Overall, this is easily one of the most comprehensive plugins for guitar players out there, and if you like to have a bit of everything , I can't recommend anything else.
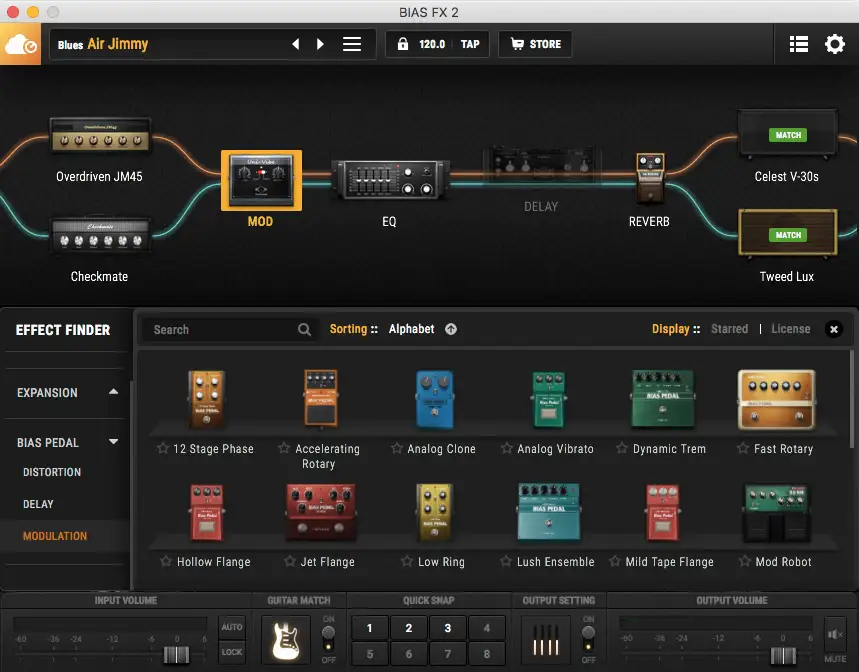
Positive Grid Bias FX 2 Elite

While Positive Grid Bias FX 2 Elite may not be as immediately user-friendly as AmpliTube, it absolutely holds its ground in terms of power and flexibility. If you’re looking for something that goes beyond easy plug-and-play and offers deep customization, this is the plugin for you.
Bias FX 2 Elite comes loaded with 100 amps , over 100 effects , and 18 rack processors , giving you a massive palette of tonal options to play with. The real magic, though, is how tweakable the interface is. As with Neural DSP plugins, you can get into the nitty-gritty and create an incredibly detailed guitar rig from scratch.
One feature I love is the Guitar Match technology. If you’ve ever wanted to hear what your guitar would sound like with, say, a Gibson Les Paul or a Fender Stratocaster pickup configuration, Bias FX lets you do just that. It really helps you get the vibe of another axe without having to actually buy one, which is a total game-changer.
I'm also a huge fan of the built-in looper/recorder . It's perfect for laying down quick ideas, practicing, or even just jamming along to your favorite tracks. The ability to layer parts and hear how different amp and effect combinations interact is invaluable. Plus, the plugin integrates with MIDI really well, so you can trigger patches in real time while playing live.
While Bias FX 2 Elite definitely requires a little more time to master compared to other plugins on this list, it offers depth that many others don't.
Final Thoughts
And there you go!
I hope this guide helped provide you with a better understanding of guitar plugins, how they work, and which ones you can use to record and play live with. The best thing about these plugins is that they offer the same tonal quality at a fraction of the price of a real amp, all with far more versatility.
All you have to do next is pick one and get to playing!


