

You've probably heard someone talk about "shelving" their bass frequencies or messing with the "shelf filters" on their equalizer. But what exactly is a shelf filter, and more specifically, what's a low shelf EQ?
Think of a shelf filter like a volume control that affects everything below (or above) a certain frequency point. It's pretty simple by definition! While a low shelf handles all your bass frequencies, its cousin, the high shelf, takes care of the treble end.
Back in the day, many mixing consoles came with dedicated shelving equalizers. These were simple tone controls, kind of like the bass and treble knobs you'd find on your car stereo or home hi-fi system.
These days, most of us use parametric EQs in our DAWs, and nearly all of them come with low and high-shelf filters built right in. They're those little slopes at either end of your EQ curve. In fact, you might have been using them without even knowing what they're called!
In this article, we're going to focus on the low-shelf EQ, in particular, while helping you understand what it is and why it's useful compared to low-pass or high-shelf filters. I'll show you exactly how it works, when to use it, and some of my favorite tricks I've picked up over the past decade of mixing.
Low-Shelf vs. High-Shelf Filters
Let's start by breaking down the key differences between low and high-shelf filters. These are basically two sides of the same coin, each working on opposite ends of the frequency spectrum.
I'll start by noting that our ears can only pick up sounds between about 20 Hz and 20 kHz . That's why most EQs focus on this range. In a sense, there's no point in processing frequencies we can't hear! This targeted approach also saves precious headroom in your mix, keeps your audio files smaller, and helps maintain clear stereo imaging.
A low-shelf filter is like a volume control for your bass frequencies. When you set a cutoff point (let's say 200 Hz), the filter will boost or cut everything below that frequency. However, unlike a low-cut filter, it doesn't just slam on the brakes at 200 Hz. Instead, it creates a smooth slope that gradually rises or falls until it hits your target frequency, then levels out like a shelf (hence the name!).
Let's look at some examples:
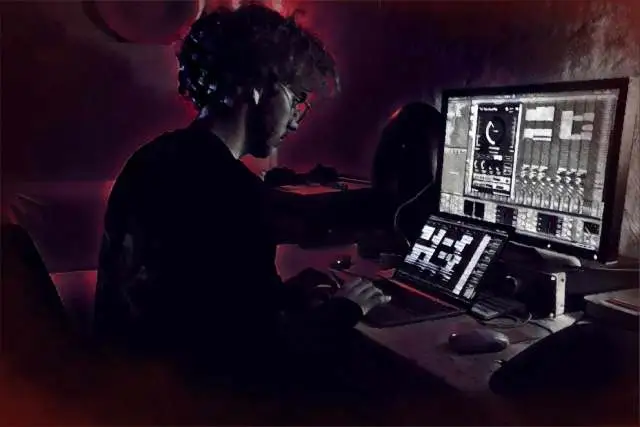
Here's a low-shelf boost - see how it smoothly ramps up the low frequencies?
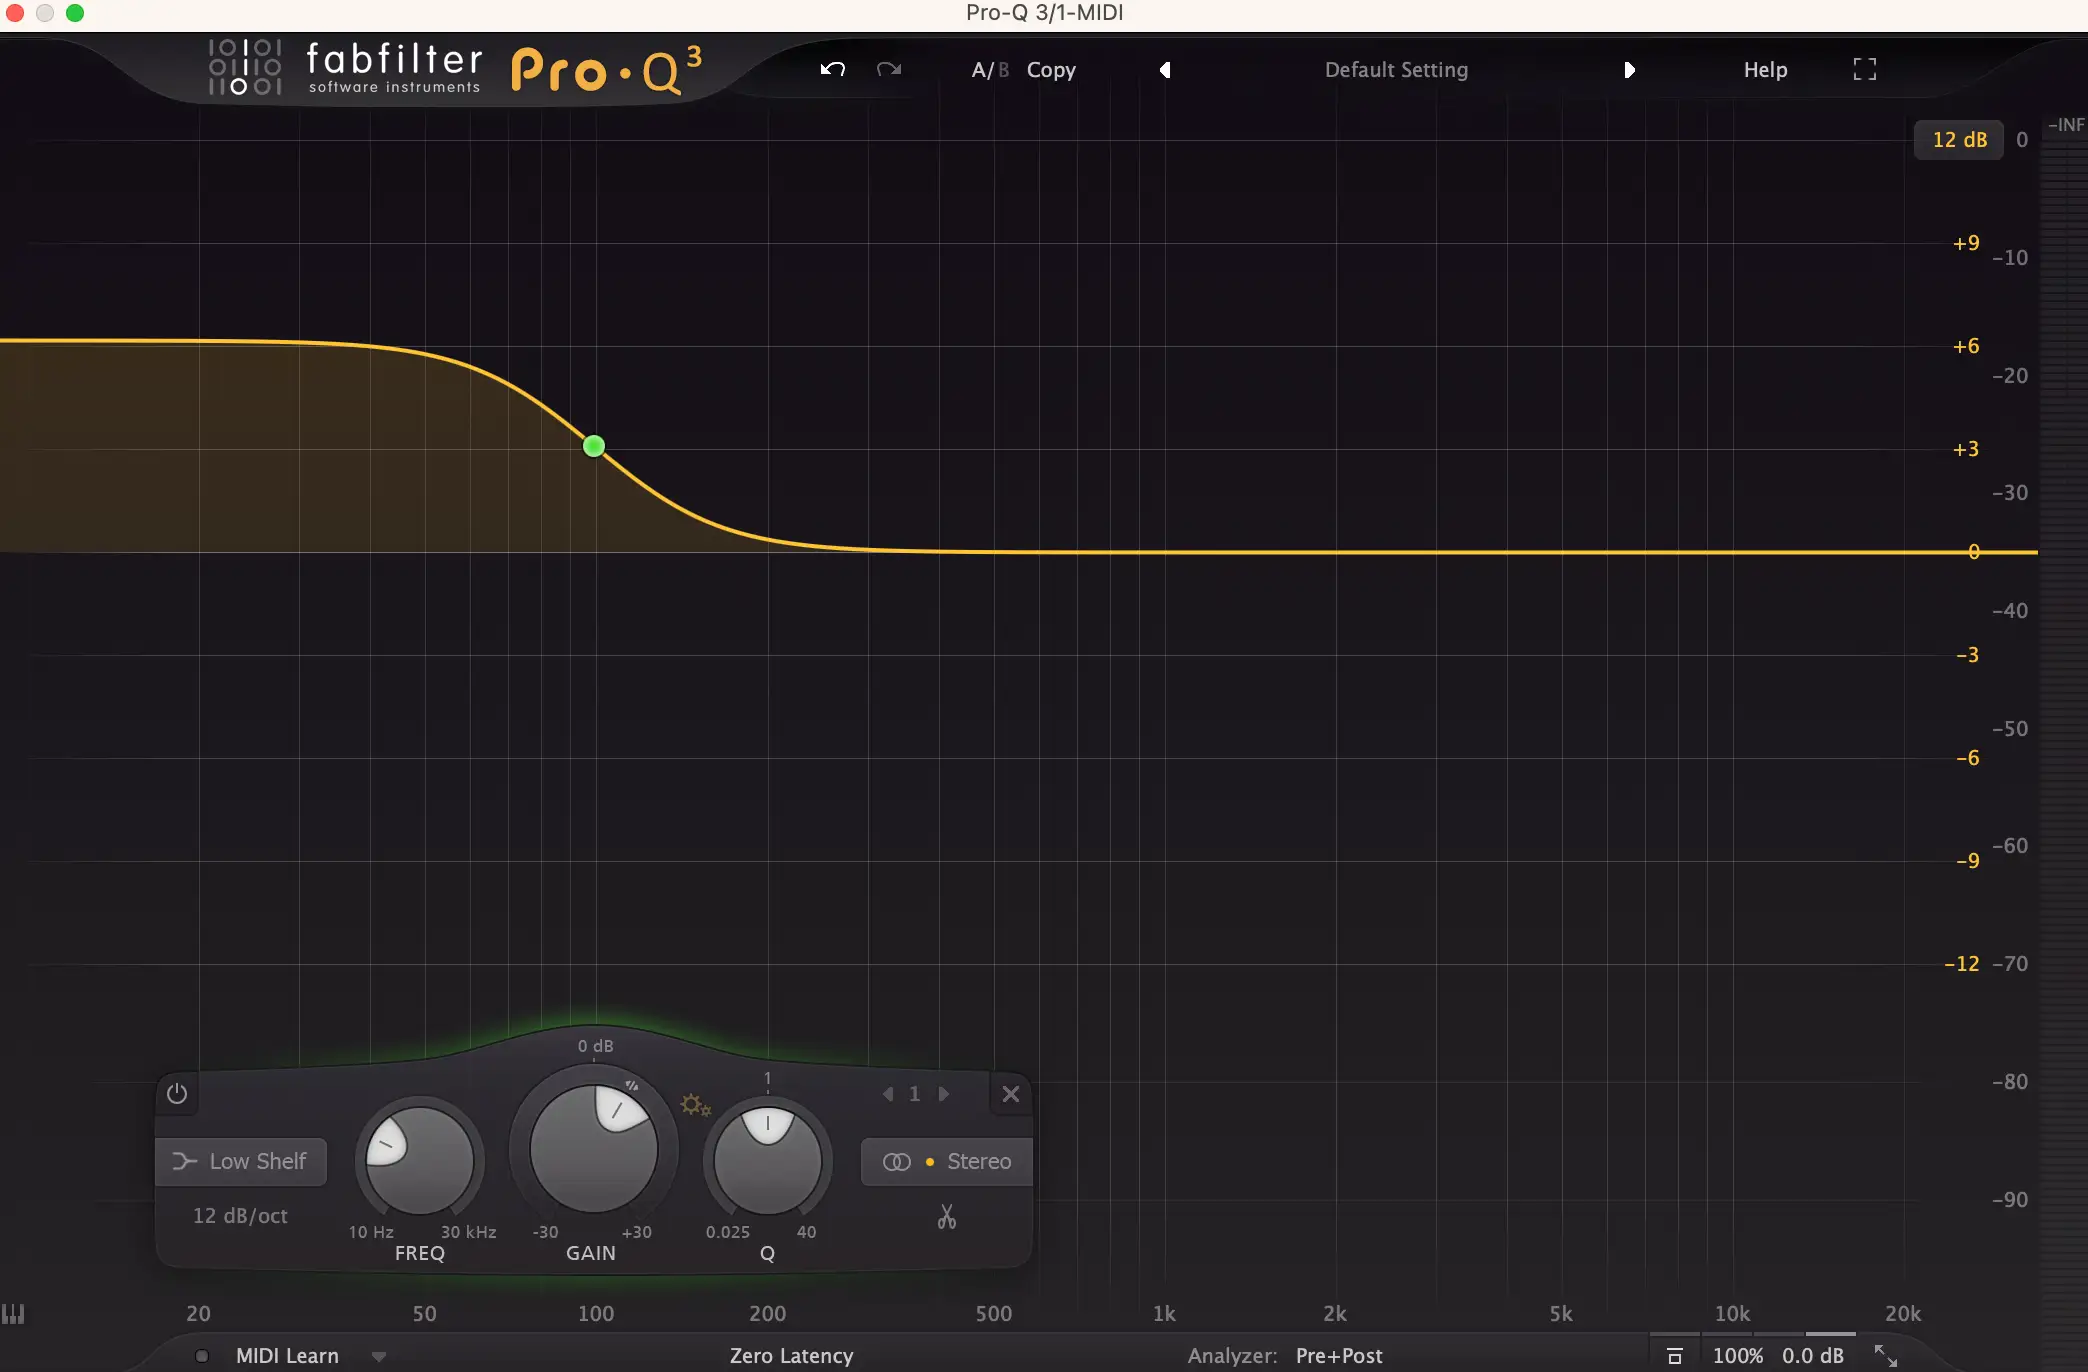
And here's a low-shelf EQ cut - notice how it gently reduces those same frequencies.
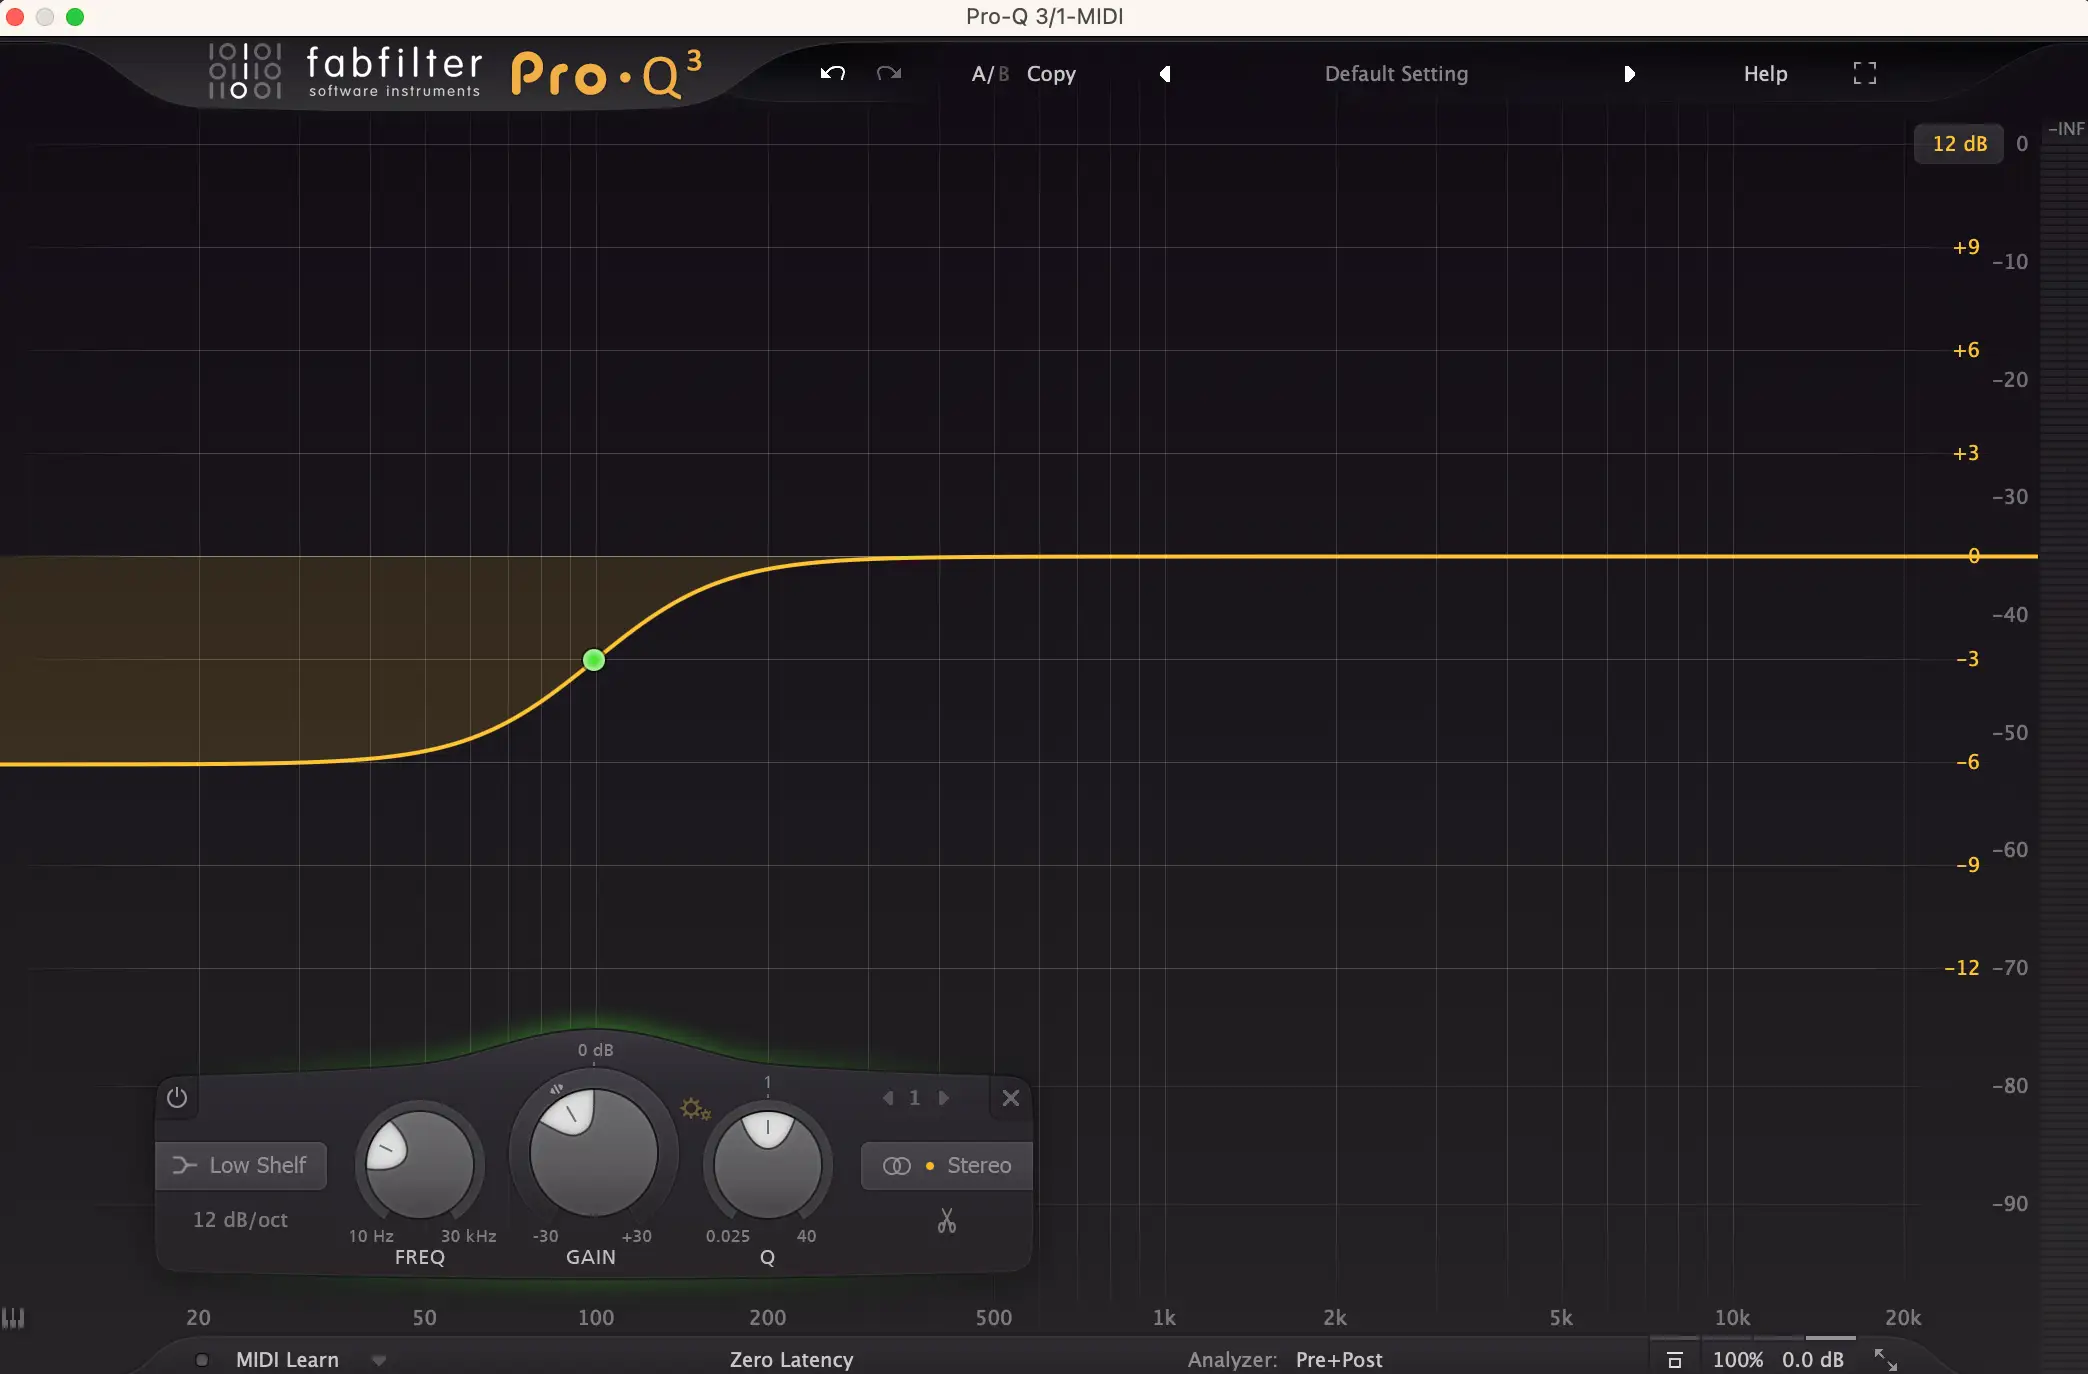
Now check out a high-shelf boost. It's doing the same thing, just on the opposite end!
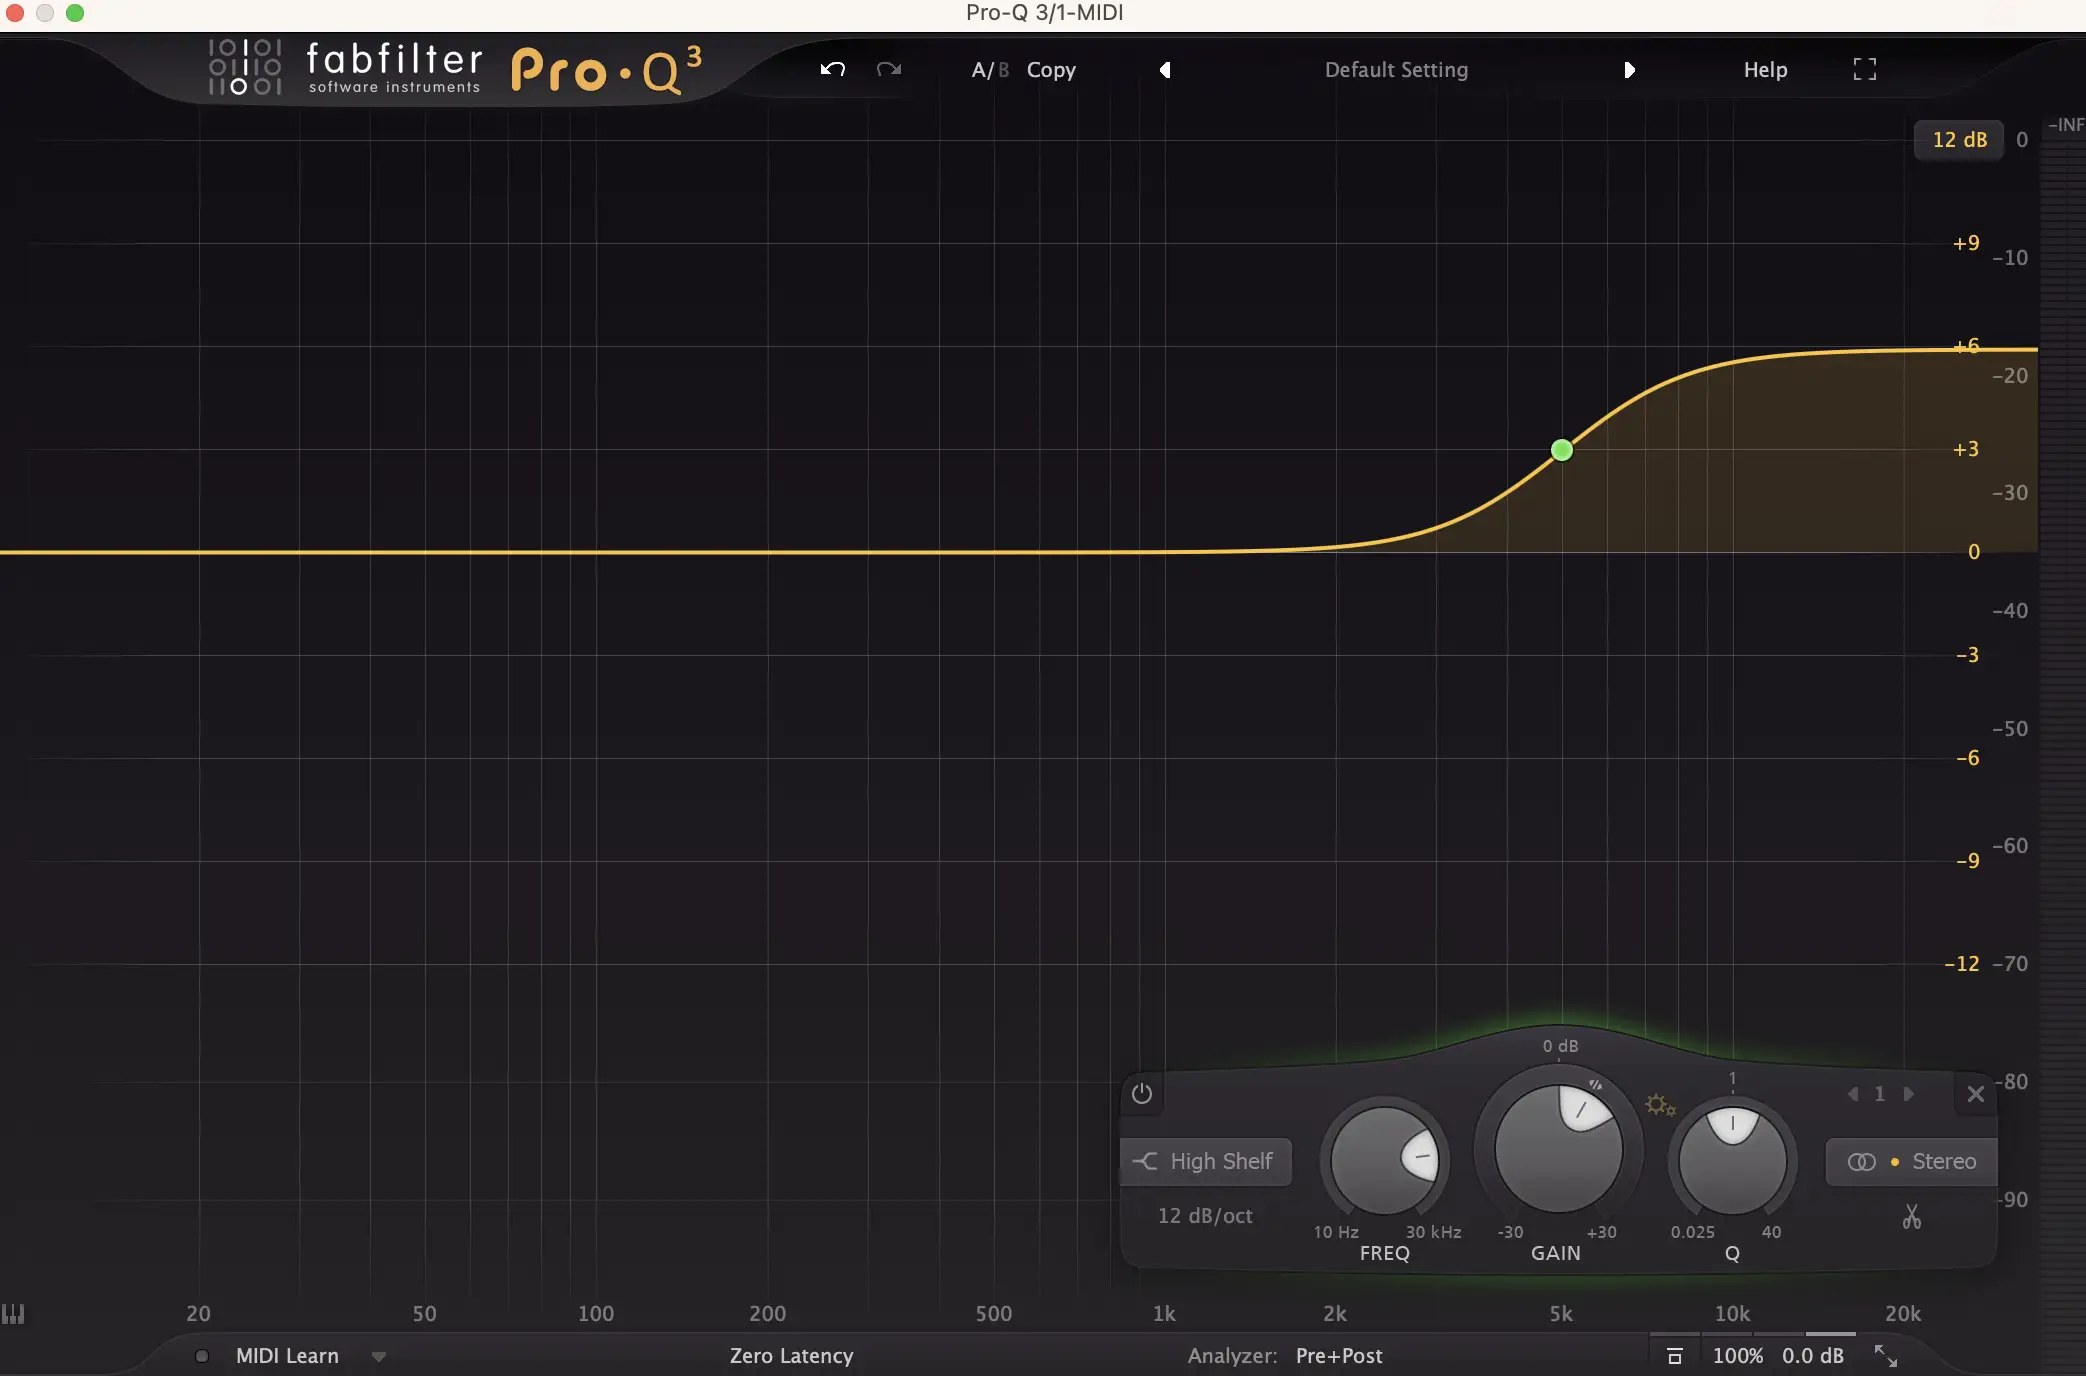
And finally, we have a high-shelf cut. Looks pretty familiar, right?

As you can see, low and high-shelf filters are basically mirror images of each other. They both create a smooth slope and plateau effect. One just works on the low end while the other handles the highs. It's like having two different volume knobs, one for bass and one for treble.
Now that we've got the basics down, let's zero in on low-shelf filters and learn how to use them in our mixes.
What is a Low-Shelf Filter?
Now that you know what a low-shelf filter does, let's get into the nitty-gritty of how it actually works. I'll keep it as simple as possible!
Remember how we said a low-shelf filter changes the volume of your low frequencies? Well, there's a bit more to it than just turning a knob. When you use a low-shelf filter, you're telling your EQ two important things:
- First, you set a "cutoff frequency" - this is where your shelving filter starts to take effect. Let's say you pick 200 Hz. You're essentially saying "Hey EQ, I want you to change everything below this point."
- Second, you decide how much you want to boost or cut those frequencies. Maybe you want to boost everything by 3 dB, or cut it by 6 dB. This creates that shelf-like shape we talked about, which is flat on the bottom, like a shelf mounted on your wall!
Where it gets interesting is that the transition between your original sound and your boosted/cut sound isn't sudden. Rather than a sharp edge, you get a smooth slope around your cutoff frequency. The shallower the slope, the smoother the transition will be, and the more natural and musical the audio running through it will sound, rather than harsh and artificial.
Low Shelf Boost Vs. Low Shelf Cut
Let's break down the two ways you can use a low-shelf filter. I promise this will make sense, even if some parts sound a bit technical at first!
When you use a low-shelf boost, you're turning up the volume of your low frequencies. This requires some extra gain (or volume boost) from your EQ. Think about turning up the bass knob on your stereo in your car. You're essentially adding more energy to the low frequencies.
On the flip side, a low-shelf cut will turn down your low frequencies. While cuts don't technically need extra gain to work, most EQs still use something called op-amps to make it happen. But don't worry too much about the technical stuff. What matters is that both boosts and cuts give you that nice, smooth shelf shape we talked about earlier.
Now, a low-shelf EQ boost looks pretty similar to a low-pass filter , but with one big difference. Instead of the signal just rolling off forever like a low-pass filter would do, a low-shelf boost amplifies the low end and then levels out after the cutoff frequency.
If we get a bit nerdy and ignore the phase (or look at this using a linear phase EQ), you can think of a low-shelf boost as mixing two signals together: your original sound and that same sound with a low-pass filter on it.
Now for low-shelf cuts, they look kind of like high-pass filters , but again, there's a key difference. With a high-pass filter, the cut keeps going lower and lower forever. But with a low shelf, the cut stops at a certain point and levels out to create our shelving filter.
Just like with the boost, we can think about a low-shelf EQ cut in a similar way (ignoring phase again). Imagine taking your original sound, mixing in some high-pass filtered version of it, and then turning down the overall volume to match your original signal's level in the high frequencies.
I know this might sound like a lot of technical mumbo-jumbo, but don't stress if you don't catch every detail. The main thing to remember is that low-shelf filters give you smooth, natural-sounding control over your low frequencies, whether you're turning them up or down.
Low-Shelf Filters In a Perfect World
In a perfect world, a low-shelf EQ would work like a light switch. Flip it on, and everything below your chosen frequency gets turned up or down instantly. The frequency graph would look like a perfect shelving filter, with a sharp, clean edge right at your cutoff point. No smooth slopes, just a nice, crisp right angle.
However, that's not how sound works in the real world. It's like trying to draw a perfectly straight line in the sand. No matter how careful you are, the edges will always be a little fuzzy.
Even with today's digital EQs (which can get pretty close to that perfect shelving filter shape), you'll always have some kind of transition period. And you know what? That's actually a good thing! Those smooth transitions help your EQ changes sound more musical and natural to our ears. A super sharp cutoff would sound artificial and might even create some nasty artifacts in your audio.
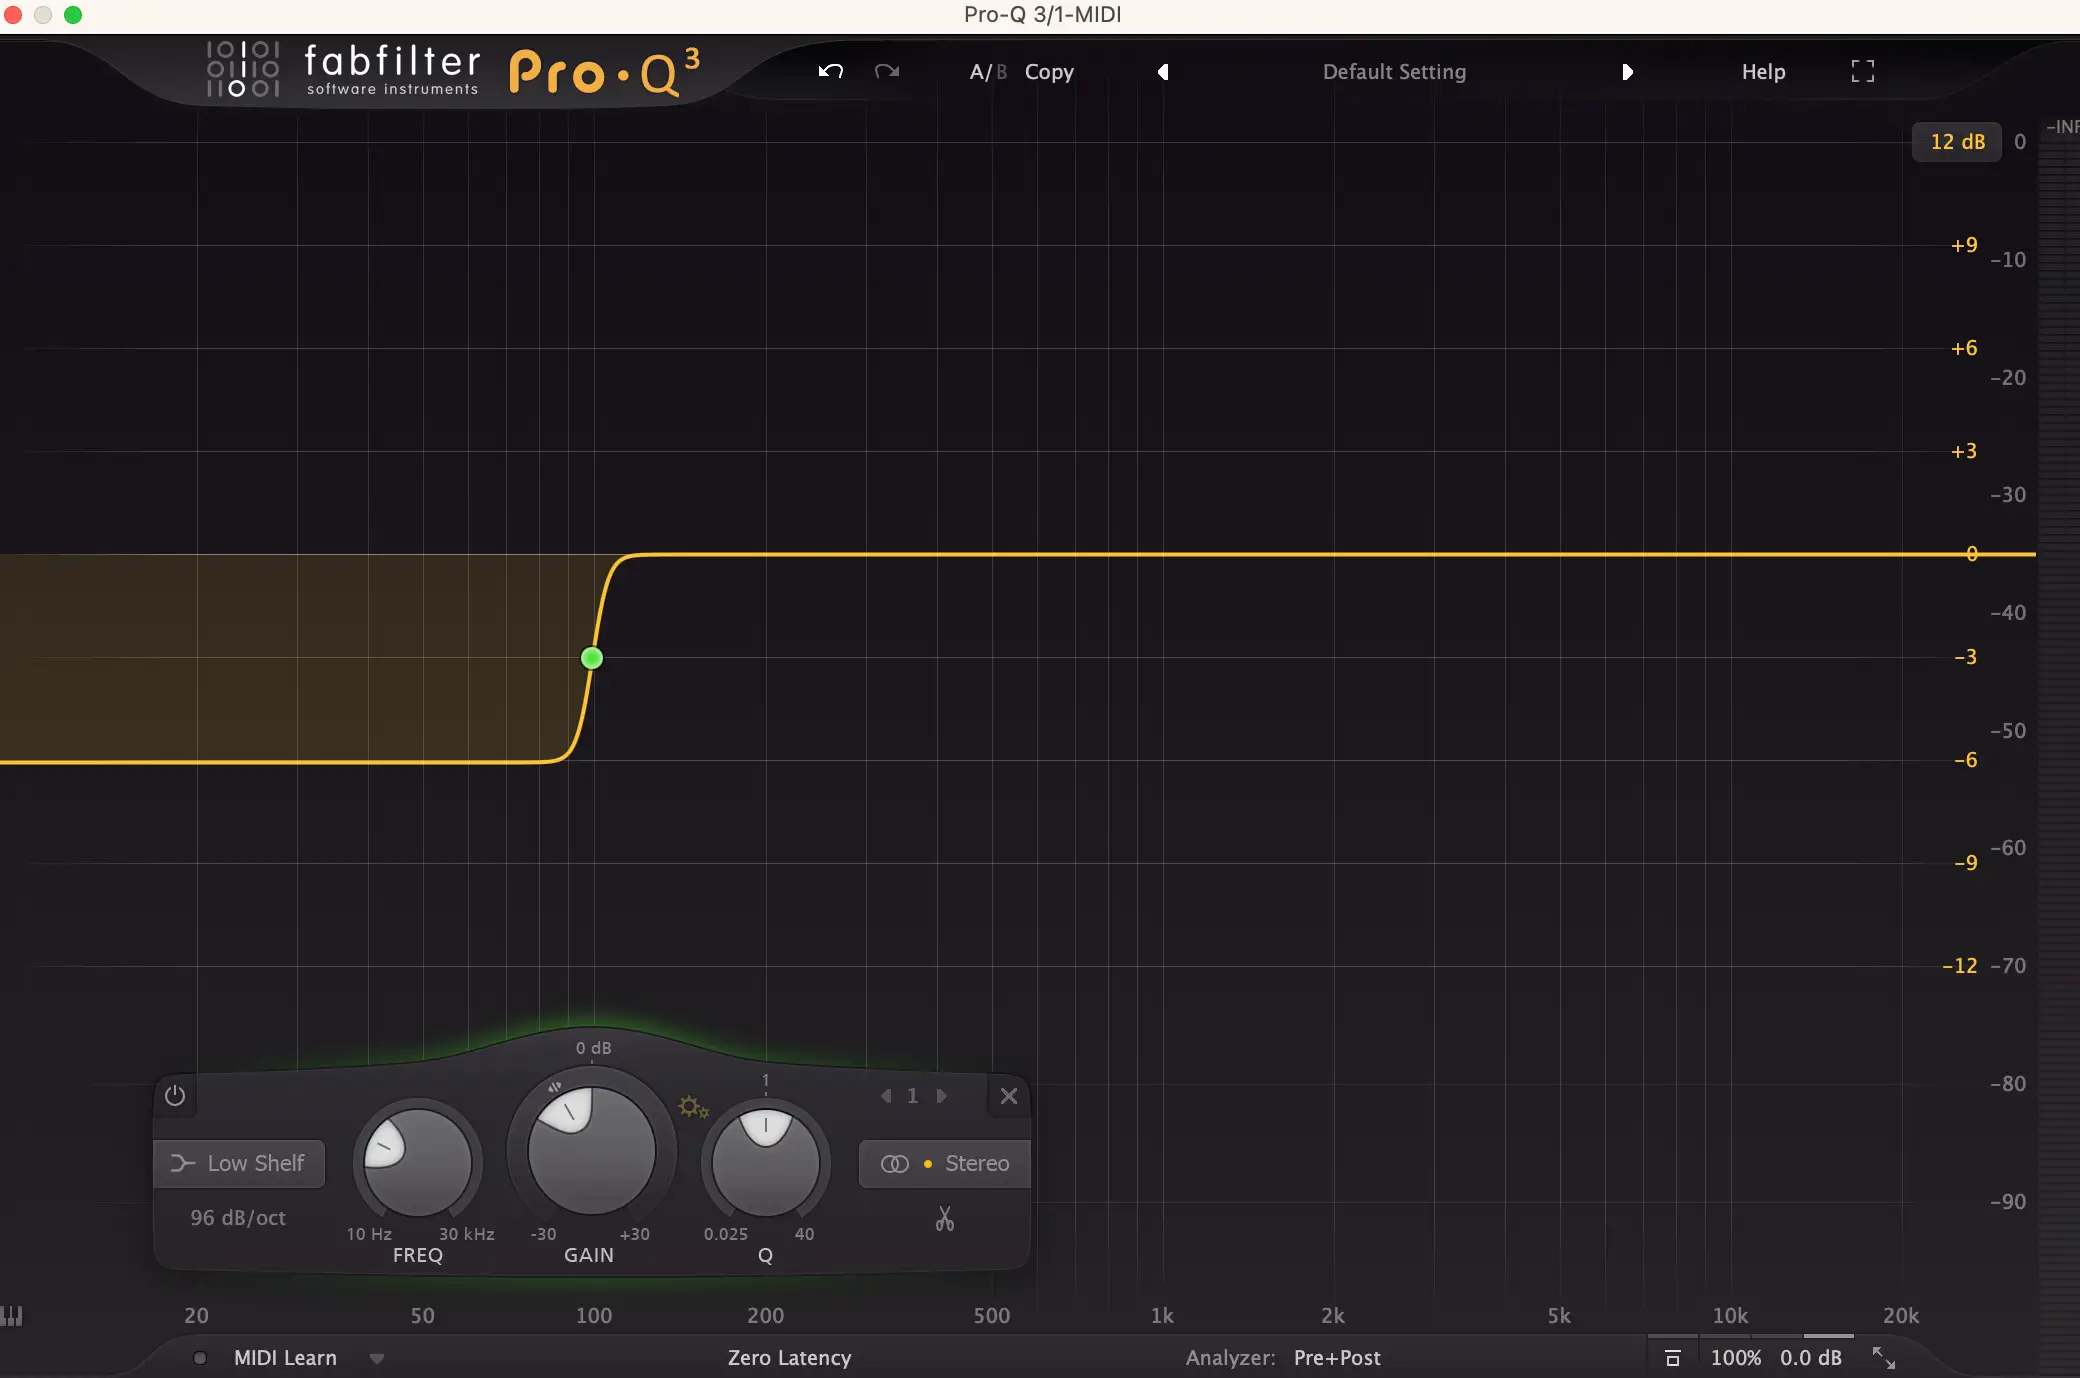
If we look at the image above, which features a 96 dB/octave slope (the steepest slope available on the FabFilter Pro-Q 3), we still have a slope. It's not a straight dropoff.
Important Low-Shelf EQ Controls
Alright, now that we've got a solid grasp on what low-shelf filters are and how they work, let's talk about the controls you'll encounter when you're using them.
Gain
Let’s start with the Gain control. This controls how much you want to boost or cut your low frequencies. Want more bass? Turn the gain up. Want less? Dial it down.
Gain is measured in decibels (dB), and it works just like the volume knob on your stereo. If you boost it by +6 dB, you're making the bass much more pronounced. If you cut it by -6 dB, you're taming the low frequencies to make the sound clearer or create more room for other elements in the mix.
While most EQs give you around +/- 15 dB of gain, some analog-modeled plugins like the Pultec EQP-1A can push this even further, up to +20 dB! FabFilter's Pro-Q 3 takes it a step further with +/- 30 dB of gain.
Frequency
Next up is the Frequency control, which is the most important control when it comes to where your shelving filter kicks in. It sets the cutoff point for your shelving filter and tells the filter which frequency to start affecting.
If you set your frequency at 200 Hz, the filter starts adjusting everything below that point. Boosting or cutting this frequency means you’re affecting the sub-bass and bass range of your track, which has a huge impact on the overall tone.
If you move your frequency lower, say to 50 Hz, you’ll impact the really low sub-bass range. On the flip side, moving the frequency higher (say 300 Hz) will affect the bass and lower mids.
Slope
The Slope is a bit more of a subtle control. It controls how steep or shallow the transition is between the frequencies you’re boosting or cutting and the ones that aren’t being affected.
If you set a steep slope (around 24 dB/octave or more), the transition from boosted to untouched frequencies will be much sharper, making the effect more abrupt. This can work well in certain situations but can sound a bit too artificial in others.
For example, if you're trying to fix something specific , like cutting out a problematic low frequency or removing sub-bass rumble, a steep slope can be useful. It helps you quickly get rid of that specific frequency without affecting too much around it.
However, in more musical or tonal situations, where you’re aiming for a smooth and natural sound (like when you're boosting bass to add warmth to a track), a steep slope can end up sounding artificial.
A shallower slope (like 6 dB/octave) creates a gentler curve, making the change feel more natural and seamless.
Q Factor
And finally, the Q Factor. This controls the width of the frequency range that’s being affected by the filter.
A lower Q means a wider range of frequencies gets affected around the cutoff point. Think of it as a broad brushstroke that gently influences a lot of your bass range. A higher Q, on the other hand, means you're focusing on a much narrower band. It’s like zooming in on a specific spot in your frequency spectrum and tweaking only a small part of it.
Phase-Shift in Low-Shelf Filters
So, you might be wondering, "Why should I care about phase shift?"
Fair question! Well, even though phase shift isn’t something we always notice directly, it plays a big role in how your mix feels .
When you're using a low-shelf EQ, not only are you boosting or cutting the volume of your low frequencies, but you're also subtly altering the timing of those frequencies. This can affect how everything in your mix sits together, so it’s important to understand what’s going on behind the scenes.
Phase shift refers to how the timing of a signal is adjusted when you apply a filter. So, while the filter affects the loudness of your low frequencies, it also messes with the timing, making certain parts of the sound arrive a little earlier or later than before. This might not always be noticeable right away, but it can change how everything lines up in the mix.
Now, here’s where things get interesting. High-pass and low-pass filters are known to cause a 90º phase shift for every reactive component (like capacitors or inductors) in the filter. That means every time the signal passes through one of these components, it gets delayed by a quarter of a cycle. This can give the sound a certain "off-sync" feel, especially when you’re using these filters in extreme ways.
However, low-shelf filters don’t push the phase shift quite as hard. While they still introduce some phase shift (meaning they still alter the timing of your signal), they don’t go all the way to the full 90º shift that high-pass and low-pass filters can cause.
Instead, the phase shift is much subtler .
What does this mean for you as a producer or mixer?
It means that when you use a low-shelf EQ, you’re affecting both the volume and the timing of your low-end frequencies, but the changes will be less dramatic and more musical than with other types of filters.
When to Use Low Shelf EQ
With a firm grasp on low-shelf EQs and how they work, let’s talk about when to use them. They're more versatile than you might think.
Adding Warmth to a Full Mix
One of the classic uses for a low-shelf EQ is to add warmth to an entire mix during the mastering phase. A gentle low-shelf boost can make your mix feel fuller without going overboard.
I'll usually start by setting my cutoff frequency to around 100 Hz to 150 Hz for a nice, broad boost. From there, I'll boost by about 2 to 4 dB to give my mix smooth, rounded feel. I recommend keeping the slope around 6 dB/octave for a subtle approach.
Giving a Kick Drum More Beef
Kick drums often live in the low-end, and sometimes, they need a little extra boost to really pop out of the mix. If you’re looking for a punchier, more focused kick , a low-shelf boost can do wonders for bringing those deep lows forward.
Set your cutoff frequency around 50 Hz to 80 Hz and apply a boost of around 3 to 5 dB. Use a steeper slope (like 12 dB/octave) to give the kick a more defined punch while keeping the boosted low frequencies from spilling over into the mids.
Making Space for Low-End Instruments
Low-end instruments, whether a bass guitar or synth bass, often need dedicated space in a mix. If they’re getting lost in the track or competing with other low-end elements, a subtle low-shelf cut on other, mid-range instruments can help create space.
Set the cutoff frequency around 80 Hz to 120 Hz and apply a moderate cut of about 2 to 3 dB on your mid-range instruments, using a shallow slope of around 6 dB/octave.
Low-Shelf EQ vs. Tilt Filter
Tilt EQs can be used in a very similar way to low-shelf EQs, though rather than boosting or cutting frequencies above or below a specific point, they shift the entire tonal balance of the track running through them by adjusting both the low and high frequencies at once. This gives you a “tilting” effect, where the bass and treble are either boosted or cut together, creating a more balanced overall sound.
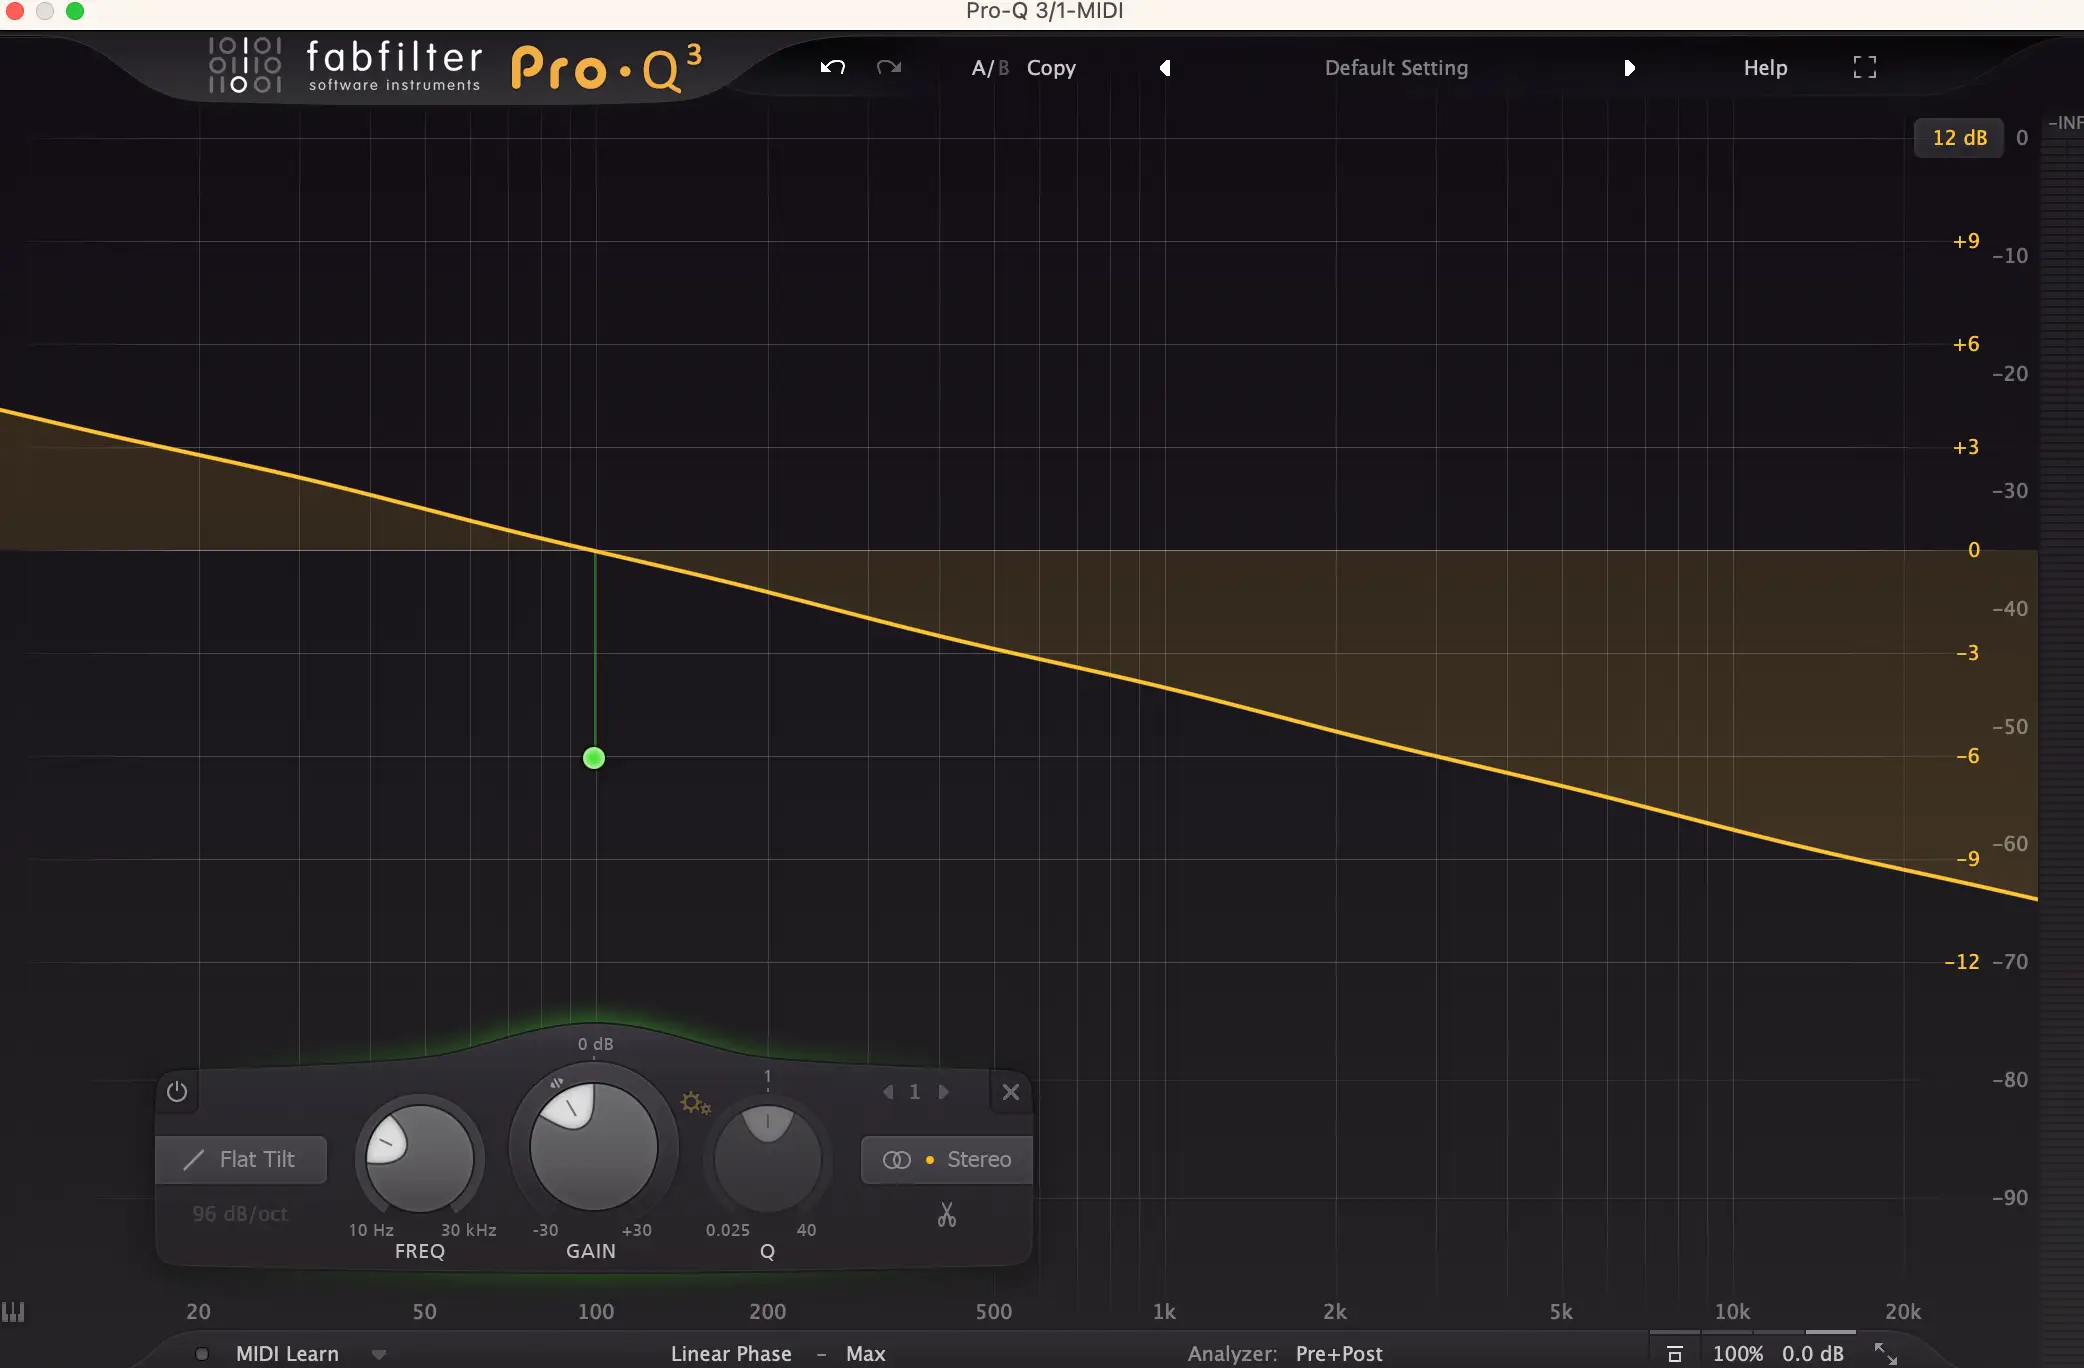
Tilt EQs are usually broadband (meaning they affect a large range of frequencies) and work by turning up or down the low end while doing the opposite for the high end. So, if you boost the low frequencies, the high frequencies will be reduced by the same amount, and vice versa.
It’s like tilting the entire frequency spectrum to one side.
I often reach for a tilt EQ rather than a shelving filter if I want to give a track more warmth by boosting the lows and cutting the highs, or to make it brighter by boosting the highs and cutting the lows. It's a great tool for shaping an overall mix, especially when you're struggling to find the right balance of low-end fullness and high-end clarity.
Final Thoughts - Making the Most of Low-Shelf EQ
A low-shelf EQ might seem like a deceptively simple tool, though it can make a world of difference in your mixes when used properly. I like to use low-shelving filters to add warmth, clean up the low end, and shape the overall balance of my mixes in tandem with high and low-pass filters.
They can be very smooth and musical, though equally precise depending on the settings and the EQ you use.
As with any form of EQing, less is often more , especially with low-shelf boosts. Too much in this frequency range with a low-shelf EQ can overpower your mix. If I really need a big low-shelf EQ boost, I'll typically pair it with a high-pass filter so that I'm not bringing up a bunch of inaudible mud.
Of course, it's always worth experimenting, as long as you have the right monitoring system to do so. After all, every mix is different, and sometimes the most extreme adjustments are what get the job done.


