

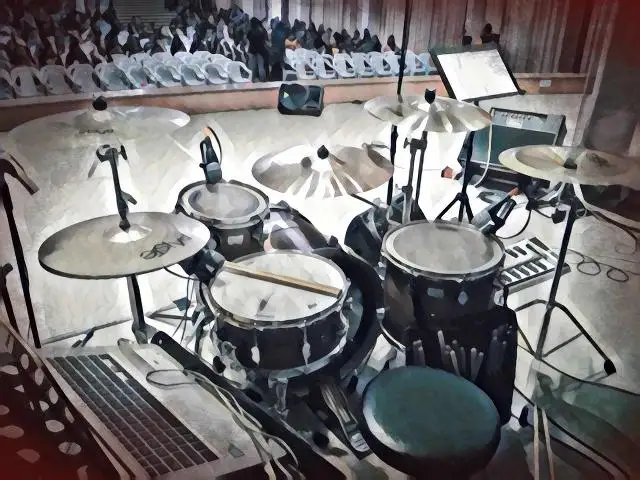
As the heartbeat of almost any great song, getting the kick drum right in your mix is crucial. It's the foundation that the rest of your song is built on, creating that low-end thump that can help listeners feel your music better.
However, when it comes to mixing a kick drum, there's lots of false information out there that leads new mixing engineers astray. Low-end, in general, is often the mortal enemy of new mixers, so focusing on getting an important element like the kick right can be super helpful.
For that reason, I've created a little guide with tips and tricks to help you get your kick drum sitting properly in the mix. Let's dive in!
1. Get Rid of Unnecessary Frequency Content
The very first thing I'll do with a kick drum in a mix is get rid of any unnecessary frequency content that's getting in the way of other instruments or muddying up my mix. Unless the kick was very poorly recorded, or you're heavily processing your kick for effect, you shouldn't need to take out a whole lot at this point.
One of the first areas I find myself looking at is the mid-range. I often find that the area between 400 and 500 Hz can benefit from a slight bit of attenuation. There's a lot of frequency build-up in this area, especially once you start adding other elements to your mix. For live kicks, in particular, this area is where we get a lot of 'boxiness.'
I'll start by using an EQ with a middle-of-the-road bandwidth to get rid of that boxiness. In turn, getting rid of those frequencies will usually bring out the good parts of the kick, such as the rich lows and the click highs.
Sometimes, I'll use a high-pass filter to clean up the low frequencies on my kick, though this completely depends on the song and the arrangement. Extreme lows have a nasty habit of triggering compression heavily and eating up headroom in a mix, so getting rid of them can be super helpful.
In some cases, the kick is there to sit above the bass and provide more of a mid-range rhythmic punch than a low-end thump.
In reggae music, for example, we have low-end bass with many sub-harmonic frequencies, which need free frequency spectrum real estate to thrive. This is one example of a case where I'll usually hit my kick drum with a high-pass filter to give the bass room to breathe.
Unless I'm going for a specific effect, I'll never take the high-pass filter higher than 50 Hz.
2. Give It a Boost
After moving through the frequency range and finding frequencies that I think are hurting the mix, I'll use another EQ plugin to shape the bass drum so that the good parts of it stand out.
Once in a while, I don't have to boost at all. This is especially true when using quality kick samples, as they already have all the built-in punch and knock that I need. However, when I do need to give my kick drum a little bit of love with EQ, there are certain frequency ranges I'll look to first.
For starters, I like to look in the 50 to 80 Hz range, where the sub-harmonic frequencies live. These frequencies aren't so easy to hear as to feel. When I want my kick to have a bit of extra low-end punch, it's a great place to give a broad boost with something like a Pultec EQ.
Next, I'll move up the spectrum to the low frequencies from around 100 to 250 Hz, as this is where the fundamental frequency of your kick will live. You can boost here to get a bit of tone and body, though just be careful not to get in the way of the bass.
Lastly, I'll make my way into the upper mids around 1 to 5 kHz. This is where you'll find the attack of the kick. For a live kick drum, this is where the beater is hitting the skin. I usually only feel the need to do this if the kick is getting lost in the mix, yet I don't want to boost the entire thing because the low-end is already sitting nicely.
The specific frequency you boost will depend on the style of kick you're going for. For example, in rock mixes, I'll often boost anywhere from 1 to 2 kHz, though if I want that ultra-high, clicky sound you hear in metal mixes, I'll boost anywhere from 2 to 5 kHz.
3. Get It Under Control
The way in which I use compression on my kick drum will depend completely upon the context of the mix. A live kick drum, for example, will require much more compression than a sampled kick, as there will be dynamics to control.
No matter the context, the most important elements to look at are the attack time and release time.
I like to think of my kick drums as two distinct components. The attack is the first part of the kick, where the beater hits the skin, while the release is the second part of the kick drum, where the resonant tone rings out.
When I want to give my kick drum a bit more punch, I'll dial in a slow attack to allow the initial hit of the "beater" to pass through the compressor before it clamps down on the resonant part of the kick. Sometimes, however, if my kick is too punchy and I want some more body out of it, I'll use a quick attack setting and a release time of around 40ms to engage the compressor as soon as the beater hits.
Once you've dialed in the perfect attack and release settings, you can use the ratio and threshold settings to dial in the amount of compression you want. There's no magic number here, but generally, heavier styles of music, such as rock and metal, require more dynamic control than natural styles of music, such as folk and jazz.
PRO TIP: One of the best ways to dial in the right attack and release time is to turn the threshold all the way down so that you're getting 10dB or more of compression. This will make it easier to hear how your attack and release settings are impacting your sound.
4. Supplement It
Even though using samples of triggers in conjunction with live drums is frowned upon by some old-school engineers, it's a part of modern music production, and I hope we can erase this stigma once and for all.
When used properly, a kick sample or trigger can be just the thing your drums needs to come to life.
If I'm triggering a kick drum, I'll use something like Steven Slate's Trigger plugin, though if I'm stacking it with a sample, I often find myself converting the kick drum audio to a MIDI track in Pro Tools and using a sampler like Native Instruments Battery 4 with a bunch of pre-loaded kick samples to find one that fits best.
The key here is finding a sample that augments the original kick . It should not replace it entirely.
Don't hesitate to process the sample if need be. For example, sometimes, I have to scoop out some of the mid or low frequencies in my kick sample so that it fits with my live kick. Other times, I have to use a transient shaper to adjust the attack and release of either one.
For example, if my live kick drum doesn't have much attack but has a wonderful body, I'll use a transient shaper to shave off the attack of the live kick and use a sample with a punchy attack and quick decay.
PRO TIP: No amount of mixing or processing can replace good sample choice.
5. Get Your Bass In Line
Many times throughout my career, I've spent hours trying to get the kick drum in a mix right, only to realize that it was actually the bass that I needed to fix.
Kick and bass sit in the same frequency range, and getting a decent mix often means making sure they work in conjunction with one another.
For starters, you want to make sure that there's no frequency masking going on between them. While a little bit of rub is okay, too much fighting can be problematic and make your low-end sound like a muddy mess. Make sure to use EQ curves on your kick drum and bass guitar that complement one another.
Let's say you have a bass guitar with a whole lot of energy in the 100 to 200 Hz range. If you were to try boosting your kick drum in that area, you'd get a lot of pushback from the bass. Instead, consider giving your kick drum a broad cut in that range to make way for the bass, and I guarantee you'll hear your low end open up.
The next thing is to make sure your dynamics are on point. Similar to the kick drum, we want the bass in most mixes to feel locked in . This means compressing it in a way that each note sounds even in volume. If some bass notes are way louder than others, there's a higher likelihood that those loud notes will cover up your kick drum when they come around.
PRO TIP: One way I like to lock in my kick and bass is by sending them both to a parallel compression bus and compressing them heavily together. I'll then blend that bus into the rest of the mix to give it more punch.
6. Check Your Mix Buss
Many engineers use compression on their mix busses, which is great for getting ooey, gluey mixes that feel cohesive. However, if a mix buss compressor isn't used properly, it can squash the life out of your kick drum.
Inexperienced engineers often make the mistake of dialing in attack times that are too fast, which can squash the initial transient of the kick, not to mention any other instruments with transients that are necessary to the rhythm and groove of the track.
An attack time of around 30ms is a good starting point, as it'll allow the transient of your kick drum to come through before clamping down to glue the rest of the mix elements together.
7. Don't Over-process Your Overheads
I can't even begin to tell you how frustrating it is to watch engineers use aggressive high-pass filters on their overhead tracks to get rid of low frequencies.
Sure, you don't want to have a ton of sub-frequency content in your overheads, though having some low-end in there is crucial for a hard-hitting drum sound. In fact, that low-end can be just the thing you need to augment your kick drum track.
Unless you're mixing poorly recorded overheads with a bunch of junk in the low end, a gentle dip with a low shelf will usually do the trick. The same thing goes for the room mics.
8. Be Careful With Reverb
If you're mixing a song that calls for lots of reverb on the drums, such as an '80s-style stadium rock track, your first instinct can be to send all of the drums (including the kick) to a big plate or hall reverb. However, this approach can leave you with a kick drum that lacks punch and presence.
Any reverb that I typically need from the kick drum, I can get by sending the overhead mics to reverb.
On the other hand, if I'm really certain that my kick hits need a bit of ambiance of their own (which can sometimes be the case in very sparse mixes), I'll send it to a reverb buss with an EQ in front of it. On the EQ, I'll use a high-pass up to around 500 Hz to make sure I'm not getting any lower frequencies. This can give your mix a fuller sound without it sounding muddy.
Elevate Your Kick Drum Mixing
Trying to mix kick drums can feel difficult.
However, by using EQ to tame and boost certain portions of the frequency spectrum, taking advantage of proper compressor settings to control dynamics, and mixing other instruments getting in the way of the kick so that it has its own space in the mix, you can achieve a godly kick drum sound with ease.
Just make sure to avoid using too much compression and having too much low-frequency content in your reverb.
I hope you found these tips extremely helpful! I have no doubt you'll be a master of kick drum mixing in no time!


