

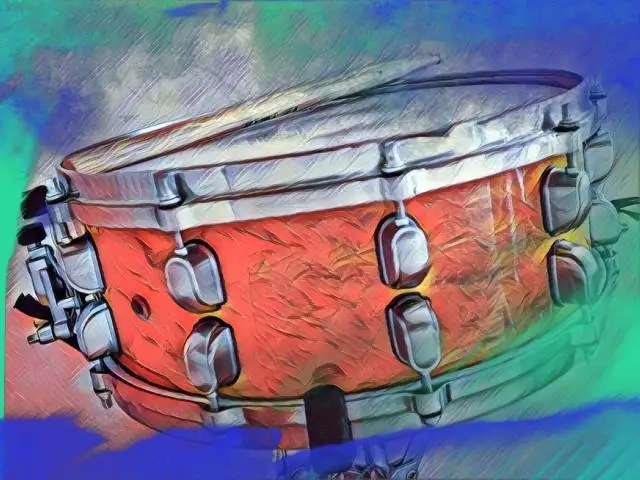
When it comes to mixing snare drum, there’s a lot to think about. Most people want a fat, tight snare that punches through the mix and gives the track its much-needed energy, right?
Of course, not every snare is the same, and each one needs its own treatment. That said, there are certain qualities that pretty much all snares share, like members of the same family, and you’ll need to keep these in mind as you mix.
In this guide, I’ll be focusing on how to mix a live snare drum within the context of a modern pop or alternative track. But don’t worry - most of what I’ll talk about can be applied to any snare you end up working with, whether it’s in a punk rock anthem, a trap banger with all samples, or anything in between.
Choosing the Right Snare to Begin
Choosing the right snare to start is a key part of the mixing process, and a lot of that comes down to understanding the context of your song. Before you start processing your snare, think about what vibe you’re going for.
Is this a high-energy pop song, a modern rock anthem, or maybe a laid-back, D'angelo-style neo-soul track? The snare sound should fit into the bigger picture of the song, and that starts with knowing the vibe you want to create.
A helpful tip here is to have a reference in mind for what you want the snare to sound like. Whether it’s a specific track or just a general feeling, having that sound in your head will make a huge difference as you work through the mix.
For example, think about the difference between Travis Barker’s snare on a Blink-182 song. It's tight, snappy, and aggressive compared to the soft side-stick snare on a Bob Marley track. Both snares serve their songs perfectly, but they sound worlds apart.
So, as you begin the mix, try to pinpoint that ideal snare sound in your head and aim for it. It’ll help guide your decisions during any part of the process. And remember, your reference isn’t set in stone. Just use it as a benchmark to get you started in the right direction.
Use a Gate to Clean Things Up
Gating is often one of the first things I do when mixing snare drums, especially if I'm dealing with an acoustic snare that has a lot of cymbal bleed. For those who don’t know, cymbal bleed happens when the snare mic picks up sound from other parts of the kit, particularly the cymbals, which can make your mix sound cluttered and messy.
With a gate, you can clean things up by cutting off any unwanted noise when the snare isn’t being hit. This keeps your mix tight and focused, without all that extra junk leaking through.
That said, the style of the track is super important when deciding whether to use a gate. For example, in a rock or pop song where you want a sharper, punchier snare, gating is pretty much a must. But on a more relaxed acoustic, folk, or jazz track, where you’re going for a more organic, open feel, gating might not be the best move. In that case, you might want to embrace the natural bleed to help keep the vibe intact.
When gating a snare, the goal is to remove any extra noise without affecting the sound of the snare itself. Start by setting the threshold just low enough that the gate opens when the snare hits but stays closed when there’s silence.
The trick is to find that sweet spot where the snare still sounds natural and lively, but the bleed is minimized. Be careful not to set the attack or release too aggressively, though, as if the gate reacts too quickly or slowly, it can make the snare sound unnatural or choppy.
Check the Phase Relationship
If you’re working with a track that has two snare mics, you’re in for a bit of a balancing act. Typically, you’ll have one mic placed on top of the snare (often called the “top mic”) and another placed underneath it (the “bottom snare mic”).
The top mic captures the main sound of the snare, and is what gives you the 'crack' sound, while the bottom mic picks up the snare wires buzzing and provides some extra depth and snap.
The tricky part is dealing with the phase relationship between these two mics .
If they’re not in phase, they’ll cancel each other out in weird ways, and you lose punch, clarity, and even low-end energy. This is why it’s so important to check the phase relationship between the mics and make sure they’re playing nice together.
To check for phase, all you need to do is listen closely. One simple method is to flip the phase switch on one of the snare mics (usually the bottom mic) and compare the sound. If flipping the phase button makes the snare sound more focused and punchy, you’ve got the phase right. If it sounds thinner, weaker, or hollow, then the mics were out of phase, and you’ll need to flip it back.
If you're part of the recording process, there are a few things you can do to fix it.
First, try adjusting the mic placement slightly to see if it helps . If you’ve got a mic positioned too close to the snare or pointing in a way that creates phase issues, a little repositioning can do wonders. If that doesn’t do the trick, sometimes using a phase inversion on the mic with the worst phase relationship (usually the bottom mic) can clean things up.
Find the Right Volume in Your Track
Getting the right volume for your snare is the most important part of the mixing process. I like to work with a reference track for this step, as snares can be different levels depending on the style of the song.
Just find a track that has a snare sound you want to emulate, make sure it's the same relative volume as your mix, and use that as your reference point.
Here’s how I recommend going about making sure your snare’s volume is just right:
- Start with the Mix at a Good Level : First, set your overall mix to a low, comfortable listening level. You want to be able to hear everything clearly without getting fooled by the sound of your room. This gives you a good foundation to start working from.
- Find Your Reference Track : Load up a reference track that has a similar vibe or snare sound to what you want. This track will be your guide for how loud your snare should be in comparison to everything else.
- Match the Volume : Bring up the snare in your mix, and use your reference track to help you match the volume. A good starting point is to set the snare so it’s around the same level as the snare in your reference track. Make sure you’re focusing on the main body of the snare sound (not just the initial hit or the tail).
- Trust Your Ears (and the Metering) : Finally, keep an ear out for how the snare interacts with the rest of the mix. If it starts to distort or sounds like it’s competing for space, back it off a little. You can also check the meters to make sure you’re not peaking too much.
Of course, it won't sound perfect just yet, as you'll likely need to EQ, compress, and saturate it, but this should give you a good foundation to build on.
Use EQ to Fit Your Snare in the Mix
EQ is where you can really make your snare track begin to fit with the rest of your mix If your snare isn’t sitting right in the mix, no amount of compression or reverb will fix it. The key is in the EQ, and making a few simple adjustments can take your snare from sounding flat to punchy and exciting.
One of the first moves I like to make is boosting the high end to bring out some crack and excitement. Typically, I’ll boost around 8kHz with a high shelf to add some air and sparkle. This gives the snare that sharp, cracky top end that cuts through the mix without making it harsh.
You can experiment between 7kHz and 10kHz depending on the snare and the sound you want, and I usually prefer a shelf here over a bell because it sounds smoother, especially with bleed from the other drums.
Next, I’ll add a bit of low-end body to the snare. If the snare is a bit too thin, I usually go for around 180Hz to 200Hz with a bell filter . This adds that satisfying thump and fullness to the snare without making it too boomy. If you’ve got a snare that’s naturally deep, you might want to boost lower, say around 120Hz or 150Hz, but for most pop or alternative tracks, the 180Hz range works great.
The next step is dialing in a little smack in the upper mids. You don’t want to overdo it, but adding some presence around 2.5kHz to 4kHz can really bring out the attack of the snare. Start with a bell filter and find that sweet spot where the snare really punches through.
Lastly, if your snare drum is sounding a bit honky or boxy, you can pull out some midrange, usually somewhere between 400Hz and 1kHz . If you’re hearing something that sounds like an unpleasant ring or too much of a "thud," this is the spot to address it. Cutting a bit in this range clears up that muddiness and helps the snare sit better in the mix.
When you’re done, you should have a snare that’s got a nice crack on top, some thump in the body, a smack in the midrange, and no unwanted honk. Try bypassing and engaging your EQ settings to hear the difference, and make sure it fits well in the full mix. Most of the time, these EQ moves get me 90% of the way there, and from there, I'll fine-tune depending on the snare drum and the track.
Compression for Control and Character
Compression is one of the best ways to add control and character to your snare. Of course, you can't just throw a compressor on your snare and pray that it sounds good. The settings and approach you use will have a big impact on how your snare sits in the mix.
For snare drums, the key to great compression is a slow attack and a fast release .
Here's how you can dial it in:
- Set Your Attack to Slow : This is the most crucial part of compression. With a slow attack, you’re letting that initial snare hit shine through, which gives you the crack and energy you want. If the attack is too fast, the compressor grabs the transient too soon and squashes the life out of it. The snare will lose its punch, and it can start to sound unnatural.
- Fast Release : A fast release lets the compressor quickly get out of the way after it has reduced the volume, allowing the snare to sustain and ring out properly. If the release is too slow, the compressor can still be working on the snare when the next hit comes, which can reduce the strength of the following snare hit and mess up the rhythm.
- Choose a Reasonable Ratio : Start with a ratio of about 3:1 or 4:1. This is strong enough to control the dynamics but not so aggressive that it kills the character of the snare. If you find the snare starts to lose too much body or character, you can back off the ratio a little.
- Makeup Gain : After compressing, you'll likely need to bring the level back up with makeup gain, so that it's the same volume in the mix, but now with the enhanced attack from the compression.
Once your snare is compressed, the difference can be night and day. You’ll hear that initial attack pop more, and the snare will sit more naturally in the mix. It's all about finding the balance between control and character!
Parallel Compression
Parallel compression is one of the best tools for making your snare (and kick) sound punchier and more exciting without sacrificing the natural dynamics of the performance! The basic idea is to take your snare, send it to a separate compressor (often with heavy compression settings), and then blend it back into the original snare sound.
This way, you get the best of both worlds: the compressed sound adds punch and sustain, while the original signal keeps the natural dynamics intact.
For parallel processing:
- Create a Parallel Track: Start by duplicating your snare drum track or creating an auxiliary send that routes the snare signal to a new track dedicated to parallel processing. This parallel track will receive the heavy compression, while the original snare track remains untouched.
- Apply Aggressive Compression: On the parallel track, you’ll want to compress the snare aggressively to bring out the punchy qualities. Here's how to set it up:
- Ratio : Set the ratio between 4:1 and 10:1. A higher ratio will give you more aggressive compression.
- Attack : Choose a slow attack time (around 30–50 ms) to allow the initial snare transient to come through before the compressor kicks in.
- Release : A fast release (50–100 ms) will quickly unclamp the compression after each hit, allowing the snare to ring out and breathe naturally.
- Threshold : Adjust the threshold so the compressor engages during snare hits, with substantial gain reduction (usually 10 dB or more). The idea is to compress the transient but leave the sustain intact.
- Blend the Signals: Once the parallel track is heavily compressed, gradually mix it back with the original snare signal. Start with the parallel fader at 0 and slowly bring it up until the snare starts to feel more present, punchy, and dynamic. You want the compressed track to enhance the snare’s energy without overshadowing the original sound.
Limiting
Knowing when and when not to use a limiter on your snare drum is crucial, as improper use is the fastest way to suck punch out of a drum mix.
You might consider putting a limiter on your snare if you’re trying to control the absolute peaks and keep them from going over the threshold, especially if your snare hits are peaking too high and causing distortion or unwanted clipping.
A limiter can keep everything in check without affecting the rest of the snare’s sound. This is particularly useful if you’ve already dialed in your snare’s compression but still need a little more control.
That said, a limiter is not always the best tool for snare control. If you’re aiming to preserve the natural attack and punch of the snare, a limiter might not be your best option. When used improperly, it can squash the snare’s transients.
Rather, if you're looking to tame the peaks while keeping the snare’s punch and energy intact, a clipper might be a better option than a limiter. Unlike a limiter, which smooths out the peaks by reducing the overall gain, a clipper gently clips the signal once it reaches a certain threshold. This can result in a more musical distortion that adds character and warmth.
Lately, I've been a big fan of Ash from Acustica Audio.
Transient Shaping for Attack and Sustain
If you’ve been using compression to shape the attack and sustain of your snare but still feel like you’re not quite hitting the mark, it might be time to reach for a transient shaper instead. A transient shaper is a fantastic tool for dialing in the snare’s attack and sustain in a way that compression alone just can't do.
You don’t need a complicated, multi-knobbed transient shaper to get the job done (although I am a big fan of Waves' Smack Attack ). In fact, a simple one will do just fine such as the Transient Shaper from Native Instruments . It’s straightforward yet super effective and CPU-friendly, allowing you to easily shape the sound of your snare drum with just a few controls.
If your snare feels weak or lacks punch, for example, you can use the transient shaper to boost the attack by increasing the "attack" or "transient" setting. If you want to mellow out an already transient-heavy snare, you can do the opposite.
If your snare needs more length or body, dial up the "sustain" control. This will stretch out the snare's tail, giving it more presence and allowing the snare to "linger" a bit longer in the mix. I also like to dial this back if I notice any unwanted ring or resonance in my snare drum.
Add Sauce with Saturation
Most of the time, when I’m mixing a snare drum, I like to give it a little extra character with some saturation.
Saturation can really bring a snare to life by adding warmth, harmonic complexity, and a little bit of grit, especially if it sounds sterile.
It's important to note that saturation comes in many different flavors, and each type has its own personality. The main idea behind saturation is to introduce harmonic distortion to the sound, which can be subtle or more intense depending on the kind of saturation you use.
You can get anything from tape-style warmth to gritty, fuzz-like distortion.
One of my all-time favorites for snares is tape saturation . It's great for when you want a smooth, warm-sounding snare with a bit of natural compression. With it, you can bring out the snare's natural character without making it sound too harsh. Plus, tape tends to add a bit of thickness, which works wonders for snare drums, giving them a solid body and that vintage vibe.
For tape saturation, I’ve been using Ozone’s Vintage Tape module and Goodhertz Tupe . Both of these give me that authentic tape sound without needing to actually record on tape (thank goodness, right?).
Sometimes, though, I want a bit more grit. That’s when I turn to Soundtoys Decapitator or Fabfilter Saturn . These plugins offer a more intense form of saturation that adds a crunchy, aggressive tonality when dialed in heavily.
Layering with Samples
If your snare isn't sounding that great on its own, you might try layering it with some quality samples. I typically like to use anywhere from 2 to 3 snare layers when I feel like my acoustic snare isn't cutting it.
Usually, I want a snare drum sample with low-end punch to give it body and a 'pop' snare sample to give it a snappier high-end. The goal here is to find a snare drum sample that complements the one you already have.
If I need a bit more sustain from my acoustic snare (or if it wasn't recorded in a good room), I like to use a roomy snare sample and a transient shaper to shave off the initial transient so that I can layer just the decay and sustain portion of the sound.
If I want a layer that's a bit more noticeable, I'll use a clap or percussion layer that's ever-so-slightly off from the initial transient of my actual snare sound. From there, you can use puzzle piece EQ to get the layers to fit with one another better.
Reverb
The last portion of my snare drum processing chain is often reverb. There are infinite ways to approach reverb, and different genres will often call for different reverb styles.
I may have a retro 80s track that calls for a large gated plate reverb or a vintage reggae track that sounds great with a mono spring reverb.
The goal is to figure out what fits with your entire mix.
Small, short room reverbs can create a sense of realism and proximity, simulating how a snare would sound in a tight recording space. For rock and pop, plate reverbs can add a smooth, glossy tail. If you need a stadium-sized snare drum sound for a ballad, you might go for a long hall .
The decay time or reverb tail length should complement the genre and arrangement. A short decay (0.5-1 second) is perfect for rock and pop, as you want the snare to sound sharp and punchy. For electronic music, ambient music, or other slower genres, longer decays (1.5-3 seconds) can create a more atmospheric sound.
Using Pre-Delay
Pre-delay controls the time between the snare hit and the onset of reverb. Shorter pre-delays (around 10-30ms) work well for tight snares, while longer pre-delays (40ms or more) can create a more distinct echo, which is great if you want to hear the depth of the reverb but keep the dry snare drum upfront.
EQing Your Reverb
The last thing I usually do with snare drum reverb is to EQ it so that I don't have a ton of unwanted frequencies clogging up the mix.
With your reverb on an aux track, use a high-pass filter to cut below 200 Hz to get rid of any unnecessary low frequencies and a low-pass filter down to around 6kHz to get rid of any splashy higher frequencies.
The actual numbers you use will vary, though this should give you a good start. The goal is to ultimately limit the frequency range of your reverb so that it complements the snare without swallowing it.
Final Thoughts - Mixing Snare Drum Like a Pro
As you progress through your mix, you'll likely find that you need to make continuous changes to your snare drum, whether it's the amount of reverb you're using, the style of saturation, or your snare EQ. Whatever you need to do to get there, just remember that the main objective is to ensure your snare drum is serving the mix in the final version.


