


Learning how to EQ piano can be a bit of a headache, especially when you consider how crazy wide of a frequency range it has. To give you some perspective, the piano's frequency range extends from 27.5 Hz to 4186 Hz.
EQing piano, unfortunately, isn't as simple as just cutting a few frequencies here and there. You’ve got to be mindful of how every note fits into the track you're working on.
The notes you play will have a big impact on your EQ settings as well. If you're not playing a lot in the low range, you might not need a lot of the added low-end that it comes with. EQing is all about context, meaning what the piano’s role is in the track and how it supports everything else.
Then there’s timbre, which can really change your approach. A grand piano has a completely different vibe from an upright or electric piano. Each type has its own tonal characteristic that will influence how it sits in a mix.
In this guide, we’ll take a look at how to EQ piano in a way that works for your specific track. Let's dive in!
Best Piano EQ Moves
High-Pass
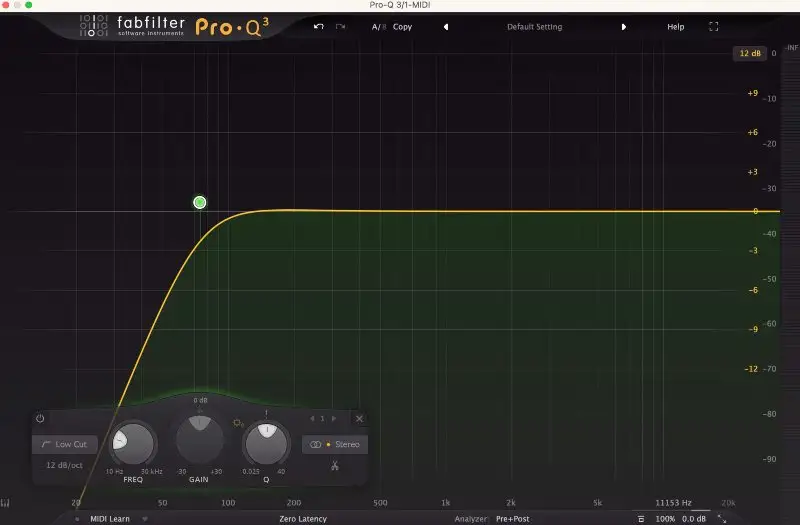
I usually like to kick things off with the high-pass, just like with an electric guitar in an average rock track, most piano recordings don’t need ultra-low rumble. It’s just noise that doesn’t add any musical value and only makes your mix muddy.
You won’t hear it in the mix (unless you’re listening on some monster subs), but trust me, it’s there, and it’s taking up space you could be using for something more important, such as the sub-end of your bass guitar or kick.
When you’re setting up your piano EQ high-pass filter, aim to start somewhere around 70Hz. A good rule of thumb is to find a balance where you’ve removed the low-end mush without cutting into the body of the piano. You want the notes to still have that full sound, so be careful not to go too high.
If you can, throw on a pair of headphones for this part, as you'll hear your low-end a lot better than you would through speakers, and you’ll be able to get more precise with your cuts.
I like to use what I call the “sweep from the bottom” method. Start at the very lowest end of the frequency spectrum, and gradually sweep up with the high-pass filter. As you move up, listen carefully for when the piano’s low notes lose their fullness. That’s usually your sweet spot.
Warmth

With warmth, the goal here is to add a little extra depth and richness to the piano recording, which usually lies between 75Hz and 250Hz .
To find the sweet spot, use an EQ to sweep through that range. Start at around 75Hz, and slowly move up toward 250Hz while listening carefully. You’ll hear the low-mid “meat” of the piano as you sweep, and when you hit the right spot, it’ll feel like the piano sounds fuller and more present without any boominess.
The question I often ask is, when do you add warmth, and when do you pull back?
Often, if my track feels thin or the piano sounds too “sharp” or “tinny” in the mix, it's usually a sign a slight boost could fill things out.
On the flip side, if your piano is feeling muddy or overpowering, especially when there’s other low-end content in the mix, you might want to cut a little bit in this region.
Boxiness
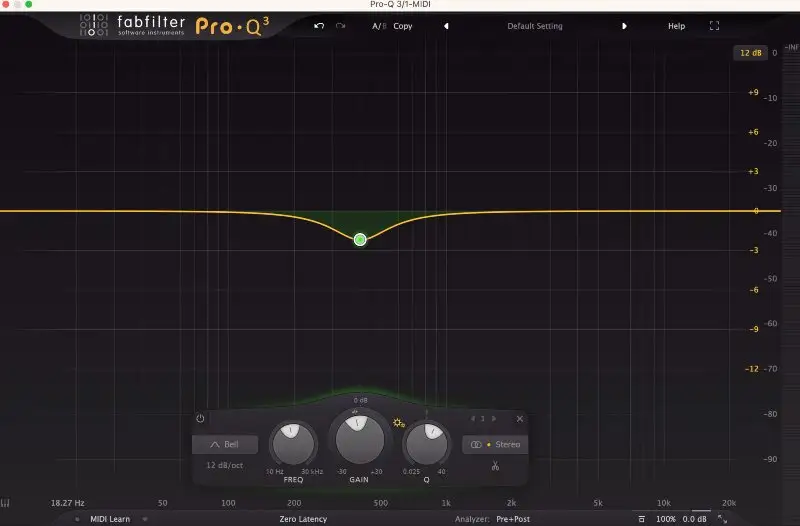
The best way I can explain boxiness is that hollow, almost "canned" sound that you hear on some recorded instruments. When mixing piano, this boxy frequency range usually sits around 350Hz to 400Hz. It’s a part of the spectrum that doesn’t really add much to the musicality of the sound but rather fills up space in a way that makes everything sound kind of... congested.
When I’m dealing with this, I typically go for a subtle cut in that range. You don't need to make a massive dip, but just enough so that you don't strip away any of the body or warmth from earlier.
Once you’ve made your cut, A/B your mix to check if it’s working. Take a listen with your piano EQ on and off to see if the boxiness is gone without affecting the overall tone too much. If you find that the piano sounds clearer and more defined, you’re on the right track. But if it feels like it’s losing something, you can always pull back a little and dial it in again.
Presence
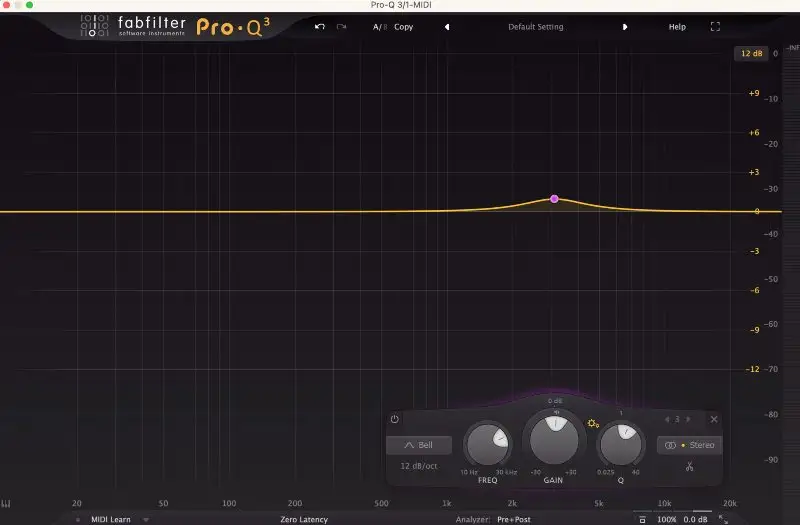
The presence range is one of those areas where there are no hard and fast rules. Every song and piano has different needs for upper mid-range frequencies. However, if you want your piano to cut through the mix, especially for leads, I usually reach for a little boost between 3-4kHz.
Small boosts can usually do the trick. I don't like to boost too much here, as pianos can really start to sound “sharp.”
Transients
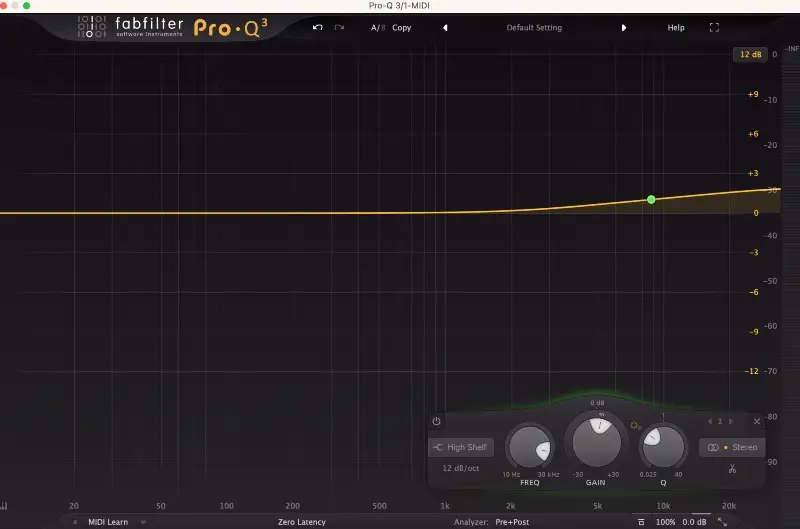
Transients are the initial attack or the "hammer hitting string" sound you hear when the keys are first struck. These sounds typically sit in the 9-11kHz range , and they’re crucial if you want your piano to punch through the mix.
If you're working in genres like pop, rock, or electronic music, adding a little boost here can really make your piano cut and shine. I love this range when I need the piano to cut through a busy track, especially when there are other instruments fighting for space in the higher frequencies.
That said, too much of a boost in this range, and your piano could end up sounding harsh or overly bright. A subtle bump will usually do the trick.
Best Piano EQ Tips
EQ In Context
When it comes to EQing, it’s important to think in terms of the mix . A piano might sound great solo, but when you start adding other instruments, that’s when it actually matters. EQing in context means making adjustments based on how the piano interacts with the rest of the track, not just how it sounds on its own.
If you EQ in isolation, it’s easy to fall into the trap of making it sound perfect by itself, but then it gets lost when the rest of the mix comes in.
If you're having trouble hearing your piano EQ moves with the rest of the mix playing, you can EQ in solo and A/B the EQ with the full track playing. Solo the piano, tweak the EQ, and then switch back to hear how the changes are sitting with the whole mix.
Use a Narrow Q to Get Rid of Unwanted Resonances
Recording acoustic instruments, especially something as nuanced as a piano, can be a bit tricky. Even if you have solid recording gear and a great player, sometimes the room you're in or the condition of the piano itself can introduce some annoying, unpredictable resonances.
When I run into something like this, I use what I like to call the “sweep and destroy” technique. It’s exactly what it sounds like: I sweep through the frequency spectrum with a narrow Q (the width of the EQ band) and listen for anything that's not sitting sit right. These are usually resonances that aren’t adding anything useful to the mix. Once I find them, I can notch them out without affecting the rest of the sound too much.
I also like to use FabFilter Pro-Q3 parametric EQ plugin for this because of its dynamic functionality. What’s great about Pro-Q3 is that you can set it to only cut those resonant frequencies when they get too loud, so it’s not constantly affecting the sound, but only when needed.
Final Thoughts - Using Your Piano EQ Roadmap
And there you have it - how to EQ piano like a pro!
These piano EQ settings should give you a solid roadmap for getting your piano sitting just right in the mix, but remember, don’t take them as gospel.
Every piano track is different. Beyond the instrument itself, the way you record piano will naturally be different than the next person. You're likely dealing with a completely different mic setup, a funky room, or a piano with its own personality (or lack thereof).
What makes the process fun is that there’s always room to experiment and find what works for your piano sound!
So, while these piano EQ suggestions should help guide you, don’t be afraid to step off the beaten path. Cut or boost as you see fit, and trust your ears. If you find that something isn’t quite working, try a different approach.
Also, if you’re feeling like EQing piano alone isn’t cutting it, a little bit of analog-style saturation can do wonders for bringing your piano to life.


