

There are countless reasons why you might want to remove reverb from your audio recordings, whether you’re a podcaster, content creator, musician, or sound engineer. What all these audio-related fields have in common is the constant strive to achieve professional-sounding results, even with significant budget constraints.
Reverb is one of those sonic elements that can enhance or compromise the quality of your audio. In the right quantity, it can enrich a vocal recording or add realism to a musical performance. However, it can also make your audio sound muddy and unclear if not carefully balanced with the soundstage you’re creating.
Today we’ll analyze the nature of reverb, how we can prevent it, and most of all, how we can remove it from our audio files in post-production.
The Nature of Reverb
Reverb is a natural acoustic phenomenon that occurs when sound waves reflect off surfaces and objects, blending with the original sound and creating an echo effect. This effect influences the quality and ambiance of sound in many ways: it can make a musical instrument or voice sound more natural and add an ethereal atmosphere to your recordings, but it can also cause your audio to lose clarity.

It all comes down to the behavior of sound waves as they interact with their environment. When a sound is produced, it travels through the air as a wave and bounces off surfaces, creating a series of echoes that arrive at your ears at slightly different times. This superimposition of sound waves is what we call reverb.
Indoors, reverb is caused by the reflections of sound waves off walls, ceilings, floors, and objects within a space. The size and shape of the room, the furniture, and construction materials define the characteristics of the reverb.
Hard, flat surfaces like concrete walls or glass windows reflect sound waves more efficiently, while soft materials such as carpets, curtains, and upholstered furniture absorb sound waves, reducing reverb.
Although reverb is less common outdoors, it can still occur in certain environments like large open structures or natural settings with reflective surfaces like cliffs or large bodies of water.
The parameters that define reverb are its duration (reverb time or RT60, which is the time it takes for the reverb to decay by 60 decibels), diffusion (the spread of reflections), and frequency response (how different frequencies are affected differently by the reverb).
How To Prevent Reverb While Recording
Unwanted reverb can muddy your sound, making post-production more complicated and time-consuming. So how about trying to prevent it before recording your audio?
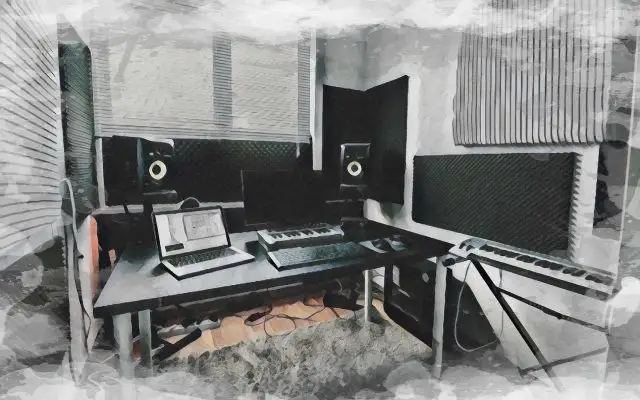
The first step to prevent reverb is choosing the right environment for your recording sessions. A room with minimal reverb, such as a small, carpeted room with soft furnishings, is ideal if you're looking for a reverb-free environment. Avoid rooms with hard surfaces like concrete, glass, and bare floors, as they reflect sound much more efficiently.
If you're planning to create your own recording studio, removing unwanted reverb should be your top priority. Use absorptive materials (blankets, curtains, or portable acoustic panels) to cover reflective surfaces and absorb sound waves, and place diffusers like bookshelves or plants in the room to scatter sound and break up direct reflections.
There are even faster solutions to the reverb issue. For instance, positioning the microphone as close as possible to the sound source will increase the ratio of direct sound to reflected sound, reducing the impact of unwanted sounds significantly.
Make sure you're using the right mic for your project. Directional microphones like cardioid or shotgun microphones are designed to capture sounds from a specific direction, meaning they won't capture the surrounding sonic elements that much.
Many recording devices these days offer built-in digital signal processing (DSP) that helps you mitigate reverb in real-time, but they're not magic tools: proper acoustic treatment and microphone technique are still crucial, and that's where you should start when removing reverb.
Room correction software are a great option if you have a DAW, and if you're a musician, they can revolutionize your workflow with endless spatial possibilities.
Remove Reverb from Audio in Production
Removing reverb from an audio file in post-production has become increasingly simple over the years. I've been working in the music industry for more than a decade, and it's fascinating to see how much things have changed and how many options we have at our disposal nowadays.
Now, just like we have dedicated vocal remover software, there are also specialized tools that can distinguish between the direct sound and the reverberated sound in an audio signal. These software can analyze the signal for characteristics that define reverb, such as timing, frequency content, and decay of sound reflections.
These tools can then mitigate or remove reflections from the audio file without significantly affecting the direct sound, which brings to life a cleaner recording that sounds as if it were recorded in a more controlled environment. Many of these software tools offer adjustable parameters, so you can fine-tune the amount of reverb reduction and control the processing applied to the audio.
As you would expect, the results in your audio recordings can enhance your sound and make it more professional, regardless of your field.
In the ever-growing podcasting ecosystem, clear voice recordings are crucial if you want to engage with your listeners and ensure the content is easily understood.
In music production, adjusting reverb in post-production can help achieve a cleaner mix, especially when it comes to vocals or acoustic instruments recorded in less-than-ideal conditions, and offer a more precise spatial placement of elements within the mix.
Finally, removing reverb in film and video production can help dialogues cut through the mix, even when layered with sound effects and background music.
The Best Tools for the Job
Audacity
Audacity is all you need if you're looking for a quick fix for your audio needs. It's a free, open-source digital audio editor and recording application software available for all operating systems. While not a reverb removal tool per se or not as advanced as other, more expensive tools, Audacity does have noise reduction and audio effects that can help mitigate mild reverb effects in your audio file.
iZotope RX De-reverb
The iZotope RX audio editor is widely regarded as a standard in the industry, and rightly so. The RX de reverb module within iZotope RX offers precise control over reverb reduction, using advanced algorithms and noise profile tools to separate and reduce reverb components from your audio project.
It's particularly effective when cleaning up dialogue and vocal tracks, with both automatic and manual control options that make it ideal for beginners and pros alike. More expensive than most alternatives, its extensive features justify the investment if you're serious about audio production.
Zynaptiq Unveil
Zynaptiq Unveil is a great plugin designed for reverb reduction and signal focusing. It uses cutting-edge real-time signal processing technology, which allows it to separate reverb from the direct signal in your audio recording. The result is that users can have complete control over the amount of reverb they want in their recordings.
Unveil is popular because it notoriously maintains the natural character of the original recording while reducing unwanted noise. It's perfect for music production, post-production, and sound design but has a steeper learning curve than most automated plugins.
CrumplePop
This has been my go-to tool for years. CrumplePop offers a range of audio plugins for video editors and podcasters, including tools for noise reduction and reverb removal.
Their plugins are extremely easy to use: you can either use the software as a standalone version or as a plugin to run on your DAW. Plus, it works seamlessly with popular video editing software such as Final Cut Pro and Adobe Premiere Pro.
Each plugin is specifically designed to tackle certain unwanted elements of your audio file, from echo to background noise removal, and each tool is designed to be as intuitive and effective as possible.
Final Thoughts
Remember that prevention is better than cure. Start by ensuring that you're recording audio in the best possible location, with as little natural reverb as possible. Next, make sure your audio equipment is up for the task. Are you using the right microphone for outdoor recordings? Is your mic designed with podcasters in mind? Sometimes, it all comes down to having the right gear for the task.
Finally, familiarize yourself with the powerful post-production software mentioned above. Each one of them, when properly used, can bring to life professional recordings and enhance the audio quality of your audio content.
Good luck!


