

Saturation and distortion find their way into just about every mix I do.
Whether you want to warm up your individual tracks or add some major crunch to your vocals or guitars, these tools are wildly versatile.
However, with such a wide stylistic range of saturation and distortion devices, many producers get confused when it comes to choosing the right one for their goals. Plus, with the endless array of saturation tips online, many producers end up doing more harm to their mixes than good.
That's why, in this guide, I want to explain everything you need to know about the differences between saturation and distortion.
Let's dive in!
The Difference Between Saturation and Distortion
If you're in a TLDR mood, I'll give you the quick lowdown of the two.
Saturation is a result of distortion and compression that comes from overloading an electrical system (e.g. a tape machine or amplifier).
Distortion , on the other hand, is a term we use to describe the alteration of a waveform shape, creating a unique tonality compared to the 'dry' or undistorted signal.
In music production, producers tend to use these terms interchangeably. Even beyond the terms 'saturation' and 'distortion,' you may have heard other similar terms like overdrive, fuzz, harmonic distortion, crunch, or more esoteric words like 'vibe' and 'color.'
Just like the term "producer" changed over the past few decades, so have these terms, which is likely why it's so difficult for many producers to get a grasp on one or the other.
It's important to note that while saturation and distortion are similar, they mean different things at their foundation. To start, we'll look at how saturation occurs as a whole and the components that make it up. Then, we'll get into distortion before looking at the unique styles of each of these types of processing you can use.
Understanding Saturation
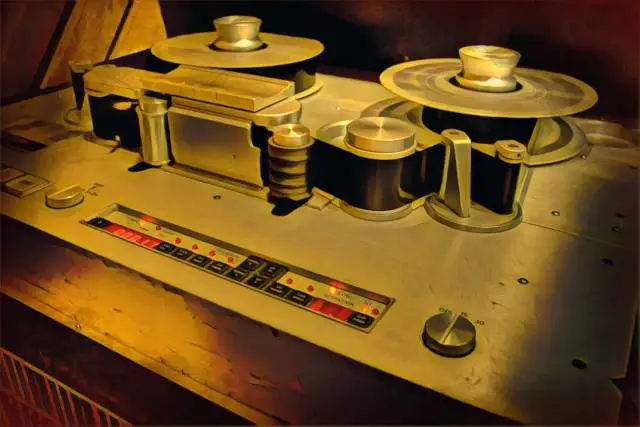
While we use the term saturation to explain an effect we use in audio processing, it used to be a physical process.
When engineers would send an electrical signal into a piece of equipment with electrical components, and that signal rose above the threshold the equipment could handle, we'd get the recognizable audio effect we call saturation.
There are a few reasons why this happens.
Compression in Saturation
Let's start by imagining that we're running an electric signal, such as a DI from an electric guitar, into an electrical component like a transistor, such as from a hardware console. The way in which that transistor acts will depend on the level of the incoming signal.
If we send that guitar through the console and the output level is the same as the input, that's a linear response .
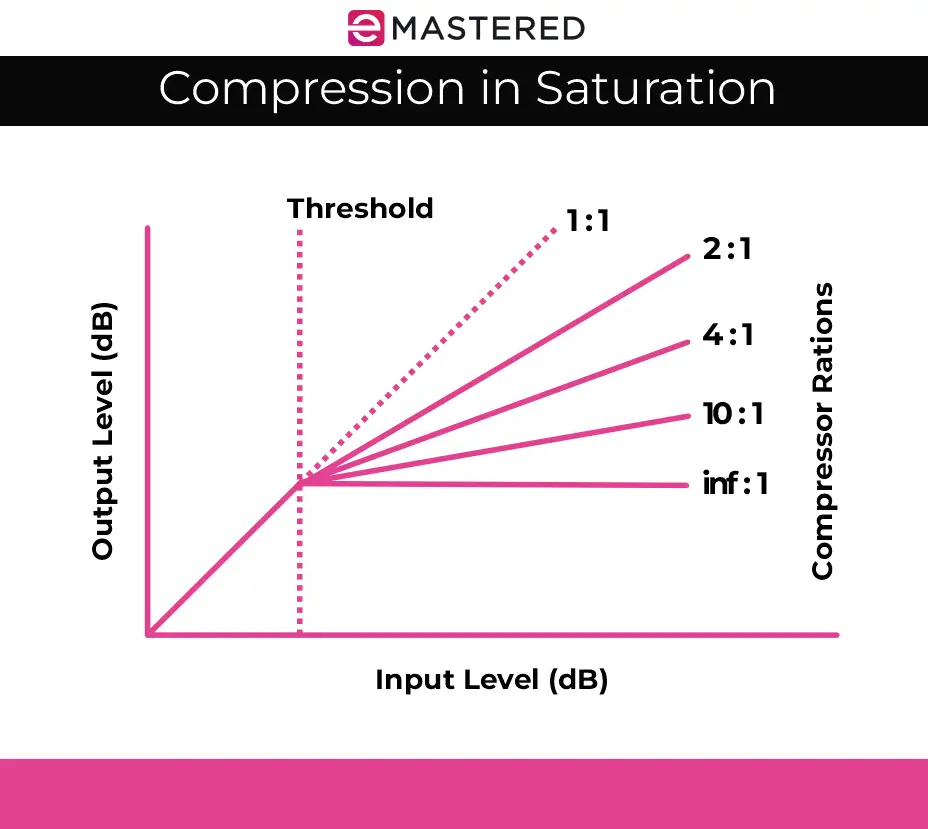
Let's take a look at the graph above, which represents compression ratios.
The first line, moving from left to right, represents a 1:1 ratio . This is a linear line where the input matches the output.
As we move to 2:1 , we get to a point where every 2 dB of input comes out as 1 dB. This is a non-linear response .
Bear with me here as this relates to saturation.
If the incoming guitar signal that we talked about earlier was running so hot that the transistor in the console couldn't handle it, it would have to initiate a non-linear response. So, if we think of the graph above as the way a signal moves into an electrical component, we can think of the higher ratios as hotter incoming signals.
Once we overload the console with the hot incoming signal of the guitar, it'll start to compress it, giving us soft-knee compression . It's called 'soft knee' because the onset of the compression is gradual as the ratio between the incoming and outgoing signal changes. This differs from hard-knee compression, wherein the incoming signal compresses to the set ratio immediately once it hits a given threshold.
When the console in this example is overloaded at a lower level, we may get a relatively low 2:1 ratio . However, at higher levels, it can move up to 4:1 .
The curve of the knee and the rate of signal compression will depend on the type of electrical component we're saturating. This is why tube saturation sounds different from both transformer and transistor saturation, which also sound different than one another.
In essence, the saturation tones you can get are endless, as there are hundreds of thousands of different types of electrical components that we can saturate using different signals. Even the same incoming signal can saturate a unit differently depending on the frequency of the notes it's playing or the overall dynamic range of the signal.
We'll dive more into the different types of distortion and saturation in a bit, but first, let's look at the distortion aspect of saturation.
Distortion in Saturation
Okay, I know you're probably thinking, "I thought you said saturation and distortion were two different things?"
You're right, though it's a bit more complex than that.
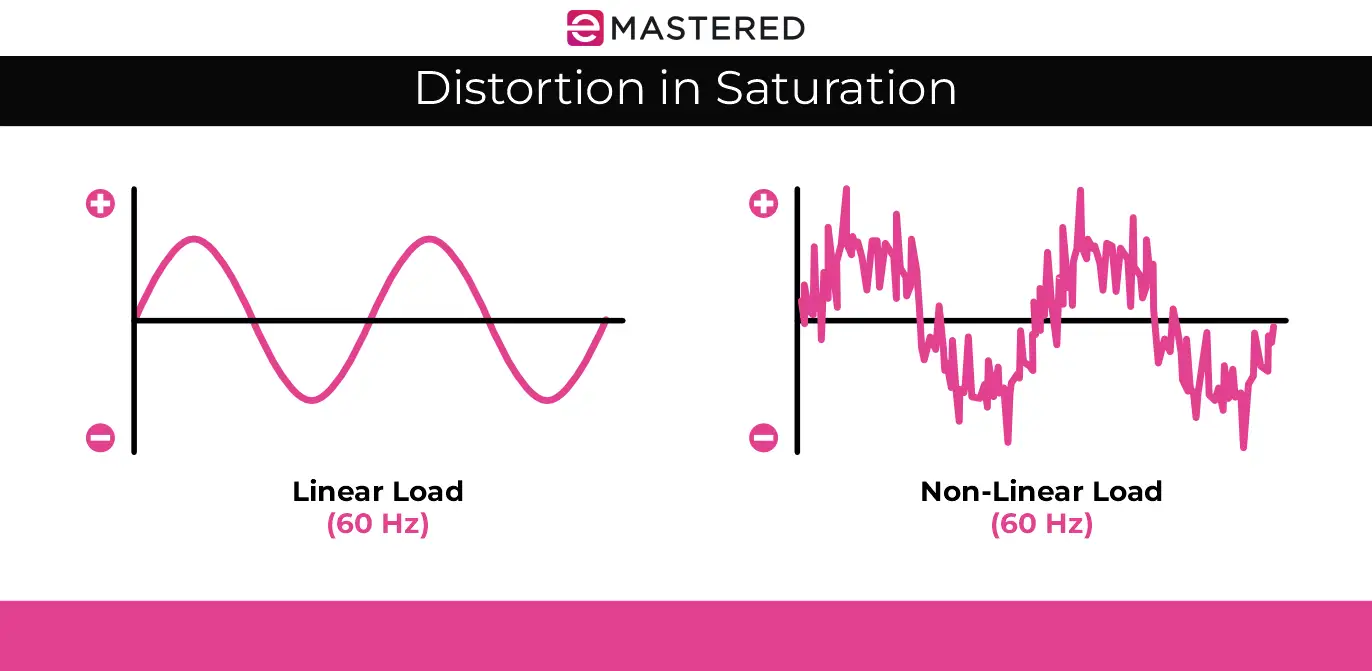
When an incoming signal gets hot enough, you not only get compression, you get distortion. This is because small fluctuations in the waveform begin to appear as the signal pushes harder into the given threshold.
If we look at the graph above, we can see spikes, otherwise known as harmonics , in the non-linear load, which essentially makes the waveform more complex than the original.
Harmonics are multiples of the incoming signal on the output side.
Let's say we ran a 100Hz sine wave through a console and cranked the incoming signal high enough to saturate the transistor. That would cause distortion, generating harmonics atop the signal.
It could generate multiples of 200Hz and 400Hz , which would be second and third-order harmonics, the first of which would be the initial 100Hz sine wave.
The type of harmonics generated would depend on a number of variables, including the level of the incoming signal, whether that incoming signal is already saturated or not, what types of electrical components are being used, and so on.
Even random variables like the operating temperatures of the devices could influence the harmonic content. An amp with hotter tubes, for example, will act differently than an amp with colder tubes.
The point of all of this is that saturation is a very nuanced form of processing, where the sound you get depends on an endless combination of variables. Before we dive in and look at the different styles of saturation, I want to quickly make sure you understand exactly how distortion on its own differs from what we just talked about.
Understanding Distortion
As I said before, distortion has to do with waveshape alteration.
There are endless styles of distortion, as with saturation, including phase distortion, intermodulation distortion, bit-depth distortion, and one of the most popular, harmonic distortion. These can also vary in styles and sound based on several variables.
Now, if we were to get technical here, we could say that any form of audio manipulation is distortion, as we're taking a sound in its original waveform and altering its state. When you add a high-pass filter or compress a signal, you're altering its waveform. When you send a signal through a chorus effect, you're altering the waveform.
However, it's unhelpful to think about it like that in this context, which is why we'll stick to talking about harmonic distortion . For science's sake, just keep in mind that distortion exists basically anywhere and everywhere in audio, even within sounds that we'd think of as relatively "clean."
Now, onto harmonic distortion, which is what most people conjure up when they think of general distortion.
It's the sound you get when you record a signal to analog tape and the magnetic particles on the tape cause subtle distortion or when you pass a signal through a tube amp and the non-linear nature of the tubes introduces harmonic generation.
This is even true in A-to-D conversion (when we're moving from an electrical format to a digital one).
Our digital systems are limited. When you record to a 16-bit system, for example, there's only so much codifiable space for the infinite amount of detail we can capture using our electrical or analog hardware. The bit-depth of the system will dictate that level of detail, which is why 24 bits give us even greater detail, and so on.
The difference between the level of detail we get in an analog signal and the lesser detail we get with a digital signal is called quantization distortion.
With a high bit-depth (24 bits or higher), you won't really notice it. However, as we start decreasing that bit depth, the distortion becomes more and more apparent.
Of course, this is just one style of distortion. The point that I wanted to make was that you'll get it no matter how you process or reproduce your audio, no matter how subtle it is.
Types of Saturation and Distortion
By now, you should have a pretty solid grasp of the similarities and differences between saturation and distortion. Let's explore some of the different types of common and uncommon saturation and distortion units you might use in your music production.
Tape Saturation
The first form of saturation I want to talk about is quite unique to others, as there aren't any electrical components involved. This is because the saturation we hear is the consequence of magnetic particle reorientation.
When a hot enough signal hits the tape, it moves these particles around to create saturation.
The second unique thing about tape saturation is that before your signal even gets to the tape itself, it has to go through an amplifier of some sort. Those amplifiers will have tubes and transistors as their main components, allowing saturation to occur at a few different points in the signal chain.
In theory, you could drive a dry vocal into the amplifier of a tape machine to get the sound of transistor or tube saturation, then drive that saturated signal onto the tape to get the sound of tape distortion itself.
This is one of the reasons tape saturation is one of my favorites. The complexity of it alone allows for an endless tonal variety.
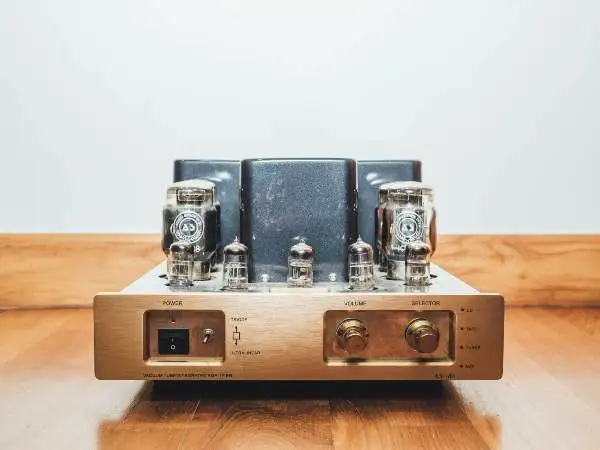
Tube Saturation
Tube saturation has a much fuller sound compared to other types of saturation.
When a signal passes through a tube amp, you get a stronger second-order harmonic, meaning it exactly doubles the frequency of the original sound.
It's important to note, however, that the type of tube will dictate the amount of compression and harmonics generated.
The question is, why does tube saturation occur in the first place?
In tubes, you'll find diodes, which are electronic components that allow current to flow in one direction only. They are used to rectify AC (alternating current) to DC (direct current) and shape the signal, contributing to the characteristic warm and musical distortion associated with tube amplifiers.
When these diodes are overloaded or saturated, this means they stop more electrons from traveling from the tube's cathode to its anode or plate. The overloading causes a positive charge in the tube, 'clamping down' on the flow of electrons, which causes compression in the output.
Transistor Saturation
Transistor saturation is a bit different from tube saturation in that it relies more on mid and high-order harmonics. When you run a hot signal through a transistor, you get a sharper and brighter sound. I typically use this style of saturation when I want to add a gritty or edgy quality to my incoming audio, especially in heavier genres like rock or metal, when I need a signal to cut through a wall of already distorted sounds.
Under normal conditions, a transistor will amplify an input signal by increasing its voltage or current, allowing it to become stronger without changing its original shape.
However, when the input signal becomes too strong, the transistor reaches a point where it cannot increase the output voltage anymore. This is because the internal components of the transistor have a maximum voltage they can handle, and once this limit is reached, any additional input voltage results in a drop rather than an increase. We call this a voltage drop .
At this saturation point, the transistor is fully "on" and cannot provide any more amplification. The output voltage becomes "clipped," meaning the peaks of the waveform are flattened. This clipping distorts the signal and generates additional harmonics.
Overdrive
Overdrive is a warmer and more transparent form of distortion that utilizes analog soft-clipping.
It has a similar sound to tube distortion, as it's meant to emulate the sound of a driven amp without the physical tubes.
You'll hear it a lot in blues music, especially when a guitarist wants a bit of grit in their tone without a lot of intense harmonic distortion in the high end.
Fuzz
When we hit a transistor or operational amplifier really hard, we get a heavily clipped signal. In a fuzz pedal, this creates a very square-like waveform, which is rich in harmonic content.
This is where we get that characteristic fuzzy sound. The harsh clipping generates both even and odd harmonics, giving us a complex output.
Jimi Hendrix was one of the original proponents of the fuzz sound. His Fuzz Face pedal can be heard on legendary tracks like "Purple Haze" and "Foxy Lady."
Digital Processing
As I briefly mentioned earlier, you can get distortion in your mixes using digital processing. We achieve digital distortion or downsampling by reducing our audio's sample rate to get rid of samples at specific intervals.
The result is a very gritty distortion that can best be described as 'harsh' and 'digital.' It's a very popular form of distortion for lo-fi producers.
This is because many early digital samplers, like the E-Mu SP-1200 and the Akai MPC60, often had lower sample rates and bit depths compared to modern standards, and getting the sounds of those devices with pristinely recorded audio means matching the sample rate characteristics.
The same can be said for bitcrushing , which we get by lowering the audio's bit depth.
Higher bit depths (like 16-bit or 24-bit) provide more detailed representations of the audio signal, though when we reduce the bit depth, fewer bits are used to represent each sample, and we get a "grainy" or "crunchy" texture with less dynamic range.
How to Use Saturation and Distortion In Your Mixes
Back in the day, saturation and distortion were just part of the recording and mixing process. In fact, many mixing engineers tried their best to mitigate or avoid the many characteristics of saturation and distortion altogether in an attempt to achieve a higher level of clarity.
However, now that we're years into the digital domain, many producers and engineers are starting to find that their mixes sound too sterile and 'digital.'
Luckily, we can balance out the best aspects of digital versatility and characterful analog saturation with software. Let's look at a few different ways in which we can use saturation and distortion in our mixes.
Clipping Audio
Clipping is all the rage these days, especially in hard-hitting genres like hip-hop.
When we clip an audio signal, we effectively reduce its peaks, chopping off the loudest part of the waveform. The loudest portions of the waveform are often the transients, and because transients have a relatively short duration, a slight bit of peak reduction isn't very noticeable.
However, when you take it past the point of transparency and round off your peaks, the effect becomes much more apparent. This is great for getting loud drums, as you can squish the transients of a pokey snare, for example, to maintain the punch and raise the volume without triggering the limiter at the end of your mix bus chain.
Helping Your Bass Translate
One of the issues I often run into with bass guitar is that it'll boom on large studio monitors and car stereo systems, though the moment I listen to that same mix on smaller speakers, such as a smartphone or tablet, the low-end gets lost, leaving me with a mix that sounds like it has a hole in it.
In this case, I'll duplicate my bass and high-pass it. I'll then send the duplicate through a distortion unit to create more top-end harmonics and gradually mix the duplicate in with the original signal. The combination of the two should be relatively subtle in this case, so much so that you barely hear it on larger speakers, though enough so the bass is apparent on small speakers.
Gluing Drum Samples
When you record a live drum kit in a studio, you get a cohesive sound, as all of the drums were recorded in the same room. However, when you Frankenstein a kit together with different sounds and samples, the end result can feel a bit disconnected. This is often because the samples were recorded in different locations, and our brains are keen enough to sense those small nuances.
While you can remedy this issue by sending all of your samples to a single room reverb and blending them in or using a compressor to help them react to one another, I like to use saturation. I'll often send all of my drum samples to a parallel distortion bus with something relatively heavy on it (Soundtoys Decapitator and Devil-Loc) and mix that parallel send in with the clean drum bus to bind everything together.
Give Vocals Character
Once in a while, I'll get vocals that simply don't have the aggression or power to match the instrumentation. One of my go-to solutions is setting up a parallel distortion unit.
By running the duplicate vocal through a heavily distorted parallel channel and mixing it in with the lead, you can pull a bit more grit out of it, giving the effect that the singer pushed their vocal into the mic a bit harder.
Warming Up Your Mix
Tape saturation has been an integral part of my master buss chain for quite some time. Not only is tape saturation a nice way to glue a mix together, but it also applies a nice bit of harmonic distortion to a mix that might otherwise need some flavor.
Waves J37 Tape and UAD Ampex ATR-102 are two of my favorite tape machine emulations, and both impart stellar tonal characteristics on entire mixes.
Top Saturation and Distortion Plugins
To start implementing some of the techniques above, you'll need a decent set of saturation and distortion plugins. While your DAW likely comes with some decent saturation plugins (I still use the SansAmp plugin in Pro Tools to this day), there are many excellent third-party options that I personally can't live without these days.
Soundtoys Decapitator
If the sound of legit analog hardware is what you're after, I can't think of a better plugin than Decapitator from Soundtoys. From the warm and round sounds of tubes to the high-octave fuzz of transistors, Decapitator does it all.
You'll find five different models of unique hardware, from analog circuitry to vacuum tubes, each of which can be dialed in with finesse or pushed to the edge using the 'Punish' button when you need something to stand out.
With a Mix knob, a Tone knob, a Drive knob, and high and low-cut filters, you get plenty of control, which is one of the reasons it's been deemed a favorite by endless producers.
Waves J37 Tape
The J37 Tape plugin is an emulation of the classic Abbey Road tape machine. The team at Waves made it true to the original, giving you all of the original controls of the hardware unit and more.
It delivers excellent analog warmth, perfect for giving sterile recordings a more characterful sound, and there are plenty of built-in delay and modulation effects for additional style. I often use these on busses to glue elements together, such as drums, guitars, and background vocals.
FabFilter Saturn 2
FabFilter is another one of my favorite plugin developers, as they create some of the most flexible modern plugins on the market. Saturn 2 has become another staple in my production setup, especially when I want multi-band saturation.
You get several types of distortion and saturation in this plugin, emulating the sounds of tape machines, tubes, guitar amps, transformers, and more. Being able to hone in on specific frequency ranges adds to the overall flexibility, and the added modulation controls offer even more unique effects.
XLN Audio RC-20
While RC-20 is more a creative effect plugin than a pure saturation or distortion plugin, the fact that it delivers the sound of vintage hardware better than most plugins gives it a dedicated spot on this list. Whenever I want to breathe some texture or life into a track, though I'm not sure exactly what I want, RC-20 is what I reach for.
Beyond the versatile DISTORT module, you get a noise generator, a wobble and flutter generator, a bitcrusher and degraded, a reverb module, and a volume drop module that emulates the volume loss often associated with tape recorder playback.
Final Thoughts
As you can see, there are several characteristics that tether distortion and saturation to one another. Though there are many things to takeaway from this comparison guide, the main thing should be not using these two terms interchangeably.
Start experimenting more with saturation and distortion in your mixes and see what kinds of sounds you can get!


