

The recording phase is arguably the most important part of the music-making process. After all, without a solid foundation, it can be challenging to create a well-crafted piece of music. Recording vocals at home can be intimidating, to say the least.
However, with a little time, patience, and strategy, you'll be able to record quality vocals from just about anywhere. We've put together the ultimate guide for recording vocals at home so that you can get the most out of your equipment.
Below, we'll dive into microphone selection, proper mic placement, tracking techniques, and more to help you capture studio-quality vocals with ease.
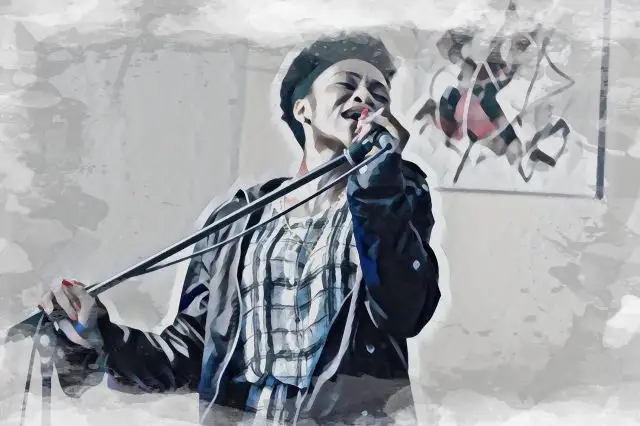
1. Select The Right Microphone For The Job
Unsurprisingly, an excellent vocal recording starts with the right equipment. Not every microphone type will be suitable for every singer, so it's important to familiarize yourself with all microphone types as a recording engineer.
Here are some of the most common microphones you're likely to see in the studio:
Small Diaphragm Condenser Mics
Like most condenser microphones, small diaphragm condenser microphones have a bright and airy sound. It doesn't have a large bass response and is great for pop vocal tracking. This type of condenser mic is typically seen throughout pop music. In most cases, pop music will utilize a cardioid condenser mic since these microphones can accurately pick up a singer's vocals with bright, sonically-pleasing tone quality.
Large Diaphragm Condenser Mics
Condenser microphones are very versatile and can be used to record pop vocals to instruments. Large-diaphragm condenser mics tend to have a fairly balanced frequency response. Anything from alternative to rock and pop vocals might utilize this condenser microphone type.
Ribbon Mics
Ribbon microphones capture an incredibly natural sound and are notoriously delicate. These microphones are usually used to capture genres that have a strong emphasis on live performance like jazz. These are technically a specialized class of dynamic microphones and have a figure-of-8 polar pattern.
Dynamic Mics
Dynamic microphones are typically the most forgiving microphones available that usually have a more warm and dark tone. There's less top-end information which tends to pair well with genres like rock, metal, and hip hop. Most singers are utilizing dynamic mics when performing live.
2. Make Sure Your Vocalist Is Prepared
If you're the vocalist or tracking someone else, you'll want to make sure your vocalist is accurately prepared to start tracking vocals so that you don't waste studio time.
Lyrics
It's perfectly natural for vocalists to hold notes nearby during a session, but vocalists should have their lyrics memorized by heart so that they can focus on the session at hand. Lyric props can cause excess noise while recording, and everything comes through on the microphone, including sounding unprepared.
Melodies
Before stepping into the vocal booth, you or your vocalist should have their melodies solidified. You should also practice variations for backing vocals, harmonies, and ad-libs to track during the recording process. In an official recording session, time is money, so doing your homework ahead of time is beneficial for both you and your engineer.
Hydration
Your vocal cords produce sound by vibrating. In order to vibrate properly, they need to stay properly lubricated, and therefore hydrated. Make sure you have plenty of water around throughout your tracking session.
Warm-Ups
An essential part of proper vocal technique is taking the time to warm up your voice properly. Doing so helps warm up your vocal cords so that you can seamlessly sing throughout your entire range without straining your voice. You can warm up utilizing breathing exercises, octave jumps, or even humming if you're tight on time.
3. Sound Treatment
It isn't just about what you use, it's where you use it. Even if you don't have professional sound treatment, you can still make your bedroom or living room viable for recording vocals. Take these sound treatment strategies to heart while recording vocals from home:
Select The Right Room
You might not have a vocal booth, but you may have a small, carpeted room at home. It's tempting to opt for the room that's most convenient, but remember that your surroundings play into the tone and quality of the vocal.
You don't want a room that has natural reverb. Sure, it might sound great on the raw audio, but baking an effect into a vocal track leaves little room for editing during the mixing process. The more reverb on a track, the less "forward" or more washed out it sounds. This can make it difficult to make out the vocal line, which is usually one of the most important parts of the song.
You want to avoid rooms that have windows or hard surfaces, or reflective surfaces that sound could easily reflect off of. Instead, pick a smaller-sized room built with soft items like couches, rugs, beds, and anything else that might help absorb the sound.
As a general rule, you should be able to clap in a space and not hear an echo to ensure the room is fairly "dead" so that you can capture an accurate representation of the vocalist.
Room Placement
Make sure you place your equipment away from the walls in your room, preferably towards the center of the space, but not directly in the center. Angle your microphone stand towards one of the corners and add your pop filter, mount, and mic.
Professional Sound Solutions
If you plan on recording vocals at home fairly regularly, investing in sound treatment can go a long way. Even if you can't afford a total transformation, propping up a couple of proper acoustic panels can make for an excellent temporary vocal booth.
Acoustic treatment doesn't have to be expensive, and a bulk back of affordable acoustic foam can help you absorb excess sound. Just do your best to absorb unnecessary background noise and make the room ambiance as clean as possible for recording vocals.
If you want a truly crisp sound, you can always head out to a professional recording studio to track final vocal recordings and work out demo and scratch vocals at home. Regardless, it's important to understand what a well-treated room sounds like throughout your career in the music industry.

4. Practice Proper Microphone Placement
Setting up your microphone properly is just as important as tending to your room acoustics. Here's how to ensure that your mic position is working in your favor throughout the recording process.
Room Placement
As discussed, you want to place your dynamic or condenser mic near the center of the room, but not the direct center. You'll also want to take care that your cables can properly reach your interface with plenty of slack so that you don't accidentally damage your equipment while recording or maneuvering around the room.
Distance
The proximity effect states that the closer you or a vocalist is to a microphone, the more low-end frequencies you'll pick up, and the further you are from the microphone, the airier it will sound. You'll want to keep this in mind while crafting the preferred tone for your vocal.
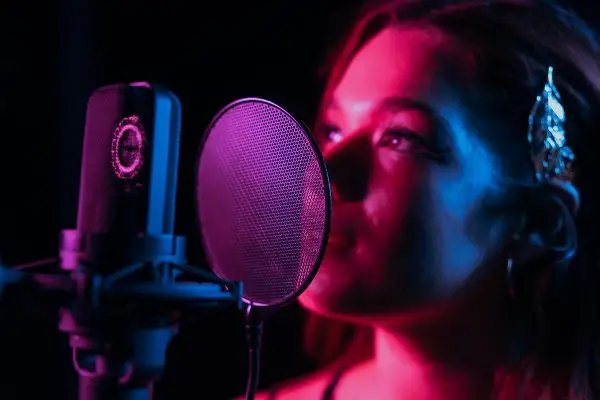
Your pop shield should be about 1 to 2 inches away from the mic, and your vocalist somewhere between roughly 5 and 10 inches from the microphone. Note that this is a generalized recommendation for condenser mics, but dynamic mics might tend to perform better when closer.
Height
Generally speaking, the starting point for mic height placement is at lip level, though your microphone position might change depending on what song you're hoping to achieve. The lower the microphone, the more low-end frequencies you'll pick up. The contrary is true as well. A higher microphone will pick up more high-end frequencies.
Adjust the height according to your vocalist's height and desired tone. Make sure that they can comfortably sing straight so they don't have to strain to get out their notes.
Angle
Don't forget that microphone angling also has a huge effect on the tone and quality of the recording. For most applications, you'll want to keep the microphone placement straight on, but experimenting with microphone angles that are slightly to the left or the right can help cut down on sibilance or pick up less low-end frequencies for catching backing tracks or alternative cuts.
Additional Equipment Consideration
To keep your microphone safe and produce a strong sound, you'll want to have compatible microphone accessories. This means investing in a sturdy microphone stand, grabbing a pop filter to cut out sibilance, and ensuring that your microphone is properly affixed to the shock mount if applicable. Essentially, make sure your microphone stand can withstand being bumped and still hold strong.
5. Configure Your Interface
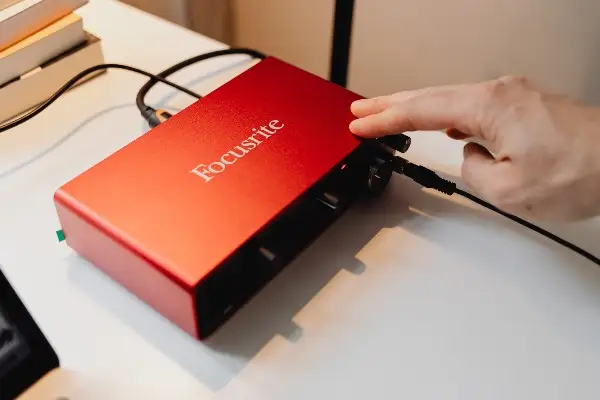
You or your mixing engineer will certainly need to think about your vocal chain after the recording process is completed, but don't forget about your hardware setup, too! You'll want to make sure you have an interface and hardware set up that suits your vocal recording needs. Here are a couple of factors you might want to take into consideration:
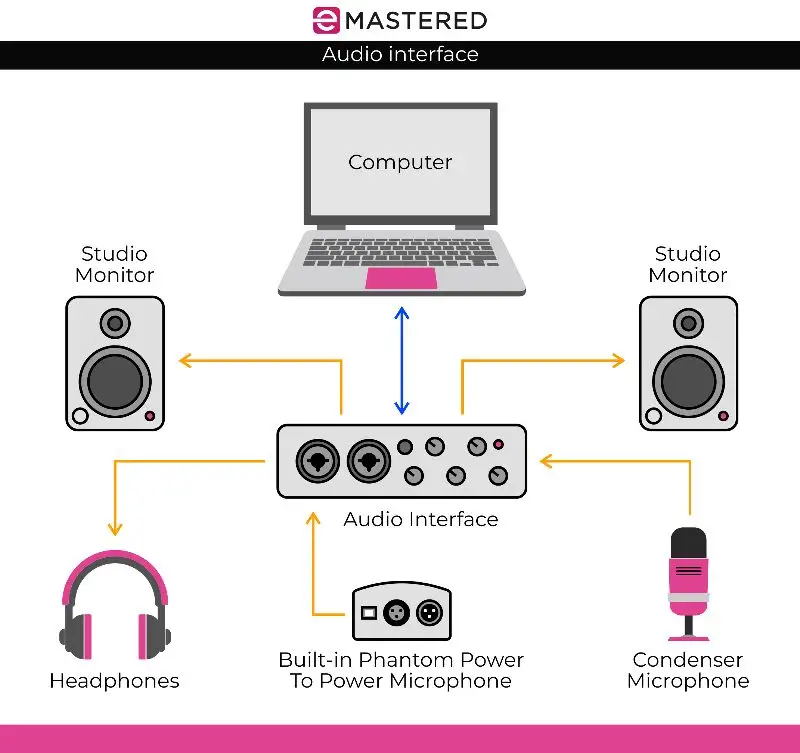
Phantom Power
Many microphones, especially popular condenser microphones require external power to operate properly. This power source is referred to as "Phantom Power" with most applicable microphones requiring 48 volts of power.
Some interfaces have phantom power built into the system, while others do not. If your interface doesn't have phantom power, you'll need another external source built into your vocal chain, usually in the form of a DI box or preamp.
Preamps
A preamp is a type of gain stage that serves as a part of the hardware vocal chain. Not all microphones require a preamp, but these tools can help boost the input signal before the audio arrives in the DAW. Preamps sometimes have built-in Phantom power and can be used to help color the sound of a vocal.
Levels
When you record vocals, you want to make sure that your levels are not too high or too "hot." If the input signal is too high straight into the DAW, you run the risk of clipping or creating unintentional distortion while recording studio vocals.
As a rule of thumb, you usually want to shoot for about 10 dB of headroom. You should not be peaking at higher than -6 dB while tracking vocal recordings. This will ensure that your mixing engineer will have plenty of space to process and experiment without running into clipping.
REFERENCE GRAPHIC: Switch "MIDI Keyboard" With "Built-in Phantom Power To Power Microphone"
6. Capturing Takes
You still have work to do after you've prepped your singer and microphone set up. A huge part of recording vocals is capturing vocals in a professional manner, even if you're just tracking your own vocals. Here's how you can capture vocals professionally while you're tracking an artist.
Saving And Staying Organized
Arguably one of the most embarrassing experiences as an engineer is having to retrack vocals because you lost or accidentally deleted a musician's files. Protect your time and reputation by saving your sessions on your hard drive, an external drive, and on a cloud-based service.
In addition to saving your sessions in multiple places, keep everything organized by naming your tracks appropriately. It may make sense to come up with a color-coding system within your DAW so that you can quickly label and organize your files while running a session.
The More, The Merrier
Don't forget to capture adlibs, backing vocals, and harmonies too. Anything that you might need in the recording, try to capture on the same day. One vocal session can sound completely different from another, so do your best to keep things consistent.
Note Taking
If you're running a session for someone else or tracking your own vocals, be sure to take notes. You might have to take shorthand notes to stay in the moment of the session, but doing so will make it a lot easier when you return to your session hours or days later.
Trust us, it's a lot easier to take a quick note than to depend on yourself to remember the nuances of the vocalist's preferences after the session has ended. This could be as simple as starring or changing tracks to a different color after your vocalist comments that they feel like they just laid down a promising take.
Be A Good Coach
As an audio professional, it's your responsibility to coach your vocalist through the recording process. Even if your vocalist is making an obvious mistake, use positive reinforcement to guide them to the preferred performance.
Remember, being on the mic is a vulnerable position. Encourage your singer, compliment them when they do well, and be the coach behind the daw that you would want to produce an excellent tracking session.
7. Don't Be Afraid To Set Up Another Session
The human voice is mysterious. A lot goes into its sound including formal vocal training, hydration, rest, and even mood. That being said, you'll find that some sessions sound better than others. A vocalist cannot perform the same vocal recording twice, so it's okay if the vocals simply aren't there on a given day.
Sometimes, recording a single can take multiple vocal sessions. If the sound isn't there when reviewing your vocal takes, set up another session. Vocal recordings are the bread and butter of most songs, and while a strong mix can help good vocals sound great, you need a good recording, to begin with.
Review your draft vocal comp with your vocalist to make sure that the vocal sound is exactly what you're looking for and rerecord if necessary. Everything builds on top of the vocal recordings, so don't take this portion of the process lightly.
There you have it! Recording vocals isn't too challenging with the help of these 7 essential principles. Enjoy the art of vocal recording at home!


