

Since trap music exploded out of the Southern U.S. in the early 2000s, it has become a dominant force in hip-hop. The genre owes much of its distinctive sound to the Roland TR-808, the sounds of which have become instantly recognizable.
When learning to make trap music, one of the first things you'll need to get the hang of is making trap drum patterns . The drum pattern, in all actuality, is what sets trap apart from other forms of hip-hop and electronic music. Of course, not all trap beats are exactly the same, and having an understanding of the small nuances found in each can make you a more versatile beat maker.
In this guide, we'll take a look at all you need to know about trap drum patterns, from the fundamental sounds to the more advanced arrangement techniques.
The Trap Beat Basics
Making solid trap drum patterns starts with having the right sounds. Whether you use sample packs or VSTs, here's a small list of drum elements you'll want to have in your arsenal before you dig in:
- 808s : Though they originated from the Roland TR-808, when most modern trap producers refer to 808s, they're referring to the musical, sub-bass patterns that often sit underneath the main kick.
- Kicks : Kicks in modern trap are usually pretty sharp with a short tail to make room for the sustain of the 808.
- Snares : The snare usually has a sharp, piercing sound and is played on the 2nd and 4th beats. However, many trap producers use syncopated snare patterns to make things more interesting, which we'll get into in a bit.
- Hi-Hats : In trap music, hi-hats are probably the most defining feature. With rapid-fire rolls and triplets alongside pitch changes and velocity automation, the hi-hat pattern is where you truly get to stand out from everyone else.
- Claps : Often used in place of or alongside snares, claps are great for adding a different layer to the beat. Most often, these are sharper, digital-sounding claps, rather than live.
Getting the Tempo Right
While the average trap beat is around 140 BPM, it can sit anywhere between 120 to 160 BPM. Note that I'm counting it in double-time here, meaning you could also say that the range falls between 60 to 80 BPM.
Making Your First Trap Drum Pattern
I work in Ableton when making trap beats, so I like to have my samples loaded up in the stock Drum Rack and ready to go. This way, I can use the beat pads on my MIDI controller and bang out ideas, rather than just placing notes on the MIDI grid. For learning purposes, however, we're going to go step-by-step as if we were drawing in our trap drum patterns instead of playing them out.
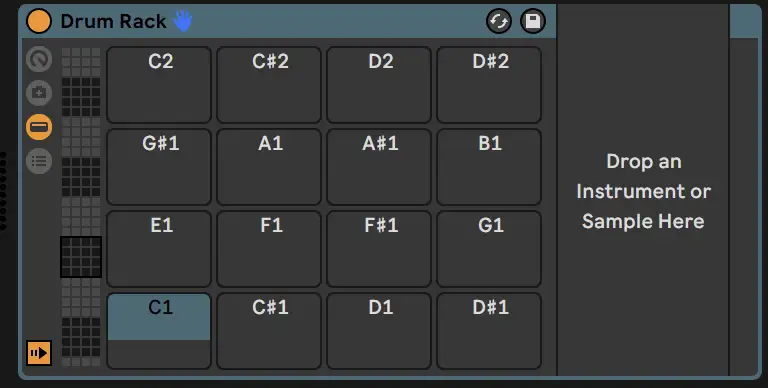
Even so, I recommend having all of your samples in something like Ableton's Drum Rack or Native Instruments' Battery 4.
Kick and Snare
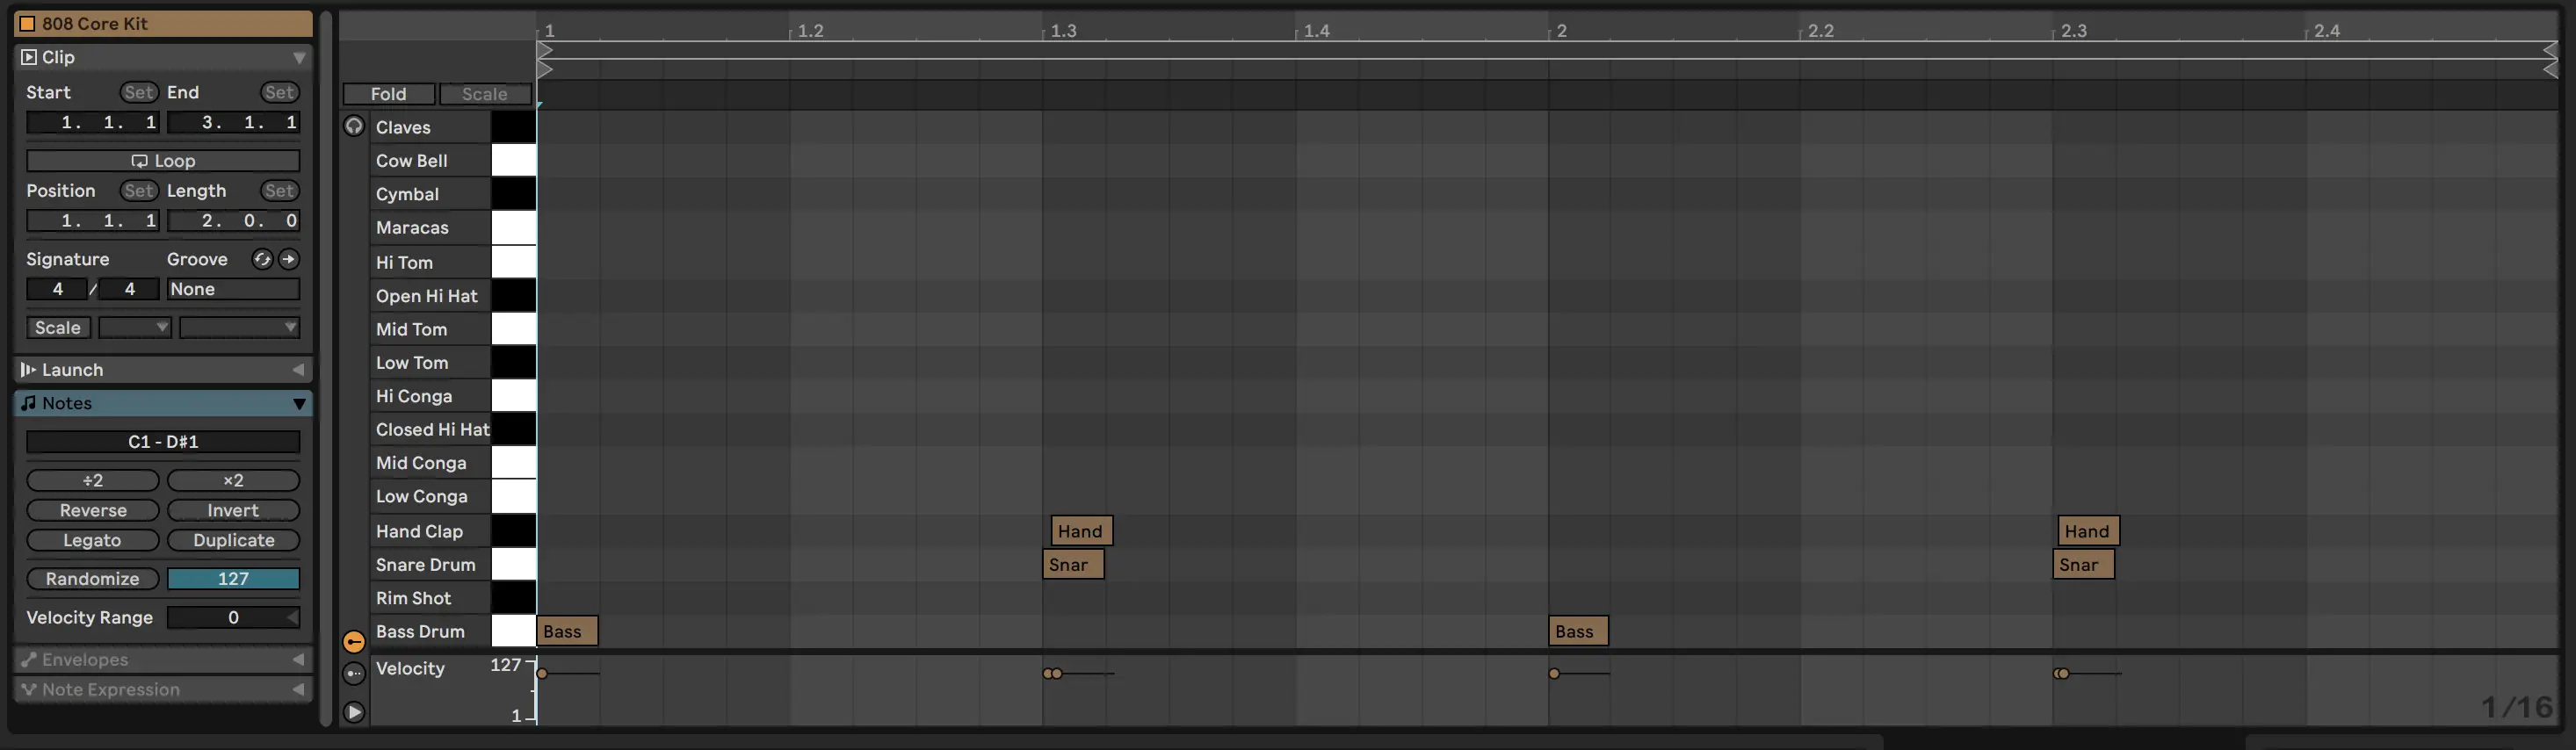
Let's start off with the foundation of any trap drum pattern - the kick and snare.
Start by placing a kick on the first beat of every bar to establish a strong downbeat. This is akin your basic 'four on the floor' pattern.
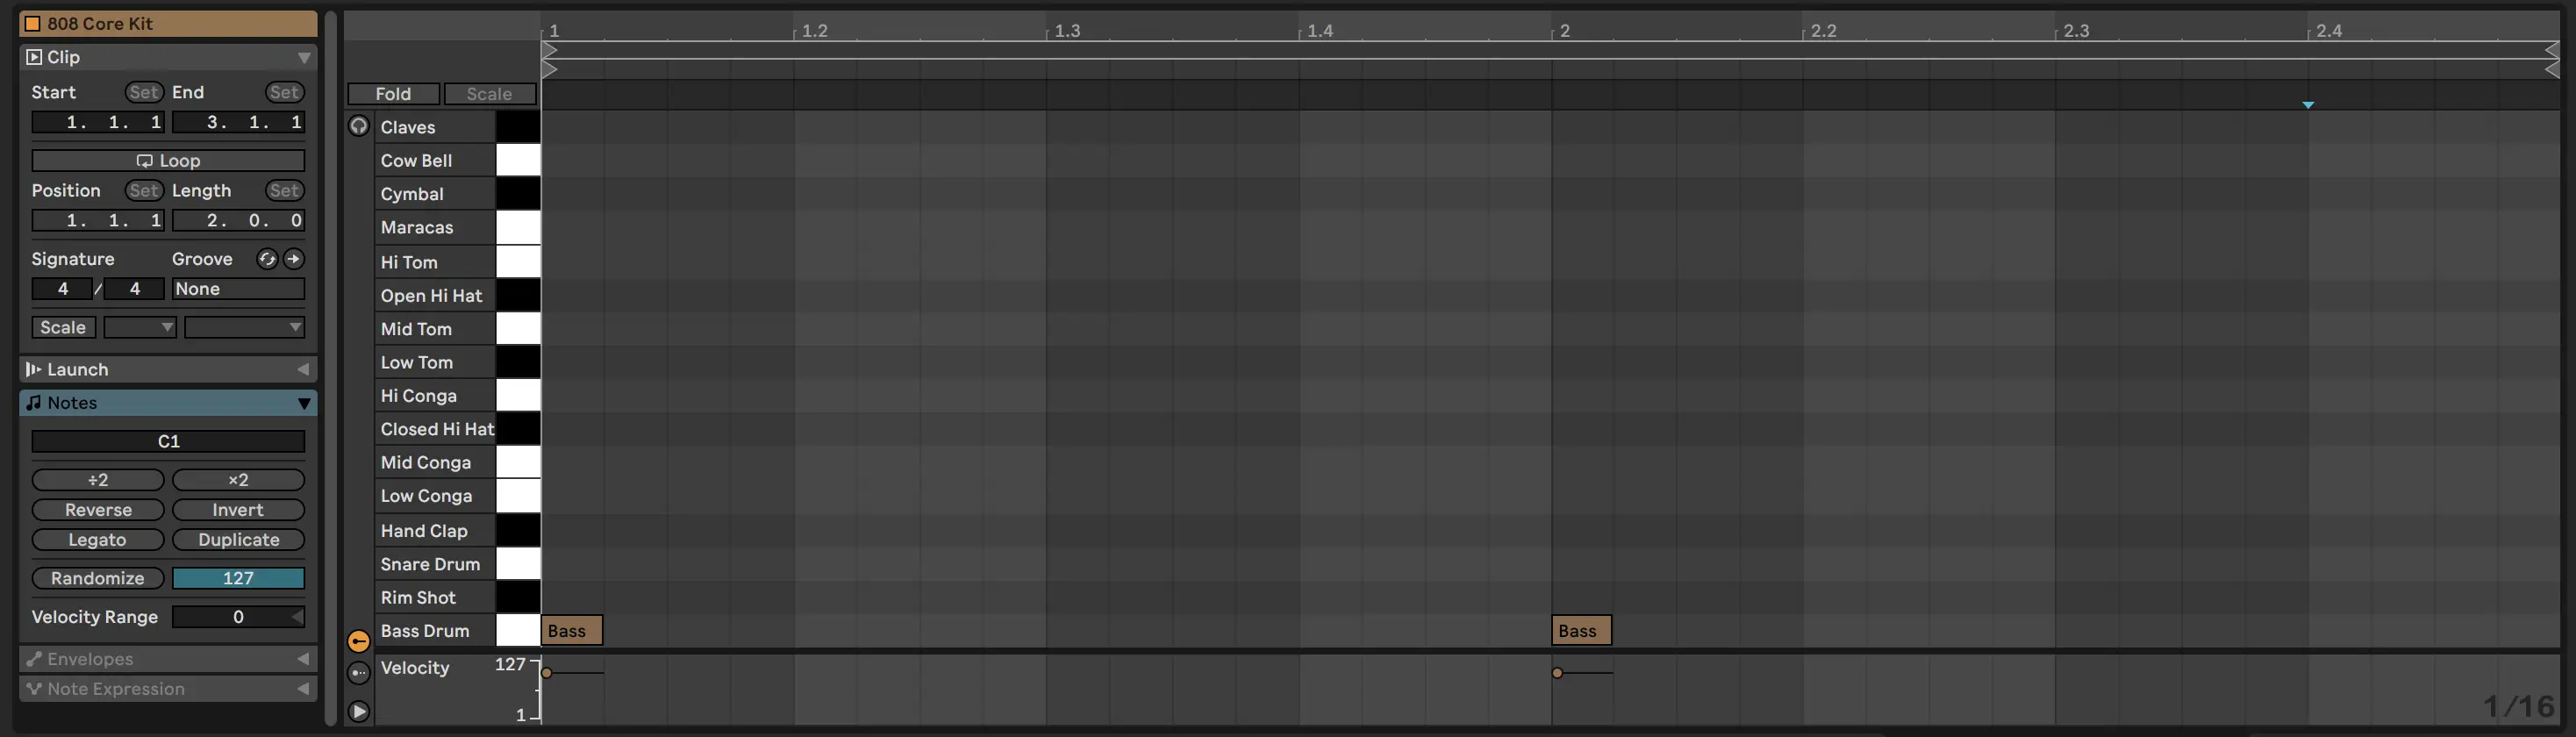
From there, you can get creative by adding additional kicks between the main beats to make your pattern more complex. Many producers will place kicks just before the third beat, for example. I also recommend experimenting with offbeat kicks to create a bit more groove.
Next, we'll place the snare.
Trap snares typically land on the second and fourth beat of each measure. Start by placing your snares there to fill in the spots where listeners will naturally expect to hear the snare.
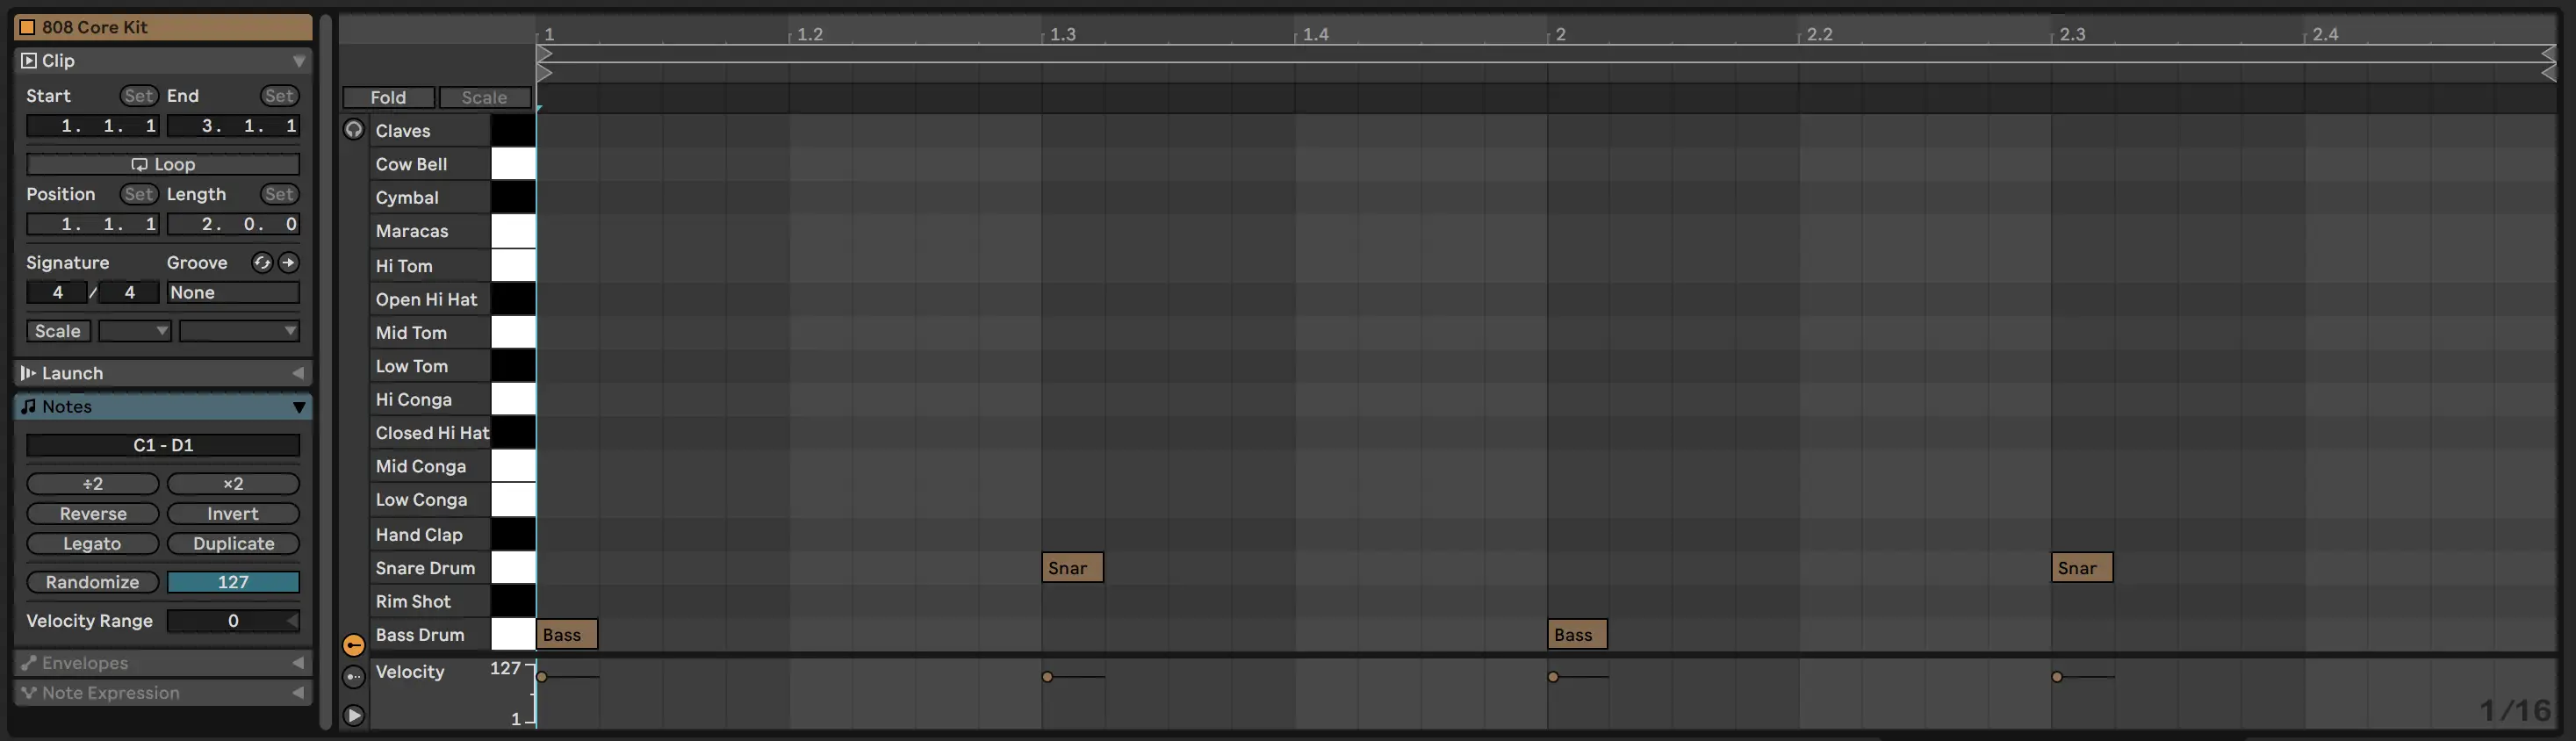
At this point, your beat should feel like it's starting to take place. You can then place some additional snares around the main beats. For example, you might try placing a snare on the "and" of a beat (e.g., between the second and third beat).
I'd also recommend layering some claps or snaps atop your snare hits on some of the stronger beats (like the fourth beat) for a bit more texture and emphasis. Try placing your layered sounds ever so slightly ahead of or behind the snares to 'humanize' your beat.
Next, try adjusting the velocity of certain kick and snare hits to add life to your patterns. If everything is the same velocity the entire time, it can start to sound mundane. Even shifting the velocity of certain hits up and down just slightly, or shifting some hits off the grid, can do wonders for your trap beat.
At this point, I often like to loop my pattern to hear how it feels when repeated. If the beat sounds repetitive, I can make adjustments to keep the energy up.
PRO TIP: Create slight variations in your pattern every four or eight bars to keep listeners engaged. For example, you might drop out the kick or add a double snare hit.
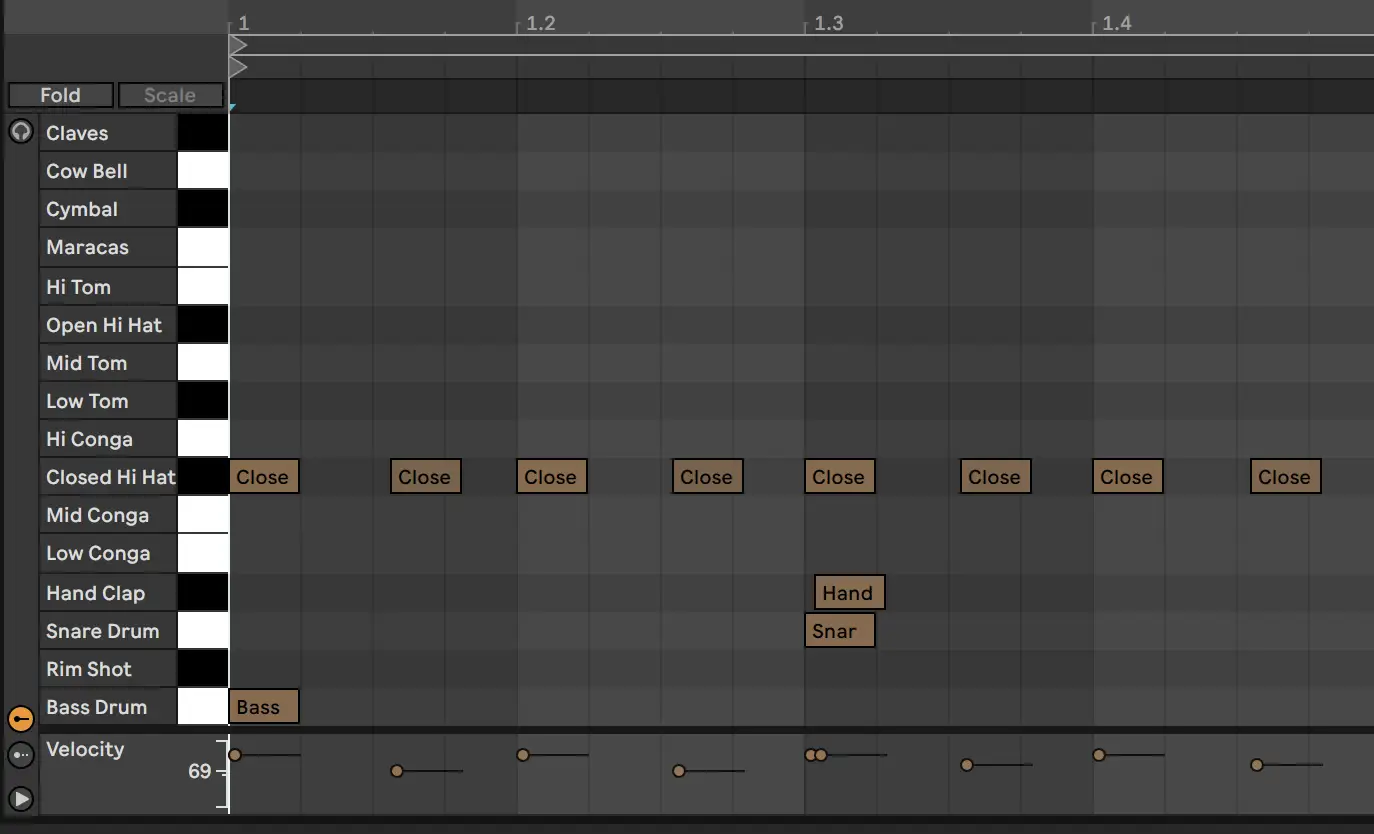
Hi-Hats
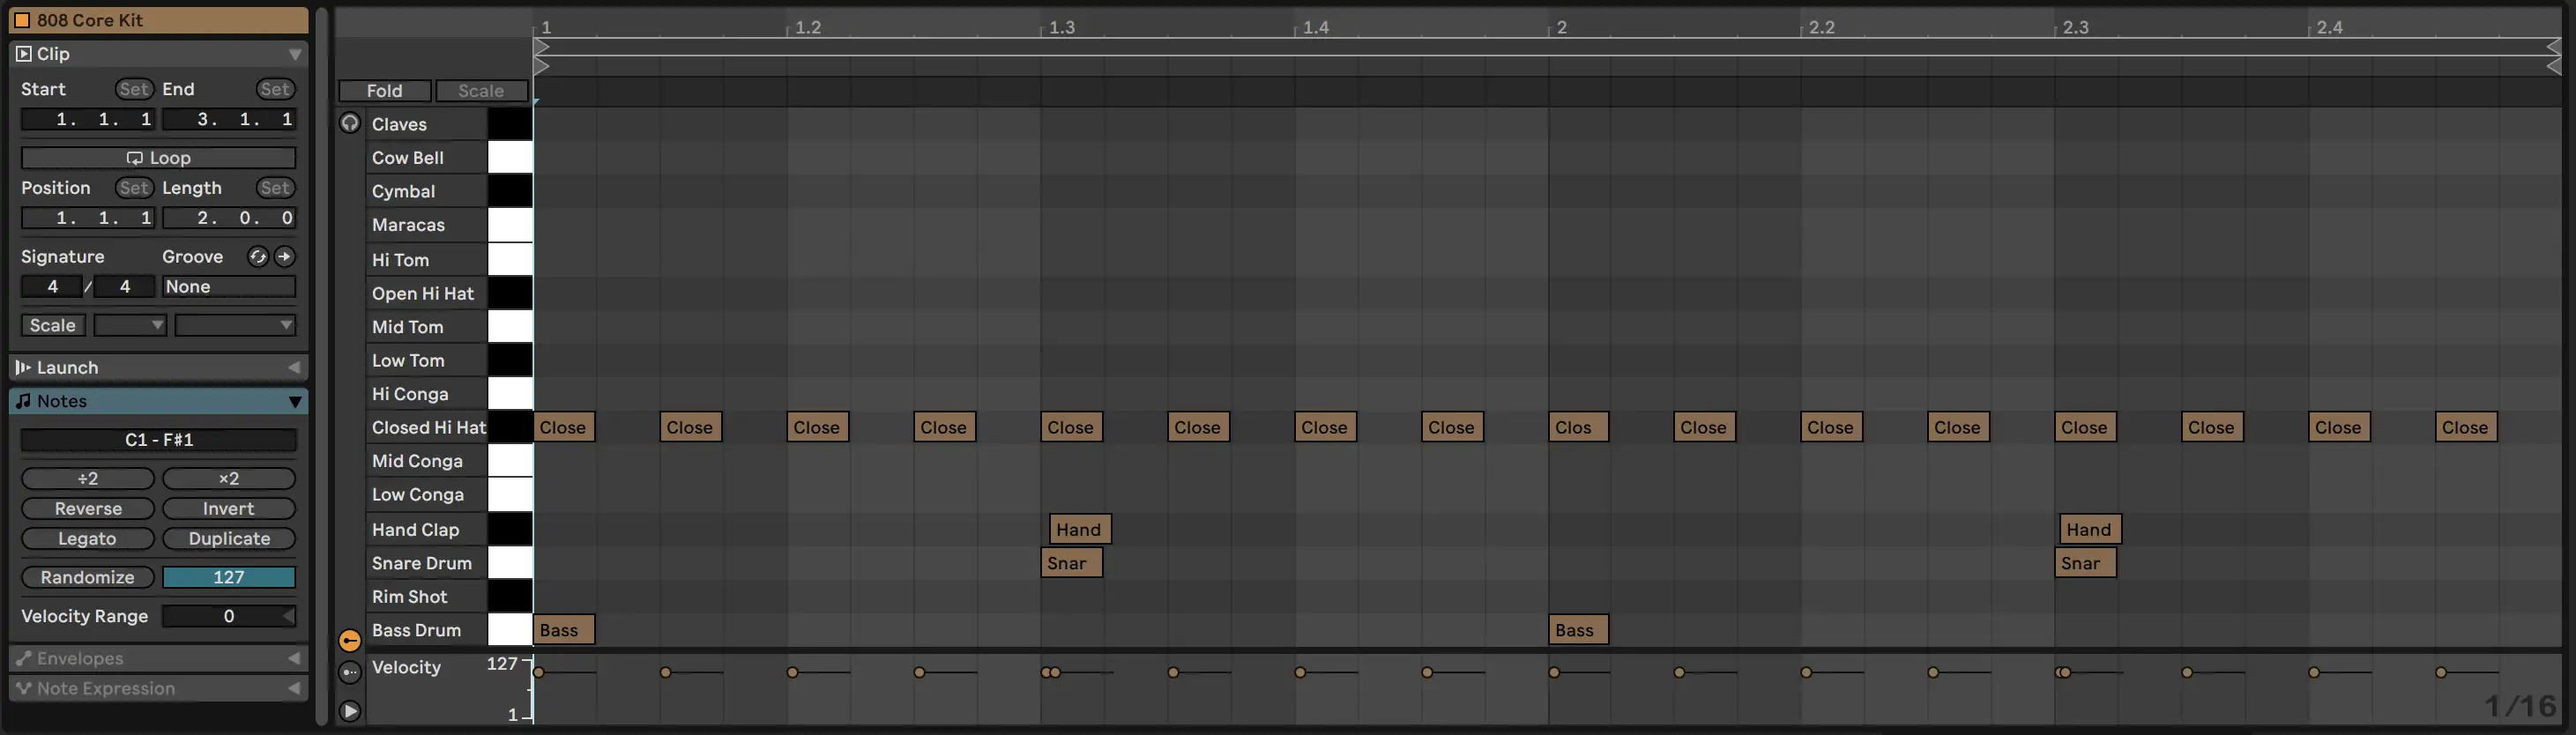
Next, let's hit our hi-hats.
Start by making sure your MIDI editor is set to at least 16th notes. You may even want to set it to 32nd for even finer divisions, which can be useful for rapid-fire rolls.
When drawing your hi-hats on the grid, start simple. Place a hi-hat on every eighth note to establish a steady rhythm. This is going to be your basic pattern from which you can start adding variation.

If you know you want a quicker rhythm, you can place a hi-hat on every 16th note instead.
From there, we'll look for spots within the drum loop where we can add a roll to enhance the rhythm. I often like to put my rolls either just before snare hits or at the end of a bar. You'll want a pretty fine MIDI grid for this (32nd or 64th notes). Fill your chosen spots with rapid hi-hat hits and adjust the length and speed of the rolls depending on the effect you want to go for.
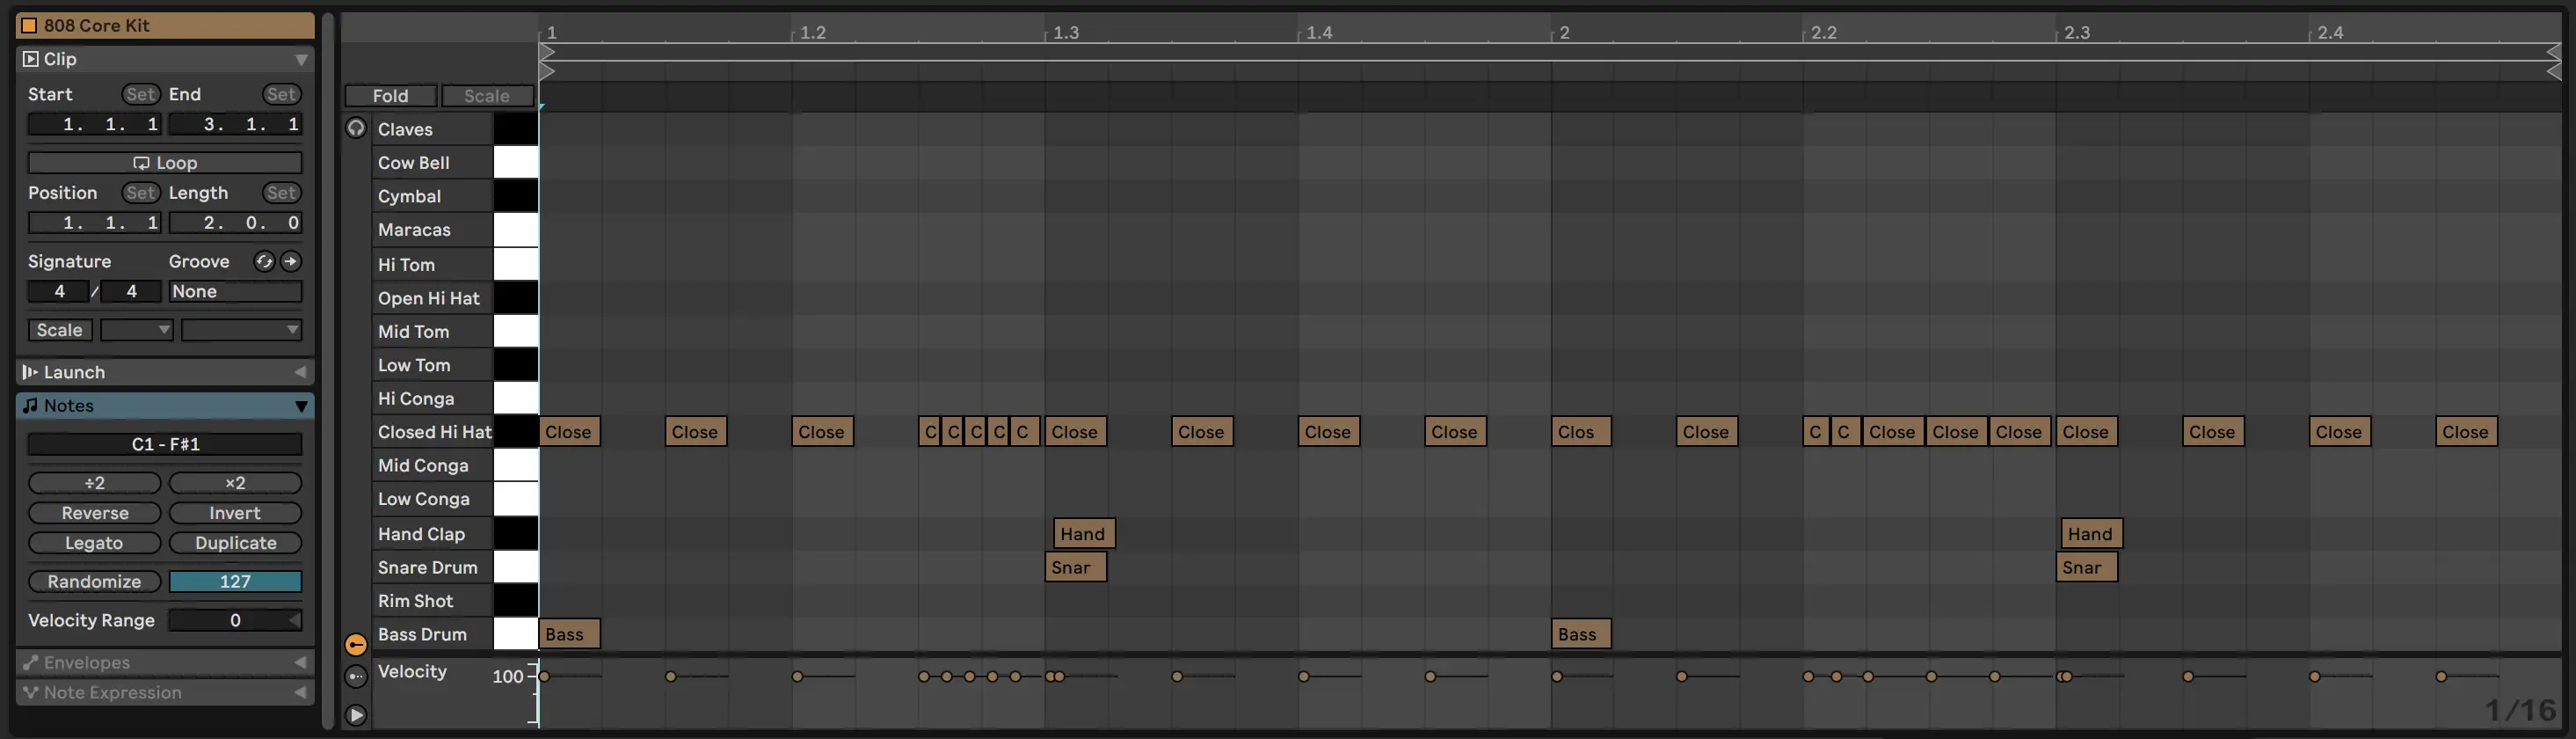
While you can certainly stop here, I often like to adjust the velocity of my hi-hats to make them sound more dynamic and less mechanical. Here's an example of how you might adjust the velocity on your hat pattern:

Again, try looping your pattern to get a sense of how it feels when heard over and over again, and make adjustments as necessary.
Advanced Trap Drum Pattern Techniques
The above is more than enough to get you started making basic drum patterns. However, if you want your trap drums to stand up to the pros, you'll want to experiment with more advanced trap drum pattern techniques.
Using Triplets
Triplets are a staple of trap music, especially in the hi-hats.
When drawing in triplets, start by setting your grid to a triplet feel, such as 1/8T or 1/16T, depending on the speed or texture you're going for. From there, you can introduce triplet hi-hats throughout certain spots in different measures to create some variation in your pattern.
The same thing can also be done with your snare. Triplet snare rolls are great for getting that rapid-fire effect you often hear at the ends of bars, as they act as a fill or transition.
Incorporating Swing
Swing alters the timing of the rhythm in your track. It's usually done by delaying the second note in a pair, which gives the beat a more laid-back, "swinging" feel. In trap music, it's a great way to give your drums a more human feel.
Most DAWs have swing or groove templates that you can apply to your tracks to shift sounds slightly off grid, though I think manual control is a bit better. Try delaying every second or fourth hat to get a swing feel. You can even change the velocity of those hits to mimic the feel a real drummer would provide.
Hat Automation
There are endless ways to automate your hi-hats to get more creative with your beats. For example, you might automate the panning of your hi-hats, making them move from left to right to create more movement in your track.
Another creative tip is pitching down a hat roll near the end of a bar to give your drum loop some tonal variety.
Layering Sounds for Depth
Layering sounds is one of the best ways to add texture and depth to beat.
While we've talked about layering a snare with something like a clap or a snap, there's no reason you can't take it further by adding percussion or other textural layers.
For example, layers such as rims, shaker hits, or electronic percussion can be great additions to your primary snare or kick samples to create a unique composite sound. Try playing around with the placement of these additional samples and don’t hesitate to apply effects like saturation, bit crushing, or delay to make them stand out.
Just make sure you don't overcrowd the mix or overshadow the main drums.
Using Effects On Your Trap Drums
One of my favorite ways to add flavor to my drums is with effects like reverb, delay, and distortion/saturation. While there are infinite ways to approach effects in trap music, here are a few simple effect techniques I find myself using on just about every trap beat I make.
Reverb on Trap Drums
Reverb is great for helping drum sounds feel more natural and less sterile, especially with more natural-sounding room reverbs. Of course, it can also be used creatively to give certain elements space.
The key here is not drowning your drums in so much reverb that they lose punch.
Snares and claps are pretty common candidates for reverb in trap music. I usually like to refrain from adding any reverb to the kick, unless it's a top kick layer in a sparse part of the track and it feels like it's lacking ambiance.
Short, bright reverbs like plates can make your snares and claps pop out of the mix, while filling the empty space between different hits. The key here is using shorter decay times to keep your reverb from overwhelming the mix, and pre-delay to separate the initial hit from the reverb tail to keep your snares/claps from getting pulled back in the mix.
I should also mention that it's often better to place your reverb on an auxiliary track and send your individual drum elements to it rather than placing it directly on a track. You'll get more control and flexibility, more CPU-efficiency, and more consistency across your tracks, especially if you decide to send multiple elements to a single reverb.
PRO TIP: Set up a small room reverb on an aux track and send each drum element to it in different amounts to make them sound like they're coming from the same "space." This is a very common technique for creating cohesion between various drum samples.
Delay on Trap Drums
Next, we have delay. You can set a delay up in the same way you'd set up your reverb (on an aux track).
Again, though there are infinite ways to employ delay on a track, there are few particularly effective delay tricks you can use to enhance the overall groove.
For example, you can set up a ping-pong delay and send snare hits or rolls to it on certain beats.
If my hi-hats are sounding a bit dull, I might add a light delay to them for more interest and movement around the stereo field. For a syncopated effect, try setting the delay time to a more unconventional division, such as a dotted eighth note or a triplet, to offset the interaction with the main beat.
In this case, you can add the delay straight on you hi-hat track and pull back the Mix knob on your delay plugin to dial it in ever so subtly with the dry sound (somewhere between 10% and 30% wet should do).
Keep the feedback pretty low as well, as it'll help with not cluttering the mix with too many repeats.
PRO TIP: Some delay plugins allow you to apply a filter to the delayed signal. It's often a good idea to apply a high and low-pass filter to push the delayed signals behind the main signals and keep them from muddying the lower frequencies.
Distortion/Saturation on Trap Drums
Lastly, we have distortion and saturation, which are great for adding harmonic content. Using these effects in the right way can help give your drums a more aggressive sound.
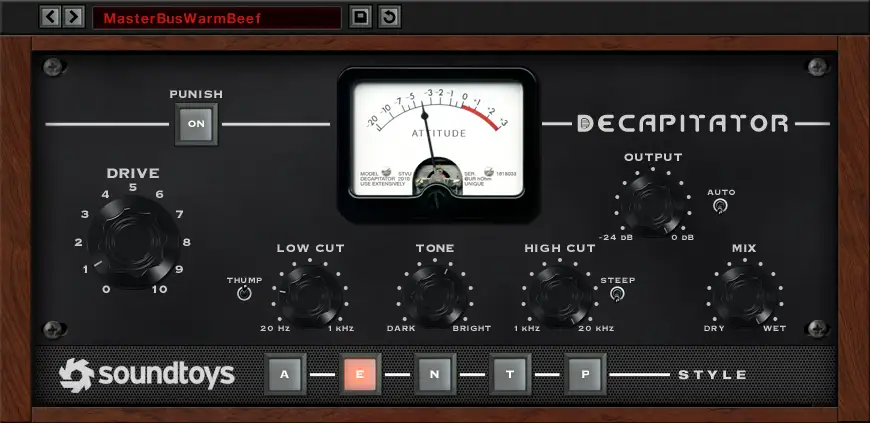
For example, you can apply mild distortion with plugins like Soundtoys Decapitator or FabFilter Saturn to give your kicks some extra punch and weight, or add some crunch to your snares.
Place your distortion or saturation plugin directly on your individual drum track or drum bus, start with a lower mix setting, and increase as needed to find the sweet spot where your drums sounds aggressive without losing punch.
Final Thoughts - Punching Up Your Trap Drum Patterns
Trap music has been shaped, molded, and manipulated by hundreds, if not thousands, of iconic music producers. One of the best things you can do to step up your music production game is analyze and recreate trap drum patterns from top trap producers like Lex Luger, Metro Boomin, and Mike WiLL Made It.
Download a few packs with snappy drums, load them up into your drum rack of choice, and start playing around! Who knows, maybe one day, your beats will inspire the next generation of tap producers.


