

Throughout the interface of your DAW, you’ll find what seems like an endless array of meters. If you’re anything like me, when you first started mixing, the idea of “metering” seemed like a dark art.
At this point, if you’re just stepping into the wild world of metering and you aren’t already using a true peak meter, your tracks might be clipping without you even knowing it!
In this ultimate guide to true peak metering, I’m going to teach you all you need to know, so you can make sure that your tracks don’t get slammed like they’re being slammed up against a glass ceiling (or brick wall, for that matter).
What Is a True Peak?
Before digging in and exploring true peak metering and limiting, the first thing you need to know is what true peaks are.
A true peak is essentially an estimate of an analog peak level coming from a DAC (digital-to-analog converter). The important thing here is noting that the true peak is different than the normal peak level you see at the output stage of your DAW.
I use Pro Tools, though I'm pretty certain that most major DAWs provide what's known as the sample peak level, which is the threshold instantaneous level for audio samples in digital audio.
Digital recordings have to take an analog signal and convert it into a digital signal, which is then stored on your system, depending on the chosen sample rate, in thousands of samples per second. That digital signal will then be recreated to make an analog signal through analog reconstruction.
While your DAW's dBFS meters will show you the peak values of your samples relevant to the digital realm, you won't see true peak.
Uniquely enough, when a digital signal turns back into an analog signal for playback during the D/A process, the levels can vary slightly. In some cases, reconstructing an analog signal can lead to peaks above the max threshold for your digital sample. These are true peaks or inter-sample peaks.
Traditional limiters and meters can't detect true peaks, meaning any audio signal that passes the 0dBFS threshold can actually end up in your finished master without you ever knowing it. Even if you're in a nice studio and working with quality converters in a treated environment, you probably won't be able to hear what it's doing.
However, once you export that file and play it on a consumer system, such as a phone, laptop, or car stereo, that digital clipping will become glaringly obvious. If that file is compressed from a WAV or AIFF to an MP3, it'll be even worse.
So, the question is, how do we measure the actual peak level, so we don't have to worry about unwanted clipping.
This is where true peak meters come into play.
What Is a True Peak Meter?
Because regular peak meters aren't very accurate, pro engineers use true peak meters to get the actual true peak level of their mixes when converting it from digital to analog. Again, note that some people refer to true peaks as "inter-sample peaks," and I believe the term "true peak" didn't even come around until the 2000s.
Basically, if you're working in the digital domain and someone uses the inter-sample term, they're talking about true peaks.
How to Use a True Peak Meter
The beauty of true peak meters is that they're incredibly simple.
To start, put one on the very last insert of your mix bus or master channel in your digital audio workstation.
It needs to be at the end of the chain for it to work, as adding another plugin after it could add volume, meaning the meter's measurement won't be accurate.
Once it's at the end of your chain, play your track and let it measure loudness. Most true peak meters will represent "clipping" with a red bar. Essentially, if your meter goes into the red from yellow, orange, or green, it means that it's clipping.
There are two fixes for this:
- Turn the overall volume of your track down
- Work on controlling the dynamic range of your track with a true peak limiter or compressor
The key is to make sure your song never exceeds 0 dBFS. I would actually recommend leaving a little bit more headroom than that for a clean mix. We'll get into that in a little bit.
First, let's check out how you can use a true peak limiter to keep your song from going into the red.
How to Use a True Peak Limiter
Similar to true peak meters, using true peak limiters is super easy.
Don't let it scare you!
Most limiter plugins provide true peak limiting. You typically just need to hit a "true peak limiting" button to engage it.
Here's where things get interesting:
In many cases, I'll use two limiters on my master bus:
Primary Limiter : This is the limiter I'll use to push my mix's perceived loudness, shape the overall dynamics of my track, and add a little bit of color. There are many great analog-style limiters for this, especially if you want a bit of warmth at the end of your chain.
Secondary Limiter : Next, I'll implement a true peak limiter. This limiter shouldn't be doing too much work. It should just be there to catch any peaks that rise above the threshold of the primary limiter. As for settings, I'll typically use a low ratio with a fast attack and release.
Note that you may not have to use a true peak limiter if you have healthy levels in your mix. Of course, engineers worked without true peak limiters for years without having to worry about clipping. In some mixes, I'll find that my true peak limiter is hurting my transient information.
In that case, I'll get rid of it and reduce the overall volume of my track between 0.5 and 1dB. This volume reduction should take place after the other processing on the master buss, though before your true peak meter.
If you're not worried about having insanely loud mixes, especially if you make more organic music, and you don't want to deal with the potential transient harm that having an absolute ceiling can impart, the solution is as simple as turning your track down.
Top Metering Plugins
While you can certainly use the meters built into your digital audio workstation, they aren’t the most precise for processes that require complete nuance, such as mastering. If you want to get your hands on some legitimate metering tools, here are my top two favorites.
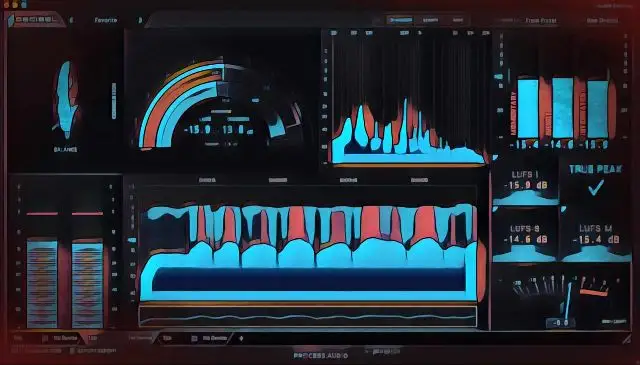
Process Audio - Decibel
Decibel might be one of the most comprehensive LUFS metering plugins on the market today. Not only does it have a sleek, modern interface that's easy to navigate, but the possibilities for different styles of metering are seemingly endless.
One of the great things about Decibel is that you can use it on multiple devices, including a smartphone or tablet. You can link it over to your desktop using Wi-Fi to mirror exactly what's happening in your session, essentially allowing you to use another screen to keep the meters out of the way of your session. The real-time displays are completely unlimited too, meaning you can have it running on multiple devices at once.
The interface allows for total customization using somewhat of a modular setup, You can use numerous meter types in the same window, and make the most important meters the largest and the least important the smallest.
If you're working with a stereo audio file, you can drop it into Decibel to get an analysis for your true peak readings and loudness specs.
Overall, it's a game-changer for metering in a digital system (or ecosystem, for that matter).
Brainworx bx_meter
Brainworx is one of the biggest names in digital mastering plugins, and the company's sophisticated metering plugin offers top-notch analysis of your mix, allowing you to visualize what you're hearing in several ways.
With the bx_meter plugin, you can see the true or inter-sample peaks and the RMS values of your mix. It'll also give you the relation between them with two real-time LEDs.
Beyond its standard metering capabilities, Brainworx bx_meter has a Mid/Side mode and a number of solo switches (as you'd expect to find on most Brainworx plugins), which can be valuable if you're having trouble hearing something in your mix.
All in all, it's a truly sophisticated plugin from a truly sophisticated company.
Top True Peak Limiting Plugins
Once you know your true peak measurements, you'll need a plugin to implement true peak limiting.
Here's a short list of some of my absolute favorite true peak limiter plugins.
FabFilter Pro-L 2
I feel like FabFilter, more than any other plugin company, helped me get better at mixing. Not only do all their plugins offer precise parameters, allowing you to approach mixing and mastering from a surgical standpoint, but they also offer some of the best visual feedback in the game.
Pro-L 2 delivers on both fronts, offering comprehensive loudness metering for various loudness standards and true peak level meters for complete dynamic control.
Even better yet, it has a wide range of unique limiter algorithms, allowing you to mix with a preferred output in mind. It also offers support for Dolby Atmos 7.1.2, which is a pretty big deal for those who need to deliver a fully mastered soundstage.
One of the neat things about Pro-L 2 is that if you bring up the gain while holding down 'Shift,' the plugin will automatically adjust the output volume, so that you aren't tricked into thinking your louder mix sounds better. This can be especially useful for aggressive limiting.
Brainworx bx_limiter True
Here we are, back again with a Brainworx plugin. One of the main things that the company set out to do when making the Brainworx bx_limiter True plugin was to create a true peak limiting plugin without the negative artifacts of true peak limiting, which many engineers loathed at the time.
As a result, they made an ultra-clean limiter with an array of onboard sweetening parameters for those who want to add a bit of color and uniqueness to their mix. One of my favorite aspects of this limiter is the onboard high- and low-pass filters, as they keep the low-end and high-end of your mix from impacting the limiter too hard.
You can also use the central Foundation control for subtly shaping the low-end before it hits your limiter, making for a much cleaner master.
How Loud Should My Mixes Be?
While mixing, I don't often like to get too wrapped up in true peak values. Instead, I pay more attention to perceived loudness. With that said, it's safe to keep your short-term loudness or LUFS around -23, never peaking above -3.
I also like to keep the loudest part of my mixes around -6dBFS. Most DAWs show dBFS on the master fader.
The idea behind keeping the maximum level around -6dBFS is that it provides more headroom for the mastering engineer to work with. With proper compression and healthy levels throughout your mix, keeping everything below the clipping point should be pretty easy.
How Loud Should My Masters Be?
Of course, when it comes to mastering, you'll want to pay more attention to your true peak meter.
Overall, it's a good idea to keep your peaks under -1dBFS, leaving around 1dB of headroom. Some platforms, however, such as Spotify, recommends -2dBFS, so if you want to optimize for that platform, its' something to consider.
The important thing here is to keep a close look on your true peak meter to ensure your master doesn't go above the preferred target.
You can use tools like Loudness Penalty Analyzer to determine how your chosen loudness will sound on any given platform, though if you're looking for a golden rule, there isn't one. Many major pop mastering engineers will top out at around -5 LUFS, though other engineers prefer to stay well below that number, sometimes as low as -9 LUFS.
Test it out and choose the one that sounds best to you.
Final Thoughts
Using a true peak meter is pretty straightforward, and if you want to make sure your mixes or masters aren't going into the red, they're invaluable tools. Check out some of the tools above, and see how you can start experimenting with them to keep your tracks in check.


