

If you’ve been messing around with digital or analog synths or sound design for any length of time, you’ve probably come across the term LFO. And if you haven’t, well, you’re in for a treat. LFOs are one of those things that might sound like some sort of secret handshake among synth nerds, but once you get the hang of it, you’ll wonder how you ever lived without an understanding of them.
LFOs, or Low-Frequency Oscillators if you want to get all technical, are key elements in creating movement, texture, and life in synthesis. From subtle bassline wobbles to moving synth pads, LFOs are your go-to tool. But if you’ve never used one, figuring out how to make them work for you can feel a bit like learning to ride a bicycle for the first time.
The good news? LFOs are way less tricky than they first appear to be.
In this article, we’re going to break down what an LFO is, how it works, and how you can start using it in your music right away.
What is an LFO?
So, what exactly is an LFO?
LFO stands for Low-Frequency Oscillator, which is just a fancy way of saying it’s an oscillator that moves at a very slow rate - so slow, in fact, that it’s usually below 20 Hz. To put that in perspective, it’s so low that you can’t actually hear it as a pitch, which raises the question: why would we use something we can’t hear?
Here’s where the magic of LFOs comes in. Even though you can’t hear an LFO signal directly, you can definitely feel what it does. Instead of producing a tone like a regular oscillator, an LFO creates a waveform that moves so slowly it can be used to change or modulate other aspects of your sound. This is how you get things like vibrato, tremolo, or that classic wobble in a dubstep bassline.
Think of an LFO as a control knob that automatically twists itself back and forth in time with the beat. It can control the pitch of a note, making it wobble (vibrato), or adjust the volume, creating a pulsing effect (tremolo). It can even be used to modulate parameters like the filter cutoff frequency, giving you that sweeping, whooshing sound that can make a synth patch come alive.
How Do LFOs Work?
Now that you know what an LFO is, let’s talk about how to actually use one. The first step in making an LFO work is to route it to the parameter you want to modulate. Think of the LFO as a little engine that drives movement in your sound. But like any engine, it needs to know where it’s going. That’s where routing comes in.
When you route an LFO to a parameter, you’re basically telling it, “I want you to move this specific thing for me.” This could be the pitch of your oscillator, the cutoff frequency of a filter, or the volume of your sound. Once routed, the LFO starts oscillating that parameter back and forth according to the waveform you’ve chosen.
You can control how fast or slow this movement happens by adjusting the “Rate” of the LFO. But don’t worry - we’ll get into the specifics of rate control a little later. For now, just know that the rate is your tempo dial for the LFO’s movement, letting you speed things up for rapid, jittery effects or slow them down for a more gradual sweep.
The key thing to remember when working with LFOs is to identify the destination in your specific synthesizer. The LFO’s signal needs a target, so it’s essential to specify where that movement is going.
LFO Parameters
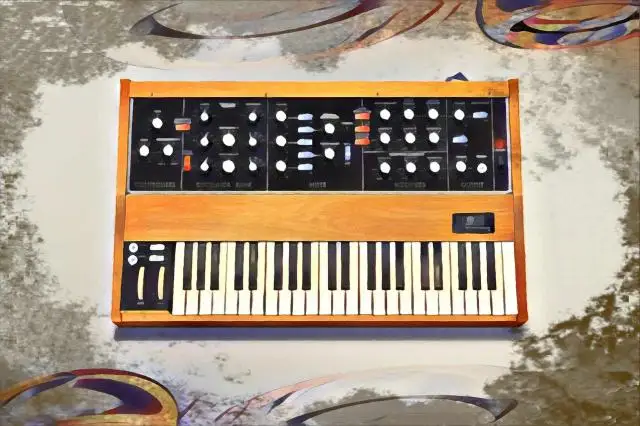
LFOs come in all shapes and sizes, and you’ll find them in just about any style of synthesizer, from vintage analog gear to the latest digital software synths.
But no matter where you find them, most LFOs share a few key parameters that you’ll want to get familiar with.
Assignment
The first parameter to get to grips with is Assignment. This is where you decide which part of your sound the LFO is going to modulate. Basically, you're giving your LFO a job.
The cool thing is, depending on what you assign it to, you’ll get very different results. For example, assigning the LFO to the pitch might give you a wobbly vibrato effect, while assigning it to the filter cutoff could create a sweeping motion that adds texture to your sound.
Shape
Next up is Shape, which controls the pattern of the LFO’s oscillation. If the Assignment decides what the LFO is going to affect, Shape is how it’s going to affect it.
Most LFOs let you choose between classic waveforms like sine, square, and sawtooth. Each of these waveforms has its own distinct character. For example, a sine wave creates a smooth, flowing modulation, perfect for gentle effects like a natural vibrato.
On the other hand, a square wave creates a sharp, on-off modulation that’s great for stutter effects or adding a rhythmic pulse. Sawtooth waves offer something in between, with a rising or falling ramp that can give your sound a more aggressive edge.
In the audible range, these waveforms would produce very different sounds. But even when used as a modulation tool, the Shape of the LFO plays a big role in how the modulation feels. A smooth sine wave will create subtle, organic movements, while a square wave can make things sound choppy and more pronounced.
I recommend experimenting with different shapes and listening to how they alter the character of the modulation.
Rate
The Rate parameter is where you control the speed of the LFO’s oscillation. Think of it as the tempo dial for your modulation. The Rate essentially determines how quickly the LFO moves through its waveform cycle.
When you set the Rate to a slow speed, the LFO moves lazily through its cycle, creating gradual, sweeping effects. This is great for slowly modulating a filter for a smooth, atmospheric vibe. On the flip side, cranking up the Rate speeds up the oscillation, resulting in faster, more intense LFO modulation. This can create anything from a rapid tremolo effect to a fast, choppy, helicopter-like rhythm.
Many synthesizers also offer LFO rate sync , which locks the LFO’s rate to your project’s tempo. This means that no matter what speed you set the Rate to, it will stay in time with your track. This is especially handy when you’re looking to create rhythmic modulations that match the beat.
Amount
The Amount parameter controls how much influence the LFO has over the parameter it’s modulating. Depending on the synth you’re using, this might also be labeled as Depth or Amplitude, but it all comes down to the same thing: how strong or subtle you want the LFO’s effect to be.
Different Ways to Route LFOs
LFOs are a secret sauce in synthesis, as they bring life and movement to otherwise dull sounds. Sure, basic oscillators can produce nice tones, but those tones can get a little boring and basic on their own. No one wants to hear a triangle wave drone on for two minutes.
In the next few sections, we’ll explore some of the many ways you can route LFOs in your synth.
LFO to VCA Level
The amp section in a synthesizer, often referred to as the VCA (Voltage Controlled Amplifier), is where the final stage of your sound's volume is controlled. In simpler terms, the VCA determines how loud or soft your sound is at any given moment.
Volume changes over time are crucial in helping our ears recognize the character or timbre of a sound. That’s why sending an LFO to the VCA level is such a powerful way to add life to your patches. When you route an LFO to the VCA, you’re essentially modulating the volume, making it rise and fall according to the LFO’s waveform.
LFO to Oscillator Frequency
When you press a key on your synth, the oscillator kicks in and produces a signal at a specific frequency, corresponding to the note you’re playing. This frequency is what we perceive as pitch. For example, hitting middle C triggers an oscillator to generate a signal at about 261.63 Hz, giving you a C note.
But when you route an LFO to the oscillator’s frequency, things start to get interesting. Instead of the pitch staying steady at the frequency of the key you pressed, the LFO modulates it at its own frequency. This means the pitch will start to wobble, rise, or fall depending on how you’ve set up the LFO.
LFO to Filter Cutoff
The filter in a synthesizer controls which frequencies get to pass through and which get cut out, shaping the overall character of your sound. In subtractive synthesis, filters are used to sculpt the sound by subtracting certain frequencies, usually by lowering the higher ones, hence the name. The most common filter type is the low-pass filter, which lets the low frequencies pass through while cutting out the highs, but there are other types, like high-pass and band-pass filters, each with its own unique effect.
When you route an LFO to the filter cutoff, you’re adding motion to this frequency-shaping process. The LFO modulates the cutoff point of the filter, making it move up and down according to the LFO’s waveform.
For instance, using a slow LFO with a sine wave to modulate the filter can create a smooth, sweeping effect, where the sound gradually opens up and closes down. If you go for a faster LFO rate, you can achieve more rhythmic effects, like the classic “wub-wub” sound in dubstep, where the filter rapidly modulates in sync with the beat.
LFOs in Effects
LFOs aren’t just for synthesis. They play a huge role in shaping the sound of many audio effects as well. Here are some common effects that rely on LFOs:
- Chorus : An LFO can modulate the pitch of a duplicated audio signal slightly, creating a shimmering, doubling effect that makes the sound feel wider and more lush.
- Flanger : Here, an LFO can modulate the delay time of a duplicated signal. As the delay time changes, it creates a series of sweeping notches and peaks in the frequency spectrum, resulting in a swirling, jet-like effect.
- Tremolo : An LFO modulates the amplitude of the signal, creating a rhythmic pulsing effect where the sound’s volume fluctuates rapidly up and down.
- Phaser : An LFO signal modulates the phase of different frequency bands in the signal. As the phase shifts, it creates a sweeping effect, similar to flanging but often more subtle and with a more “spacey” character.
How to Use LFOs
Vibrato and Tremolo Effect
One of the most common uses of LFOs, as we said earlier, is to create effects like vibrato and tremolo by modulating the pitch or cutoff.
For instance, if you’re working on a lead synth sound and want to give it a bit more character, you can use an LFO to modulate the pitch slightly. You can also create the classic “wah-wah” effect in a synth pad or add rhythmic sweeps to a bassline.
Modulate LFOs with Each Other
As LFO modulation became increasingly central to sound design and synthesis, synth designers started to implement more flexible systems for configuring it. Enter the modulation matrix, one of the most powerful tools for incredibly complex routings and interactions between different modulation sources and destinations.
One of the coolest things you can do with a modulation matrix is modulate a low frequency signal with another LFO. This might sound a bit like a science experiment gone wild, but the results can be truly amazing. Essentially, you’re taking a signal that’s already controlling movement, like an LFO modulating the pitch or filter cutoff, and then modulating that LFO’s own parameters with another LFO.
All in all, you can get some pretty interesting sounds by doing so.
Audio Rate Modulation
If your LFO is capable of operating at audio rates (meaning it can oscillate fast enough to be within the range of human hearing) you’ve just unlocked a powerful sound design technique. When an LFO reaches audible rates, it goes beyond the typical slow modulations and starts acting like an oscillator itself.
This is where things get really interesting because you can effectively create a basic FM (Frequency Modulation) synthesizer.
In audio rate modulation, the LFO can modulate another oscillator’s frequency at such a high speed that it produces new, complex waveforms, that reflect the metallic tones characteristic of FM synthesis.
Final Thoughts
Knowing all there is to know about LFOs is crucial if you’re serious about using synths in your music. Now that you know how LFOs work and how to harness their power, you’re well-equipped to experiment and push the boundaries of your sound design.
Have fun!


