


The acoustic guitar is one of those timeless instruments that you hear in countless genres. From the warm, folky strumming heard from bands like Mumford and Suns to the crisp fingerstyle sounds of country artists like Charley Crockett, acoustic guitar is still a staple in modern music. You can even hear it filling out the stereo space in radio pop songs.
But as essential as it is, it’s also one of the trickier instruments to mix.
Why?
Well, it's naturally dynamic with a range of tones from top to bottom, and without the right treatment, an acoustic guitar can easily get lost in the mix or sound muddy.
On a side note, even the best compressors won’t fix a bad recording. If your guitar wasn’t captured well from the start, no amount of processing can work magic. So, the first step is always to make sure your recording is clean, clear, and balanced. Once that’s in place, you’re ready to take things to the next level.
This guide will walk you through how to use compression to make your acoustic guitar stand out and sound smooth, controlled, and polished in your mix.
Should You Compress Acoustic Guitar?
So, should you compress your acoustic guitar? Well, the short answer is that you can, but you don’t always have to.
There are situations where you might not need much compression at all. For example, if you’re recording a very soft, intimate acoustic performance with minimal picking or strumming, little to no compression can actually keep the natural feel of the performance intact.
Plus, if your acoustic has been recorded with compression going in (meaning the interface or mic chain had a hardware or software compressor printed on the track), you might find you don’t need to add any more.
But, and here’s where most of us land, in many cases, acoustic guitars do need a bit of compression. Acoustic guitars have a wide dynamic range, meaning they can go from really soft to really loud in the blink of an eye. This can be a challenge in a mix, especially when you need the guitar to sit well with other instruments without being either too overpowering or too quiet.
Compression helps tame those dynamics, making sure the guitar stays consistent throughout the track. It smooths out the peaks and brings up the quieter parts, so you can hear every nuance without it competing with other instruments or vocals.
How Much Compression Should You Use on Acoustic Guitar?
When it comes to compressing an acoustic guitar, it’s always a good idea to approach it with caution. After all, acoustic guitars are natural instruments, and one of their beauties lies in the subtle nuances of their sound.
Over-compressing can strip away that organic feel, leaving you with something that sounds… well, a bit too "processed." You want to preserve the instrument’s character while still keeping things controlled in the mix.
Personally, I like to start with a gentle approach. Around 1-3 dB of compression can often do the trick for a well-recorded, natural-sounding acoustic. You’d be surprised how often that’s all it takes to get a nice, balanced sound without squashing the life out of the performance.
Of course, the amount of compression you use really depends on the genre or the performance. Some acoustic guitar recordings actually thrive with a heavier dose of compression.
Take, for example, the beautiful, natural sound of Nick Drake’s "Pink Moon" (which is a great example of minimal compression.)
Now compare that to the heavily compressed acoustics in Filter's "Take My Picture" (you can definitely hear the difference there!)
The point here is that there’s no one-size-fits-all answer for how much compression to use. The key is to listen carefully and adjust the compression based on the dynamic range of the acoustic and the vibe you’re after.
With that said, there are certain settings we can use to get specific sounds out of our guitars, and doing so requires understanding compressor settings.
Best Acoustic Guitar Compression Settings
Acoustic Guitar Compressor Threshold
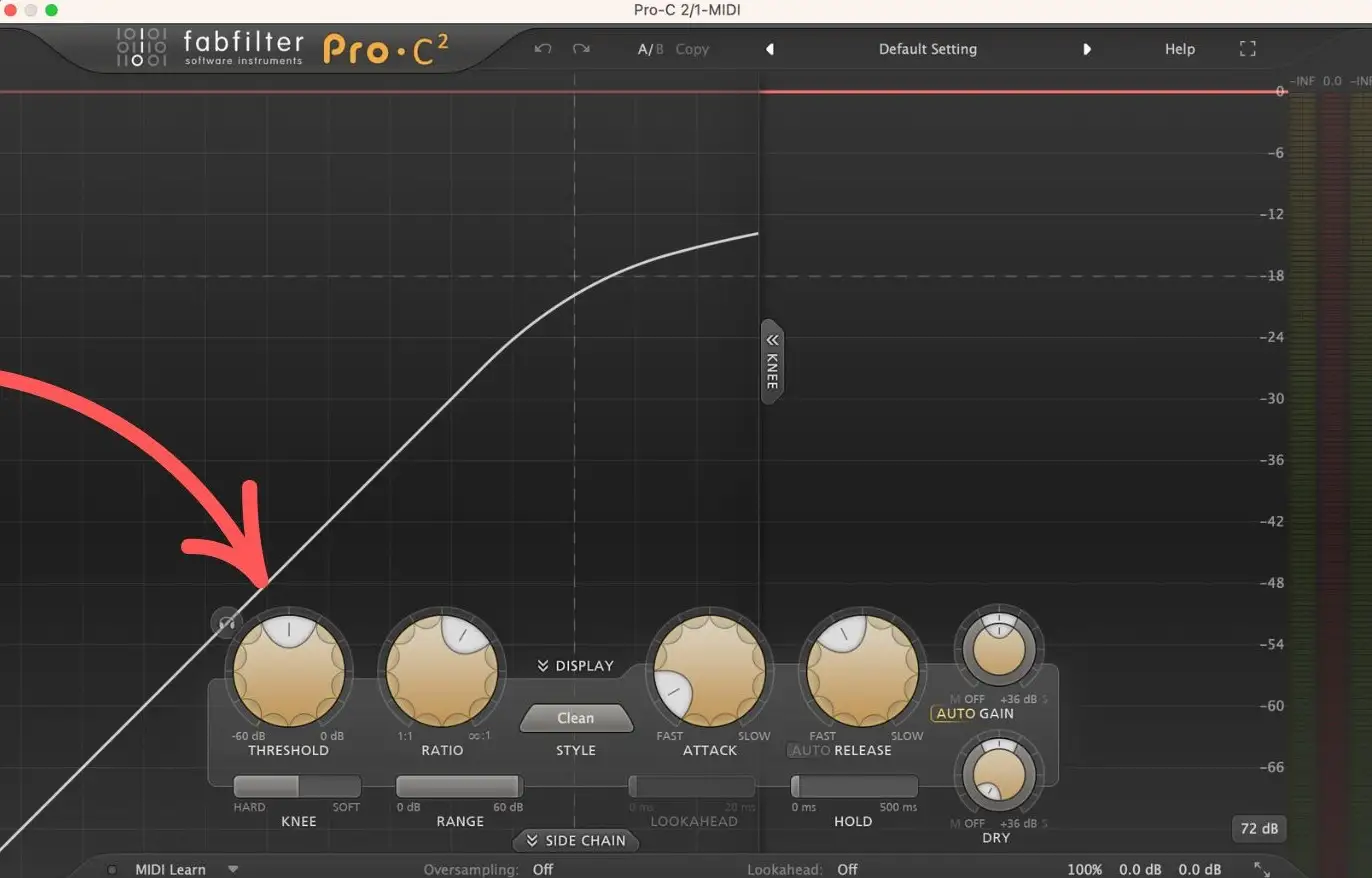
The threshold on a compressor is the point at which the compression kicks in . Think of it as the "on" switch. When your audio exceeds the threshold, the compressor starts working to tame the peaks rising above it. The lower you set the threshold, the more of your signal gets compressed. The higher you set it, the less of the signal is affected.
When it comes to setting the threshold for acoustic guitar, you want to find that sweet spot where the louder parts of your performance are being controlled without squashing the quieter, more delicate nuances.
A good rule of thumb is to set the threshold just below the level where the louder strums or picking start to pop out. This way, the compressor will kick in on the louder moments but leave the quieter bits untouched, preserving the natural dynamics of the performance.
Note that sometimes, one static threshold won’t cut it, especially if your acoustic guitar performance has a wide range of dynamics. If your playing goes from soft fingerpicking to heavy strumming, for example, you might find that your chosen threshold doesn't work for the entire track.
This is why I always recommend using automation to automate the threshold and adjust it throughout the track. Alternatively, you could even break your performance into two separate tracks and apply different thresholds for each. That way, you can tailor the compression to each section.
Acoustic Guitar Compressor Ratio
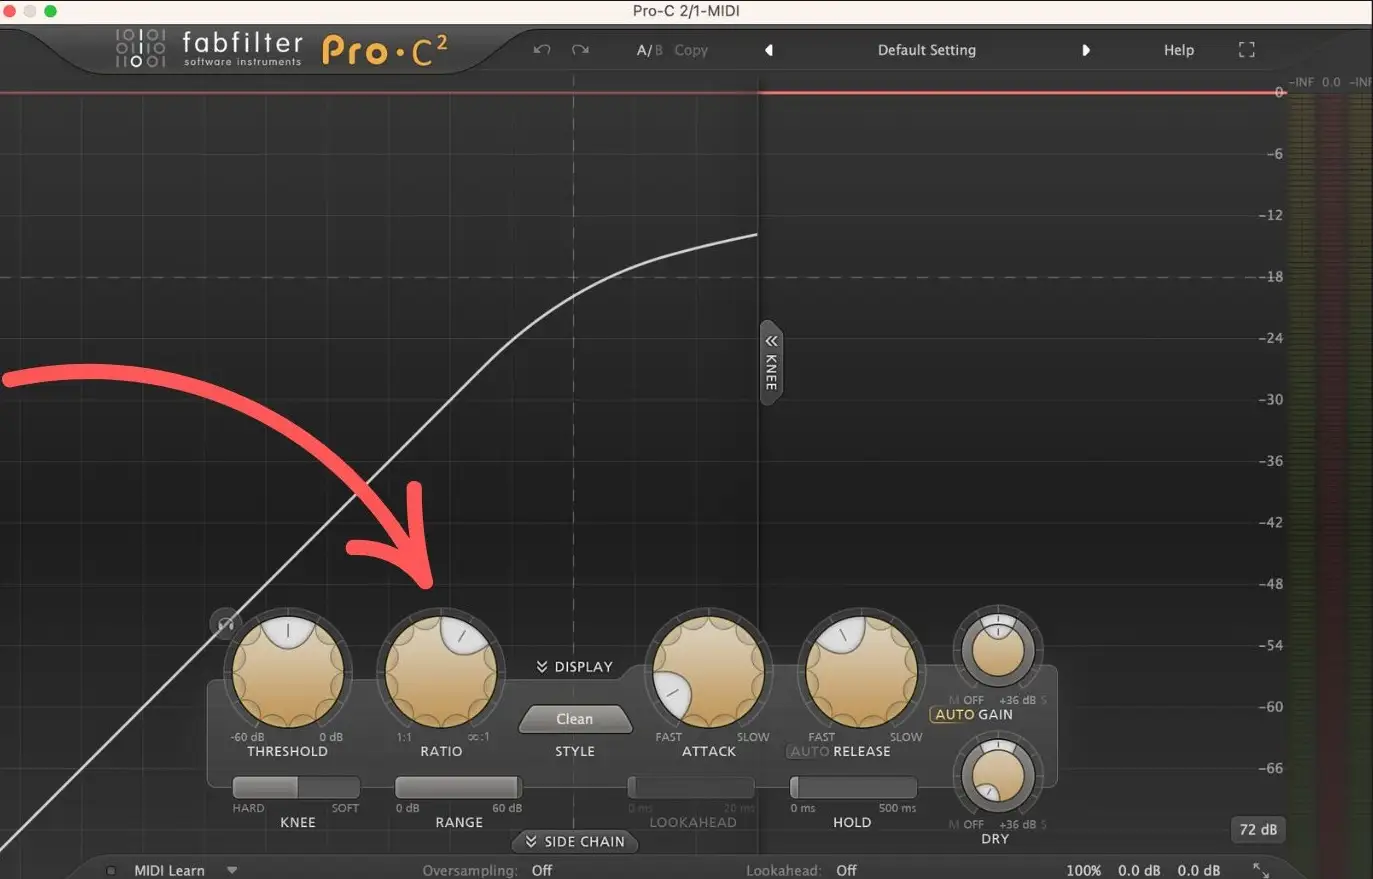
The ratio on a compressor dictates how much compression you apply once the signal exceeds the threshold . In simple terms, it tells the compressor how much to "squeeze" the sound.
If you set your ratio to 4:1, for every 4 dB the signal exceeds the threshold, the compressor will only allow 1 dB of it through. So, the higher the ratio, the more the compressor will control the dynamics, effectively reducing the volume of the louder parts more aggressively. If you set it too high, though, you could end up with a sound that feels flat or overly processed, so you want to strike the right balance.
Personally, I tend to go for a ratio between 4:1 and 5:1 . However, if I'm dealing with a more intense performance, like heavy strumming in a rock track, I’ll sometimes push the ratio up to 8:1. But, and this is a big but, I usually only go this high when I really need to tame some seriously unruly dynamics or I'm going for a specific, ultra-compressed sound.
Acoustic Guitar Compressor Knee
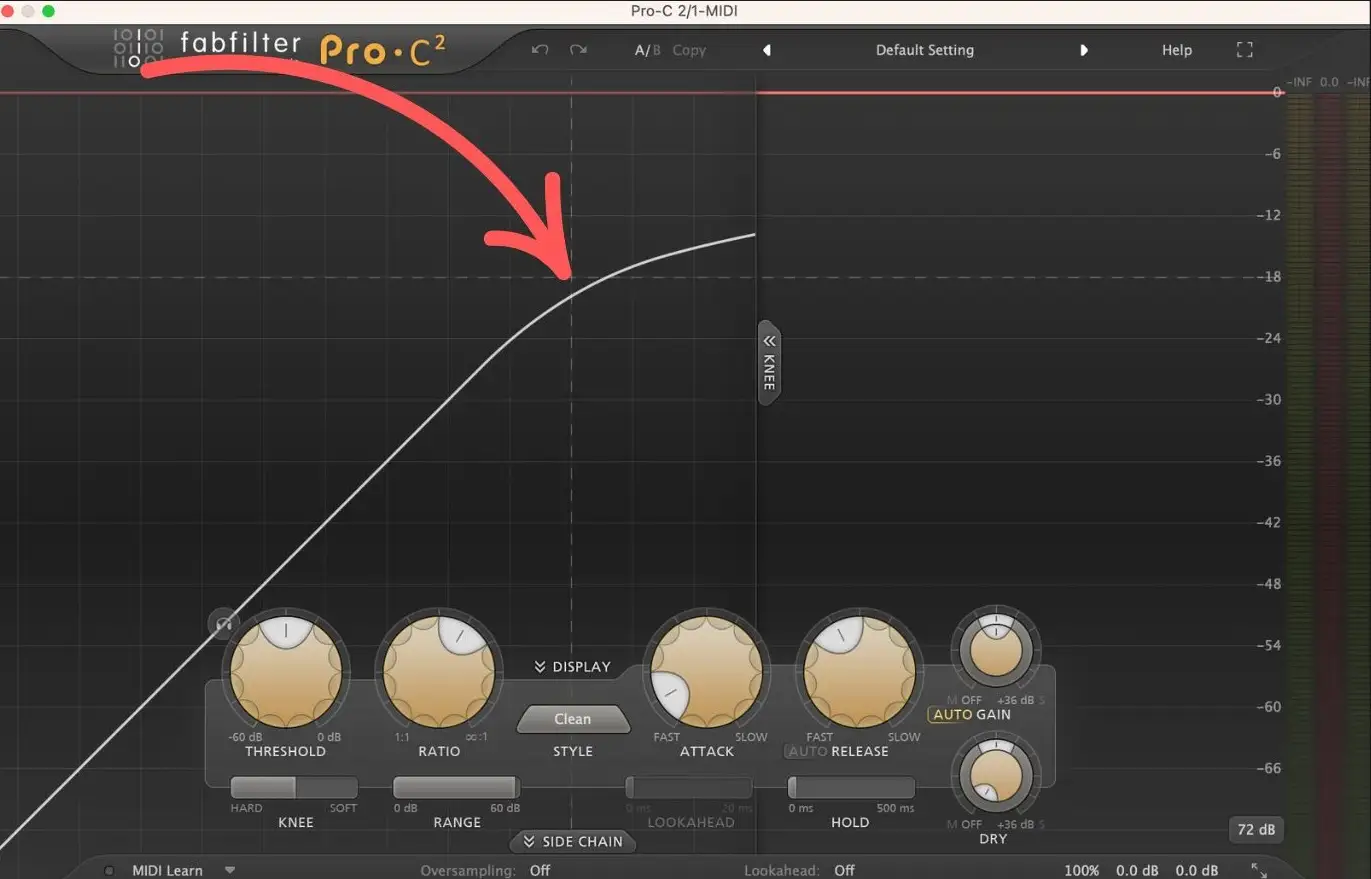
If your compressor has a knee setting, you’ve got another tool at your disposal to shape the way your compression hits your acoustic guitar. The knee controls how smoothly or abruptly the compression kicks in once the signal exceeds the threshold . In simple terms, it dictates the transition from "no compression" to "full-on compression."
You can think of the knee as the compressor’s "softness" or "hardness." A soft knee gradually applies compression as the signal approaches the threshold, making the transition feel more natural, while a hard knee slams the compression into place immediately once the threshold is crossed, creating a more noticeable effect.
For natural-sounding acoustic guitars, I usually opt for a soft knee . However, if I want things to sound a bit punchier or controlled and I'm not as worried about keeping things subtle, I might experiment with a harder knee.
Attack and Release Times for Acoustic Guitar
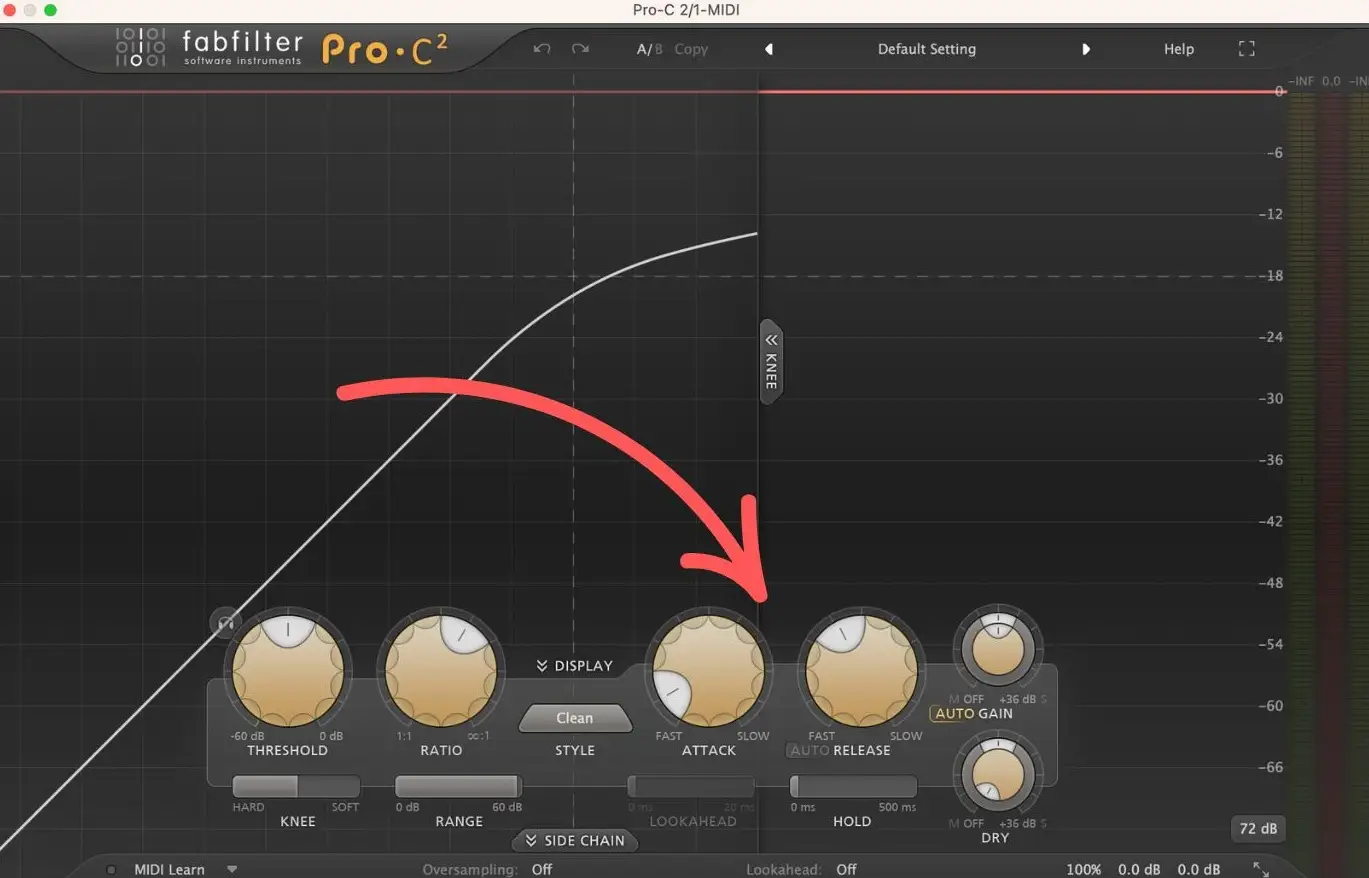
Attack and release times are, without a doubt, the two most important settings when it comes to shaping your acoustic guitar’s compression. These settings really dictate how the compressor reacts to the performance, and your style and vibe will play a big role in how you dial them in.
Attack time is how quickly the compressor kicks in after the signal exceeds the threshold, while release time is how quickly it lets go after the signal drops back below the threshold. Together, these two settings control how the compressor responds to the dynamics of your playing.
If you’re working with fingerstyle guitar, for example, you’ll often want a slower attack time . The reason for this is that fingerstyle playing usually has a lot of nuance, and you want more of that uncompressed transient to come through. Slower attack times let the initial hit of the string (the sharp, plucky sound) through before the compressor starts to smooth things out. This also applies to rhythmic strumming , where you still want to preserve the attack of the strums but keep the dynamics in check.
Now, if you’re looking for a more controlled, tight sound, or if you’re dealing with really percussive strumming, you might go for a faster attack time . This can help tame transients immediately. But, for most acoustic guitar performances, especially in natural or folk genres, I tend to settle around 10-15ms for my attack time.
When it comes to release times , relatively faster settings tend to sound more natural because they let the compressor quickly let go of the signal, which helps maintain the musical flow of the performance. You don’t want the compressor holding onto the signal too long.
That said, slower release times can work in certain contexts, especially if you want to smooth things out a bit more or if you're dealing with a more ambient, less percussive style of playing. However, you definitely don’t want your release time to be too fast, or you’ll risk the compressor constantly pumping and breathing in a way that distracts from the music.
A good starting point for release is usually around 50ms . This gives you enough time for the compression to work without it feeling overly noticeable. From there, you can fine-tune it based on the feel you're after.
Output Gain
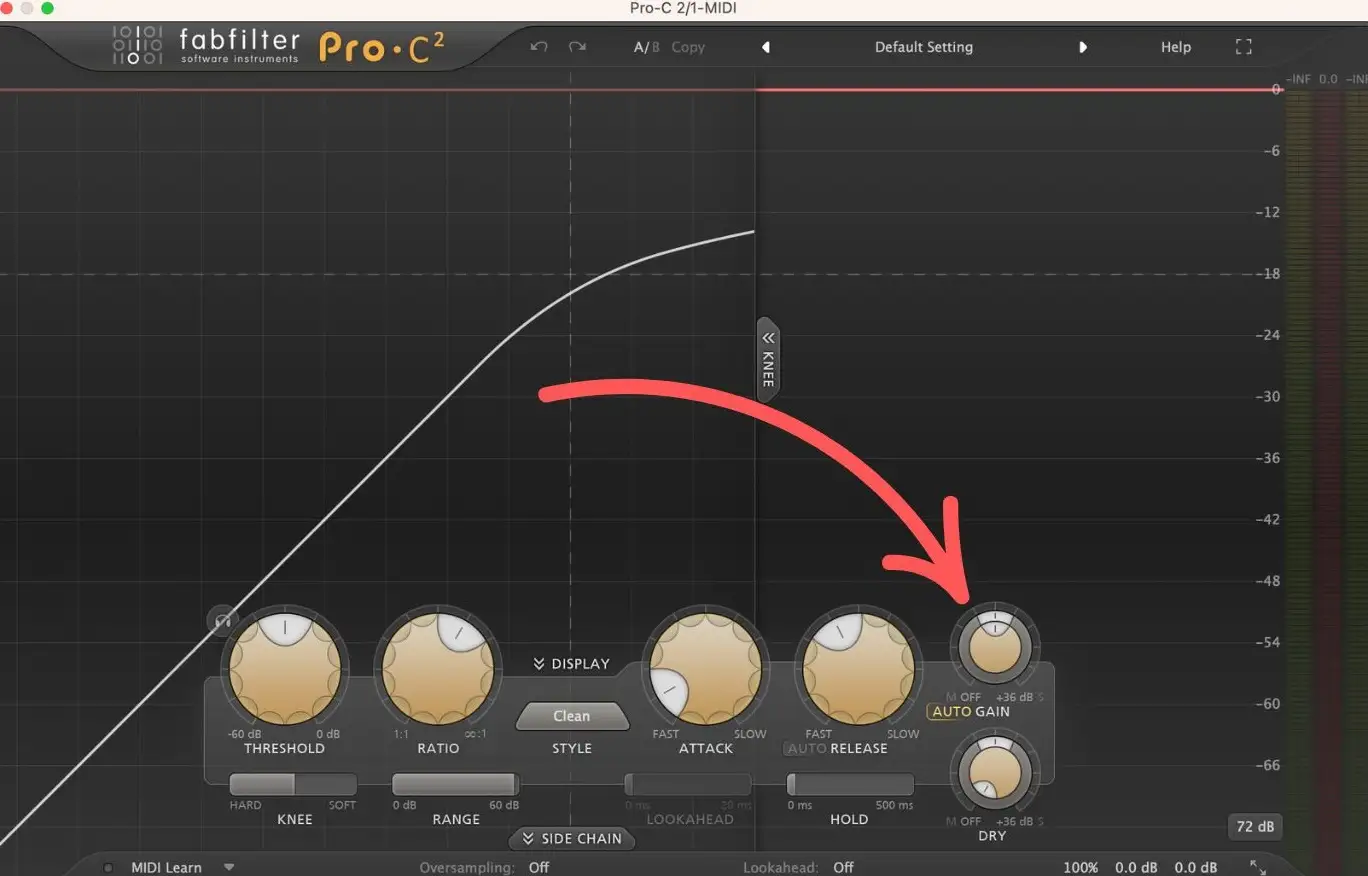
When you’re done compressing, it’s always a good idea to A/B your track before and after compression to make sure that the volume stays consistent. This is because compression often reduces the overall level of your signal, and if you don’t match the output level, it can be hard to tell if the compression is actually improving the sound or just making it quieter.
You might end up thinking, "This sounds worse!" when it’s actually just the drop in volume throwing you off. So, keeping the volume level the same ensures you’re making an apples-to-apples comparison.
That’s where the output gain setting (also known as makeup gain ) comes in. This is the control that allows you to boost the signal back up after compression has reduced it. Just make sure to adjust the output gain so that when you switch between the compressed and uncompressed versions, the levels are as close as possible.
Using Multi-Band Compression on Acoustic Guitar
Multi-band compressors are one of my favorite tools to use when mixing acoustic guitars. These compressors are different from traditional compressors, as they allow you to apply different levels of compression to specific frequency ranges, or "bands," within the same track.
So, instead of applying one blanket compression to the whole signal, you get more control over how each part of the frequency spectrum is treated.
One area where multi-band acoustic guitar compression really shines is the low end . Acoustic guitars can have a lot of dynamic range in the low frequencies, especially between 100-300Hz .
If you have a recording where the low-end is fluctuating wildly, maybe because the mic was too close to the sound-hole or because of the way it was played, a multi-band compressor can help even that out without affecting the rest of the guitar's sound. It’s a great way to keep those lows in check without choking the natural character of the mids and highs.
Another nifty trick with multi-band compression is using it to tame finger squeaks that often sneak in during fingerstyle performances. These little noises can be loud and distracting, but with a multi-band compressor, you can zero in on the specific frequency range where those squeaks live (usually around 3-5kHz ) and dial them down without affecting the rest of your track.
It’s essentially a more precise tool for cleaning up your acoustic guitar's performance.
Using Saturation on Acoustic Guitar
Saturation can be a great alternative (or a complement) to compression when working with acoustic guitars. While compression focuses on controlling dynamics, saturation is often meant to add warmth, color, and harmonic character to a sound.
Essentially, saturation introduces a bit of "distortion" to your signal, making it sound fuller and more textured without completely altering the dynamics like compression sometimes does.
There are different types of saturation, and each has its own flavor.
Tape saturation is one of my favorites for acoustic guitars. When you run your guitar through a tape emulation, it creates second and third-order harmonics . Second-order harmonics add warmth and smoothness to the sound, while third-order harmonics contribute more of a bite or edge.
Together, they give your guitar a rich, full tone that feels alive and organic. Plus, tape saturation often comes with a bit of built-in compression , which helps control the peaks without feeling too “squashed.”
The only thing to keep in mind with tape saturation is that it can lose some of the transient and high-frequency detail . So, if you’re working with a very detailed fingerstyle piece and you want to preserve all those little nuances, you might want to use tape saturation sparingly.
On the other hand, tube saturation is another excellent option, especially if you want a bit more character. Tube saturation tends to introduce a strong second-order harmonic , which results in a warm, rounded sound that can really help smooth out the lower mids and add fullness. It also naturally preserves more transient detail , so if you need clarity in your picking or strumming, tube saturation is a solid choice.
My Favorite Acoustic Guitar Compressor Plugins
Not all compressors are created equal, and when it comes to acoustic guitar compression, some designs just work better than others. Plus, certain compressors have a more transparent sound, while others add more color and warmth.
The right compressor for your acoustic guitar depends on the vibe you’re going for. With that said, I recommend trying out some of the ones below, as they've been staples in my mix templates for many years.
FabFilter Pro-C 2
FabFilter Pro-C 2 is one of the best compressor plugins for getting a transparent sound on your acoustic guitar. What I love about it is that it won’t add any unwanted coloration to your guitar unless you specifically choose one of the eight modes designed for adding character. So, if you want to keep things clean and natural, this is a fantastic choice.
But don’t let its transparency fool you, as Pro-C 2 is packed with powerful controls. One feature I really appreciate is the lookahead gain reduction , which lets the compressor anticipate incoming transients before they hit.
This helps prevent sudden peaks from slipping through, so you get smooth and even compression at all times. It also includes 4x oversampling , which reduces aliasing and ensures the compression sounds pristine even at higher sample rates.
One of my other favorite parts of Pro-C 2 is the waveform display , which visually shows you exactly how much compression is being applied to your signal. It makes dialing in the right amount of compression much easier, so you’re not left guessing. You can literally see how much you’re compressing in real-time.
Plus, it comes with a built-in sidechain EQ , which lets you tailor the compression response to specific frequencies. If your acoustic guitar has a bit too much low-end rumble, for example, you can use the sidechain EQ to shape how the compressor reacts to it.
There's also parallel compression controls, which are perfect for when you want to retain some of the original dynamics of the guitar while still getting the benefits of compression.
Comp FET76
Next up is the Comp FET76 , which is an emulation of the classic 1176, an absolute industry standard in the world of compression. Most rock or pop records you've ever heard most likely have an 1176 compressor on them. This plugin brings all that character and energy into your digital setup, but in a more compact, user-friendly format.
What I love about the Comp FET76 is that it's one of the easiest compressors to use . With just a handful of controls, you can quickly dial in the sound you're looking for. No need to overthink things or get buried in endless settings. This simplicity makes it perfect for when you want to get to the point and still have a lot of control over your sound without fussing with too many options.
Just note that it has a lot of character . The 1176 is typically known for its aggressive, fast compression, and the Comp FET76 carries the same punch. When you use it, you’re going to hear a bigger impact on the character of your acoustic guitar sounds. It can really bring an acoustic guitar forward in a mix, giving it a certain "in-your-face" presence that you can’t get with more transparent compressors.
I’d recommend the Comp FET76 more for rock or modern acoustic guitar sounds, where you might want a bit more edge and warmth in your tone. It’s especially great if you're working on a track that needs some grit or a more saturated vibe. Even if you don’t go heavy-handed with the compression, the Comp FET76 will still add a uniquely warm, analog sound.
Waves Abbey Road RS124
If you’re after that classic 60s Beatles sound, the Waves Abbey Road RS124 is a fantastic choice. This compressor is modeled after the legendary STA (Signal Transfer Amplifier) compressor, which was famously used during the late 60s at Abbey Road Studios. So, if it's a vintage, warm, and wooly vibe you're after, this is your ticket to ride.
One of the best things about the RS124 is how easy it is to use . It keeps things simple with just a few controls, so you can focus more on how it sounds rather than fiddling with a bunch of parameters.
As for the tone, tube compressors have a unique sound that sets them apart from solid-state compressors. The reason for this is the way tubes behave. As we touched on in the saturation section, they add a bit of natural warmth and harmonics, which is why you get that richer, more rounded tone. The RS124 does this beautifully, and I often find myself leaning on it when I want a slightly creamy, vintage feel.
UAD Teletronix LA-2A
The UAD Teletronix LA-2A is my go-to compressor when I want a smooth, natural sound. This plugin is based on the classic opto compressor hardware, which uses optical circuitry for a super transparent, musical quality. You get gentle, smooth compression that doesn’t feel overly “processed,” which is why it's perfect for acoustic tracks where you want to preserve the natural dynamics of the performance.
One thing I love about the LA-2A is that it has fixed attack and release settings , which means you don’t have to worry about tweaking any additional parameters. Instead, all you need to do is dial in the peak reduction to control how much compression you want. This makes it incredibly easy to use.
Final Thoughts
Alright, that just about wraps it up! If you're mixing just about any acoustic guitar recording, you'll likely need to use compression in some form or another, whether for controlling the dynamics or for adding character.
Whatever the reason, take your time dialing in the settings and listening to what your compressor is doing. Different settings will work best for different types of performances and genres.
If you’re looking for more tips on getting your acoustic guitar to sit perfectly in a mix, be sure to check out our full guide on mixing acoustic guitar !


