


When it comes to EQing vocals, there’s no one-size-fits-all solution. Every voice has its own unique characteristics, so you’ve got to treat each one with a custom approach. This is especially true when you’re working with male and female vocals.
While both often need a little massaging here and there, male vocals tend to have a bit more of a focus on the low mid-range compared to female vocals. Guys often have that deeper, thicker tone that can sometimes feel a bit muddy, especially in the 200-400Hz range. So, EQing male vocals requires some extra attention to clear up those low mids while still maintaining warmth and presence.
Of course, there’s more to that. And while there’s no magic formula, there are some basic places to look, so you’ve got a solid game plan whenever you pull up a vocal EQ and have no idea where to start.
How to EQ Male Vocals
As I said, with male vocal EQ (or any vocal EQ for that matter), the approach can shift depending on the singer. Just like you wouldn’t expect a baritone and a tenor to sound the same, the ranges we’ll discuss below will vary from singer to singer.
For example, a baritone vocal track might have a much more prominent presence in the lower mids or bass frequencies, giving the voice a thicker, warmer tone. On the other hand, a tenor will often have a brighter, more focused sound higher up in the range. This means you’ll want to pay attention to where the vocal is sitting within those ranges, adjusting your EQ accordingly.
The best way to figure out where your vocal is sitting is to use an EQ with an analyzer on it. The FabFilter Pro-Q 3 has been my go-to forever, and it’s what you’ll see pictured below!
I’m also often a fan of using wider Q settings, as they give the sound a more natural feel, avoiding that harsh, pinpointed effect that can come from super narrow Q settings. Of course, if you're dealing with a specific problem frequency, like a nasty resonance or an annoying whistling sound, that’s when you’ll want to get more surgical with a tighter Q. But for the most part, wider settings do the trick.
Now, let’s break down the different ranges of the male voice from bottom to top, and I’ll show you how I approach EQing each of these areas.
Start with a High-Pass Filter
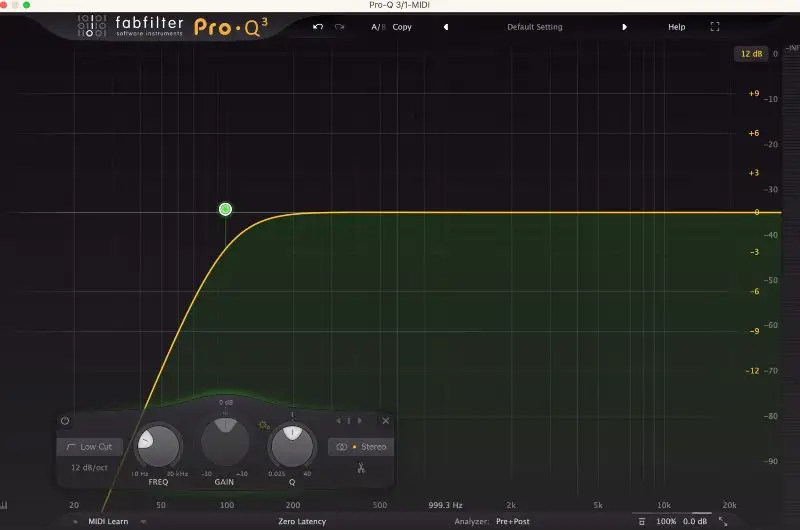
Before you dive into the meat of your vocal EQ, I would say 95% of the time, I like to start with a high-pass filter.
Why? Because it helps clear out unwanted noise and that non-musical rumble you’ll often find in the low end, below the usable bass frequencies. This is the stuff that doesn’t add anything to the vocal.
Generally, I like to set the slope to around 12dB or 18dB per octave . To find the perfect cutoff point, I’ll start by sweeping the high-pass filter gradually and listen carefully for when the mud clears without making the vocal sound too thin. The key here is not to overdo it, especially with lower voices. Baritones and basses have more of that deep, rich sound, and if you cut too much, you can make them sound weak and lifeless.
So, be cautious and adjust your high-pass filter carefully based on the voice you’re working with.
EQ the Body

The 150-300Hz range is where the "body" or fundamental of a vocal track typically lives. This is the meat of the sound, or what gives the voice its fullness and presence. You can either boost or cut in this range depending on how you want the vocal to sit in the mix.
If the vocal feels a little too thin or lacks power, a slight boost in this area can help fill it out and give it more weight. Just be careful, as if you boost too much, things can get a little boomy and overpowering, especially in the 200-250Hz area.
Now, if you find the vocal is too boomy, you can also try using a dynamic EQ . I love dynamic EQ because it lets you target problem frequencies in a more controlled way. We’ll get more into that in a bit and why dynamic EQ has actually become my first choice in many EQ situations.
If you want to add some body, you can boost in this region. However, I often find that sometimes, a little saturation is the magic fix. Saturation, especially tube or tape saturation, can add harmonics to the lower mids and make the vocal sound fuller and more present without the need for EQ.
Cut Out Boxiness
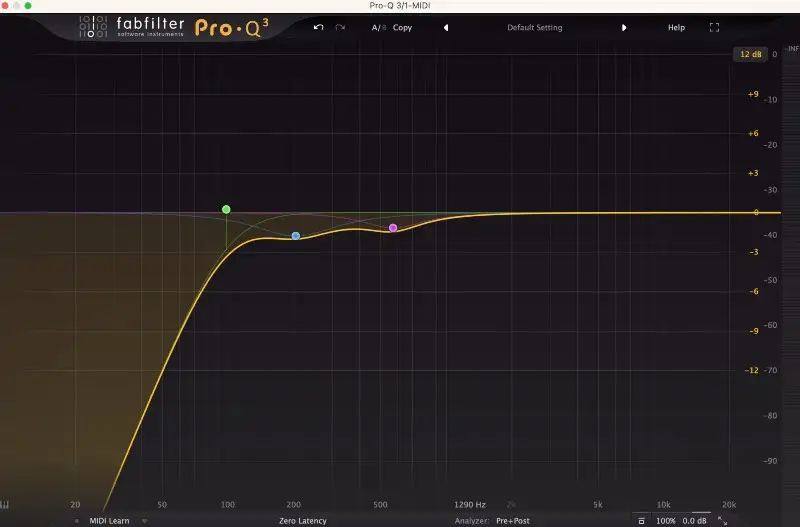
500Hz is the infamous boxy zone. This frequency range tends to be a bit of a problem on most vocals, whether male or female. It's the frequency range where vocals sound like they’re trapped in a cardboard box. Think dense and muffled. This "boxiness" is something you’ll want to address if you’re looking to open up a vocal and make it sound more present.
Personally, I often cut a little bit here, not just to clean things up, but to actually brighten the vocal. By reducing some of that mid-range thickness, the higher frequencies start to shine through more clearly.
Dynamic EQ works wonders in this situation, too.
Nasal Quality
One area you'll often find a bit of unwanted character in is between 1.5 and 2kHz . This is where the nasal quality tends to sit, and if it's too pronounced, it can make the vocal sound grating or even a bit telephonic.
If you’re dealing with a vocal that’s feeling too nasal, this is a great area to cut. A gentle dip around 1.5-2kHz can help smooth things out and remove any annoying honkiness.
That said, if the vocal is feeling hollow or thin, this is actually a good area to boost. By giving it a little lift in this range, you can bring some life back into the sound and add a bit of richness to the midrange. But, as always, it’s about balance.
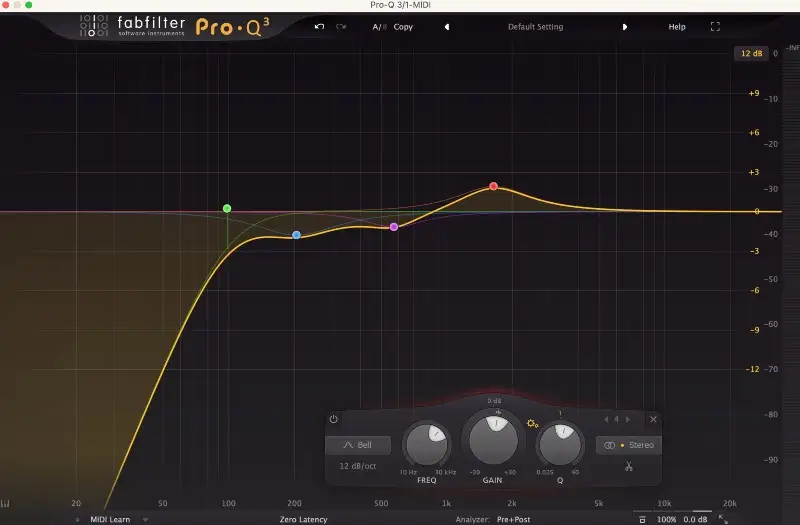
Harshness or Presence
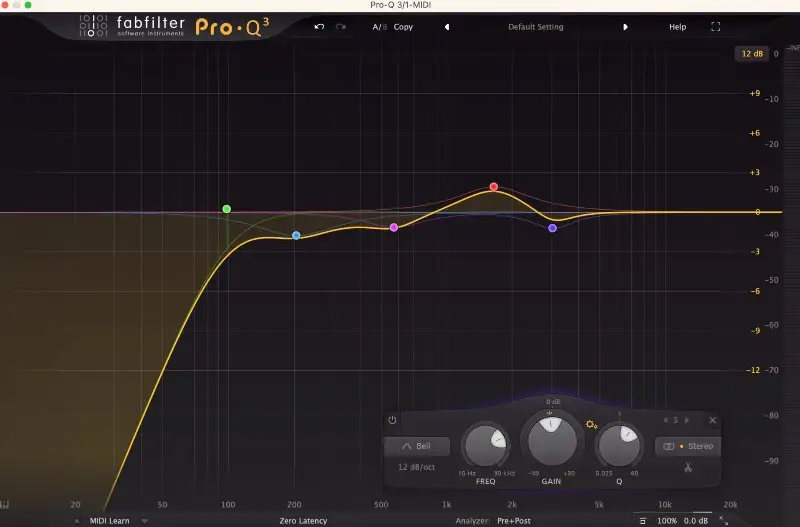
The presence range, which typically sits between 2kHz and 4kHz , can be a bit of a double-edged sword. It’s where a lot of the vocal clarity and detail live, but it can also be the area where a vocal starts to sound grating if there's too much frequency information built up.
Our ears are especially sensitive in this range, so too much in this area can feel harsh and annoying.
4kHz is particularly troublesome for many vocals. I call it the “spitty” range. If certain notes in this range stick out and start piercing through, a little cut here can work wonders to smooth things out. You don’t want to completely strip the presence, but you definitely want to avoid any unpleasant abrasiveness.
On the flip side, if the vocal is feeling a bit flat or lacking in presence, you can try boosting between 2kHz and 4kHz. If you’ve already tried boosting in the 1-2kHz area and it’s not giving you the presence you need, this range can be a good next step. As always, just be careful not to overdo it.
Open Up the Air
To really make a vocal sparkle and feel open, I like to bring out a little "air" with a high-shelf EQ, usually above 10kHz . A well-placed high-shelf can make the vocal feel more "open" without it sounding harsh or too bright.
When I’m adding air, I usually turn to a Pultec EQ or an analog EQ for this task, as they provide a smoother, more musical character.
That said, if you go a little too heavy on the high boost and end up with more sibilance than you’d like, pairing your high-shelf boost with a de-esser can be a lifesaver. A de-esser helps tame those sibilant “S” sounds that can pop up when you add air to the top end.
Gentle Low-Pass Filter

The last move I usually make when EQing a male vocal is a gentle low-pass filter around 20kHz . The reason for this is that it helps clean up any inaudible sounds in the very high frequencies that don’t add anything to the vocal. By cutting them off, you put the vocal in a bit more of a "pocket," giving it a more controlled, focused sound.
I usually go with a relatively gentle 18dB slope for this. That way, you're not completely cutting off all the high end, but you’re still cleaning up the extremes without losing any of the brightness or air you’ve worked hard to create.
Additional Tips
Consider Your Recording
If you want the most natural-sounding vocals, less is often more when it comes to EQ. The goal is always to shape the sound with as little processing as possible, so you can preserve the character of the voice. If you can get the vocal sounding good right from the start, you won’t have to rely on EQ to fix things later.
If you have control over the recording process, take a moment to think about how your microphone selection and recording environment can help you "EQ" the vocal before it even hits the track. For example, if you want a brighter, more forward sound, you might choose a mic that emphasizes high frequencies, like a large-diaphragm condenser.
On the flip side, if you’re looking for a smoother, warmer tone; a different mic, such as a ribbon mic, might suit your needs better. The right mic can do a lot of the heavy lifting, so you don’t have to overdo it in the mixing phase.
We’ve got a great guide on vocal microphones that can help you pick the right one for the sound you’re after.
Of course, the environment you’re recording in is just as important. An optimal recording space should be free of background noise and reflections. A well-treated room that uses foam panels or bass traps can help prevent unwanted room sounds from getting their way into your recording. If your environment isn’t soundproofed or acoustically treated, you might end up with a vocal that sounds boxy or distant, which will require more EQ work later.
Lastly, consider microphone placement . Where you position the mic can have a huge impact on the tone of the vocal. For instance, moving the mic a little closer or farther from the singer can emphasize or de-emphasize certain frequencies. If you’re after a more intimate sound, you might try getting the mic closer to the vocalist. For a more open, distant sound, pulling it back a little will do the trick.
Use a De-Esser
Using a de-esser is equally important to EQ, especially when you’ve boosted the high end or added air to the track. De-essers help reduce harsh “S” sounds and other sibilant frequencies that cut through the mix a little too much.
Unfortunately, most people don’t use them properly. Here’s how I like to approach de-essing:
- Find the Problem Area : Start by identifying where the sibilance is most problematic. Typically, this falls between 5kHz and 8kHz, but it can vary depending on the vocalist. I like to find where the sibilance is harshest by looping a section with a lot of “S” sounds looking for where they jump out on my frequency analyzer.
- Set the Frequency : Once you've identified the troublesome frequency range, set your de-esser to focus on that area. If you’re unsure where to start, try a frequency range between 5-7kHz, as this is usually where the sibilance sits.
- Adjust the Threshold : The threshold determines how much sibilance needs to be present before the de-esser kicks in. Lower the threshold until you start hearing the sibilance get tamed. You don’t want it to be too aggressive, so make sure it’s only acting on the sharp “S” sounds, not the entire vocal.
- Check Your Mix : After setting up the de-esser, listen to the vocal in the context of the full mix. Sometimes, what sounds good soloed might be too subtle or too noticeable in the mix. Adjust the settings until the sibilance is controlled, but the vocal still sounds natural and clear.
Use Dynamic EQ
Dynamic EQ has become my go-to tool for EQing vocals (and really, any other instrument) more than anything else. It's just so versatile and precise, which is exactly what you need when you’re trying to get a vocal sounding polished without over-processing it.
It’s basically a blend of regular EQ and compression, as it allows you to tame certain frequencies only when they become problematic, instead of making permanent cuts or boosts across the entire performance.
Essentially, dynamic EQ allows you to apply EQ adjustments based on the volume of the incoming signal. Instead of having a static EQ cut or boost at a specific frequency, dynamic EQ kicks in when that frequency exceeds a certain threshold, making it much more responsive and natural.
Let's say you’ve got a male vocal with some unwanted low-mid build-up around 200Hz that occasionally gets a little too muddy. Normally, you’d cut that area, but a static cut could make the vocal sound too thin when the low-mids aren’t a problem. With dynamic EQ, you can set a threshold and let the EQ only engage when those low-mids become too pronounced, giving you the best of both worlds.
FabFilter Pro-Q 3 actually has a fantastic dynamic EQ feature built right in, which makes it super easy to dial in exactly what you need.
Reference Other Vocals
For mixing in general, I like to use reference tracks. If you’re not already doing this, trust me, you should be. A reference track is essentially a professionally mixed song that you use as a benchmark to compare your own mix against. This can help you make better, more informed decisions because you’ve got something to work toward.
This can also help you get the vocal level right, balance the EQ, or find the right amount of presence.
The best part about reference tracks is they help you avoid "mixing in a vacuum." It's easy to get lost in the details of your own mix and end up second-guessing yourself. With a reference track, you’ve got a solid point of comparison that can guide your choices.
What’s also surprising is that sometimes, when you pull up a reference track, it can reveal things you never noticed before. Maybe your vocals sound more muddy or nasal than you realized, or you might discover that you’ve been over-boosting the high end. It’s a great way to check your work and make sure your vocals are sitting as they should in the mix.
Final Thoughts - Learning How to EQ Like a Pro
Before we wrap things up, let’s remember something important: this guide on how to EQ isn’t a gospel. It’s just a starting point to help you get a handle on EQing male vocals. Every vocal is different, and every mix has its own needs, so don’t be afraid to experiment and adjust as you go.
Sometimes, a vocal track might require EQ settings that are totally unique, and that’s part of the fun of mixing. Think of this as a toolkit, not a rulebook.
Also, EQing in isolation isn’t the whole story .
You’ve got to EQ vocals in the context of the mix. That means considering how the vocal fits with everything else happening in the track. Using other tools, like saturation and compression, can help shape the vocal and get it sitting perfectly in the mix alongside EQ.
Trust your ears, keep experimenting, and don’t be afraid to try something new! Have fun mixing!


