

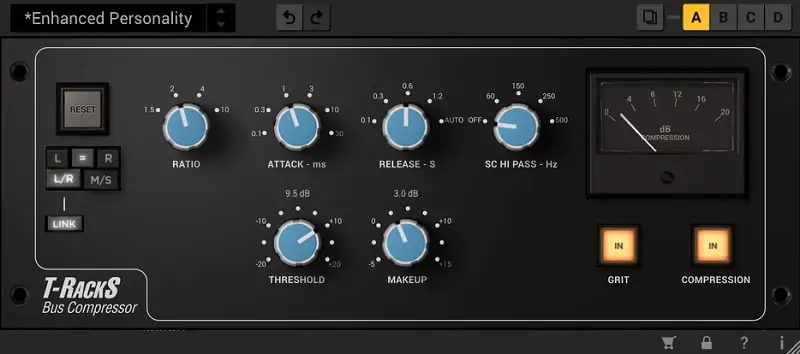
The process of adding compression to your entire mix is known as mix bus compression .
The mix bus, which is another term people use to describe the output section of their DAW, is where every piece of audio in your sessions flows before it is sent out to your interface and your speakers.
Some people also refer to this section as the stereo bus or master bus.
One of the best ways to elevate a mix that is almost there is by injecting it with a bit of compression. Properly tuned mix bus compression can make your mixes sound more cohesive and exciting while controlling any out-of-control dynamics.
Plus, mix bus compression delivers that "glue" that you always hear engineers talking about.
Guess what?
You don't need to buy an expensive hardware compressor to glue your mix bus together either! You can simply throw up the stock compressor in your DAW and start experimenting.
However, in reality, great mix bus compression isn't a willy-nilly process. One tiny mistake can obliterate everything you've worked so hard on for your mix up to this point.
For this reason, we're going to dive in and teach you all you need to know about mix bus compression, so you never have to second-guess yourself again.
Biggest Mix Bus Compression Mistakes
In our experience, the best way to teach people about mixing techniques is by starting off with what not to do.
Let's look at a few common mistakes that mix engineers make when they apply mix bus compression.
Heavy Gain Reduction
How much gain reduction is too much gain reduction?
Well, for starters, your needle shouldn't be bouncing all over the place when you compress your stereo bus. Most of the time, 1-2 dB of compression will do the trick.
If you notice some peaks in your mix are still sticking out, go back into the mix and fix the offending instrument.
Using High Ratio Settings
Because mix bus compression affects the entire mix , subtlety is crucial.
The last thing you want is aggressive compression smashing your beautifully dynamic mix to smithereens. Most of the time, a 2:1 ratio will do the trick. If your compressor allows for it, we would recommend going even smaller around 1:5:1 .
Using Fast Attack and Release Settings
I can't think of a time I used a fast attack time on my mix bus compressor.
Fast attack times have a nasty habit of removing transient information that can make your mixes punchy. When you set your attack time too fast, you suck the life out of your mix.
No one wants a flat pancake of a mix.
With that said, there are no golden rules when it comes to attack and release settings. It truly depends on the song. Some mixes will call for slightly faster attack times than others.
For the most part, however, we recommend going with a medium to slow attack.
The best way to dial in attack time is by starting really slow (somewhere above 100ms) and dialing it faster until you begin hearing the transient peaks dull out, then dial it back.
If you're new to mixing, hearing how this setting impacts your sound can be difficult. To combat this uncertainty, you can reduce your threshold until you're getting around 10-15dB of gain reduction, which will make alterations in your attack time more obvious.
Once you've found the right attack time, you can dial it back down to 1-2 dB.
In the same way, you should use a slower attack time, you should also use a slower release time. A fast release time can result in a phenomenon known as "pumping."
This is when a compressor releases too quickly, making the end of a note or syllable louder than its transient. While EDM producers and gym rats love pumping, it's not something you should strive for with mix bus compression, as it can make your mix sound wholly unnatural.
If your release time is way too fast, it can even impart distortion!
To make your life easier, we recommend looking for a compressor that has an auto-release setting. An auto-release setting takes all the thought out of the equation, as it bases the release on the input signal.
If you don't have a stereo compressor with an auto-release button, you should do your best to time your release time to your track's tempo. In doing so, you can help your stereo compressor breathe with your mix.
Similar to the way you set your slow attack time, you can set your release time by starting with a slower release and gradually increase the time until you feel like it's breathing with the tempo of your song.
Locking in the right attack and release time just feels right. We guarantee you'll know it when you get there!
Using a Release Time That Is Too Slow
Unfortunately, ultra-slow release times can be just as dangerous as ultra-fast ones.
Instead of catching peaks and adding glue to your whole mix, a bus compressor with an ultra-slow release time and 2dB of gain reduction will just make your track 2dB softer than it was before.
The needle on your compressor should return to 0 in time with your song.
One neat trick to help with this is to time your release to your snare or kick drum. If the needle returns to 0 dB between these drum hits, you'll know you're in the ballpark.
When Should I Put My Bus Compressor On The Mix?
One of the most common mistakes we see when it comes to mix bus compression is when an engineer chooses to apply it.
You'll see many mastering engineers advocating caution when it comes to putting a bus compressor on the mix. However, there are many great mix engineers who get incredible-sounding records with mix bus compressors.
The key here is putting your compressor on the mix early and mixing into it. By doing so, you can get the compressor to respond as you mix.
I would go so far as saying don't even bother putting a bus compressor on your mix if you're deep in the mixing process.
Think about it.
When you stick a compressor on a mix that you're basically finished with, the only thing you're doing is altering the mix you've worked so carefully to craft.
I would also go as far as saying don't stick a mix bus compressor on your mix if you plan on sending it to a mastering engineer or a mastering service like eMastered. One of the main things mastering is for is giving your mix that last little bit of glue, loudness, and excitement.
There are two circumstances in which I'd recommend putting a mix bus compressor at the end of a mix:
- You're mastering a song for someone else
- You like experimenting, and you want to hear what mix bus compression would sound like.
Now that you have an understanding of when to use a mix bus compressor, let's look at how you might go about setting one up.
How To Set Up A Mix Bus Compressor
You want to find mix bus compression settings that work most of the time and we're here to help!
While you'll certainly want to consider the fact that your settings will change from song to song, this method will give you a default place to start.
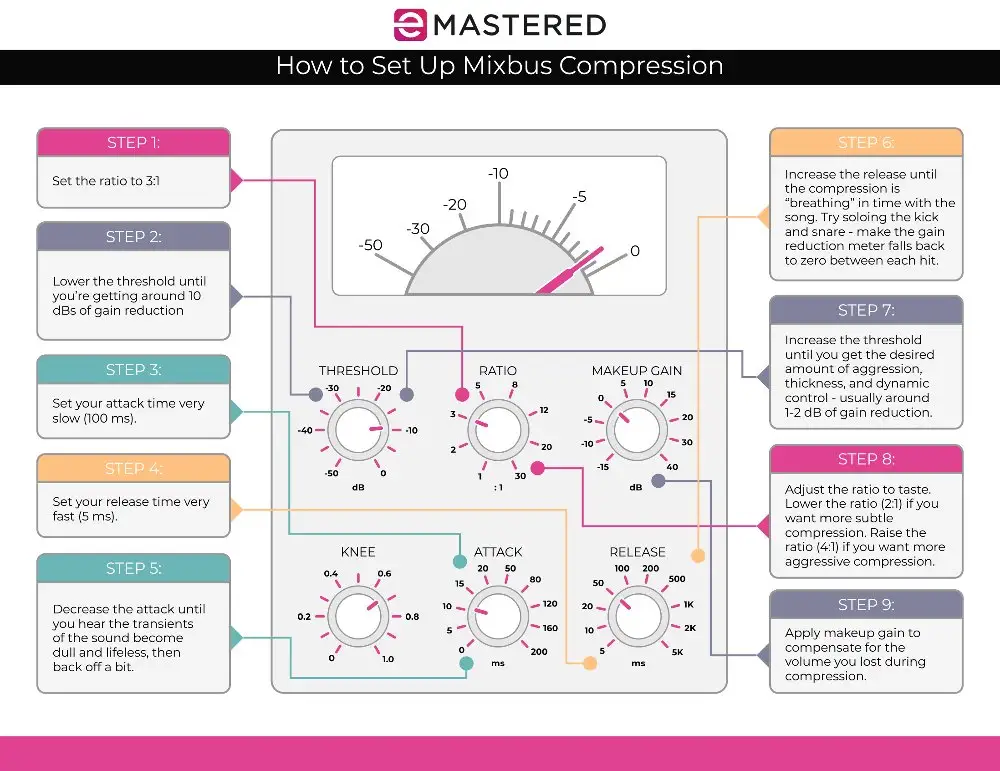
#1 Use A Slower Attack and a Medium Release Time
Slower attack times between 50 and 100ms and medium release times or auto release.
PRO TIP: One of the best ways to set your release times is to look at your gain reduction meter. While it's important to listen to how your compressor is reacting to your mix, you can watch your gain reduction meter to see if it's bouncing or 'breathing' in time with your mix. If so, you're probably in the ballpark.
#2 Set Your Ratio
Start with a ratio of 2:1. If you find that your compressor isn't transparent enough for your mix or that the 2:1 ratio isn't gelling with the dynamic of your song, you can bring it down to 1:5:1.
#3 Reduce The Threshold
Bring the threshold down until it's taking down anywhere from 1-2 dB during the loudest parts of the song.
#4 Listen To Each Part Of The Song
How does the compressor react to your mix during the chorus vs. the verse?
Is the compressor pumping or breathing?
Do you hear distortion when you turn your mix bus compressor on?
Don't be afraid to automate the settings during different sections to account for changes in dynamics throughout the course of your song!
What Kind Of Compressor Is Best For Mix Bus Compression?
One of the most common questions that we see when it comes to mix bus compression is
What kind of compressor should I use on my mix?
It's important to note that there are many different types of compressors and many unique sonic differences between them. Some are more suitable for mix bus compression than others. There are a few main reasons why they are different, including:
- Different compressors use different kinds of circuitry (emulated circuitry in the plugin versions)
- Different compressors have unique controls and time constants
There are four main compressor types that are used for mix bus compression, including FET (Field-Effect Transistor), VCA (Voltage-Controlled Amplifier, Variable Mu Tube, and Optical compressors.
Of course, you can also go with digital processors that don't emulate these bus compressor types, though for the sake of giving you an idea of the sonic characteristics they provide, we'll stick to talking about modeled compressors for now.
FET
FETs use a unique transistor, which controls the amount of gain reduction. This transistor works very similar to the way a tube works, though you won't often find mastering engineers using these compressors for mix bus purposes compared to optical and VCA models.
There are a few reasons for this.
For starters, FET compressors are often brighter and have very focused sound quality. While that can be great for getting instruments to sit right in a mix, it's not very pleasing when you begin applying compression atop an entire mix.
Secondly, FET compressors can achieve incredibly fast attack times compared to the other three types of compressors, which is why many engineers consider them limiters.
Of course, that's not to say you can't use them on your mix bus, though they require much more care and attention than the other three if you don't want to squash your dynamics.
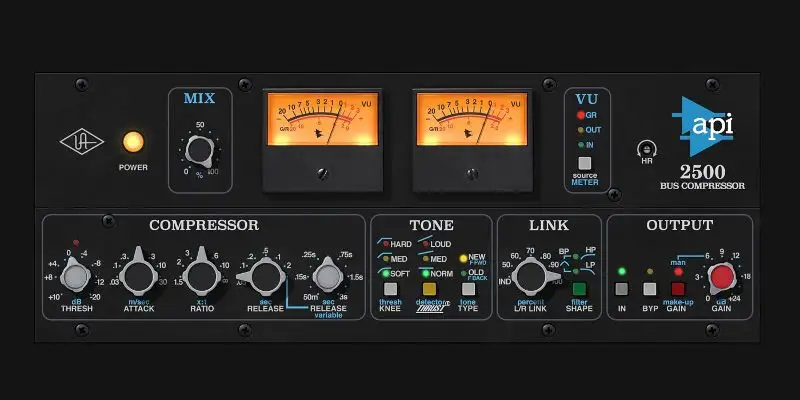
VCA
VCA compressors are also very colorful in terms of sound quality. However, the color that you get from these compressors isn't the same as the bright and focused sound of the FET.
These voltage-controlled amplifiers apply an amount of gain that is derived from the audio input. Essentially, the input signal is used as the compressor's threshold.
VCAs are one of the most popular compressor types for bus compression and you should certainly have one in your arsenal. Some of the most iconic hardware VCAs include the API 2500, the SSL G-Series, and the Neve 33609, all of which can be found in plug-in form.
Variable Mu
Don't let the name confuse you! 'Mu,' in hi-f audio speak, means 'gain.'
There are many compressors that have signal chains with vacuum tubes in them, though real vari-mu compressors use a valve to deliver a unique style of compression. To control the amount of gain reduction, they re-bias the tube.
A great vari-mu compressor should offer warmth, smoothness, and a slight but pleasing bit of harmonic distortion. Some of the best and most iconic names in the vari-mu world include the Pendulum ES8, the Manley Variable Mu, and the Fairchild 660 and 670.
Optical
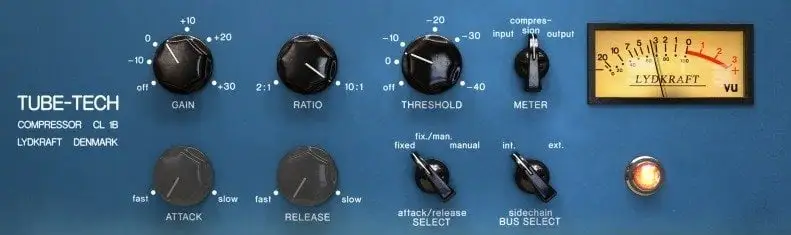
You'll find the sound of the optical compressor all over modern music production, as they are very musical and transparent. This is because optical compressors use photo-optical detector circuitry to control gain reduction.
One of the great things about optical comps is that they often have minimal components inside them and minimal controls on the outside.
If you're looking for a clean and musical compressor to give you easy tonal control and balance, an optical compressor is a great starting point. Some of the most iconic models include the Millennia Media TCL2, the Tube-Tech CL2A, the Joemeek SC2, and the Avalon AD2044.
Compression Parameters To Look For
When trying to find the right compressor for your mix, it's important to consider some parameters that you might find on them. Here are a few things you might consider looking for.
Stereo-Link
For starters, you want your compressor to react to the left and right channels in the same way. If it's reacting more to the peaks on the right than the left, you could end up with a lopsided mix.
If you're working with a dual-mono compressor that doesn't have a stereo-link option, it can mean bad news for your mix.
Of course, if you have a dual-mono compressor that you're looking at and it has a stereo-link option, it might be worth investing in, as you'll not only be able to use it for your mix bus but also the individual tracks in your mix.
Auto Release
One of the most useful compressor settings is the auto-release, which you can find on several compressor plugins. When you're working with a busy mix, especially one with very complex changes and transitions, the dynamic variations can become unpredictable.
Essentially, you could go in and set your release time so that it sounds smooth and natural on one section, though it doesn't quite work with another. While you could certainly automate it throughout the song, having a program-dependent setting like an auto-release can make your life a whole lot easier.
Side-Chain Filter
Consider working with a compressor that has a side-chain filter built-in. The great thing about side-chain filters is that they equalize the incoming signal without impacting the sound of the signal itself.
So, let's say you have a very prominent kick drum or bass sound in your mix. By filtering out those frequencies, so they don't hit the detector circuit, you can help your compressor respond in a smoother manner.
Without a side-chain filter, low-frequency-heavy instruments could cause your compressor to pump. You don't want your mix to feel like it's being sucked into a vacuum each time the kick hits.
The API 2500 is one of my absolute favorite bus compressors that uses a high-pass filter.
Multi-Band Compression
If you're already familiar with the concept of parametric EQ, then you can think of a multi-band compressor as a dynamic processor with band-dependant processing.
With a multi-band compressor, you can divide your compressor into a number of EQ bands across the frequency spectrum, choosing how much of each band you compress.
For example, you might find that the low frequencies in your mix lack control, somewhere between 100 to 250Hz. With a multi-band compressor, you can work specifically with this band while ignoring others.
It's important to note that this kind of processing requires a high-quality monitoring system. Too often, we see amateur engineers try and use multi-band compression on their mixes because they believe they have a problem in a certain frequency range.
However, the problem usually has to do with their listening environment.
If you don't have a room with proper acoustic treatment , this type of processing is best left to a mastering engineer.
What Should Compression Do To My Mix?
When mixing without any compression, the faders are the parameters that determine each element's relative level. However, when a compressor is on the mix bus, you add an entirely new element for managing dynamics.
This can be a good and bad thing.
For example, there are circumstances where you might feel like you're fighting with the compressor, especially when it comes to the most important elements in your mix. Your drum bus or your vocals might be the loudest elements in your mix, meaning they'll be the first to cross over the threshold.
The problem here is that you could have a compressor on the mix and move the faders of these particular elements up without hearing a relative level difference because you're simply hitting the compressor harder, which is, in turn, reducing your levels with every increase.
Understanding how a compressor reacts is very important if you choose to use one on your bus. However, there are benefits to the way compressors react too.
When a compressor turns the loudest signals down in a mix, the consequence is that the quietest signals sound relatively louder. This is the sensation of glue that we were talking about earlier. You're taking multiple elements that may sound like they are in their own distinct spaces, lacking a cohesive character.
However, when you ever so slightly squeeze their dynamic range, you help them fit together in a space that feels more like a cohesive unit.
Final Thoughts - Nailing You Mix Buss Compression
While there are many that would argue mix buss compression is best left to an experienced mastering engineer, we believe that with the proper understanding of why, how, and when, you can apply healthy mix compression to elevate your mixes before you send them to get mastered.
It's really not about whether or not you use mix compression but rather how you use it. Of course, now you know that too much compression can ruin your mix and that your mixing style will have a major impact on the compressor settings you use on your mix.
As with any other mixing process, you can't always assume you'll use the same settings twice.
Equipped with the knowledge above, we urge you to spend some time experimenting with different compressors on your mixes and take notes about the qualities they impart.
Soon enough, you'll be a mix bus compression master!


