


You're about to embark on your very first project mixing an album. Congratulations!
Working on a few songs individually will hone your chops in the mixing department, but when it comes to working on a full album of material you want to aim for a consistent sound across the whole album. It's one of the most important elements to make it sound like an album, rather than multiple tracks released together.
Sure, mastering will help provide cohesion to your music, but a wise man once said 'you can't polish a turd'. Translated into the audio world, a good master starts with a good mix.
How do you set about getting all the songs in your project to sound consistent? It's a three-pronged attack, consisting of planning ahead, methodical workflow, and keeping your eye on the end game.
Part 1: Welcome To The Future
Tip #1: Make sure the songs are ready to be mixed
Whether you're mixing for another artist or for yourself, be sure to check out the project to make sure it's ready to be mixed. Are there timing inconsistencies in the drums? Do the vocals need tuning? Are the guitar tones up to scratch?
All these elements need addressing and fixing before you can start the actual mix process. Doing so can be time-consuming, and if you find yourself having to tune vocals halfway through mixing one song it's easy to get distracted and lose sight of the big picture.
Tip #2: Get organized
Mixing album projects involves juggling a lot of moving parts, and keeping track of where you are with each song in terms of mix, the revision process, and deliverables. (And payment, if you're working for someone else).
In order to avoid building up a hot mess on your hard drive it's a good idea to plan your housekeeping ahead of time. This includes elements like:
- File organization and folder hierarchy
- Whether the album was recorded by another engineer, or by yourself, it's worth creating a new dedicated mix session that only has the final comps and edits of takes. This will make file management much less unwieldy.
- Organize mix sessions, mix versions, and final deliverables into their own discreet folder, within a master project folder.
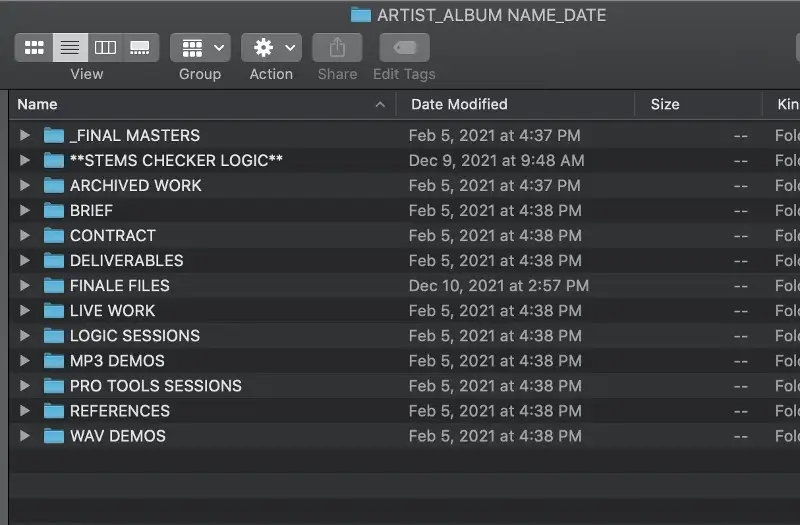
- File naming
- It's helpful to name your files with both a version number and a date, so you'll always be clear about which version you're talking about in the revision process. I like to use ARTIST_ALBUM_SONG NAME_VERSION NUMBER_DATE to make it easy to find files at a later date if necessary.
- A system for tracking progress
- A simple spreadsheet or Google doc will help you keep tabs on where you are in the process of mixing each song.
- An agreed-on revision process
- When you're ready to share your first mix with the band you'll want a neat and manageable way to get feedback. It's not going to help the overall sound of the album if you're fielding notes from multiple emails, texts, DMs, and phone calls. Instead, make sure there's one central place to give feedback, whether it's a shared Google doc or time-stamped comments in the cloud.
None of the above is an attractive part of the mixing process, but being organized will help your workflow, and therefore the overall sound of the record.
Tip #3: Establish the key elements of the album
Listen to the unmixed songs and identify what common elements are present throughout. An obvious choice would be the lead vocal, and may also include guitars, or drums. This can vary depending on the genre you're mixing though. For instance, in a hip-hop track, a key element may be the samples used.
Using these core parts as a starting point for your mixes will help you gain an understanding of what's unique about the sound, and help deliver an overall consistent sound for the album.
Tip #4: Know the kind of sound you're after before you begin
Knowing what the focal points of the album are is good, but it's also helpful to have a clear idea of the general vibe the band is looking for ahead of time. Ask them (or yourself, if you're flying solo) to send reference tracks, along with what they like about each song.
This doesn't have to include all the elements of a song. For instance, they might like the airy sound of the vocals on one track, and the snare sound of another. The idea here is to get an understanding of where the artist wants their finished album to sit musically and sonically.
Tip #5: Pre-mix all the tracks
Once you've established that everything's good to go and you know what your goals are, work through each of the songs on the album, and clean up any unnecessary noise. This includes removing low-end rumble, unwanted noises, and making sure the takes are clean.
Note that at this point, you're not affecting the sound in any way, just cleaning things up so you save time later on. Making your mixing workflow easier is key to achieving a great-sounding album.
Part 2: Gettin' Jiggy Wit It
OK. You've done all the pre-game shenanigans and you're ready to mix the first song! But wait...
Tip #6: Use a template
You've identified the core elements of the album, and you know the kind of sound the artist wants. It's now worth taking some time to set up a basic template in your DAW that includes VCA groups, bus routing, common effects, and basic track layouts.
If you create a template that already has the compressors, EQs, and routing settings that you know you'll need before you start, it will save time as you work through each of the songs.
While some people argue that using templates results in a bland, homogenous sound (Nickelback, anyone?), that's only the case if you don't change settings on the plug-ins. When used smartly, templates can save time and make the whole process much smoother.
Tip #7: Keep it to yourself
It's hard to let go of your babies and give them to someone else's care. But as a mix engineer, you'll do the artist a better service if they're not in the room while you're mixing. You did set up that revision process ahead of time, right?
If you're working on your own material, this is where having a dedicated mix session will help. You'll be less tempted to fiddle with parts and concentrate solely on the mixing process.
Be objective here; your role is to mix what you have, not to endlessly tweak what could be.
Tip #8: Choose the first song to mix wisely
There are many different ways to choose the first track on your mix palette. It might be the one that sounds the most fun to mix, or what the artist considers to be the best track on the album. My preferred choice is to pick the one that is the best representation of the band's overall sound.
Once you've mixed the first track, you'll have a better understanding of the work you need to do on future songs. This does depend to a certain extent on the recording process - for instance, if the drums were recorded in different studios over a period of time you may have more work cut out for you to get them to sound consistent.
On the other hand, if you nail the lead vocal sound on that first song, you're going to find the remaining songs much easier to mix.
Either way, this first song will give you a road map for crafting the remaining songs to have a cohesive sound. Speaking of which...
Tip #9: Become Prince of the Presets
I'm not talking about stock presets that come as standard on plug-ins (although they can be good starting points). This tip is all about creating your own presets specifically for the album you're working on.
Once you've mixed the first song you'll have a sense of how things will look moving forward. For instance, you may have spent time carefully EQ-ing the lead vocals. Save this as a preset (ideally with a prefix that helps you identify it as belonging to this particular album) so you can easily recall it in a new song. Create as many presets as you need - it'll only save you time as you move forward.
In the same way, if you've set up some sweet compression on an acoustic guitar you can apply this to all the songs on the full album to help it sound consistent throughout.
A lot of what can be carried over from one song to the next depends on how the music was recorded. And even if everything was done consistently you'll still want to tweak the settings on each channel from one song to the next to avoid a formulaic cookie-cutter sound.
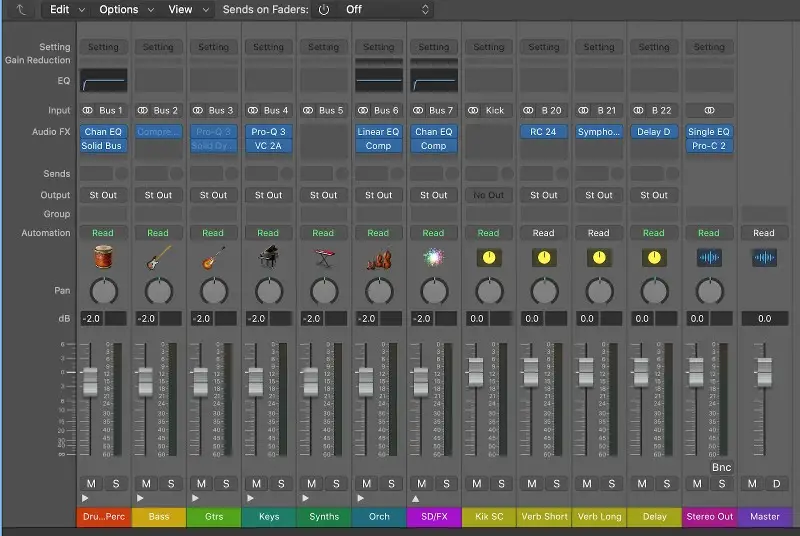
Tip #10: Become a Bus Driver
Using busses is a great way to save on CPU processing power, and to make your workflow more efficient.
They also make the revision process more manageable. If, for instance, the band wants the delay shared by the vocals and the rhythm guitar changed from a 16th to an 8th, delay, you only have to change one setting.
Instrument busses are also super helpful for delivering alt mixes (which all artists should be asking for - sync licensing folks!). Delivering a drum and bass mix is as easy as soloing the two busses. Plus, if each instrument group has its own effects bus it'll make printing stems a doddle.
So get into the habit of routing associated tracks (like all drums, or all guitars), and common effects like reverb and delay, to their own bus channels.
Tip #11: Use reference tracks
Remember tip #4 above? This is where those reference tracks will come in handy. Comparing your ongoing mix to commercial tracks that have the sound you're after will help guide your choices as you mix, and help maintain an objective perspective.
When referencing commercial tracks, be sure to bring down the fader on that channel to the same peak level as your mix, so you don't suffer from loudness bias.
Similarly, it can be a good idea to check the current track you're working on against other songs on the album that you've already mixed.
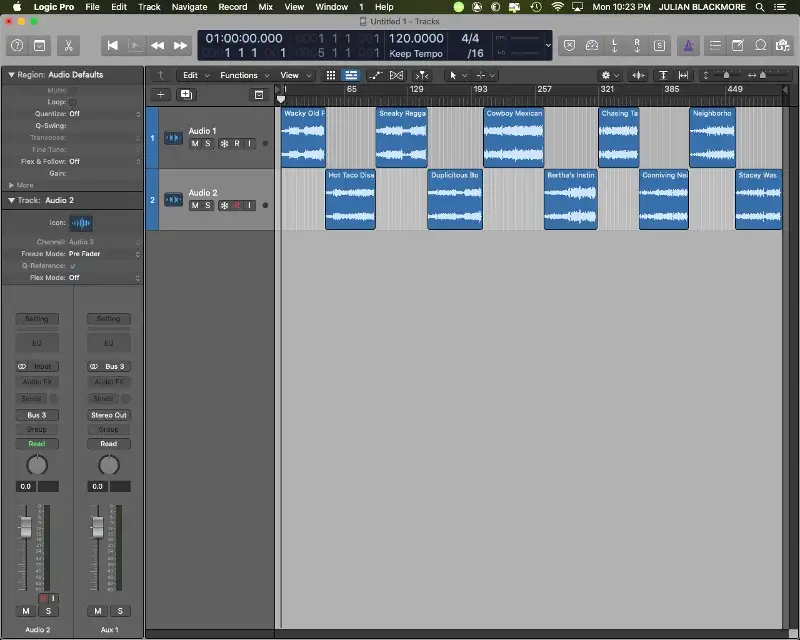
For this, set up all your tracks in a mastering-style session to see how they sit with one another. Paying attention to the key elements of the album (you did that in tip #3, right?), listen closely to see if they maintain consistency across the full album.
Tip #12: Throw out what you don't need
It's not unheard of to go a bit wild during recording, and lay down more parts than are necessary. It makes sense; the artist is in the throes of creation, and at this stage of music production they don't know how any given song is going to sound when it's properly mixed.
However, you might find when you approach the mixing phase there's a track here and there with parts that just don't sound consistent with the other songs. (This is why reference tracks, including songs from the album you're mixing, are a good idea).
In this case, it's worth considering whether you really need to include these parts. Don't compromise the key tracks you identified earlier just to crowbar in that theremin bass line that someone thought would be a good idea at a 3 am session.
Of course, if you're mixing tracks for another band or artist you'll have to approach this conversation with diplomacy. Consider doing alt mixes with and without the offending part, so they can hear the whole thing in context.
Tip #13: Take frequent breaks
It's important to rest your ears often while mixing, to maintain perspective. Ear fatigue creeps in unnoticed, and can lead you to make poor mix choices.
So, aside from mixing at a sensible volume (70dB for smaller rooms), take a 20-minute break every couple of hours to give your lug holes a rest.
Another tactic you can use to stay fresh is to mix for the first few hours of the day, and leave the remaining time for housekeeping or admin chores, or setting up the mix for the next song. The next morning you'll be able to hear things with a fresh perspective.
Tip #14: Listen in different environments
Be sure to check out all the mixes you conjure up in different listening settings. A car stereo is an obvious choice, but also try mixes out on earbuds, sh*tty computer speakers, and on your phone.
Ultimately you want all your tracks to sound great on any system, not just yours. Additionally, you don't know what system the band you're mixing for will be listening on, so doing due diligence in this area can help during the revision process.
Part 3: Master Blaster
A solid piece of advice for anyone mixing, whether it's an individual song or a whole album, is to leave the finishing touches to a mastering engineer.
Most artists however are working on a limited budget and will often ask the mix engineer to also handle the mastering phase.
Whether you take the DIY method , farm it out to a dedicated mastering engineer, or use an online service like eMastered , the following tips will help keep the whole project sounding cohesive:
Tip #15: Leave headroom
One of the most important aspects of mixing is to leave a suitable amount of headroom on the master bus. Not only does this prevent digital distortion from clipping, but it also helps create separation and clarity in your final mix.
A good rule of thumb is to have the peaks of the whole mix hitting no higher than -6dB. It's important not to adjust the master fader to create enough room here - use the channel faders instead.
Tip #16: Use master-bus inserts with care
Ideally, you'll have no plugins inserted across your master fader. If, however, you find that you need a little compression to help with dynamics control, or for gluing things together, use it sparingly.
Whatever you do, don't use a compressor to boost the volume of the whole track.
If you're not sure, stick with the tried-and-tested adage: less is more.
Conclusion
Music consumption has changed a lot since the analog era when people were making records designed to be listened to from start to finish.
In today's streaming world it's not uncommon for listeners to bounce from one song by Artist A to another by artist B.
Despite this, it's still considered important to have a cohesive sound across an entire album or EP. And with these tips, you should be on the right track (ahem) to achieve this.
Go forth, and mixeth the music!


