When you have a slew of processing plugins at your disposal it’s all too easy to run riot and over do things. And nowhere is this more common than in the world of compression.
Over-compression is a surefire way to suck the life out of your music and have listeners reaching for the skip button.
In this article we’ll be looking at what over-compression is, and what you can do to avoid it.
By the time you’re done reading you’ll have a better understanding of how to compress with finesse, and elude the jaded sound of an over-compressed track.
Grab a beverage, and let’s begin with a brief look at what compression is.
What Is Compression?
Compression is a way of processing audio to reduce it's dynamic range - the difference between the loudest and quietest parts. When a track is compressed the peaks of the signal are tamed, and the quieter parts are made louder.
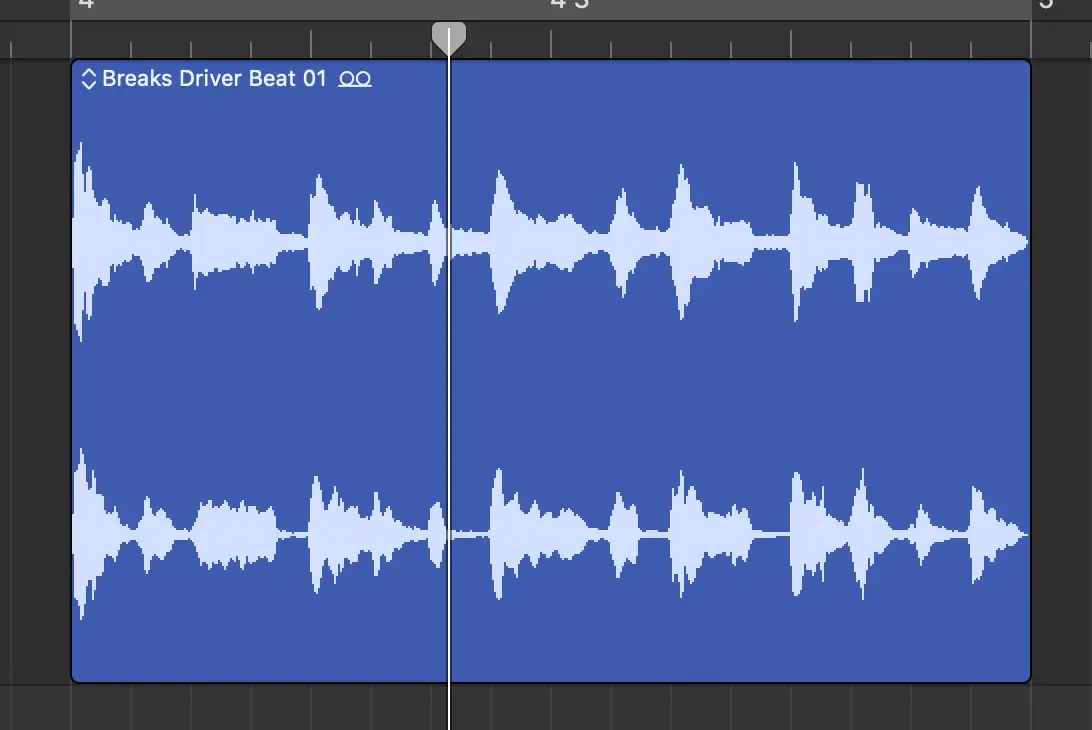
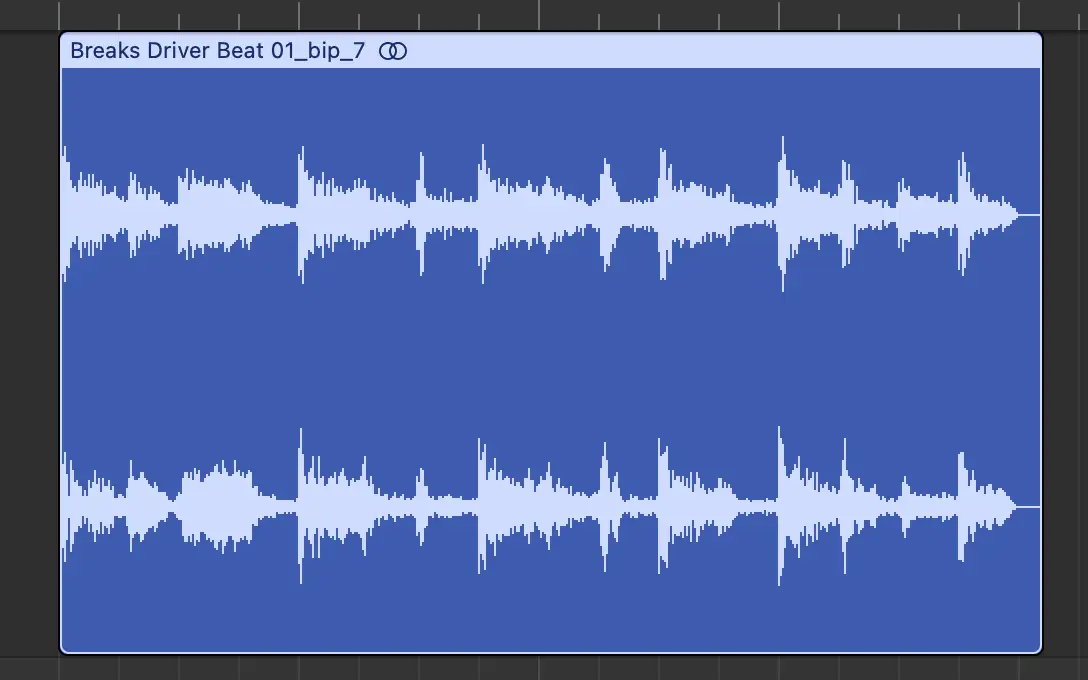
The resulting sound is more consistent, and can help a track sit nicely in a mix.
There's a whole bunch of other things you should know about compression, but as long as you have a handle on these basics we can carry on. Capiche?
What Is Over-Compression?
Over-compression occurs when audio is excessively compressed, to the point where the dynamics of the signal are squished to oblivion.
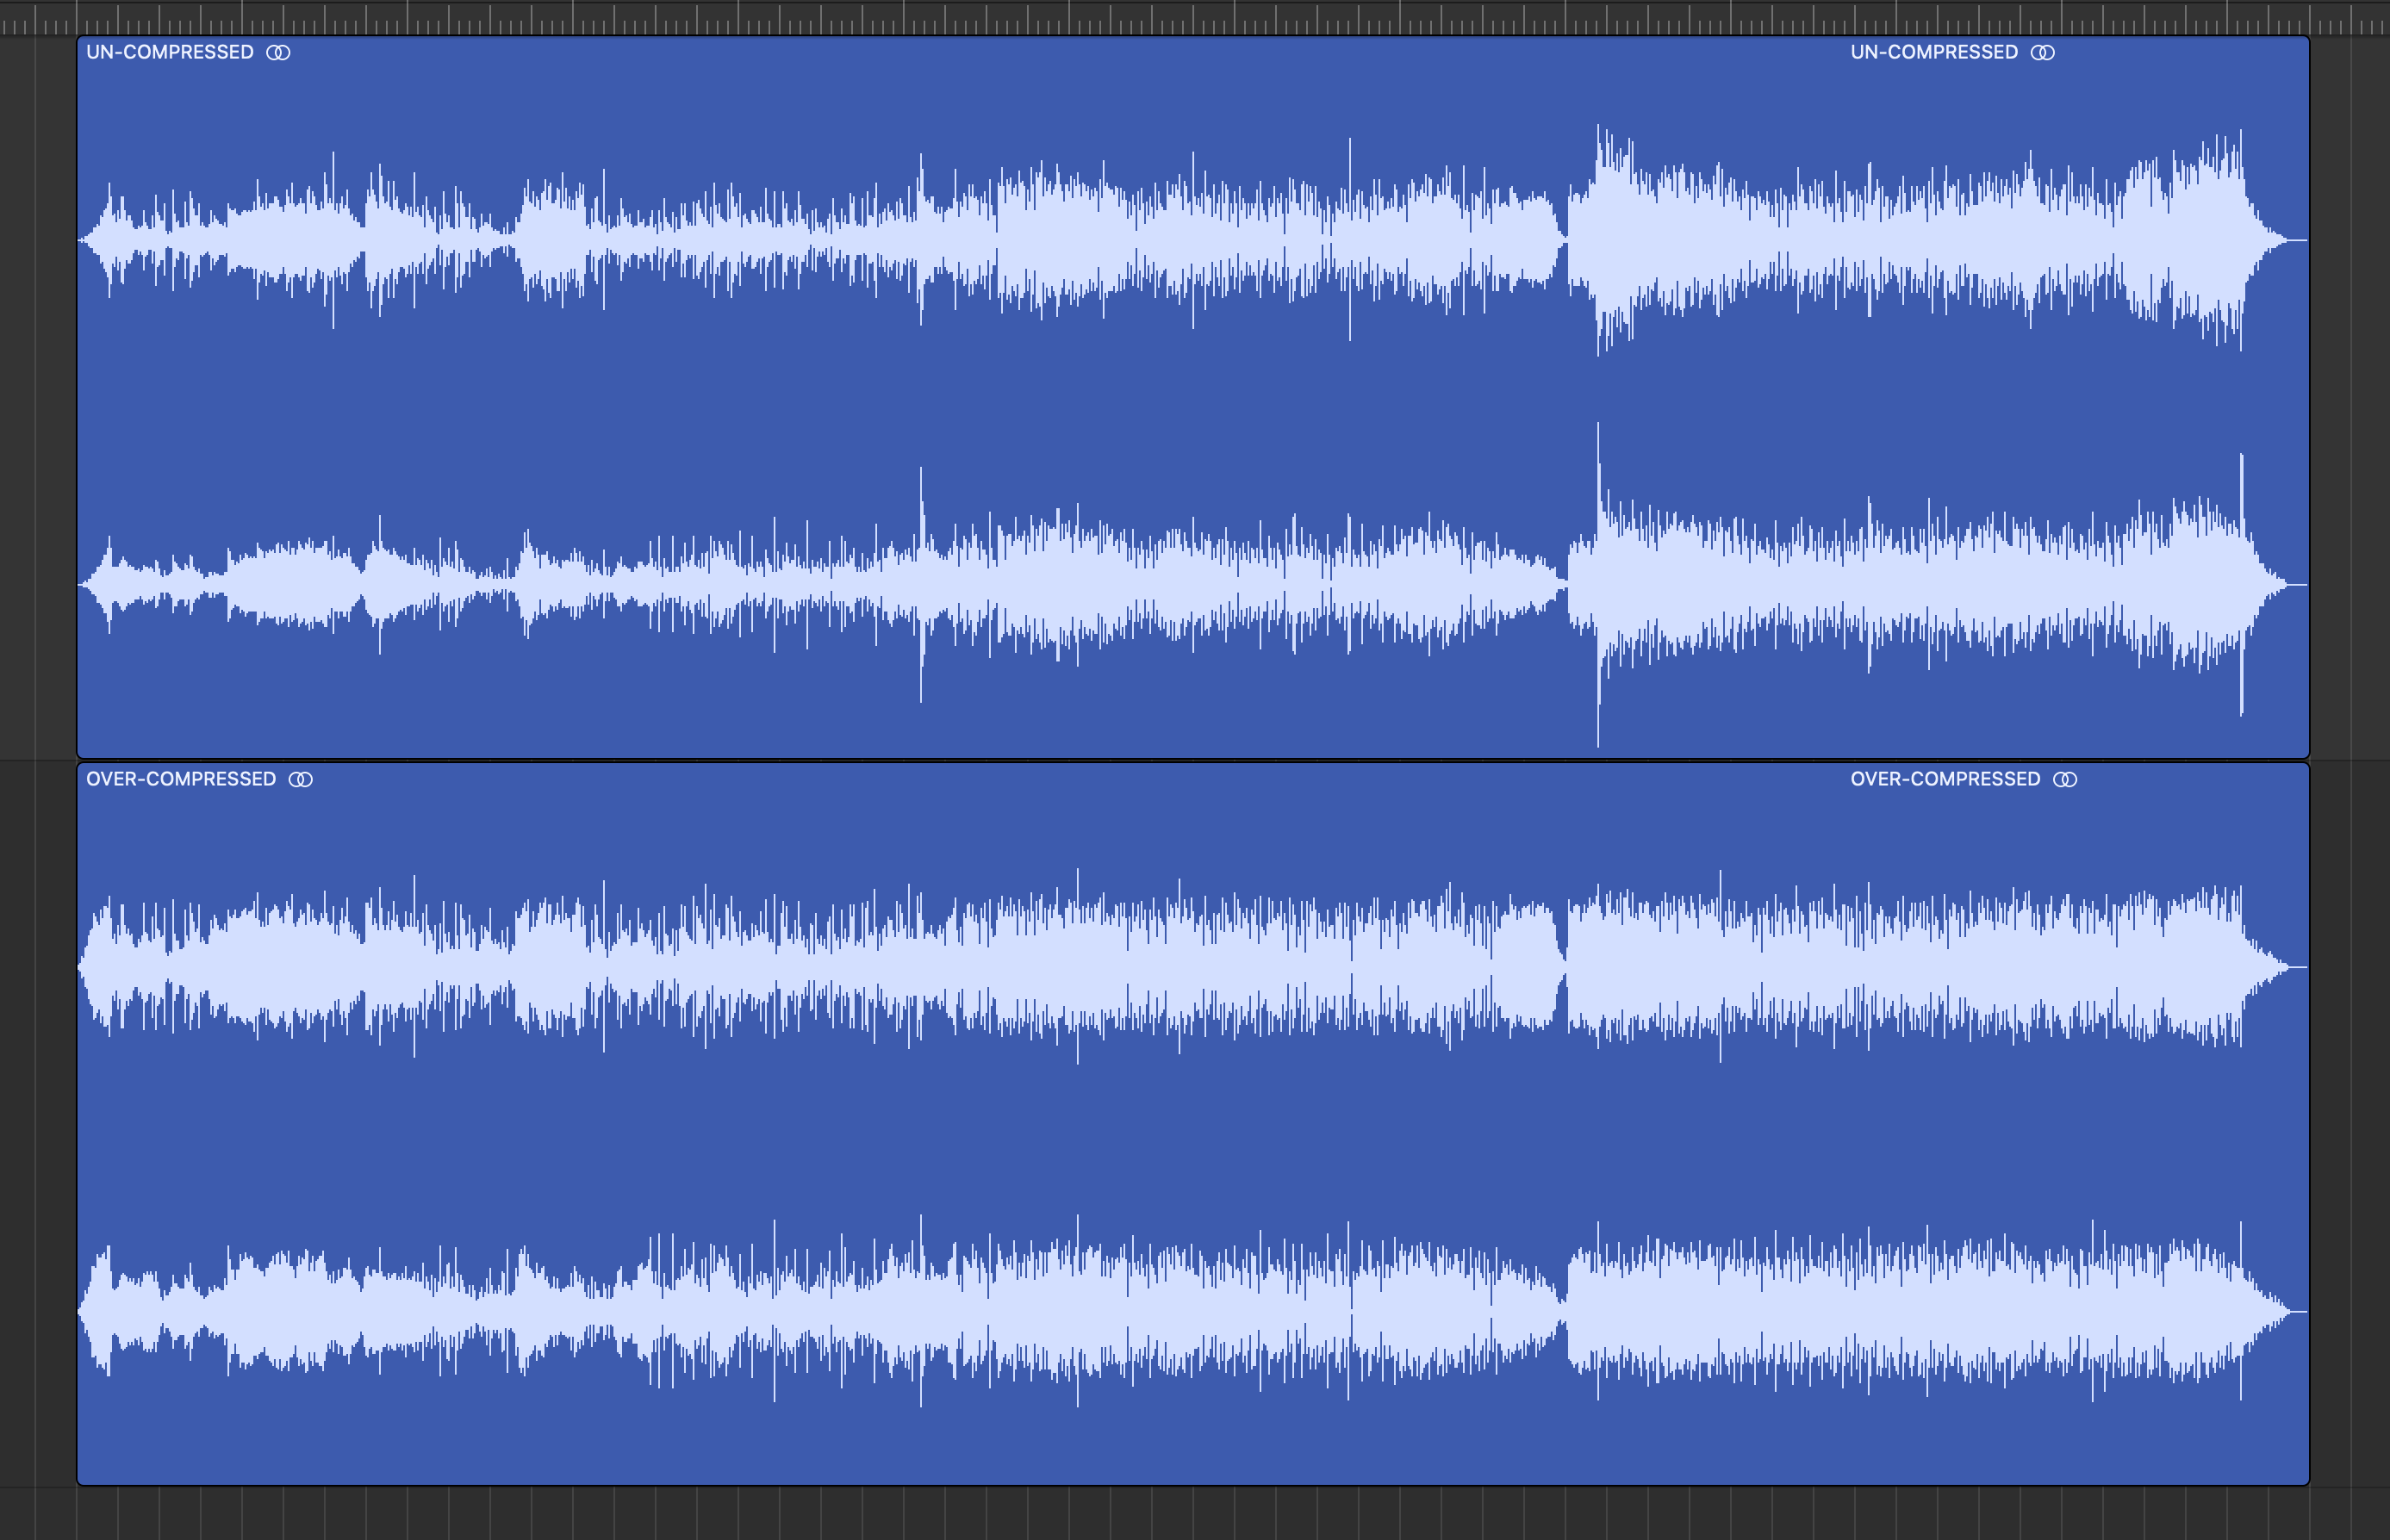
The image above shows a mix with no compression at the top, and beneath it the same mix with waaaay too much compression applied. See how there's barely any variation in the dynamics of the waveform?
At the very least overly-compressed music doesn't sound natural, and at the worst the resulting sound can be unpleasant, or even difficult to listen to. Listening to audio that is over-compressed inevitably leads to ear fatigue , which makes for a grouchy producer (or audience).
That second mix above? Trust me, it sounds nasty.
What Are The Signs Of Over-Compression?
Flattened Waveform
One of the easiest ways to spot a song that has been abused by a compressor, even before you've pressed play, is by looking at the waveform.
Take a look at the example below - can you guess which version suffers from over-compression?
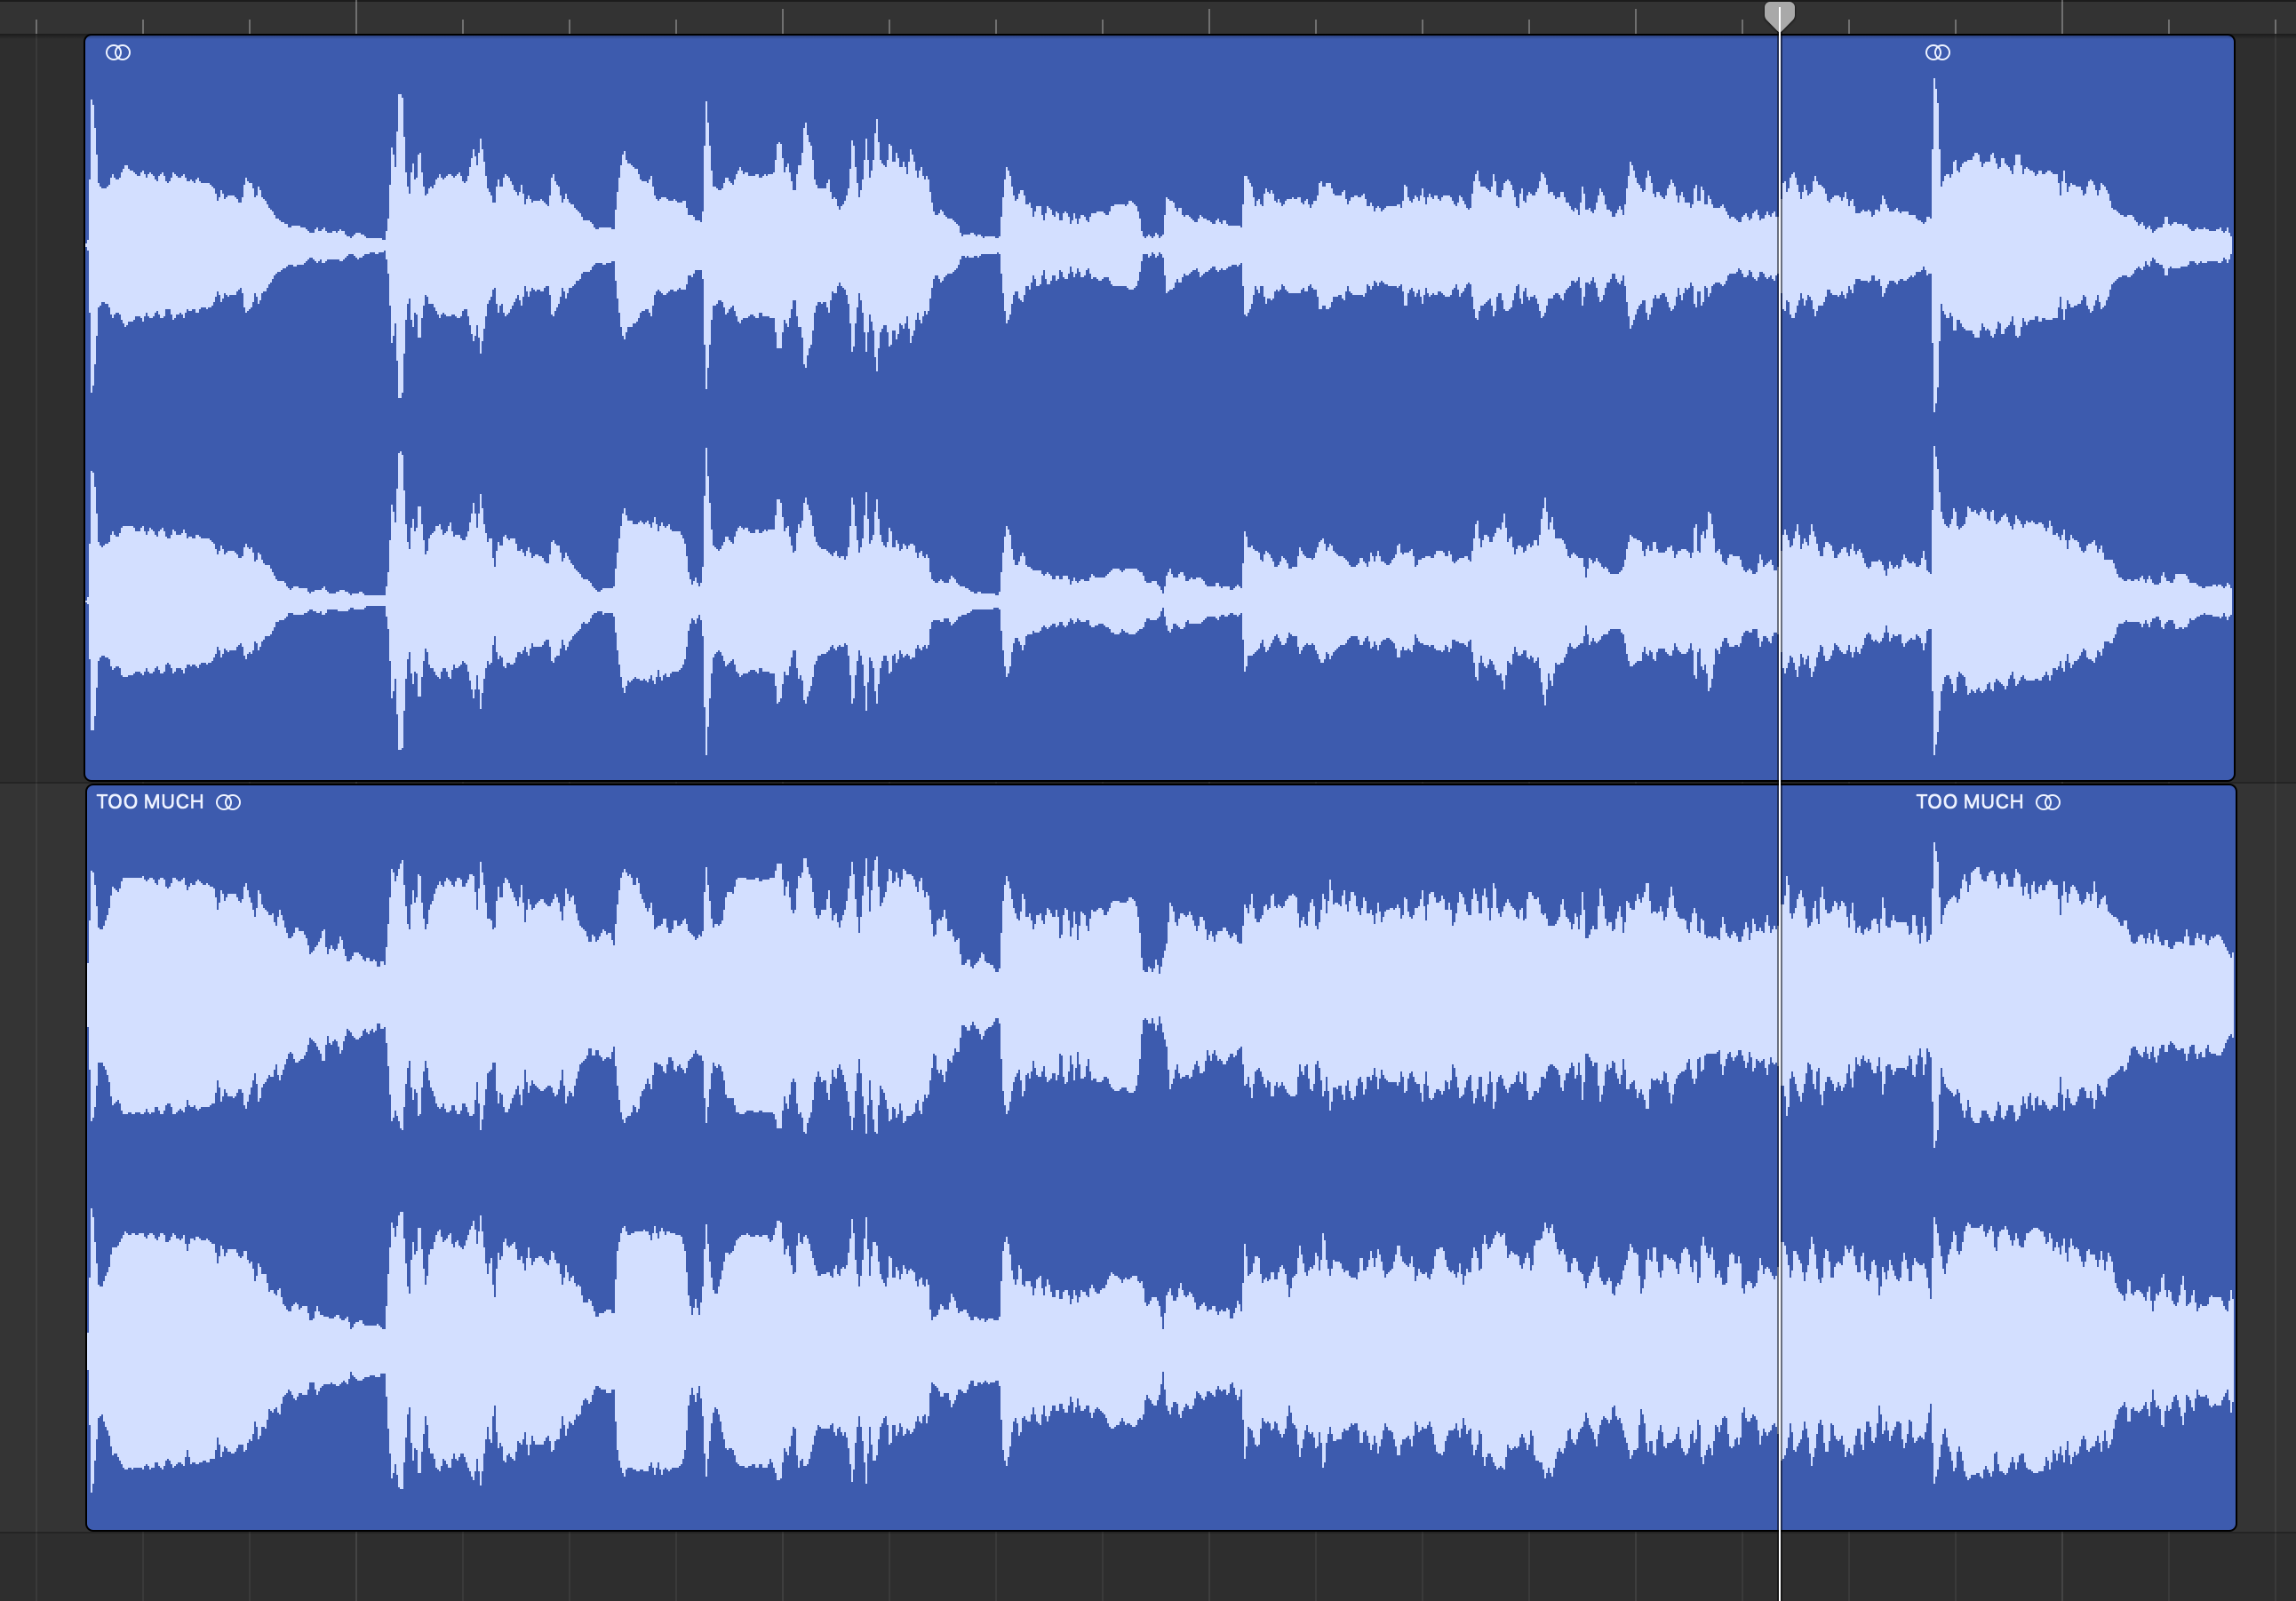
That's right - the one marked 'too much'. A lack of noticeable transients in a waveform can tell an engineer that the audio is a victim of over-compression syndrome.
It's not just a visual thing either. The reduction in transients can lead to a loss of clarity in the sound itself, particular the impact of percussive elements like drums.
Loss Of Dynamics
If you're listening to an instrument and there's no contrast between loud and soft parts it could well be the result of over-compression. Likewise if the level meter on a track doesn't breathe with the part.
Yes, compressors are good for smoothing out parts to aid in the mixing process. But if you over compress you run the risk of the song being an emotional flatline.
Pumping and Other Artifacts
Pushing the settings on your compressor too hard can result in unbecoming artifacts in the sound, such as distortion, pumping, or a kind of 'squashing' of the music.
You Can't Listen To The Entire Song
If you can't make it to the end of the song without stopping playback there's a good chance over-compression is the culprit.
Your Mix Doesn't Stand Up To A Reference Track
If you loudness match your whole mix to your reference track ( because you're using one, right? ) and it still sounds quieter, you might be over-compressing something, or many things.
While using compression can help tame dynamics, over-using it can result in the music having no energy, and sounding quieter than you wanted it to.
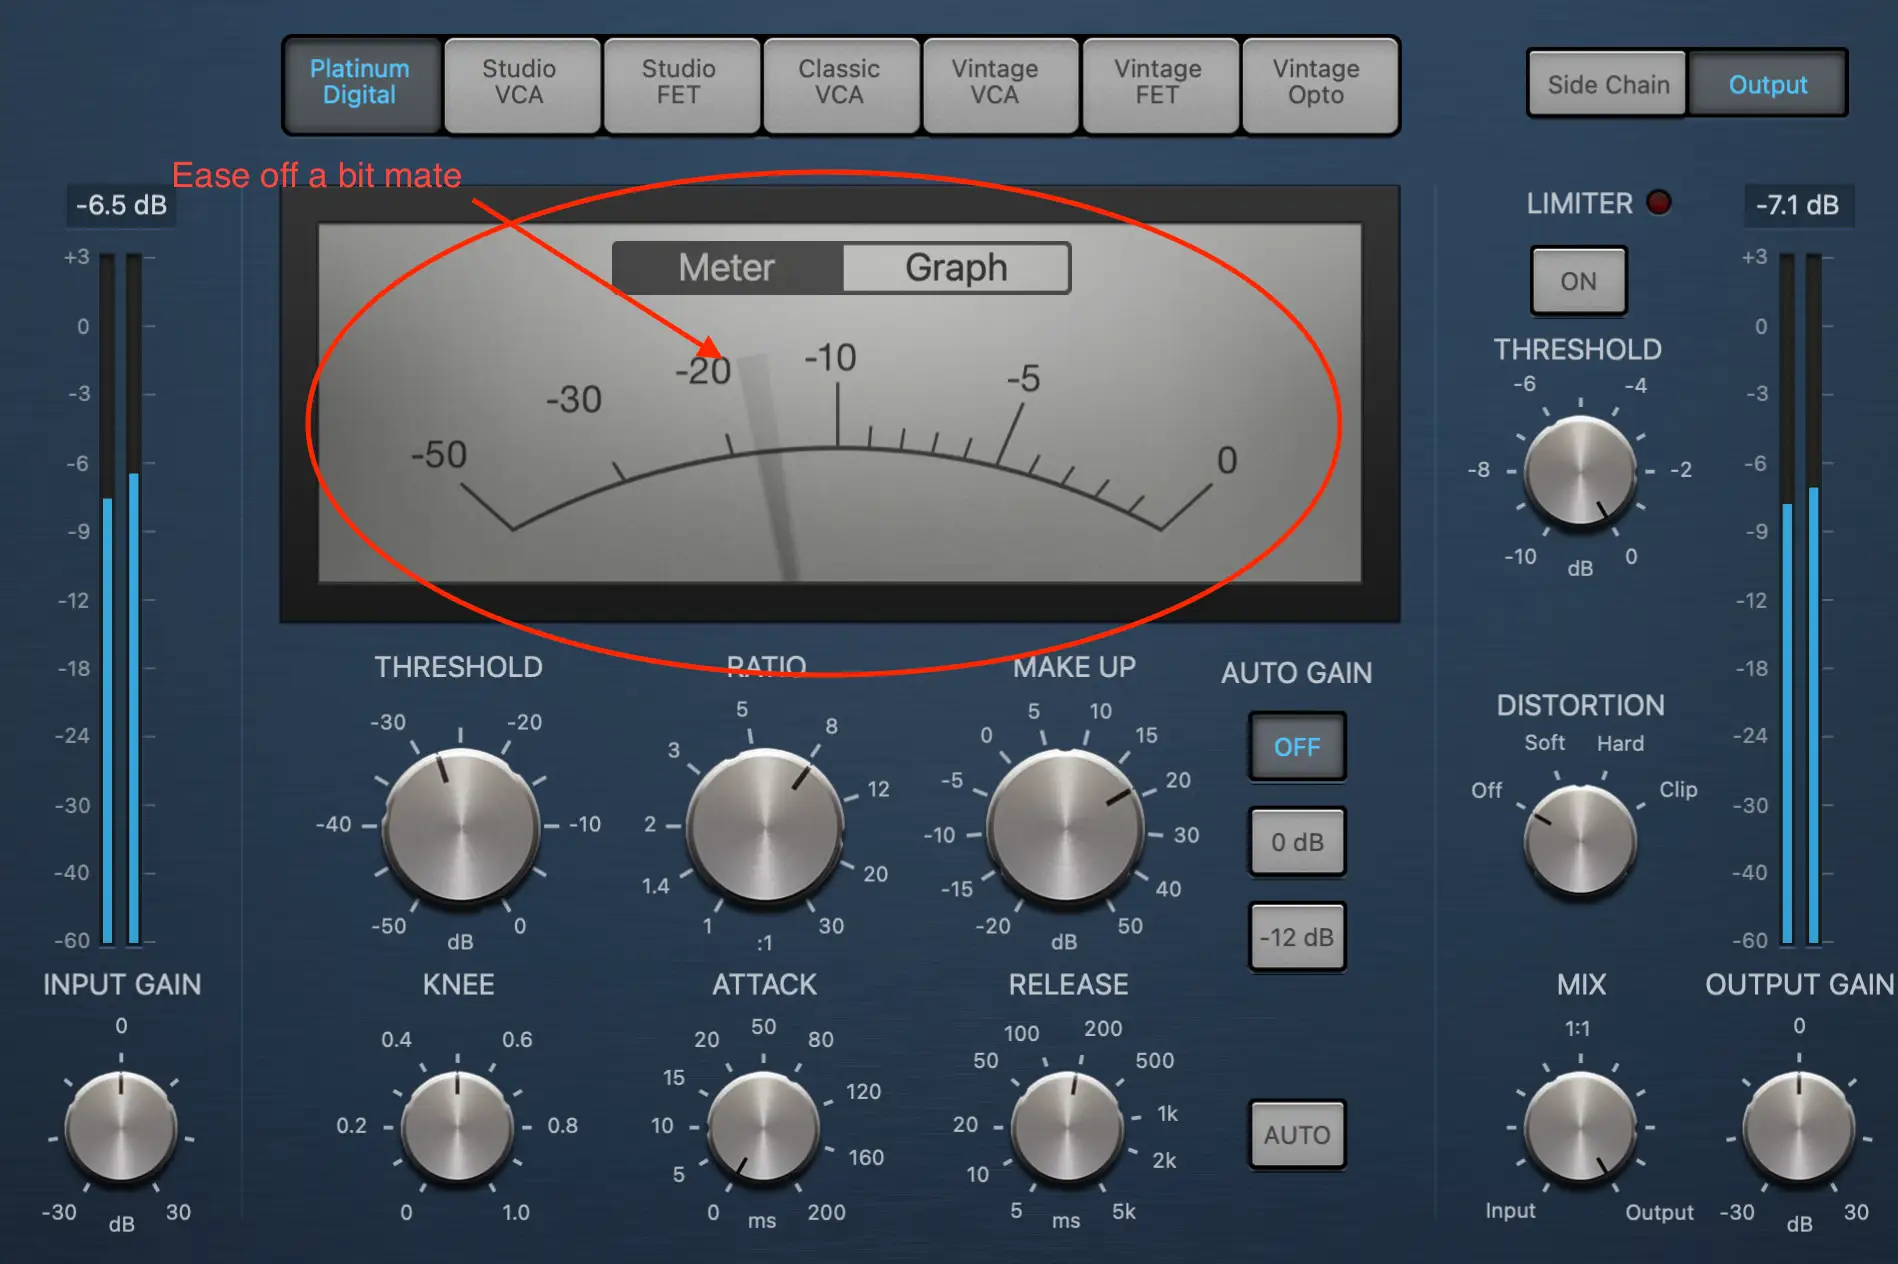
The Gain Reduction Meter Barely Touches Zero
Every compressor, digital or physical, has some form of meter to allow you to see with thine own eyes how much gain reduction is being applied to the signal.
If the gain reduction meter rarely returns to zero there's a good chance you're compressing too hard.
How To Avoid Over-Compression
Adding too much compression to one instrument, or an entire mix, is easy to do. But it's also remarkably easy to avoid. Check out the guidelines below to keep you on the compression straight and narrow.
Don't Add Compression To Every Track
With the seemingly limitless potential offered by technology it's easy to throw everything you own into a mix. But just because you can, doesn't mean you should.
To a certain extent, whether or not to apply compression to individual instruments, or group of instruments, depends on the genre of music you're working in and personal taste. But before you reach for your trusty 1176 simulator, ask yourself if it's really necessary.
Know Why You're Using Compression
Compressors are a valuable tool when it comes to processing audio signals. But if you're not sure why you just inserted Logic's stock compressor over the bass guitar track, take a moment and assess what you might to use it for.
Here's some common uses for a compressor:
Dynamic Control
Does the instrument need it's volume levels evened out? Are there sudden peaks in the signal?
Increased Sustain
The audio signal drops in volume after the initial attack, but you want it to hang around for a bit longer. A compressor can help fix this.
Tighten Up Percussive Elements
A common use for a compressor is to shape the transients of drums and other percussive elements.
Enhancing Mix Clarity
If you have a bunch of synths running into a group bus you may want to add a little gentle compression to glue things together in the final mix.
At the end of the day, if you're not sure why you want to stick a compressor over something, don't.
Use Serial Compression
Sometimes more is less, and rather than using one ring to rule them all you might use a single compressor to treat a certain aspect of the sound, and a different compressor for another.
Serial compression is a method of shaping your sound in stages, using different compressors for different functions, resulting in a more natural sound.
Ironically it's easy to end up with over-compression using this method, so proceed with caution!
Use Parallel Compression
This technique is where an an unprocessed signal is mixed with a compressed one.
Instead of inserting the compressor over the track, part of the signal is sent via an aux bus to a compressor. Using this method you can blend a clean, unprocessed signal with a compressed one and adjust to suit.
Some compressors (like the stock ones that come with Logic) give you a direct way to mimic parallel compression effect by way of a mix knob.
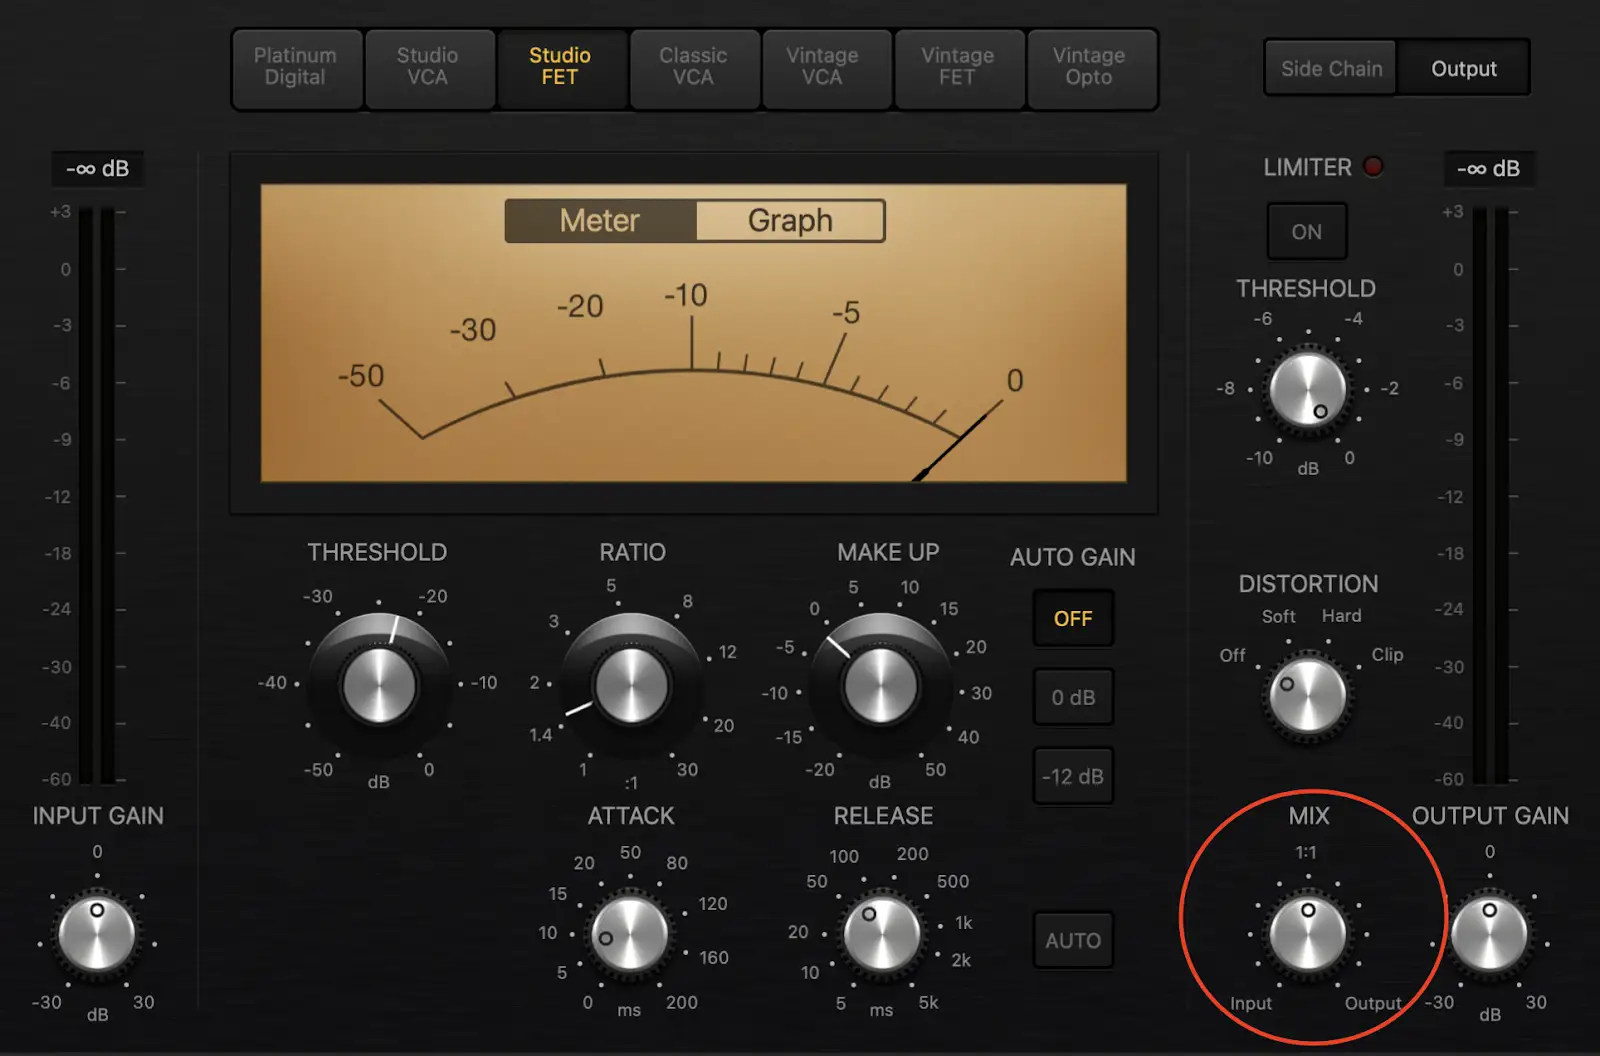
A downside of using this form of parallel compression is that you can't process the compressed signal separately from the uncompressed one.
Parallel compression became popular with engineers in NYC which led to the alternative name 'New York compression'.
Use Volume Automation
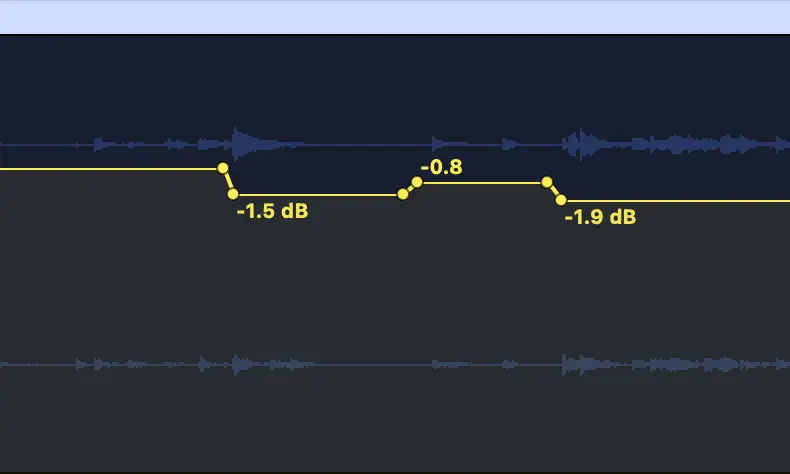
Before you reach for your compressors to keep levels disciplined, try instead to use automation to control any wild peaks or quieter parts that pop up from time to time.
Automating the volume of a track will lead to you using less compression, and so avoid the risk of over-doing things.
Ratios, Attacks, and Release Time
Where you set these parameters will depend on the source material, and the role you want the compressor to play on the signal.
That said, there's some good rules of thumb to follow here.
Ratio
The ratio regulates how strong the compression is, and to avoid over-compressing things it's a good idea to use a lower ratio.
Having a high ratio means you're compressing the signal harder. This can easily lead to over-compression.
Using a lower ratio however will help things sound more natural and transparent, allowing you to keep control of your tracks without suffocating them.
Attack Time
A fast attack time will mean the compressor clamps down on the signal as soon as it reaches the threshold.
A slow attack time will allow more of the initial transient through before the compressor kicks in.
Aiming for a slower attack time will allow more transients through, keeping the punch of the original signal. As well as making things sound a bit more spicy, you'll also avoid over-compressing the signal.
Release time
Release time is how quickly the compressor 'lets go' of the signal. If it's too short the track will sound unnatural. If it's too long the ear will have a tough time picking out the next transient.
If you have the option, it's totally fine to use the 'auto release' setting on your compressor. Otherwise, use your ears (and the tip below) to find the Goldilocks setting - not too short, not too long.
Watch The Gain Reduction Meter
While you should always use your ears to decide if something sounds good, it can sometimes be tricky to tell how much compression is happening.
You could end up adding more and more compression. Until it's too much.
So it's always a good idea to keep an eye on how much gain reduction is happening. Try and keep things between -3 to -6dB of reduction.
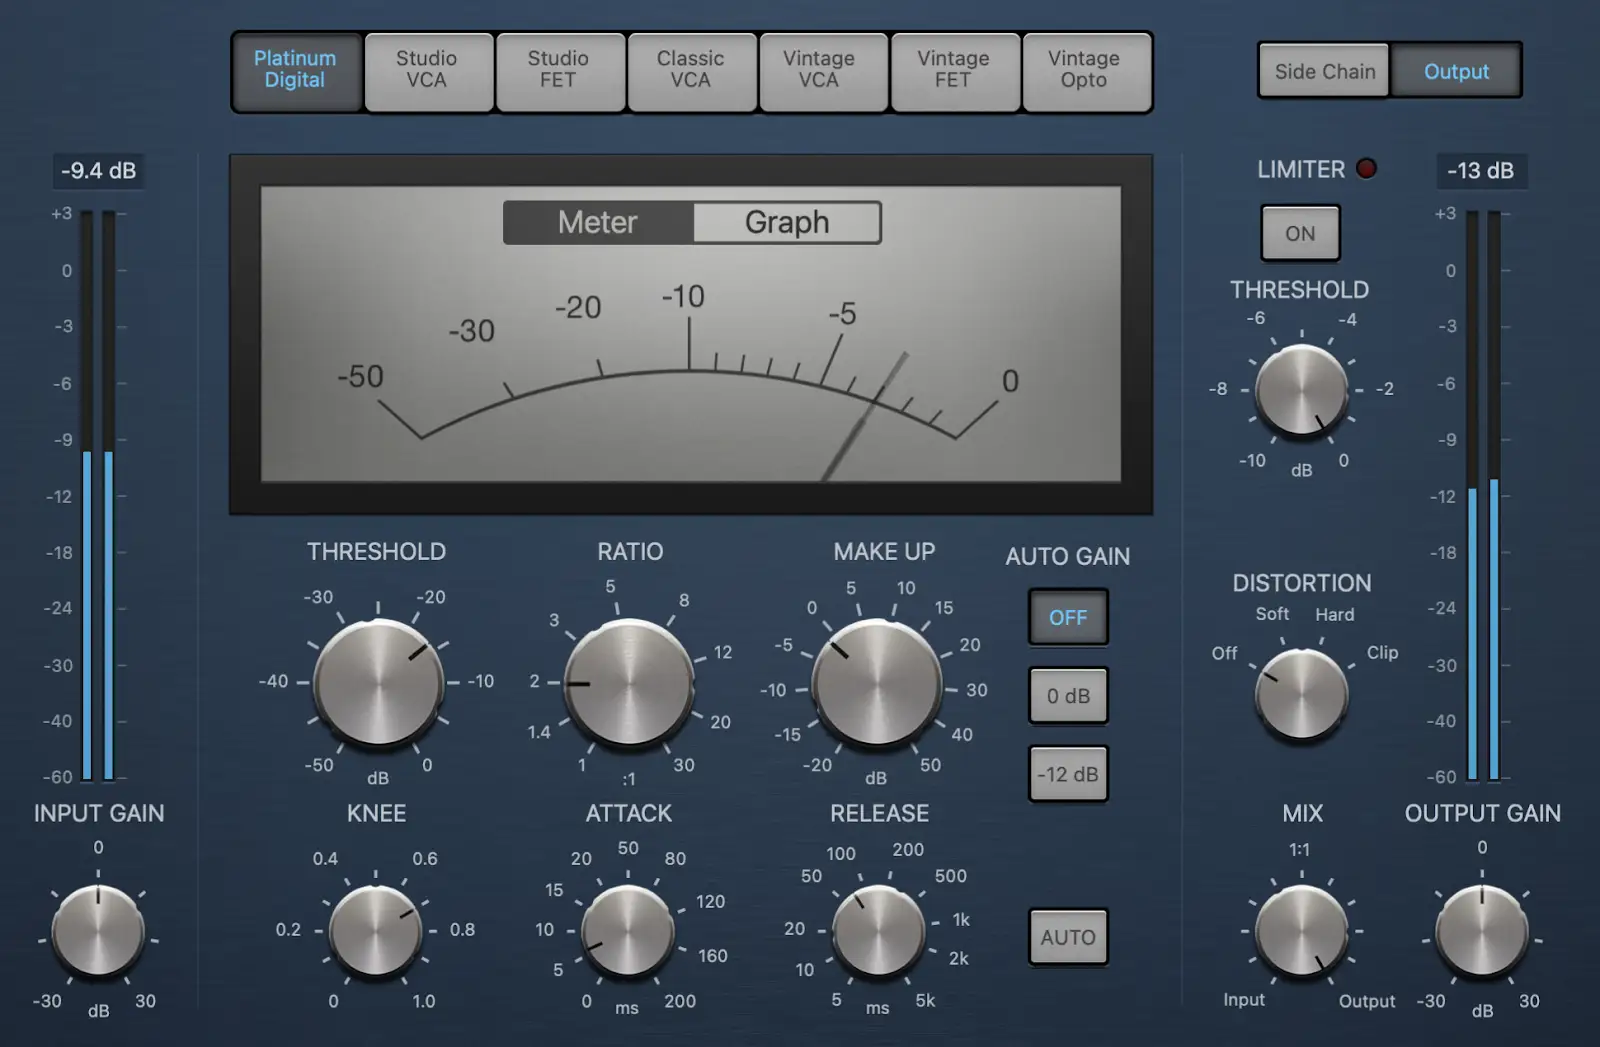
A second thing to watch out for is how often the meter returns to zero. It's a good idea to have the needle breathe with the music.
Know Your Compressor
Finally, a piece of advice that can be applied to any aspect of music production: know your tools.
Pick one compressor, whether it's a stock one that shipped with your DAW or something you picked up on black Friday, and learn it inside out.
Experiment with it. See what something sounds like when you push settings to their extremes. Listen for how a faster attack time alters the sound. Figure out what a good ratio is for vocals. Try to make things sound bad so you get a sense of how you can makes things sound good.
Remember, louder is not always better. Now go forth and maketh the music!


