The final step in the music-making process is the mastering stage.
You can think of the mastering process as the final barrier between all the work you've put into making your song and the version of your song every listener will hear.
When you bounce down your final mix into a stereo file to send to your mastering engineer, that is the pre-mastering process.
So, what exactly is the pre-mastering process, and why is it so important to do it correctly?
In this pre-mastering guide, we're going to dive in and explore everything you need to know to deliver the best final mix to your mastering engineer. Let's get into it!
What is Pre-Mastering?
Pre-mastering can be thought of as any step prior to exporting your final mix to send to a mastering engineer for mastering. The product of pre-mastering is a pre-master, which is a high-quality audio file ready to be mastered.
Artists signed to labels will often have to send their pre-masters to their labels for approval if they aren't working with the mastering engineer directly.
The methods and requirements for pre-mastering can depend on the particular project, though there are a few general guidelines you can use during the mixing process to get the best pre-master file possible.
Digital vs. Physical Mastering

The majority of modern mastering is for digital consumption. Most people listen to music on laptops, phones, DJ software, etc.
Because of this, mastering engineers have slightly lower demands than those back in the day who were mastering physical media, such as cassettes, vinyl, and CDs, each of which required different forms of treatment for proper mastering, thanks to their different quirks.
Vinyl, for example, can accentuate sibilance (high-end vocal frequencies, cymbals, etc.) in undesirable ways, leading to a loss of low-end frequencies.
If you're planning on releasing your music using physical media, we recommend looking for mastering engineers that have plenty of experience in that realm, as they'll be able to tell you exactly what they need from you.
6 Pre-Mastering Tips
#1 Reference Your Mix
The first thing you need to determine is whether or not your mix is really finished. As we all know, finishing a song is often the hardest part of the process.
With the way modern DAWs work, it's easy to get caught in a refinement loop where you never truly wrap up the song and put a bow on it. This is where references come in handy.
When you compare your mixes with references, you compare them to professionally mixed and mastered material to ensure yours is where it should be.
It's best to use songs that you enjoy as references. You likely already admire the sonic aesthetic of the music you love, so why wouldn't you want to get your music to sound similar?
With proper referencing, you can make sure your levels, frequency balance, compression, width, etc., are where they should be before your track makes it out of your studio.
If you're working on an album that you plan on sending to your mastering engineer, we recommend referencing the mixes against one another so that each song feels like part of a single, cohesive project.
Referencing makes the final adjustment process so much easier, helping to ensure you're only moving forward and staying out of the loop.
You'll have a much clearer idea of when you will hit your goal so you can continue to the mastering stage.
#2 Take Care of Edits
While I recommend getting edits done before you even begin mixing, some edits can slip past you. However, if you don't find poor edits and remedy them before the mastering phase, you could run into some serious problems.
As we know, a great master in the modern world is one that is loud enough to stand up to other modern mixes on radio and streaming services. Getting a loud mix requires a healthy dose of compression and limiting, which can bring out small and sometimes unwanted details, such as bad edits.
When I say bad edits, I'm referring to clicks, pops, breaths, and noise.
If you aren't able to fix these issues prior to mastering, you could end up with tons of distractions in the final master.
Before you send your last mix to your mastering engineer, put on a pair of headphones and listen carefully to each part of your song, making sure the work is as clean as possible.
#3 Leave Enough Headroom

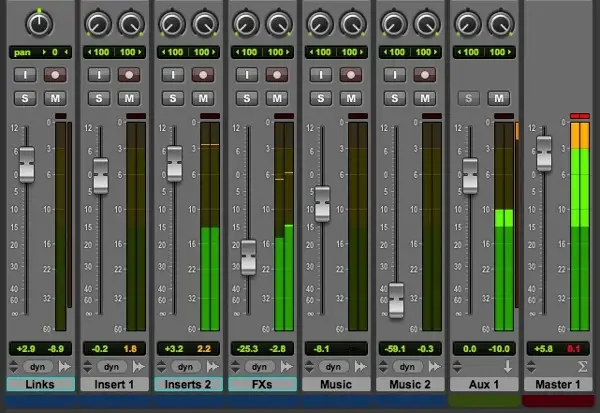
You'll want to make sure you're leaving enough headroom, so the mastering engineer has space to work. While there's not really a set standard , per se, many mastering engineers like to see up to 12dB RMS headroom and at least 3-4dB of headroom from peak - 0.
Allow the mastering engineer to pull your music up to where it should be in volume, depending on the type of track. Note that they won't be able to undo anything that you've already done, and they won't be able to push things any further if they don't have headroom to work with.
I'd like to take a moment to note how important it is to collaborate with your mastering engineer. They want to work with you to make sure your master is as good as possible. If they give you feedback about your mix and tell you to go back and make some adjustments for an optimal master, it's not because they want to be mean. It's simply because they want to be able to do their jobs the best they can.
#4 Avoid Over-processing on the Master Bus
The least amount of processing you can do on the master bus, the better. Again, mastering engineers can't undo things you've already done on your mix. If you over-compress a mix, for example, they can't make it sound less compressed.
Some mix engineers compress and limit the main mix bus to make it loud, thinking that they'll end up with a better and louder mix because they sent it out that way.
In many cases, it's the opposite.
For a mastering engineer to add EQ or saturation to an already loud or over-the-top mix, they'd have to turn it down to keep the energy level from getting out of hand.
Now, that's not to say you should never process the master bus. However, only do so if there is intent behind it. Does your master bus processing give your mix a certain sound or feel that you like?
If so, go for it!
As a mix engineer, I often find myself using these tools to give my mixes certain vibes. However, I also take a lot of care in doing so, as I never want that processing to get in the way of the mastering engineer's job.
If I ever find myself processing the master bus for the sake of loudness or brightness, I try to backtrack. I keep in mind that, eventually, the mastering engineer will take care of those sonic characteristics. The last thing I want to do is push things so far that the mastering engineer doesn't have room to push things any further.
#5 Bounce to the Highest Resolution
One of the most important elements of a good pre-master is the audio quality. For example, choosing the right sample rate and bit depth is important if you want to use your music for high-resolution lossless streaming.
I would say, for best practice, try to use high-resolution files from the get-go. High-resolution audio can give you better sound quality throughout your project, so there's really no reason to start with anything else.
You'll often see options to adjust your sample rate and bit depth when you open a new session in your DAW and when you export your audio files.
Start your session with a high-quality file type and export your mix with the same file formats.
As for which file types to use, the general rule is to use 24-bit, 48khz audio, which offers the best combination of file size and audio quality.
Of course, if you listen to your mix with a higher sample rate and you like what you hear, go for it!
#6 Send Example Tracks to Your Mastering Engineer

Your mastering engineer wants to hear what you've been referencing throughout the mixing process. Even mastering gurus with years of experience enjoy having professional masters to reference, so they have a goal that aligns with what you want to hear.
A reference track can give your mastering engineer a clearer idea of how you want your song to sound so that it sounds good alongside competing tracks on the radio or streaming services.
When it comes to modern mastering, modern rock, pop, and country music tend to have a lot of detail. A mastering engineer's job is to make sure that your track isn't jarringly different from the track before it when the listener skips to it.
Should I Use Multiband Compression On the Master Channel?
Multiband compression can certainly be an effective mastering tool, though it requires a certain level of care and caution.
If you're planning on sending your mix to a mastering engineer, I'd avoid using multiband compression altogether. There are often ways to fix balance issues in the mix. However, if you absolutely must, be subtle about it.
We have a handy guide to multiband compression that provides some helpful tips on using it in mixing and mastering.
How To Find a Mastering Engineer

With the rise of digital mastering software and consumer-level home studio gear, the number of commercial mastering services has increased tenfold.
Just about anyone can call themselves a "mastering engineer" if they throw an EQ and a limiter on the master bus and call it a day.
Of course, our team here at eMastered takes the mastering process more seriously than that. Our AI-powered online mastering engine was carefully developed by Grammy-winning engineers to change the game for those who want professional mastering, though may not have the budget for it.
Upload one of your tracks today and see how our unique engine can make your song sound louder, crisper, and larger than life.
Getting Your Pre-Master Right
Ensuring your tracks are prepared for mastering is one of the most important parts of the mixing process. It can feel like a mundane process, though it's the best way to optimize the results of your master.
With these steps in mind, you'll have a guide to follow so you never get stuck in the never-ending production process loop that many artists get stuck in.


