


Regardless of genre or style, learning how to mix bass guitar is one of the essential parts of making professional music. Unfortunately, it's also one of the most difficult things to get right.
If you want your track to sound professional with a solid, tight low end, read our in-depth guide to mixing killer bass guitar!
Get Your Arrangement Right
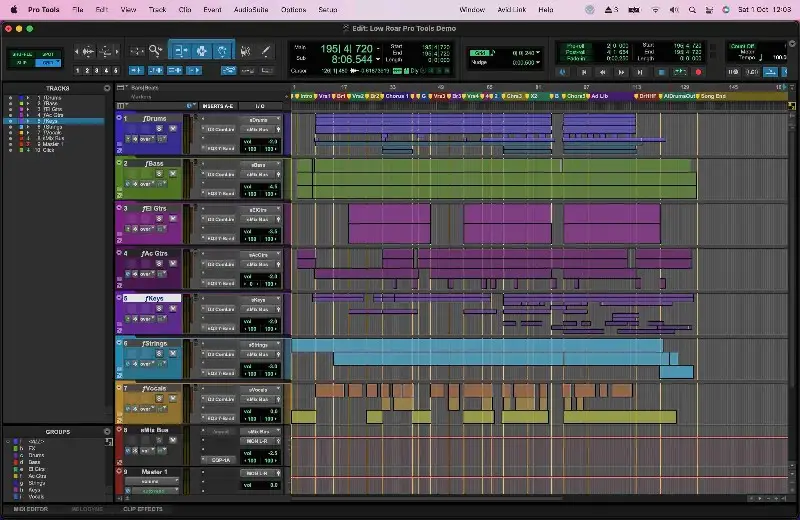
A good mix starts with a great arrangement.
While arranging might not be part of the mixing process, take a minute with this concept.
Before you ever load up a plug-in or touch a fader, take a close look at your track’s arrangement. Are there any other instruments getting in the way of the bass?
Arrangement is a broad concept, though, at its base, it is what notes are played by certain instruments in a song. Sometimes, you can get your base to mix itself by getting rid of unnecessary low notes in other instruments.
The base lives happily in the 60Hz-200Hz range, and any instruments sitting in that range make it susceptible to masking. The greater number of elements you have in that range, the harder it will be to get your base to sit properly.
When looking at your arrangement, ask yourself a few questions:
Are there any low-frequency elements getting in the way?
If so, are these parts that can be cut?
What would happen if you took these parts of the octave?
Sure, that warm, sultry Rhodes piano might sound great in solo, though when paired with your bass guitar, it sounds like a muddy mess.
The important thing here is making sure your bass has room to breathe in the arrangement before you begin mixing.
There are certain instruments that will require a bit of finagling to play nice with the bass, such as the kick drum, though we'll get to that in a bit.
Solidify Your Tone

I would confidently say that 80-90% of your bass sound is going to come from the recording process.
When I first got into mixing, I remember my mentor telling me to be careful during the recording and production process, as it was impossible to “polish a turd.”
That advice has stuck with me for more than a decade, and it couldn't be truer with bass guitar.
You'll never be able to get a good mix if your bass tone sucks.
If you have control over the recording process, work on getting a good tone. Be intentional throughout the process, and think about what kind of bass sound would fit with the other instruments involved.
Do you want a booming bass tone?
If so, cut out the highs and crank up the lows.
Want a little bit more of that Paul McCartney tone?
Bring down the lows and boost up the high mids.
The key here is getting a good base tone right off the bat. When you start with raw tracks that sound great, mixing becomes so much easier.
If you aren't part of the recording process, you can use amp sims to dial in the best home for the mix.
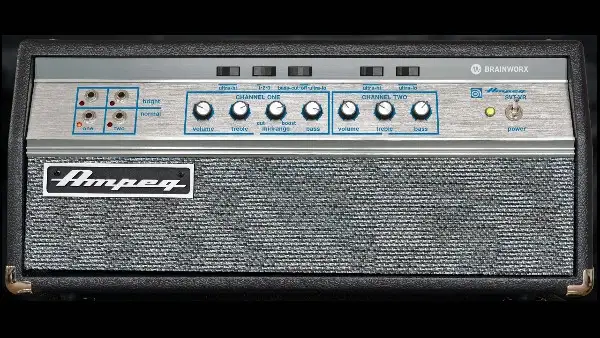
The world of amp sims can seem a bit overwhelming and complex, as there are so many options to choose from. What's important is that you have a clean DI tone to work with and decent amp simulation software to find tones.
Some of my favorite amp sims for bass include Amplitube 5 and Bias FX.
Before running your bass DI into your amp sim, make sure that you've set your gain staging properly. The volume at which you run your bass into your amp sim can greatly impact the way it sounds.
If I'm using an amp sim, I often like to set my bass tool around -18dBFS. In fact, I find that this level works pretty well for most plugins.
Even with so many amp sim options, it’s important that you set your tone with intention. Find out what cabinets for pedals your favorite bass players are using, copy the settings, and see if they work for your track. You may have to do a little bit of tweaking, though it'll give you a good jumping-off point.
Note that there are times when you may not even need an amp sim for your base. I only ever find myself reaching for one if my bass tone needs a little bit more character or warmth. Consider using a simple three-band EQ to adjust the highs, lows, and mids to taste or run your bass through a subtle saturation plugin to take the sterility out of it.
Get the Volume Right
Too many engineers reach for plugins far too soon in the mixing process.
Unfortunately, those same mixing Engineers forget about the most important tool that's right in front of them - the fader.
The only way to get a great bass mix is with the right volume balance.
Long before plugins existed or hardware compressors became standard in studios, mixing engineers were balance engineers. They would get songs to sound good by ensuring every element was playing at the right volume.
If your bass is too loud or too soft, no amount of processing is going to make it sound right in your mix.
The funny thing is that many engineers overcomplicate the balancing process
I'm going to simplify it for you:
- If your bass is feeling thin and wimpy in the track, turn it up.
- If your bass is feeling boo me in the track, turn it down.
- Of course, any great modern mix will use EQ and compression to lock the bass in place, though if you can't get your bass 80% of the way with volume alone, you need to go back to the drawing board.
Don't be afraid to automate the volume of your bass as it moves through the track. The bass might sound great in the chorus, though when the verses come around it feels like it swallows up the track.
Adjust the level of each section individually and make sure that they flow nicely into one another before moving onto the processing portion of the mix. In doing so, you'll make your mix feel far more dynamic.
The Importance of Gain Automation
Once you have adjusted the volume from section to section, you can dig in a bit deeper with volume automation.
One of the best ways to get a more consistent bass tone is by automating the clip gain .
For example, let's say you have a bass part that gets really loud when certain notes are played or the energy dies down as the line moves from the low E string to the A string. Having dynamics that are out of control to make it much harder to reel in your base once you start loading on compressors and saturation plugins.
You might be able to get a steady 6dB of compression throughout most of the song, though when those low notes come around, they push the compressor into 10dB a compression, which can sound glaringly obvious in your mix.
The idea here is to get your bass sounding as consistent as possible before you reach for a compressor. The less heavy lifting your compressor has to do, the more natural it will sound.
Have a Goal

I can't even begin to tell you how important it is to have a goal in mind when mixing.
Mixing without a goal is like throwing ingredients in a pot without knowing what kind of soup you're trying to make, or painting on a canvas without knowing what image you're trying to create.
One of the best ways to mix with a goal in mind is to have a reference track.
So, what is a reference track?
It's any song that has been mixed and mastered professionally, and one that sits in the same vein as the track you’re working on.
When you mix bass with a reference track, you can ask yourself a number of questions:
How loud is my bass compared to the bass in my reference track?
Does it need more or less high-end, low-end, or mids?
Does the bass in my reference track have any saturation or distortion?
Listen closely to your reference track and take note of what you hear. This is especially important when it comes to your low frequencies, as nothing can make or break your mix like a poorly balanced low end.
However, you can also use this reference track to give you an idea of how much compression you should use, what frequencies you need to work on with your EQ, or whether or not you should try to add unique effects, such as saturation or chorusing.
When using a reference, the most important thing is to make sure that reference is at the same volume as you are mix. I'll often start by loading up a VU meter plug-in to get the average loudness of my track, then play the reference track on a different channel, adjusting it until it's at the same volume on the VU meter.
PRO TIP - If you use effects on the master bus, such as compression or EQ, make sure that your reference track is not running through it. You can do so by creating a separate mix bus for your mix or using a specific reference plugin, such as Reference 2 by Mastering the Mix.
When trying to match the low-end on my base to the low-end in my reference track, I'll often use a parametric EQ with a low-pass filter set down to 200Hz. This way, all I'm listening to is the low end of both tracks without the distraction of the highs.
By comparing the frequencies ranging from 0-200Hz, you can determine whether your bass is too boomy, thin, muddy, soft, or loud.
Based on what you hear, tweak the level of your bass so that it sounds more like your reference track, turn off the low-pass filter, and see how it feels in your mix. If it feels good, you can continue on knowing that your mix will translate much better in other listening systems.
Tame Your Dynamics
Listen to just about any modern bass recording and you'll notice some level of consistency. The goal of compression on bass guitar is to make sure you don't have random notes getting lost in the mix or popping out in a distracting way.
Unfortunately, compression is by far one of the most confusing topics for beginner mix engineers, especially when it comes to bass. There's a fine line between having a consistent-sounding bass and one that has had the life squeezed out of it.
Getting the right compression settings is often a matter of trial and error. However, there are a few good starting points for your compressor parameters that I recommend.
The most important parameter is the attack time .
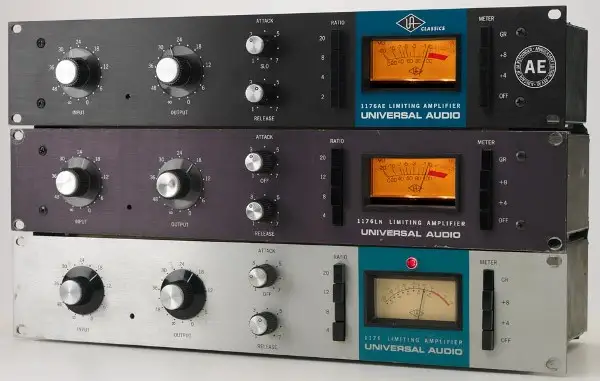
I often like to start with a slow or medium attack time of around 20-40ms. If you're using an 1176-style compressor, as many mixing engineers do for bass, you can start by placing it at around ‘3’.
Then, listen to how the compressor is affecting the transients of your bass. If you have inconsistent transience, meaning some of the notes have a lot of pluck while others sound soft and round, you might go for a faster attack time. On the other hand, if you're losing the punch and aggression in your bass, you might consider slowing down the attack time.
Next, you'll want to set the release time.
For bass, I often like to use a medium-slow release time, as a lot of the music I mix tends to have bass with more sustain in each note. You want to make sure the compressor isn't releasing too early, giving you a pumping effect. Many people say the time the release of your bass compressor to the song, though I think it's a bit overkill. If you listen closely, you should hear your base fatten up and sit nicely in your mix if you've dialed in the right release time.
I'll often start with a release time of around 120-150ms and adjust it from there. If I'm using an 1176-style compressor, I’ll start with the release around ‘3’ and see where I need to go from there. Some compressors come with auto-release functions, which can be super helpful if you're having difficulty setting the release time manually.
One of the big issues many beginners have with compression is not being able to hear how the different parameters are impacting the sound.
I recommend setting the threshold super low when adjusting the attack and release times so you get around 15-20dB of compression. It'll make it much easier to hear the effect you're attacking release times are having as you move them back and forth.
Once you've dialed them in properly, turn the threshold back up so you're getting anywhere from 4-10dB of compression.
If you find that your compressor is sucking the life out of your bass with that much gain reduction, you can turn it down so that you're getting around 3-5dB of gain reduction and use another compressor after it (in serial) to catch any further peaks.
In most mixes, I find myself using around three levels of compression on my bass to lock it in place while keeping it sounding natural.
It's important to use the makeup gain knob on each level of compression you use. When you compress your bass, it will get quieter, so you'll have to use the makeup gain knob to bring it back up to the right level.
Give Your Bass Some Space
Next, it's important to give your bass its own space in the mix.
Even if you were able to arrange your instruments in such a way that they aren't masking or covering your bass due to being in the same range, you may still have to make a few adjustments to keep your mix from sounding muddy or undefined.
The most important thing is to ensure a good relationship between bass and kick drum.
To do so, I'll often start with the pocket method .
The idea here is that we want each low-end instrument, in this case, the kick drum and bass, to have its own low-end pockets where they can live happily.
Though this puzzle piece EQ mindset is pretty old school, it still works like a charm. Both the kick drum and bass will get to live in the low end without fighting one another, which will make your mix sound more defined and give you more headroom overall.
Determine Where Your Bass Counts
Before throwing up a pair of EQs and going to town, you'll first need to decide which of these two elements will dominate the low end.
Kick and bass guitar occupy the same frequency range, which is why they often have trouble getting along. With EQ, we can give them separate spaces to live in.
Whether the kick drum or bass guitar dominates the low end will depend on the track, and this is where listening to your reference comes in handy.
Of course, there are often standards in each genre that most engineers abide by.
For example, if you're working on an EDM or hip-hop mix, you'll probably let the kick drum eat up the low sub frequencies instead of the bass. This means that the kick will take up the majority of the ultra lows, while the bass will sit up a bit higher.
For example, you may give the kick priority in the 20-60Hz range and let the bass shine in the 80-150Hz range.
This approach can change in other kinds of music, such as metal, rock, and folk. In many cases, the bass will dominate the sub frequencies, providing a consistent low end, while the kick delivers attack and punch up top.
Think about a Metallica mix. You can almost hear that basketball-like kick drum tone, which comes from the accentuated sound of the beater in the upper midrange.
Beyond genre, however, you have to consider the tone of the elements you have at your disposal.
For example, if the kick drum in your mix has a ton of low end and no top end, it might be best to let it be the sub-dominating element. However, if you have a bass guitar that's playing low sustained notes throughout the entire song, it might be better to let it take over the sub frequencies.
High-Pass It
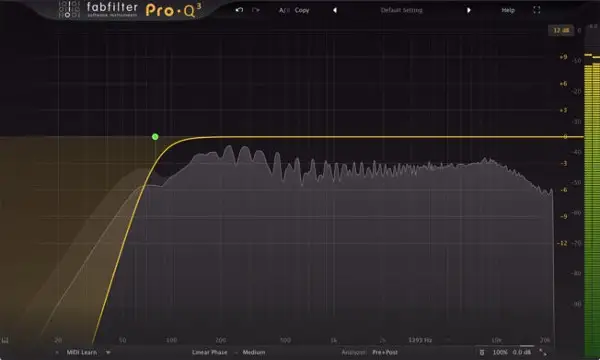
While it might seem counterintuitive to use a high-pass filter on your bass guitar to get more low end, consider that you have a limited amount of headroom in your DAW. If both elements are playing back ultra-low sub frequencies, anywhere below 50Hz, you're going to have a much harder time tightening up your low end.
The low E-string on a bass guitar goes down to around 42Hz, meaning technically, you can high-pass filter bass frequencies up to 42Hz without messing with the overall tone. As not a benefit, it will round out the sound of your bass and give it more energy in the frequencies that count, such as the lows and low-mids.
The same thing can be done with the kick drum if the bass was deemed the sub-dominating instrument. However, with kick, I don't recommend high-passing up to any more than 30Hz to be safe.
Boost the Good Stuff
The last thing you'll need to do is figure out where your bass will sit in the mix.
You can find out where the fundamental frequency lies or at what low frequencies the bass sounds best.
For example, let's say you get a lot of desirable depth and warmth around 120Hz. Try and boost the bass in that region to give it its own pocket. There's no need to go crazy here, as 2-4dB will often do the trick. Keep your boosts pretty wide as well, as boosting with a narrow ‘Q’ will bring out individual notes rather than the entire portion of the frequency range.
I think it's important to address the fact that just because you can boost does not necessarily mean you need to. Your bass might already be plenty heavy enough in that area, and boosting anymore could overpower the mix.
When deciding whether or not to make EQ boosts, use your ears.
Remove What You Don't Need
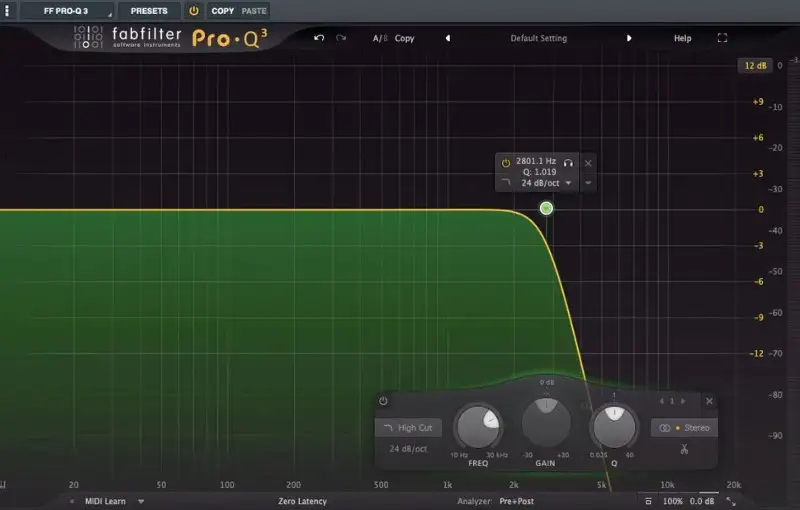
I'm a huge fan of subtractive EQ, as I find that it's a far more reliable tool for creating space and often sounds more natural. Once you've tightened up the bass with a high-pass filter and boosted the pocket you wanted to sit in, you can now remove some unnecessary frequencies that get in the way of other instruments in the mix.
For example, you might have a lot of unnecessary high-end in your bass recording, most of which is just fizz and noise. You can often use a low-pass filter and bring it down to around 6kHz without hurting the tone of your bass. When using a low pass, keep the slope relatively gentle, as steeper slopes can create nasty resonances, especially if you're using a cheap parametric EQ plugin.
Once you've set your low pass, listen to the bass in the context of the mix and see if there's any other frequency range that's bothering you. For example, I often find that the bass I record with has an unnecessary frequency bump around 180-200Hz. If I don't cut this with my regular EQ, I may use multiband compression or dynamic EQ to tame it, which we’ll get into in a bit.
Using Dynamic EQ
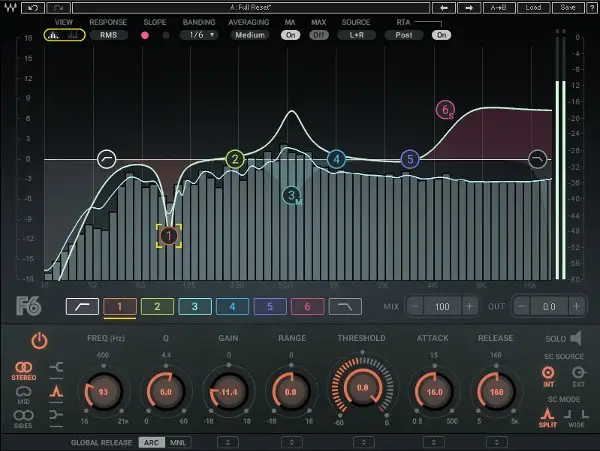
One of my favorite tools for taming bass in a mix is a dynamic EQ
The great thing about dynamic EQ is that it reacts to the source material, unlike your traditional static EQ, which remains the same throughout an entire track unless automated.
Let's look at a scenario.
Say you're mixing bass with a resonant frequency bump around 180Hz, as I mentioned earlier. You reach for a standard parametric EQ to cut 2-3dB of 180Hz to help your bass sit better. However, while this cut makes some of the notes fit better in the mix, it makes others sound thin.
So, you automate your EQ so that it only reduces the problematic notes. Unfortunately, when you're done, you realize that 30 minutes have gone by and you still have hours left in your mix.
This is where dynamic EQ comes in handy.
It essentially does all the heavy lifting for you.
In many ways, dynamic EQ works like a multiband compressor, with threshold controls that only react to the source material depending on your settings.
You can check out our “ What Is Dynamic EQ” article to learn more about how useful it can be on just about any instrument in a mix.
Saturate and Distort
There are so many ways to implement saturation and distortion on bass in a mix that I could draft up an entire article about it. Saturation can either be used subtly to help the bass poke out of the mix, especially on small speakers, such as headphones or laptop speakers. On the other hand, you can apply heavy distortion as an effect, which is very common in genres like rock and metal.
Let's talk about saturation for a minute.
Many new mixing engineers get confused about the concept of saturation, which is why I like to simplify it. From now on, think of saturation as analog distortion that adds harmonics. Essentially, it fills out the sound of any instrument it is applied to by adding more harmonics.
The confusing part is picking from the breadth saturation plugins out there, ranging from tape saturation to tube saturation and beyond.
Some of my favorite saturation plugins include:
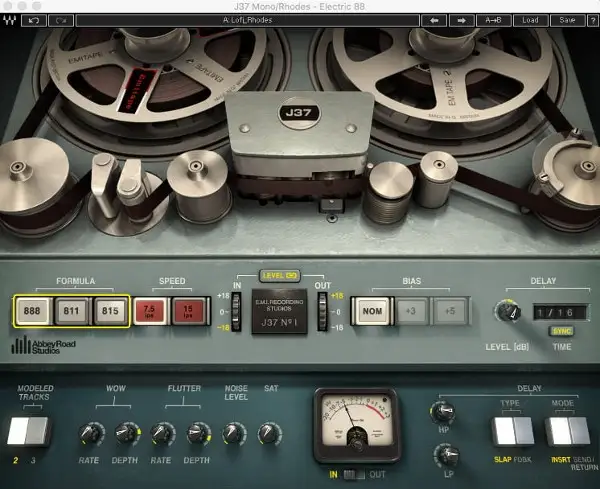
- Waves J37 - I’ll often use this tape saturation plugin to add a sense of analog warmth to my bass, especially if I'm just working with a DI. The plug-in has a solid saturation knob that allows you to dial in a bit of grit when necessary.
- FabFilter Saturn 2 - The beauty of FabFilter Saturn 2 is that it allows you to affect each band individually. Whenever I want to get a dirtier top end while retaining the pristine character of the lows, I’ll reach for this high-quality saturation tool.
- Soundtoys Decapitator - This analog model plugin can get into the realm of heavy distortion and fuzz when dimed, though when used subtly or in parallel, you can pull some delectable analog saturation out of it.
Whenever you reach for a saturation plugin, have a goal in mind.
My goal is often to make my bass track sound more full, especially if it still sounds thin or lifeless after EQ and compression.
If I'm applying subtle saturation, I'll typically put the plug-in as an insert directly on my bass channel and dial it in just enough to give it the character it needs. On the other hand, if I'm applying heavy distortion, I'll typically duplicate the base, high-pass the duplicate up to around 200-300Hz, flip on my distortion plugin, and blend the distorted signal in with the clean signal to get the best of both worlds.
The reason for this is that distorting the ultra-low frequencies can make your bass sound undefined. Through trial and error over the years, I’ve found that having pristine sub frequencies always takes the cake.
So, you might be wondering, do I NEED to use saturation?
In a digital era where people are listening to music on systems big and small, I find that saturation can be helpful in just about any situation.
One of the main problems with bass is that the low end gets lost in small listening systems, such as phone speakers, laptop speakers, and headphones. In essence, they aren’t large enough to reproduce low enough frequencies, meaning the bass gets lost.
With saturation, you can add a slight bit of distortion with extra harmonics on the top end of your bass to help it poke through smaller listening systems.
When I use saturation, I like to focus on the low-mids and high-mids, as these are the frequencies that often need a helping hand to translate through smaller listening systems. The cool thing is that you can use saturation to help your bass cut through the mix without having to apply top-end EQ, giving you a more natural sound overall.
Multiband Compression to Take Care of Unruly Lows
I want to give a quick word on multiband compression.
In most modern music, having a stable and consistent low-end is crucial. Sometimes, standard compression can do the trick, especially if you're working with a bass track that was recorded by an experienced player with dynamic control.
In other cases, mixing engineers will work with sessions that have both DI and amp tracks. They might take the pristine DI track and compress it aggressively while leaving the amp track open.
This is a really neat way to get the best of both worlds — dynamic articulation and a consistent low-end.
So, what if you only have a DI signal to work with?
While you could mimic the amp and DI process with an amp sim, I often find that reaching for a multiband compressor is a much quicker way to get the job done.
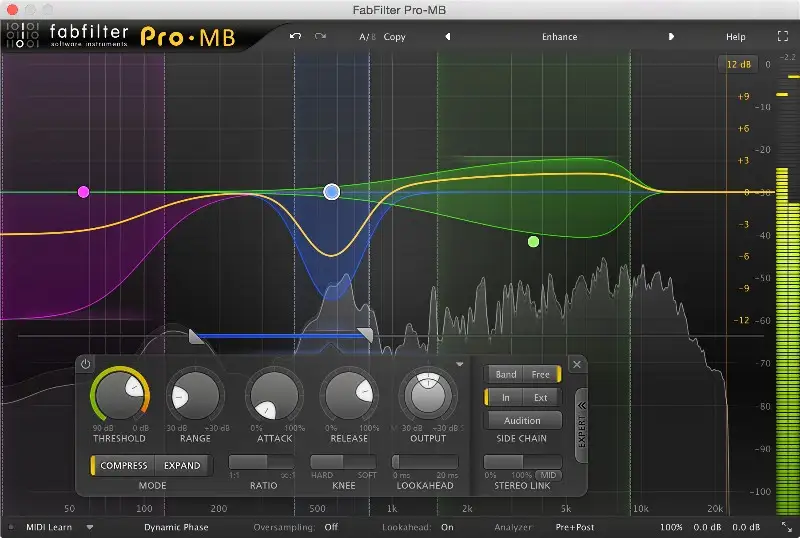
I'll start by loading up a multiband compressor, such as Waves C6 or FabFilter MB, and initiating only the low band, somewhere beneath 120-150Hz. The idea here is that I'm only looking to control the lows with this compressor.
With a medium attack and medium release, I'll compress this portion of the frequency spectrum to lock the low end in place. Depending on the source material, you can often get away with around 6-10dB of compression in the low end. Once the low notes are locked in and everything sounds consistent, use the makeup game knob to compensate for volume loss.
If done correctly, the low end of your bass should sound consistent from note to note, while the mids and high end provide dynamics.
Limit that Sucker
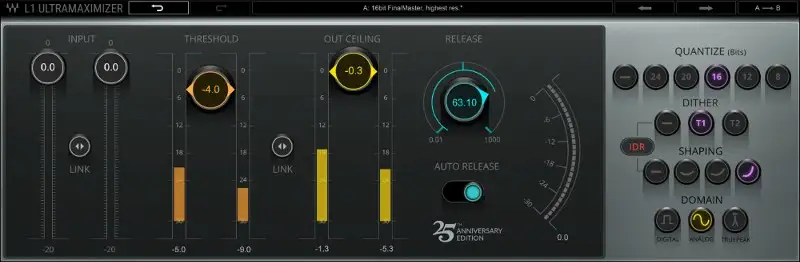
A limiter can be the cherry on top for getting your bass to cut through the mix.
However, it's important to note if there was a “less is more” approach to any type of processing, this would be it.
Most of the time, a limiter should only be there to catch the unruly peaks that you were unable to tame with regular compression. Think of the job of a limiter as preventing the track from getting any louder.
With an added level of protection on your peaks, you can maximize the perceived volume of your bass in your mix.
As with any other form of processing, don't use a limiter if you don't need it. It can sometimes sound a bit heavy-handed in lighter genres, such as folk and jazz. If you're going to use a limiter, start with around 1-2dB of gain reduction at the top at most. It's easy to turn your bass signal into a brick, and unless that's the sound you're going for, approach limiting with care.
Using Effects on Bass
Bass is mainly there to provide solidity and support for the rest of the mix, which is why it's pretty rare for it to be treated to heavy effects during the mixing process. Any bass effects you're working with were likely a production choice.
However, there are times when you might want to use effects for creative reasons. For example, that bone-dry bass DI might not feel like it's sitting well in a sparse mix, and a short, room-like reverb patch might be just the remedy it needs.
Slapping a reverb plug-in on your bass track and calling it a day is usually a bad move, as time-based effects, as well as modulation effects, can muddy the low end and drown out the groove.
If you need to use effects on your bass, create a send track with your effect and an EQ with a high-pass filter that gets rid of any information below 100Hz. This will keep the subregion of your bass solid and clear while preventing the effect from compromising its mono compatibility.
Additional Tips
If it were up to me, I'd write a book on mixing bass, as it's a truly fascinating process with so many different approaches. However, to keep things simple and wrap this up, I want to leave you with some fun extra tips you can use to mix bass:
- Panning - Many makes engineers will tell you that panning bass is a big no-no, as you want to have sub-bass frequencies right up the middle. While there is some truth to that statement, I learned from one of my successful mixing engineer mentors that panning your bass guitar slightly off-center from your kick can help create more space for each.
- Renaissance Bass - If your bass track lacks low-end and additive EQ isn't doing the trick, consider using a sub-harmonic frequency generator, such as Waves Renaissance Bass .
- Check Your Phase - If you're mixing bass guitar with multiple bass tracks, such as a DI and an amp track, make sure the two tracks are in-phase. If not, you could miss out on a lot of good low-end. Read our guide to understanding the basics of phase to learn more.
In Summary - Mixing Bass Guitar Like a Pro
So there you have it, a comprehensive guide to mixing bass. Following the steps above and keeping a keen ear, you can mix professional-sounding bass tracks as if it were second nature.
In summary:
- Take care during the arrangement process to make sure no other elements are taking up space in the low end
- Dial in the right tone for your track
- Do a few passes through the mix two get the volume balance right, and dial in additional consistency with gain automation
- Mix with a goal in mind by using reference tracks
- Use a standard compressor or multiple compressors in serial to tame your bass dynamics
- Use EQ to create space for your bass and boost the frequencies that make it stand out
- Fill out the tone of your bass or help it pop through smaller speakers with saturation
- Use multiband compression below 120-150Hz to lock your sub-frequencies into place with a medium attack and medium release
- Keep unruly peaks from popping out of your mix with a limiter
- Give your bass air and character with effects using sends with high-pass filters on the inserts
So many new engineers overcomplicate the process of mixing bass guitar. At the end of the day, the philosophy I always like to provide is that if it sounds good it is good. I hope this guide can provide a good starting point for you regarding what kinds of tools you need to craft a professional bass sound.


