Reverb. It's an essential element in any mix, whether you prefer ethereal, dream-like vocals drenched in lush reverbs, or tight, crisp instruments sounding dry as a bone.
But as indispensable as it is to music production, messing up your reverb settings can ruin even the greatest song. And of all those settings, reverb pre-delay can be the most overlooked.
So, dear reader, we're going to fix that problem. Let's take a plunge into the enigmatic world of the reverb pre delay setting, and how it can be used strategically to elevate and transform your songs.
Pre-Delay - What Is It?
At its core, reverb pre-delay is the amount of time between the initial, unprocessed audio source and the start of the processed, reverberant signal.
Measured in milliseconds, it may seem like an innocuous little thing. But it's not.
Pre-delay plays a central role in manipulating reverb, how we hear it, and perhaps most importantly, how individual instruments and vocals with reverb applied to them sit in a mix.
To really get a sense of the technical underpinnings behind pre-delay, let's zoom out and look at how reverb works.
The Science of Reverb
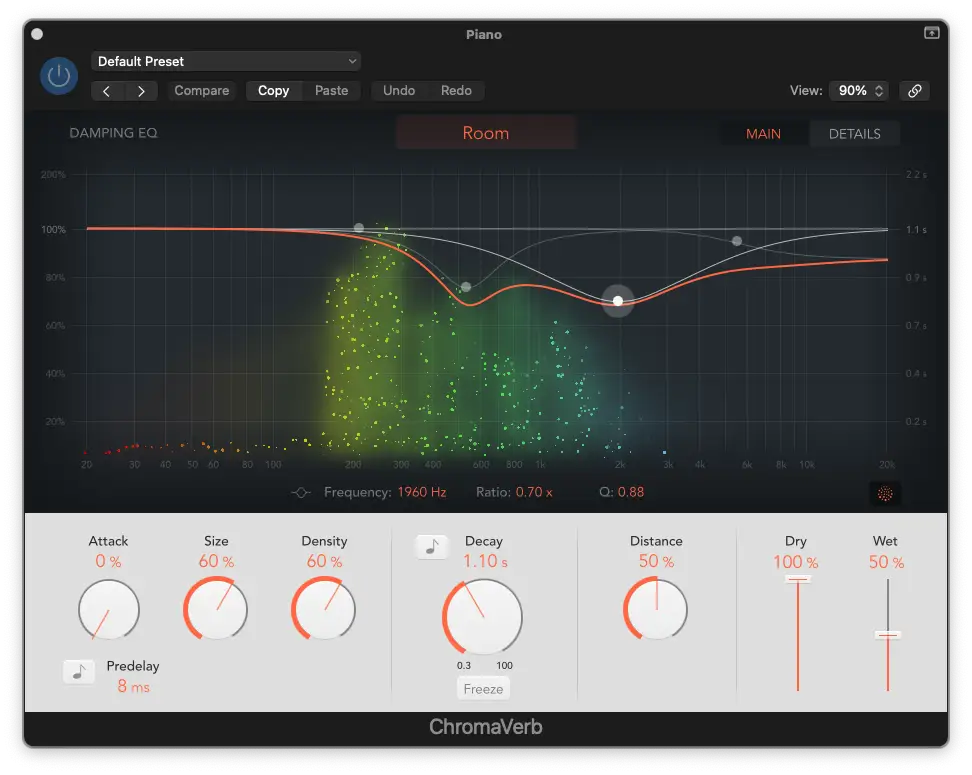
In the real world, natural reverb is made up of lots of reflections, all bouncing off the various surfaces of the environment in which the sound is located. Eventually these reflections taper off, and we hear the end result as one continuous sound - reverb!
Whether it's indoors or outdoors, the size of the space and the materials it's made up of dictate the characteristics of the reverb we hear.
Reverb units are designed to emulate these sound reflections, whether it's by mimicking the sound of a real acoustic space (like a hall or room), or by creating an artificial space using springs and plates (or emulations of them if it's a plug-in).
Digital reverb gives us unique sound-shaping abilities thanks to the number of controls on offer. They vary greatly from one plugin to the next, and can be unhelpful with their sometimes contradictory naming terminology. But they basically all perform the same function . And they nearly always have pre-delay controls.
Why Is Pre-Delay Important?

Generally speaking, we human beings don't live in a vacuum (unless you're a Nickelback fan). Our brains process millions of pieces of data to make sense of the world around us, and this includes using our ears to understand our environment.
Remember how natural reverb occurs? Those reflections help us understand the space we are in, even if we can't see it.
Imagine waking up in complete darkness: by simply clapping your hands you can get a sense of the environment around you. You'd know instantly if you'd were in a cave (bad) , standing in your bathroom (better) , or lying in your bed (best) .
Now, imagine your loved one/best friend/doggo is with you. If they clap their hands (or barked) you can tell approximately how far away they are from you, based on how prominent the direct sound was in relation to the reverb sound.
So in the real world, pre-delay is essential in helping us discern approximate distances from things, and place people and objects in space.
Pre-delay on reverb plug-ins emulates this concept. This is useful for placing sounds and instruments in the virtual environment you create. For example, in an intimate song you'll (probably) want the lead vocals to be perceived as being close to the listener. Conversely you may want the sad cello line to be in the same 'room' but sound further away from the listener.
In music production, pre-delay goes beyond just placing instruments and vocals at different points in the same space. With the right settings it can be used to add clarity and depth to the instruments in your mix.
By adjusting pre-delay on reverb settings you can also change perceived room sizes without having to adjust the decay time.
Examples of Pre-Delay
It's all very well writing about how pre-delay affects an audio track, but what does it sound like?
Here's some examples to illustrate pre-delay in action.
Take a listen to the dry piano below - zero reverb on this baby (grand):
Here it is again, situated inside ChromaVerb's Concert Hall:
Nice. But it's sounding a little lost in there, so let's dial in some pre-delay:
Now the attack of the notes is a little clearer.
And here's what it sounds like if we add too much pre-delay:
Yuck.
For comparison with a shorter reverb, here's three variations of a drummer sound-checking his snare. The first 4 beats are dry, the next four have a a short room reverb with no pre-delay, and the last four have pre-delay added:
Can you hear how much more defined the snare is in the last 4 beats?
How to Set Up Reverb Pre-Delay
No matter what genre of music you are working in; the principles around setting your pre-delay time are the same.
To start with, you need to calculate what the suitable pre-delay times you could use are, based on the tempo of your track. There's two ways to do this.
How to Calculate the Correct Pre-Delay Time
Got your calculator app ready? It's not tricky, but it will certainly be easier than working things out on paper.
To get your first calculation - a quarter note value of pre-delay - divide 60,000 by the BPM of your song.
In a fictitious song with a BPM of 120, the equation would look like this:
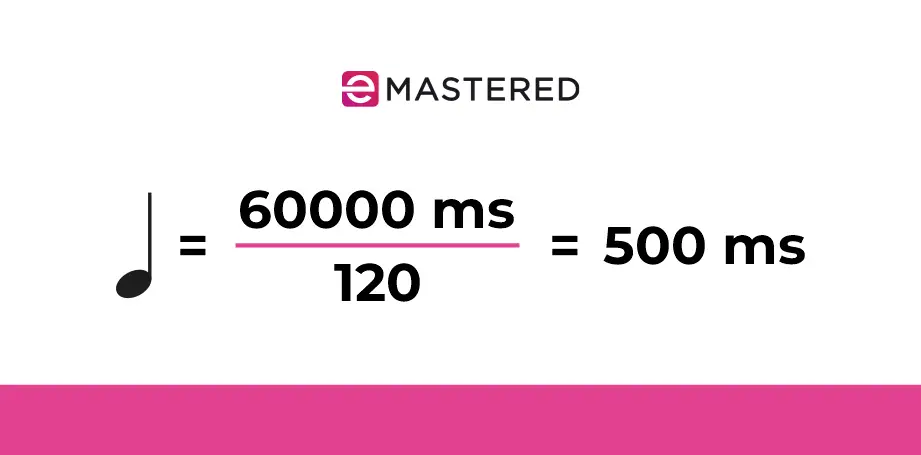
A quarter note's worth of pre-delay is hefty, so take the result and divide by two to get a new figure. You can keep dividing each subsequent result by two to get smaller pre-delays that are still in sync with your music.
Check out the example table below to see how you can get smaller, more useful pre-delay settings for a song at 120 BPM:
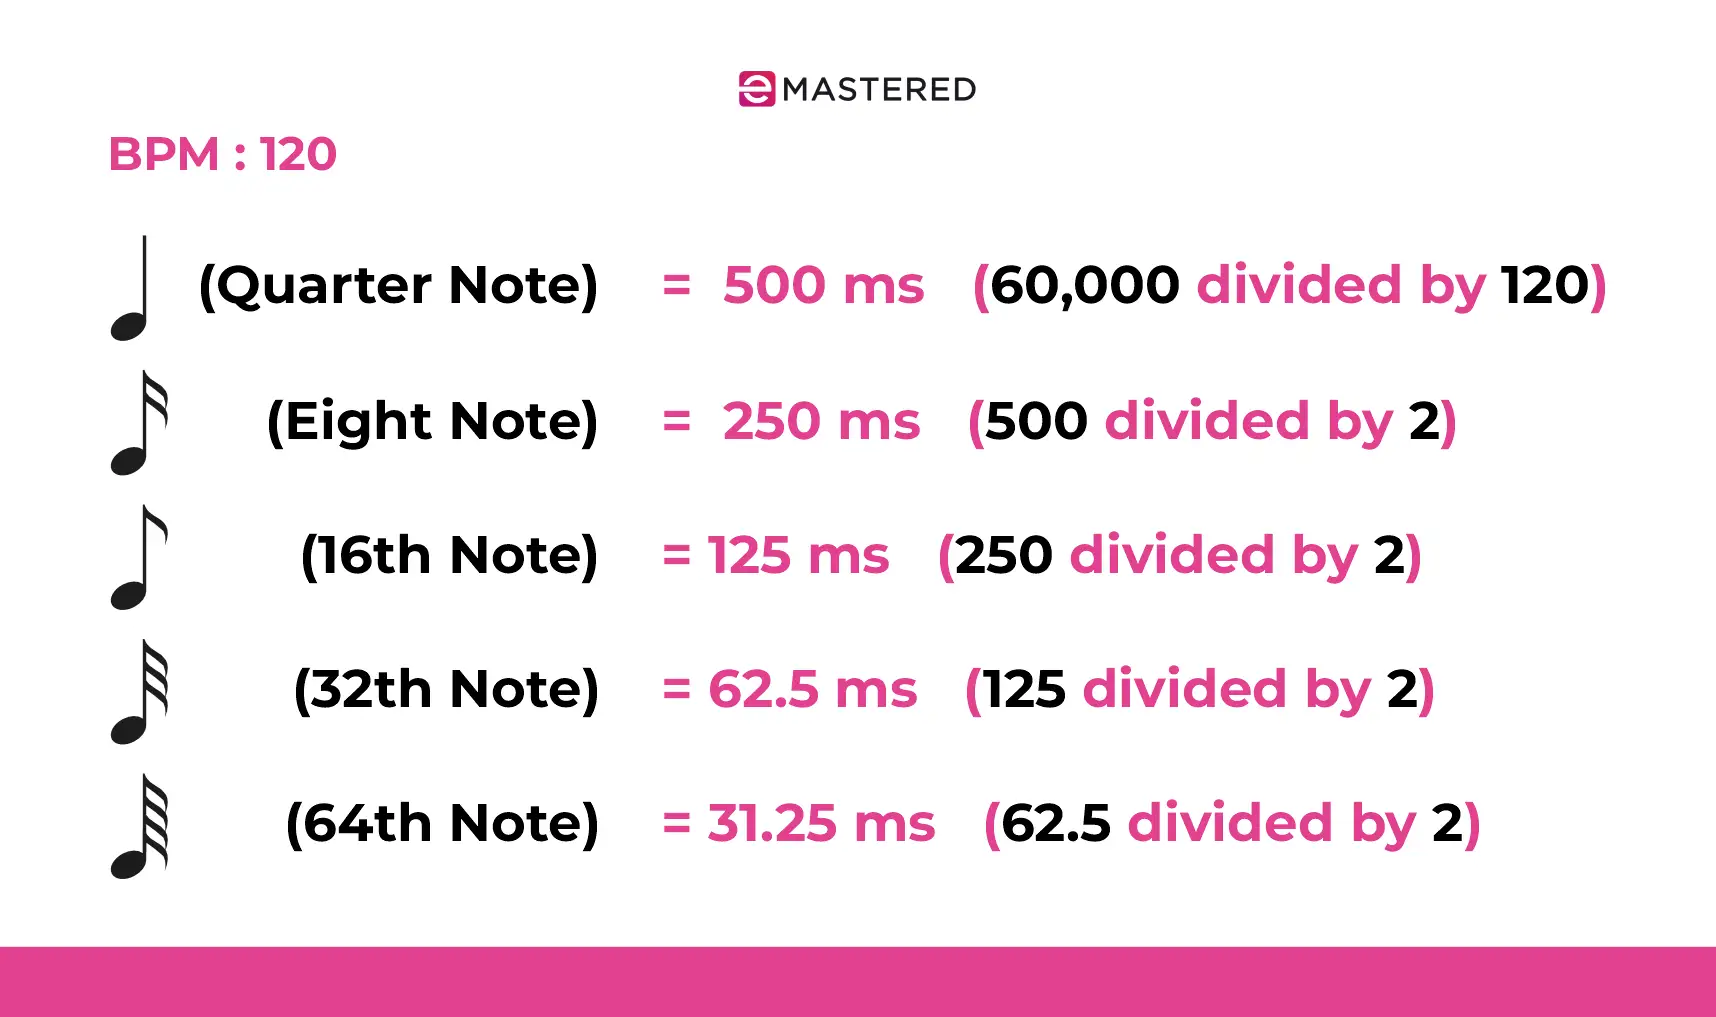
For dotted notes simply add half the value again to your starting number. So in the above example, for a dotted eighth note you'd use a setting of 375ms (250 + 125)
If you prefer someone, or something, else to do the work for you there's plenty of online calculators that will spit out the numbers. Here's a few:
- https://www.omnicalculator.com/other/delay-reverb-times
- https://nickfever.com/music/delay-calculator
- https://www.reverbcalculator.com/
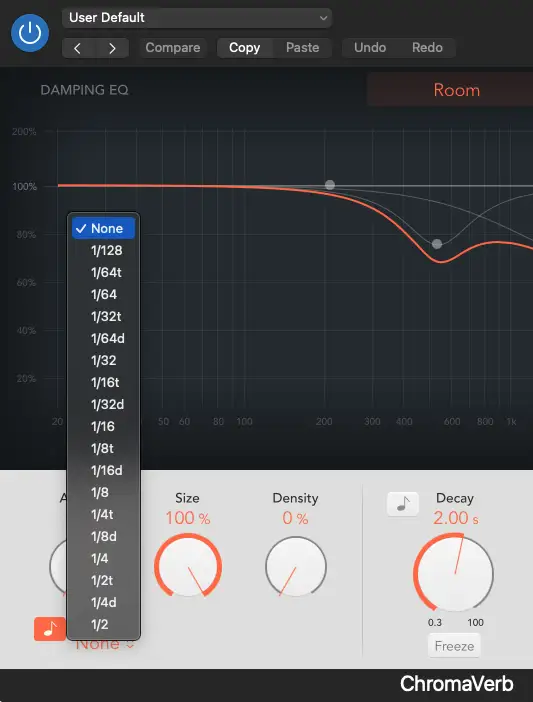
Of course, your plug-in may just do it for you. Some reverb effects allow you to toggle between milliseconds and musical-based divisions.
Rules of Thumb for Pre-Delay Times
Setting pre-delay time to the BPM of a song is a good way of making sure your reverb breathes with the music. But it's not an exact science.
A useful concept is to keep the pre-delay times in line with the size of the space you are creating with the reverb sound.
- Smaller spaces (like small rooms) should have around 0-10 ms.
- Medium-sized rooms and chambers would sit around 10-20 ms.
- A long reverb, like churches and halls, would have pre-delay time of 20ms and upwards.
Obviously these rough figures should be adjusted based on tempo, pace, and texture of the track you're working on.
As with anything in music, listening is key. Once you have the rough ball park pre-delays set, adjust to suit your tastes and the needs of the instrument or vocal. Adjusting and experimenting with different delay times in a subtle way can achieve some great results. Adding or subtracting from the timing, for instance, will create a pushing or pulling feel.
How to Balance Pre-Delay With Other Reverb Settings
Pre-delay isn't the only parameter of reverb though, and to use it effectively means coordinating it with the other parameters available to you.
Reverb Time
The longer the reverb tail is the more lush the soundscape it creates will be. To avoid an unnatural-sounding delay between the initial attack and the onset of the processed audio, keep the delay time reasonably short.
EQ
It's always a good idea to place an EQ after the reverb so you can independently sculpt the resulting sound. Shave off some low end to avoid muddying your mix, and tame those chattering reverb highs with a subtle high shelf cut. Note that this will only work if the reverb is being fed via an auxiliary channel.
Some reverb plugins, like Logic's ChromaVerb, and Waves' Renaissance Reverb have built in EQs so you can perform all this 'in house'.
Using Pre-Delay
How much pre-delay you actually use depends on context: the music, the instruments involved, the reverb size, what's important, what's busy etc. Here's some tips to get you started.
Lead Vocals
In a song, the lead vocal is usually the most important aspect, so you'll want to keep it clear and up front. Shorter pre-delays in the 20-80ms range can work really well in this case.
Guitars
Guitar tracks can profit from slightly longer pre-delay to help glue things together. For a solo you may want to increase the delay even further.
Drums
Drums are easy to mess up when it comes to reverb settings. Add a reverb to the whole kit and you're in danger of muddying the whole thing up. On the other hand you often need some room to add depth to some of the sounds.
The trick with drums (and any percussion instrument) is using short reverbs judiciously. A very short pre-delay with a short decay time.
Other Tips + Tricks
- Try side-chaining the source audio to a compressor placed after the reverb for a creative effect. This will help create a spacious mix, and make the reverb itself 'breathe' with the music.
- Another trick is to try automating the pre-delay timing throughout the mix. Don't go crazy here, but nudging things up a few milliseconds in the chorus will add more depth.
- If you're using aux groups to help make your mixing life easier, don't rely on the same reverb for each instrument group. Pick one for the lead vocal, and choose other appropriate reverbs for the other groups. However...
- You may want the effect of all the instruments performing in the same environment (like an orchestra for example). Rather than feed everything into the same plug-in, use multiple instances of the same reverb for each of the groups. Set up the same basic settings (early reflections, reverb tail, room size), and adjust the pre-delay and other parameters to suit each instrument group.
Does Genre Affect How Much Pre-Delay I Should Use?
Rules are there to be broken, and to suggest you use a specific pre-delay setting for a certain genre would be limiting to your creativity.
Yes, ballads will often use a longer reverb time with a sparser arrangement, so you'll probably want a shorter delay time. DeathCore would be faster, and busier, so you'd use more pre-delay.
It's no crime to look to the zeitgeist of a particular era for inspiration, too. The 80s were all about gated reverbs and extremely audible amounts of pre-delay.
It's all about the effect you want to create - experiment and play around with settings as you're mixing and see what happens.
Free Reverb Plug-Ins to Get Started With Pre-Delay
There's a slew of reverb plug-ins on the market, but if you want to start experimenting with pre-delay and don't have any spare moolah, here's a selection of some great free ones:
- Valhalla SuperMassive
- Wave Arts Convology XT
- Togu Audio Line TAL-Reverb-4
- Melda Production MCharm Verb & MConvolutionEZ
And don't forget to check out the reverbs that ship with your DAW. Now go forth and maketh the music!


