


Reverb is undoubtedly one of the most important aspects of music production and audio as a whole. Today, we're going to dive into the question; what is reverb?
The effect commonly gets played off as a simple addition to your tracks, but, in reality, it’s what provides the intriguing depth within a song, enveloping listeners.
The use of reverb isn’t as simple as it may seem, and it’s essential to understand what exactly reverb is. This article will guide you through 10 crucial steps to utilizing reverb and how it affects your production. We'll also talk more about various types of reverb and why you need them.
What is Reverb?
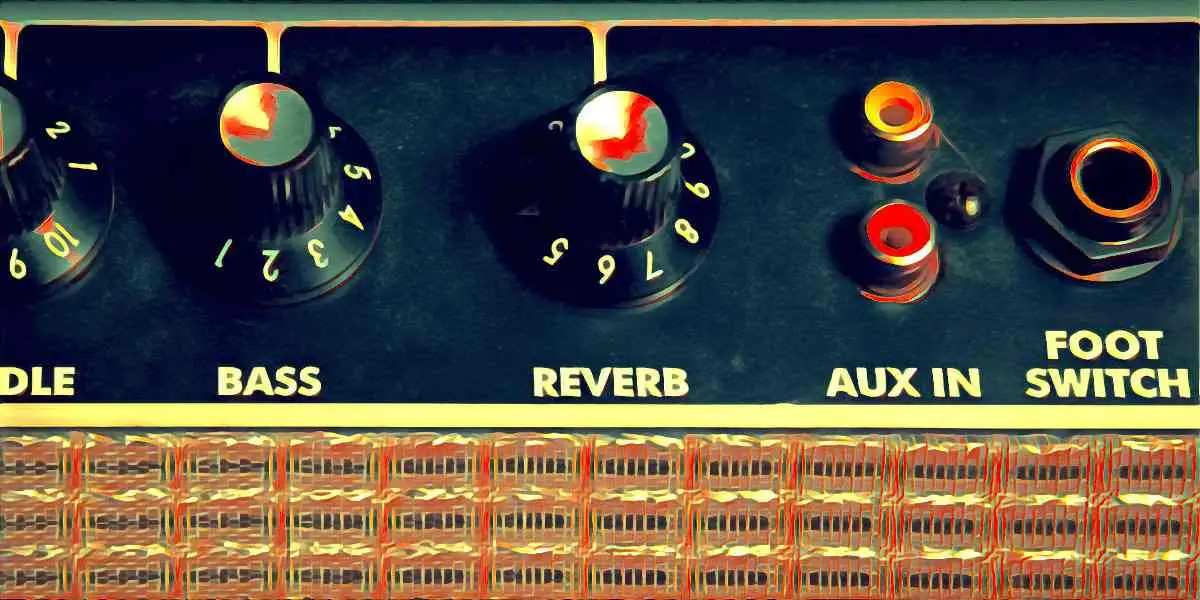
Reverb is the sound of many decaying reflections bouncing off of the initial sound. Reverb is modified in many different ways based on room size, wetness/dryness, and other variable factors. When you add digital reverb to a sound, a level of audible fatness and a different depth blend with the surrounding elements. This effect also helps your audio production sound more full. You can also modify or “shape” this effect to sound like many different types of reverb. A cave, tunnel, or concert hall allows you to create a reverb that reflects a specific space.
Why Do You Need Reverb?
In some cases, a song can sound dry, and although the vocals and instrumentation carry emotion, they may not fill enough space in the music. Testing out multiple reverb chambers can help you hone in on what sounds best for the sound as a whole.
Of course, there's always the chance for room reverb to be modified to benefit the production, but many studio environments aren't built with the specific acoustics for room reverb. Adding reverb can be trickier than expected, as parameters like decay time, size, and distance should be tweaked to suit the tracks' specific needs.
A setting that can be easily misunderstood, and is commonly set due to an impulse response to fill space, is a reverb's wet signal. Sure, having a high wet signal will fill that space, but it could also collide with other elements in the song. It never hurts to put on the studio headphones to make sure you can hear every audible detail, allowing you to create reverb with the best settings possible.
What Exactly Does Reverb Do in Music?
Starting with the basics of reverb, which is a reflection of sounds off a surface, carrying trails of the sound source, creating effects that also reflect the space where the source audio was made. Furthermore, many different types of reverb carry a different sound, whether it be plate reverb, spring reverbs, hall reverb, convolution reverb, or even the room sound; all of them have a purpose in aiding the production.
With digital reverb, no matter which style you choose, they can be modified and customized endlessly to suit the sound you're looking for. Choosing the best option is a mix of technical skills and a reliable ear for music.
It's crucial to remember that each person interprets sound waves differently, which is why music can be so subjective in a discussion. So, listen to each audio element in the production to determine if you need to add or remove the reverb. Test if you can modify the original direct sound to suit your needs before immediately adding more reverb.
Different Reverb Types and How to Use Them
Chamber Reverb
Reverb is made primarily for analog reverb recordings. It does an excellent job of filling out the frequency range without muddying up the production . You’ll find Chamber reverb helpful with classical music and even genres like pop music.
Moreover, there are different types of chambers you can work with that will display a unique sound and reverb time, based on the size and material of the reverb chamber. Utilizing this type of reverb can be a good option for emulating reverberation in a particular space. Take a listen to the audio example below to get a better grasp of this type of reverb.
Cathedral or Church Reverb
Like the title suggests, the Cathedral reverb is best utilized for choir ensembles, dramatic leads, or a vital organ. This style of reverb is excellent for making the audio sound more prominent and more dramatic. Due to the general size of most church architecture, the typical reverb tends to carry a lengthy decay.
When using a digital church reverb or the initial sound, the louder early reflections take longer to dissipate. A quality reverb has a proper mix of indirect and direct sound, and churches offer this with their complex architecture and the types of furnishings inside them.
Gated Reverb
This type of reverb can be fun to use as it uses noise gating to cut the reverb decay trail, giving it a distinctive echo. Gated reverb sounds great over signature leads, bass, and vocals.
This particular reverb was highly popularized in the 1980s. This type of digital reverb keeps the original sound clean while providing a powerful decay time.
Moreover, adjusting the parameters and giving the reverb a higher or lower pre-delay time is an easy way to provide the reverberation with a drastic difference to the whole production. You can find an example of this style of reverb below.
Hall Reverb
You’ll find this style of reverb represented within concert halls and live performances. Utilizing hall reverb in productions can help add an authentic, live sound to vocals and individual instruments and it’s even suitable for drum kits.
For example, the audible power emitted from an electric guitar would have a long natural decay from the effects of this reverb. Interestingly, concert halls are generally built to carry sound as consistently as possible.
This characteristic of hall reverb can be used in your productions to keep things tonally similar to the rest of your track. Have a listen to the audio below for an excellent example of hall reverb.
Convolution Reverb [ Wet / Dry ]
Not all reverb plug-ins can utilize convolution reverb, but it’s a fantastic option to have. It uses a digital recording and simulates the reverb within that space and its various acoustic elements. This can be a handy tool for sound designers when working on TV and film projects. It allows for a high level of customization. You can also use convolution reverb for audio productions that seem dry but need to sound as natural to the space as possible.
Plate Reverb
This style of mechanical reverb is truly unique in how it performs. Plate reverbs are emitted from a metal sheet housed in its case that is suspended with a transducer placed in the middle.
Just like an electric guitar, the housing also contains pickups, two to be exact. When an audio signal is sent through the transducer, this causes it to produce physical vibrations. As the metal sheet vibrates, it creates the signature plate reverb effect.
Spring Reverb
Moving on from plate reverb, we have spring reverb. This option is relatively simple but can be a great addition to a lively track. It has a noticeable metallic sound to it that goes well with metal, rock, even blues.
The sound is created by springs being stretched across a metal box. When the springs vibrate, sound passing through them and bouncing off the inside of the metal box creates an echo.
It’s wise to be careful with spring reverb as it can be pretty sensitive, especially with songs that are already somewhat bright in tonality - a perfect reverb for simulating the sound of spring reverb from guitar amplifiers.
When and How to Use Reverb in your Music?
Deciding on the reverb style to use in your production can be a challenging and sometimes lengthy task. It's always best to shape the reverb to the tone and style of the song so that it blends and doesn't become obtrusive. Below, you can find a few critical tips for utilizing reverb.
When and how to use reverb:
- Creating cohesion with each track
- When a song needs more depth and profundity
- Fill empty space
- Use hardware or digital reverb
Creating Cohesion
Sometimes, using reverb to blend the whole track can provide a new wholeness to the production. In terms of a reverb plug-in, many artists will give each track its individual reverb. Although this method has its place, this can lead to colliding reverberations, especially if the parameters aren't all the same, thus taking away from the uniformity of the production.
Another method commonly used in music production and audio engineering is sending each track to the same reverb buss, putting them in the same space, rather than having multiple reverb plug-ins fighting for the same audio space.
Provide More Depth
In the early stages of a song, the vocals and instruments can sound somewhat two-dimensional or dry, so-to-speak. An easy fix for that would be to apply some reverb, and you should spend time on the individual parameters to make sure the integrity of the sound isn't going to be compromised.
This is a task where a good pair of studio headphones would come in handy, allowing you to hear the fine details of each reverberation. Depending on which type of reverb you choose, this can make vocals sound full, airy, or even give them a live performance feel.
Of course, there is such a thing as too much depth, and it can easily be overdone so, don't be afraid to remove reverb if your ears tell you to.
Fill an Empty Space
In music and the early stages of production, there may be times where the track has a few spots of just empty space. No instruments, no vocals, and if it goes on long enough, it can throw off the entire vibe of the song.
Of course, you also don't want to blatantly fill it with nonsense that doesn't fit the rest of the song so, this is where reverb comes in handy. You can use reverb and its dissipating tails of audio to help fill those brief voids. Once again, you want to make sure you control the audio reflection tails, as you only want them to fill that short open space.
When to Use Hardware or Digital Reverb
Hardware will always bring an authentic sound to the production, and that's precisely what it should be used for. Even today, with how things have evolved digitally, reverb hardware still has its place in the studio. Using hardware will be a good choice if you're looking for a more organic, lively reverberation.
With digital reverb, these are always handy due to the level of customization they offer. You can shape each style of reverb exactly how you want while having access to thousands of various reverberations. It comes down to the needs of the audio production and what sounds best to you with the style of music at hand.
Mistakes to Avoid While Using Reverb
Low-Quality EQ
Proper EQ of reverb is not only crucial but one of the most overlooked parameters of the effect. Without you having to adjust any settings, reverb will naturally add varying levels of depth and sonics to the track. It's important to shape the reverb EQ to suit the needs of the production; otherwise, the tonalities could be sporadic due to uncontrolled reverberations.
Reverb Tails Colliding
Managing colliding reverb tails is another case where studio headphones would be pretty helpful. The tails of each reverb are unique, and of course, with a reverb plug-in, they can be modified to a great extent. Even if you had the EQ of the reverb under control, if it collides with the next vocal or instrument, it could clutter up the pleasant sonics of the song's structure.
Applying Any Reverb Blindly
You must spend time listening to the sonics of your track and the sonics of the reverb itself and make sure they cooperate. If you blindly put any random reverb on your vocals without tuning it up, it could provide an unwanted metallic sound to your voice, or maybe it's a little muddy because the reverb you applied has a heavy low-end EQ. No matter which type of reverb you choose, consistently adjust the parameters to align with the song's tone direction.
The Parameters of Reverb
It’s essential to understand how to apply the correct type of reverb to your track correctly. Knowing the parameters and how to use them correctly can easily take your audio production to the next level. Below, we’ll talk about a few of the critical parameters in more detail.
Pre-Delay
This one is pretty simple; pre-delay is the time it takes for the reflections to trigger after the initial sound source has been played.
Attack
When adjusting the attack parameter, you can set how long it takes for the reverb to obtain its level of steady-state intensity. This parameter is also suitable for mitigating issues with colliding track elements, giving more space for the original sound source before the reverb kicks in.
Decay
The decay parameter controls the amount of time it takes for the trailing reverberations to die off completely. Ensuring that this setting is where it needs to be will have each space filled correctly without colliding trails of reverberations.
Diffusion
This parameter determines the complexity of the reverb itself. Diffusion allows you to set the density or shape of the reverb, which you can manipulate to sound thinner or fatter.
Mix
One of the most critical parameters, the mix, is how you control the balance between your wet and dry signals. When you increase your dry signal, more of the original audio shines through, and with higher wet values, you’ll get more reverb. This is where you should be finding your perfect balance between the original sound and the power of the reverb you’re using.
Size
When it comes to the size of your reverb, this is referencing how long your reverb reflections are. To give you a visualization, when you increase the reverb size, you’re essentially increasing the size of the reverbs room.
Early Reflections
These should be understood clearly, as this is the first part of the reverb you’ll hear. The early reflections perform alone compared to the rest of the reverb you hear on the tail. So, you’ll want to make sure those hit right as the listener will pick up on them first.
10 Steps to Utilizing Reverb
You don’t want to slap reverb on a track and call it a day. It needs fine-tuning to be able to mesh with the original sonics of your production.
Of course, music is a subjective art, and you should choose the reverb you like best. Although, there are a few essential pointers to utilize, regardless of the type of reverb you select.
1. Select Your Reverb Type
In most cases, the reverb plug-in you have more than likely has presets available. It’s always good to find a solid-sounding preset and then tweak the parameters from there. It’s essential to choose a reverb that blends with the sonics of your production. Always remember, reverb is excellent for filling dry space. So, look for areas in your track that may be a bit too dry and think about which reverb would be best to fill that space.
2. Set Your Pre-Delay
Finding the right setting for pre-delay is crucial. If this parameter isn’t set correctly, it can end up making your whole production sound off in terms of tempo of the song . If you’re looking at a medium-sized pre-delay, this will give a slight delay to your reverb. This is important to note as it allows more time for the original sound to shine through before the reverb kicks in. It is allowing for a good balance between the two.
3. Set Your Level of Diffusion
When trying to determine your diffusion level, it’s essential to note the EQ in the song . If you already have other reverberations or wetness within the production, you may want to take a lighter approach with the diffusion. This would be a flatter-sounding reverb, good for not cluttering up the track or clashing with other reverberations. A higher diffusion level would sound more enveloping and fatter overall.

4. Set Your Decay Parameters
Given decay determines how long it takes before your reverb ends, you must correlate this parameter with the reverb size. When size controls the amount of room in the reverb, decay plays a vital role in ensuring that room size comes to a fitting end. If your room size is comparable to a church, then you’d want the decay to drag out a little bit, as reverb within a church tends to last longer than just a second or two.
When it comes to longer reverbs, they tend to bleed over into other notes and frequencies, which can clutter up your production as a whole. So, longer reverbs should be kept a bit quieter than short reverbs, as they tend to leave more open natural spaces between notes and frequencies.
5. Decide on Your Mix Levels
Finding the right balance between the initial sound and the amount of reverb you want to hear is one of the most vital parameters to get right. To find the perfect mix, you should pay very close attention to the track’s current dry/wet mix. Your mix should be your guide for where to set your reverb mix levels. Trust your ears!
6. Reflection Level Placement
The listener’s ears will pick up on all of the reflections, and as I previously stated, reflections can not only muddy up a track but also throw off the track’s tempo. It’s best to approach reflections like an echo, as that’s how it sounds in many cases.
If you want a bolder reflection, up the volume on the reflections and have them come in earlier. Regardless of this note, it’s essential to focus on how the reflections blend with other notes and the track’s tempo. You want the reflections to sound like they’re having a conversation with each other, not talking over each other.
7. High-Frequency Attenuation
This pertains to reducing the high frequencies going into the reverb itself. Too many high frequencies, and your reverb can sound very metallic. To help reduce this, start removing the high-end, starting around 4k-8kHz.
8. Gated Reverb
As previously mentioned, this determines the level at which the reverb tail cuts off. This was a viral effect in the ’80s but still has plenty of uses in modern music today.
9. Depth of Modulation
Some reverb plug-ins allow for modulation of the reverb effect itself. This will enable you to manipulate the characteristics of the reverb. Using this parameter generally helps your reverb sound more animated and less stagnant.
10. Damping
Damping is excellent for reverberations with too sharp sounds, generally due to pesky high frequencies. This will affect the overall tone of the reverb, but it will also provide a warmer sound that will allow your reverb to blend better with the rest of the sonics in the track. Damping, in general, is best approached as an “opposite” tool. More damping to lessen the brightness of the song or little damping to give it a bit more “air.”
Coming Full Circle
With all of the details discussed here today about reverb parameters, the do’s and don’ts, and various reverb types, you can start your next production knowing exactly how to apply it.
Remember, reverb can be easily overdone in any production. Make sure to use your ears in conjunction with the reverb parameters rules, and you’ll have a perfect atmosphere every time.
How to Remove Reverb from an Audio
Oftentimes, it's common for a recording to pick up natural reverb. Although this may be wanted in some cases, other cases may have you wondering how to properly remove the reverb without compromising the integrity of the recording. There are multiple methods to do this, and one would be to EQ out the frequency that the reverb holds.
In some instances, if the reverb is heavy on the high or low-end of the EQ, you could simply cut out that frequency, and the reverberation would be greatly reduced. It may not be 100% gone, but it will make a noticeable difference.
If that's not really doing enough for you, there are always the many audio engineering plug-ins that are built to do just that. For example, a plug-in called the ERA 4 Reverb Remover does a fantastic job at reducing reverb. Remember, over-doing the parameters on these types of plugins can quickly obstruct the quality of your recording, so make sure to use them in good taste.
Reverb Plugins and Hardware
As previously stated in the article, reverb hardware and digital plug-ins both have their place in music, and it comes down to which properties are needed for the production at hand. Hardware will provide a more authentic sound, while digital or algorithmic reverbs will give nearly endless customization. Most of the digital reverbs found in DAW's today mimic or emulate the effects of real-world reverb hardware. Another one of the advantages of algorithmic reverbs is how many artificial reverberations can be created, opening a vast world of sonic possibilities.
Furthermore, convolution reverb allows you to take your audio recordings and have them emulate the sound of a particular space. Considering the parameters that plug-ins for reverb provide, there's an endless number of spaces you can emulate and customize. Although we've talked quite a bit of reverb in a studio environment, reverb hardware can go a long way with a live performance, one being a quality spring reverb.
A Brief History of Reverb
Before the fancy and customizable algorithmic reverbs, or even the unique sounds of reverb hardware, musicians worked with natural reverb. Organic reverb from natural elements is pretty much inescapable, and humans harnessed this sound while engineering ways to refine it over time. One example would be the specific architecture of concert halls being able to harness and control acoustics in a particular way.
The creation of hardware and algorithmic reverb came about for multiple reasons. One of those reasons was customization and modification. When recording with the reverb from the room, there are a few elements of the reverberation that can't be adjusted after the fact. Algorithmic reverbs easily fixed this issue.
The Future of Reverb
As mentioned in the section above, humans have been working on grasping the power of reverb for a very long time. Considering our evolutionary nature, we're only going to continue to try and improve the quality of hardware and algorithmic reverbs. Moreover, the specific architecture of concert halls will continue to evolve, yet they will always be built with the bare necessities to properly control reverb for live performances. You can expect reverb to be used in new ways as time goes on. With the help of technology, this will only propel the prominence of reverb in audio productions, as well as the creation of new sounds.
Reverb FAQs
Should you put reverb on everything?
No, not every instrument needs to have added reverb. Having too many reverberations can overlap each other and clutter up the production. For example, an instrument that's recorded and contains room reverb may not need additional reverb on top of it.
Should you add reverb in mastering?
In most cases, you want to focus on adding your reverb to individual instruments and not your master channel. This would cause you to hear reverb across every separate track in your song. Working out the reverb parameters for each track allows them to blend with the mix perfectly.
How do you get perfect reverb every time?
To an extent, this is a subjective question as each song has specific needs based on the rest of the vocal and instrumental elements. Whether it's artificial reverb or natural room reverb, you need to make sure it fits with the other audio productions' sonics. You don't want your different types of reverb to clash with the rest of the song but, more so, complement each element.
Is using reverb cheating?
Not at all; with technology providing a vast array of digital reverb options, you can customize them in a million different ways. In turn, this will only spark new creative ideas moving forward. Sometimes, specific instruments can sound somewhat dry compared to the rest of the track, and it wouldn't hurt to try out a few different reverb chambers.
Is too much reverb bad?
Too much reverb can be a bad thing for the overall integrity of the production. Usually, this can be easily controlled by adjusting the wet reverb signal. Then again, if you have the same reverb on each separate track, the production would be too cluttered to fix by solely adjusting the wet reverb signal.
How much reverb is enough?
Remember, in the context that reverberation is being used to fill a dry, empty space in the song, you want to add just enough to fill that space. It can be pretty easy to mess up your entire mix if you don't control the reverb tails on each track.
Should you add reverb to vocals?
Yes, applying reverb to vocals is important to provide more sustain with a fuller sound. In some recording studios, reverb works naturally off of reflective surfaces and can even provide an echo chamber in larger rooms. Digital reverb provides much more customization and allows you to work in a complex space that can help you dial in a particular reverb style.
What type of reverb is best for vocals?
Plate reverb is suggested for vocals due to its smooth sound as well as bright tonality. Using this type of reverb can enhance the presence of vocals by making them sound more powerful. You'll want to be careful, as plate reverb can also come with an unpleasant metallic sound if not used correctly.
What do you call a room with no reverb?
Regarding this question, you'll hear the words "sound-proof" thrown around a lot. In some ways, that's correct, but the proper terminology for this would be called an anechoic chamber. An-echoic represents that the room is non-reflective. These rooms are typically designed and built specifically for sound absorption.
Is reverb considered auto-tune?
No, these are two different things entirely as reverb is just that, reverberations of a sound. While auto-tune, as it states in the name, is used to tune vocals and instruments to the rest of the production, ensuring everything is in key and uniform. Additionally, it's good to know that there are varying levels of auto-tune, and sometimes isn't detectable at all in the final release.
What is the difference between echo and reverb?
Echoes are a single reflection off of a surface in the distance. This surface must be more than 50 feet away for the human ear to pick up the echo. Reverb is multiple reflections off of a nearby surface while soundwaves stack and collide with each other.
Is delay the same as reverb?
No, delay in audio processing is taking an input signal and then playing back again after a particular amount of time. Of course, how the delay sounds can be adjusted in many different ways through the parameters of your DAW, but this effect is not the same as reverberations reflecting off of nearby surfaces.


