


Have you ever added low-end instruments to your track only to listen back to a dull, clouded sound? You may be suffering from a muddy mix. Even the most experienced producers can suffer from muddy sound, and while this issue can be challenging, it's nothing that can't be fixed with a little tender love and care.
If your mix sounds muddy, you've come to the right place. Below, we'll define mud, share how you can fix muddy mixes, and share some pointers on how you can avoid a muddy mix moving forward. Let's jump into it!
What Does "Muddy" Mean In Music?
So, what exactly does it mean when someone says a "mix sounds muddy"? Generally speaking, "mud" refers to the over-saturation of the low mid-frequency range, which is more or less the 200 to 500 Hz range on the frequency spectrum.
It can also be a more general term used to describe a dull, clouded sound that makes it difficult to appreciate any particular sound in a mix, kind of like a blanket is placed over your sounds. Muddy mixes lack clarity and aren't able to showcase a balanced dynamic range . Instead, the entire mix feels somewhat lifeless, with the problematic frequencies reigning as king.
There are plenty of ways to fix muddiness throughout the recording, producing, and mixing process from your home studio.
What Causes Muddy Sound?
If your mixes sound muddy, it's important to understand what may be causing your muddy frequencies. This way, you'll be able to eliminate muddy sound before spending too much energy and time trying to reverse engineer it in your mix. Here are some key factors that may contribute to a muddy mix:
A Poor Recording
All too often engineers forget that mixing music starts with the recording process. If your vocalist's microphone is picking up too many mid-range frequencies, you might sound muddy from the start. Therefore, it's essential that you have a firm understanding of each piece of equipment's frequency response.
Proper microphone placement can also prevent you from picking up unnecessary low frequencies for any particular instrument. It also helps to understand that our ears may perceive high frequencies as louder during the audio production process.
Appropriate sound treatment can provide a more accurate representation of the low mids throughout a recording session, but don't rely on your ears alone. Oftentimes, using a spectral analyzer can help you see a song's balance across the full frequency range so that you're able to accurately direct recording as needed. Overuse of add-ons like preamps or effect pedals can also lead to build-up or extra low end, so make sure you're only recording using the bare essentials for any particular track.
Low Mid Frequencies
A lot of a muddy mix can be traced back to too much sound occupying the lower mids of the frequency spectrum. This area is notoriously difficult to mix, especially since the low mids can contain elements that are essential to the full structure of a song like bass and kick.
Pay special attention to any sound that resides in the same frequency range of 200 to 500 Hz. Excessive build-up in the low mids can drown out the dynamics and clarity of the rest of the mix.
Not Enough Room In The Mix
It's possible that your mix is muddy simply because there are too many instruments or low frequencies in your mix. Every track in your recording should add a new dynamic, melody , or rhythm to the mix. If it's simply not being heard, it doesn't need to be there altogether. Prioritize room in the mix over saturation.
Improperly Balanced Mixes
Don't forget that one of the most powerful tools while mixing is the fader. Sometimes, muddy mixes can be attributed to an overall imbalance in tracks. Since lower-standing waves can be harder to hear, it makes sense that we may place these sounds at a higher volume than they need to be as a way to overcompensate.

Excessive Use of Effects
It's easy to get carried away with audio effects . At the same time, overusing plugins can lead to phase issues , distortion, and audible clutter. You may find yourself using effects to undo the blunder of another. When in doubt, do a close search to identify the search of the mud. Bypass each effect one by one, and make sure that every effect in the chain adds clarity rather than taking it away.
How to Fix Muddy Sound in Mixes
So, how can you fix muddy sound if it's already embedded in your mix? Here are a couple of key ways to remove the mud from the whole mix without compromising your arrangement.
Locate the Source of The Mud
To start, you need to identify the source of the mud. You can use tools like a spectral analyzer, graphic EQ, or just your ears to find what's overbearing in the mix. From there, fine-tune these tracks to take out the audio clutter. Cut out unnecessary frequencies, effects, and work on the balance between the problematic tracks and the rest of your session.
Also, eliminate what you don't need altogether. Sometimes, the best way to produce clarity in a mix is to take a step back and remove sounds that don't serve the song as a whole.
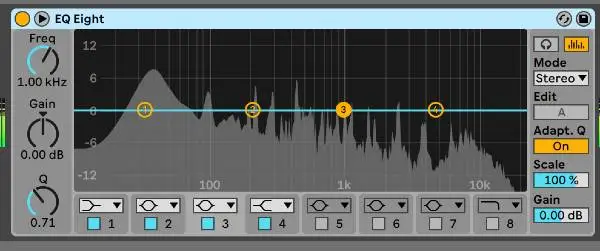
EQ to the Rescue
Corrective EQ can be excellent for clearing out mud in your mix. Utilizing a low pass filter on mid to high-frequency tracks can cut out the clutter so that your lower mid-range can be as clear as possible. In addition, you can use a sweeping EQ to cut out boominess in vocals and other tracks. Just make sure you don't overdo it.
Generally speaking, if you have to cut more than 3dB at a time, you should probably go back and rerecord your tracks.

Work On Your Balance
Sometimes, a poor arrangement on its own can create unnecessary frequencies and mud within a mix. Therefore, think about the balance of your songs. Is there a bass imbalance in comparison to the rest of the mix? Is your kick drum competing too heavily with your bass instruments?
The fader is a powerful tool in its own right, so simply lowering or adjusting levels to taste can lead to less mud. You can also use methods like sidechain compression to help you hear a bass drum or kick while the bass is playing so that you don't have to overcompensate in volume.
It's also possible that your instruments with higher frequencies are far too loud. It's a good idea to listen to a reference track to see what different frequency ranges sound like in relation to one another. Getting carried away with volume is easy to do throughout the production and mixing process, but working on balance won't just provide more headroom for your master bus, it can also help you fix muddiness with a quick knob turn.
7 Ways To Avoid Mud In Your Mixes
Ultimately, when it comes to reducing mud in your mixes, the best methodology is to eliminate it from the start. Here's a couple of things you can do while recording and producing songs to fix muddiness and make better songs.
1. Add Low End Sparingly
2. Avoid Too Many Effects or Panning Within the Mud Range
3. Create Room Before Adding More
4. Work on the Balance Between Kick and Bass
5. Check Your Analyzer
6. EQ Out What You Don't Need
7. Use A Reference Track

1. Add Low End Sparingly
Filling up the low end of your mix doesn't require many tracks. Try to limit yourself in this range as much as possible to cut down on mud from the start.
2. Avoid Too Many Effects or Panning Within the Mud Range
Tracks in the lower range don't sound the best with a lot of effects or audio panning anyway, and you could easily run into mud if you overdo it in this area. Use effects sparingly since lower sounds take up a lot of real estate in your mix on their own.
3. Create Room Before Adding More
One of the most difficult things to do while making music is getting rid of something you've created. However, this is one of the most essential skills as a producer and engineer alike, so make a habit out of it. Always ask yourself if there is something you can take away before seeking to add more tracks to your mix. The ultimate goal is a full mix with plenty of clarity between tracks.
4. Work on the Balance Between Kick and Bass
Since kick and bass often share the same frequency range in the lower mids, they can be tricky to balance. Make a conscious effort to decide which parts will shine in which sections. You can also use corrective eq to eliminate any frequencies you don't need in either of the tracks. Sidechain compression may help you build a balance between the two elements, as long as the sonic context makes sense.
5. Check Your Analyzer
Use the tools at your disposal. Our ears, unfortunately, aren't always the most reliable narrator, so make sure you use a spectral analyzer on your master bus to check in on your frequency balance. It's also a good idea to use a graphic EQ on your low mid-frequency sounds so that you can accurately adjust your balance as needed.
6. EQ Out What You Don't Need
One hot tip is to use EQ to eliminate excessive frequencies that you don't need. For instance, your hi-hat may be producing some low-end frequencies, even if it's not obvious to the listener. Feel free to use a high pass filter on sounds like these that may cloud your lower mids unnecessarily.
In the same vein, you can use a low pass filter on lower sounds to help all of your tracks have their own space within the mix. When it comes to mixing and mastering music, less is often more.
7. Use A Reference Track
Even if you spent hours mixing, that doesn't necessarily mean it was done properly. It's no secret that our ears naturally become fatigued over time, so it can help to take breaks while mixing to avoid ruining your track. You may find when you return that you can't hear other instruments over the sound of the bass guitar or other instruments in the low mids.
It's also incredibly helpful to use a reference track. This way, you can get a feel of what a polished balance sounds like and apply those insights to your own mix.
Remember that learning how to cut out muddy sounds in your session can take time. With the help of these strategies and plenty of practice, you'll be able to produce clear mixes in no time at all. Happy mixing!


