

Clipped audio is the stuff of nightmares for producers and engineers the world over.
Sometimes it happens right there in your DAW as the faders bounce in and out of the red zone like waywardly gnomes.
Other times you get sent a track from a session musician and it’s riddled with audio clipping .
So how do you address clipping in audio and still make things sound good? We’ve got all the answers you need, plus some additional tips for avoiding the issue in the first place.
Let’s dive in!
What is Clipping in Audio?
Clipping in audio occurs when a signal exceeds the maximum level tolerated by the system you’re running it through. This can be an audio interface, an amp, or your laptop.
It’s called clipping because when the audio signal goes past the system threshold, the tops of the waveform are chopped off, or clipped.
Here’s an audio example of some nasty clipping:
And here’s the audio waveform. See how the tops of the waveform are chopped off, especially at the start? That there's clipping.
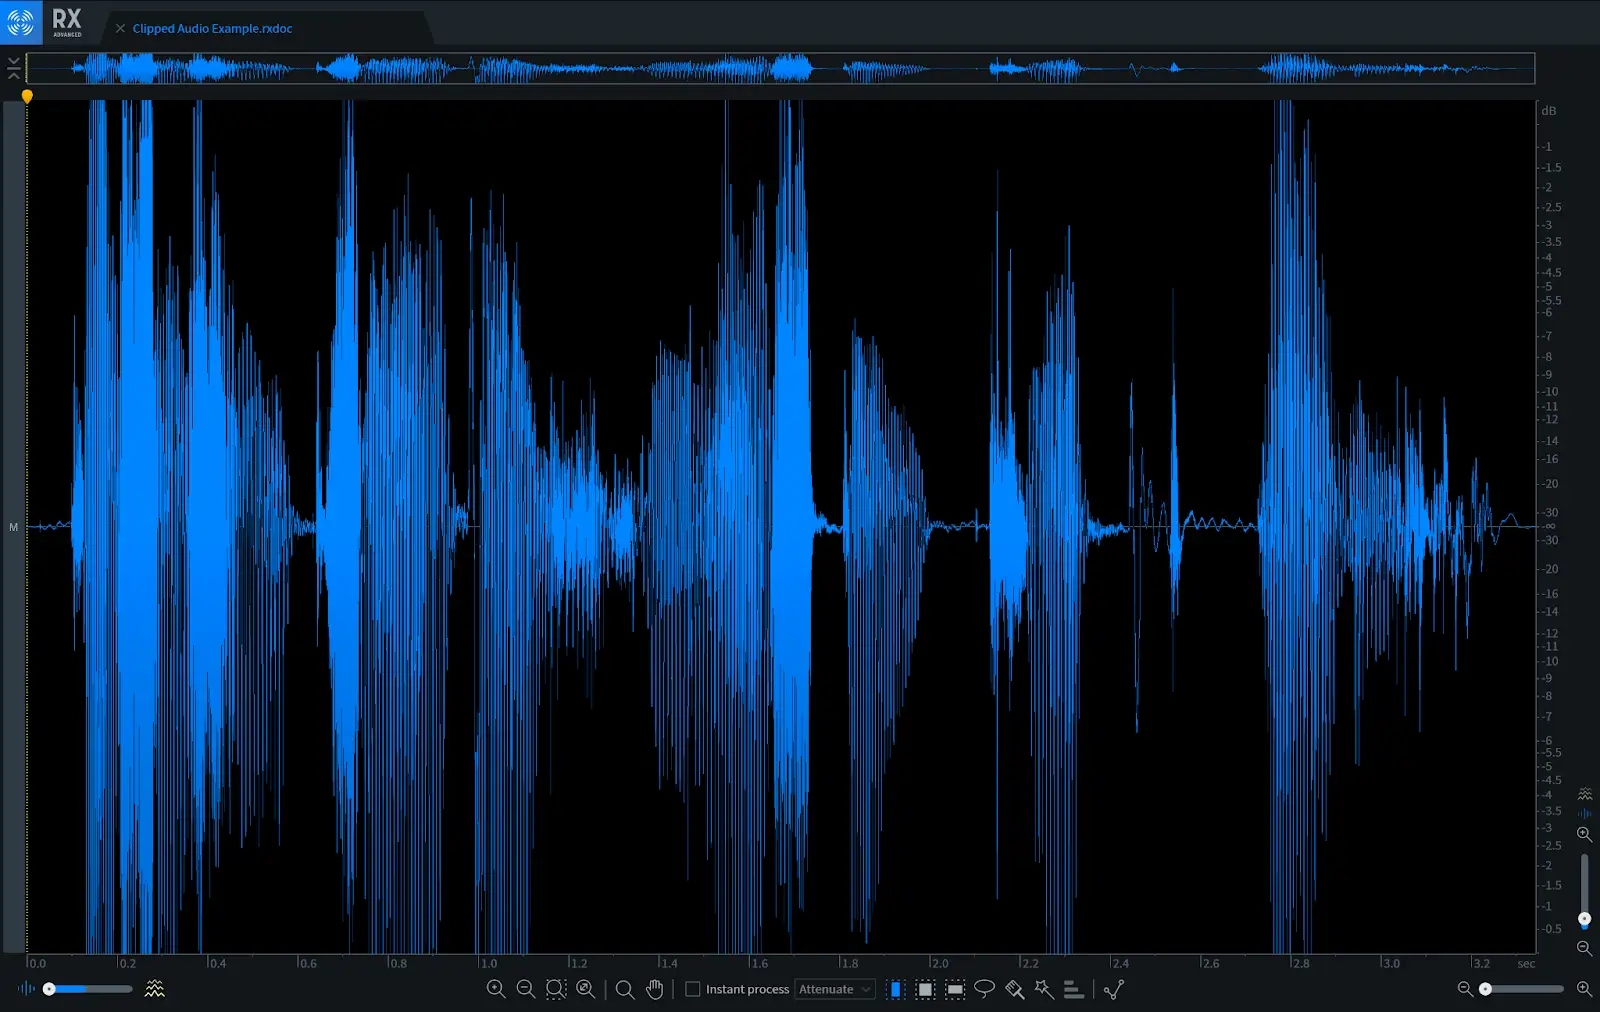
The audio information in the waveform that has been clipped out is gone. For ever.
Here's a visual example of audio clipping as it's happening in a DAW:
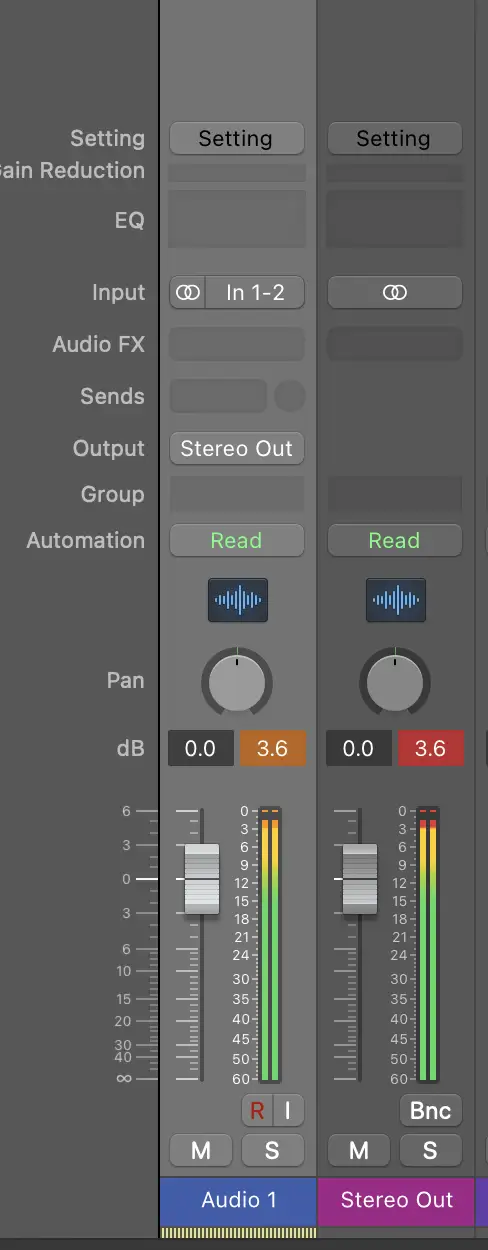
Here, both the track and the master output are exceeding the 0dB threshold, resulting in clipping.
This is a stereo audio file where the gain has been been artificially boosted, causing clipping. But even when you're working with audio recordings that don't clip individually, the sum total of the signal can result in clipping on the master fader.
It's worth noting the difference between audio clipping in the analog world and the digital one. As an analog signal exceeds the maximum level the clipping is 'rounded out', resulting in a gentler, less harsh form of clipping that is (sometimes) desirable.
In fact, due to its popularity, engineers have spent thousands of hours on re-creating the saturation effect resulting from analog clipping.
Digital distortion on the other hand, is just plain bad.
What Causes Audio Clipping?
OK, so we know that audio clipping is the result of a signal exceeding the volume levels tolerated by the system(s) its running through. Some common causes of clipping include:
- Having the source too close to the microphone
- Setting the gain too loud on an audio interface input
- Applying excessive gain or processing in effects, such as over-compression
- Poorly managed gain staging throughout the signal chain
- Setting the master output levels too high
Next up, how do we fix clipping audio?
How to Fix Audio Clipping
I'm going to state the obvious here, and say the best way to fix audio clipping is to avoid clipping in the first place. The second best way to fix distorted audio is to re-record it.
But that's not super helpful. So we'll look at two types of scenarios: one where the clipping is happening in real time, and the other where you've been handed audio files that can't be re-recorded, during which clipping occurs.
Fixing Audio Clipping in a Signal Chain
Let's say you have a bunch of tracks in your DAW. Individually, the output of each track sits below 0dB, but summed together they push the audio levels beyond the limit, and your master output is clipping.
This one's a doozy.
Simply go through each audio track (and virtual instrument tracks too!) and fix your gain staging .
This involves looking at each stage of the signal path for each track, including any inserts in the effects panel, and adjusting the output of each so the signal going into the path matches what's coming out.
If there's specific sections of the track that are particularly wayward in their dynamic range, use volume or clip gain automation to adjust the amplitude of the selected audio clip.
There's no absolute rule to adhere to but a good rule of thumb is to have a target peak level of around -9dB, with the body hovering around -18dB. This will give you ample headroom when it comes to mixing down and preparing for mastering .
A multiband compressor can be useful in reducing clipping by controlling the audio dynamics of specific frequencies.
Repair Clipping in Audio Files
Once upon a not-so-long ago, if you had a recording with compromised audio quality or unwanted noise there were only two options: do the recording again, or grit your teeth and live with the unwanted sound.
Nowadays there's many tools at a producers disposal that can resolve a clipping issue, or indeed fix any number of unpleasant sounds in a recording.
Option 1: Re-draw the waveform
When you're working in the digital domain audio tracks can be manipulated in any number of ways. This includes being able to re-draw the waveform of an audio clip.
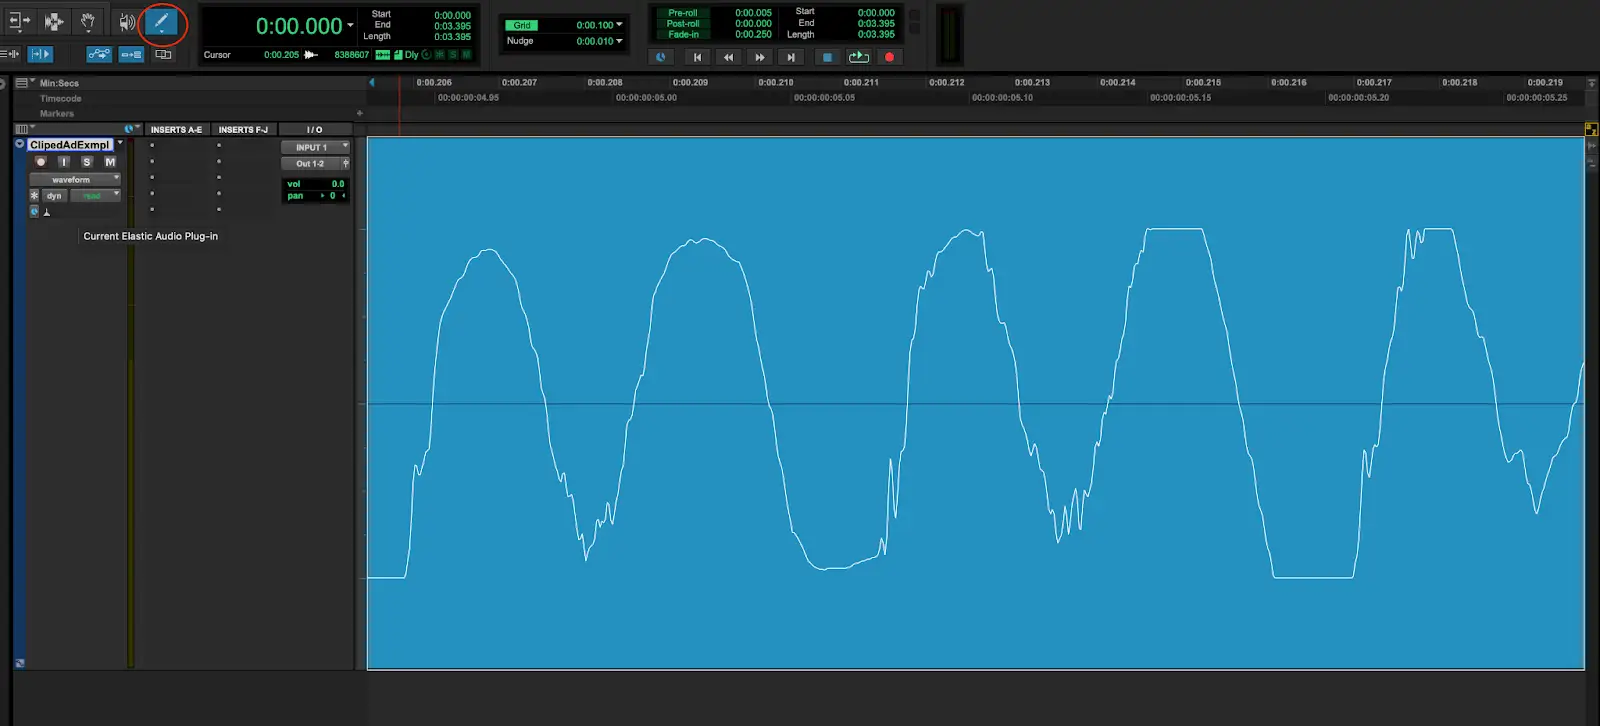
Here's the audio waveform of our nasty clipping example in Pro Tools:
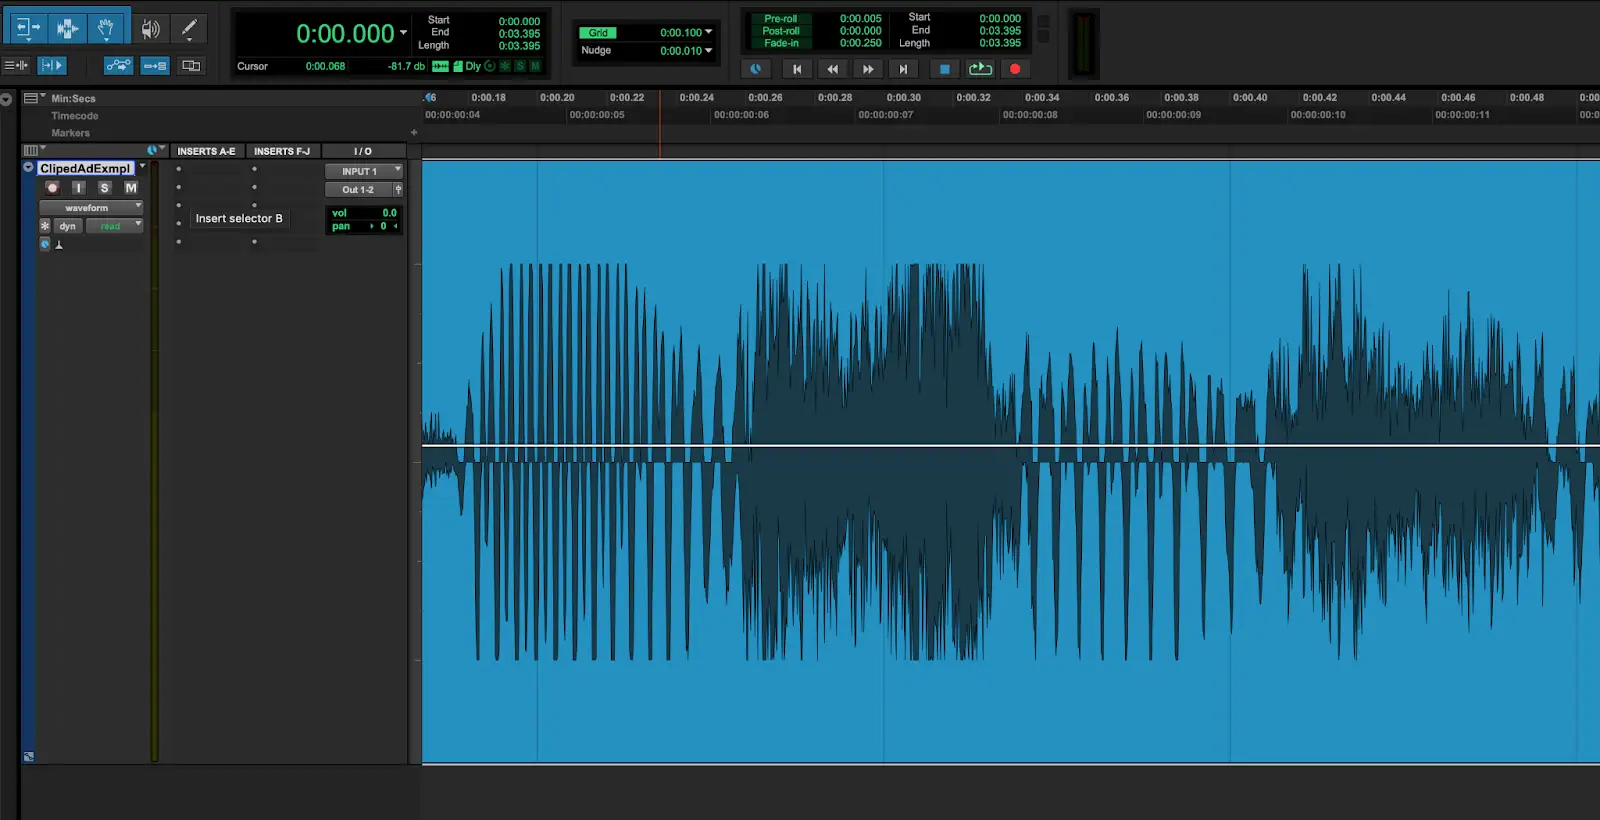
If we zoom in (a lot) we can see the individual peaks and troughs of the audio signal:

It's clear where the signal level has gone too far and clipped the audio, resulting in digital distortion: the peaks and troughs are flattened out.
By using the pencil tool we can re-draw these peaks and troughs so they no longer clip.
While this re-draw method can be handy for small details it can take some trial and error to get the desired results.
And if you have a lot of clipped sections in an audio file this is going to get painful really quickly.
Option 2: Use Audio Restoration Software
A much better option is to use one of the multitude of software gizmos out there that analyze audio files and fix audio clipping (among other things).
There's a bunch out there - see our list below - but my favorite to use is the Izotope RX De-clip plug in. It can be used as a plug-in within your DAW, or in stand-alone mode within the RX editor itself.
Fix Clipping Audio in Izotope RX
Here's the De-clip module in standalone mode. I've selected the whole file, and opened De-clip on the default settings.
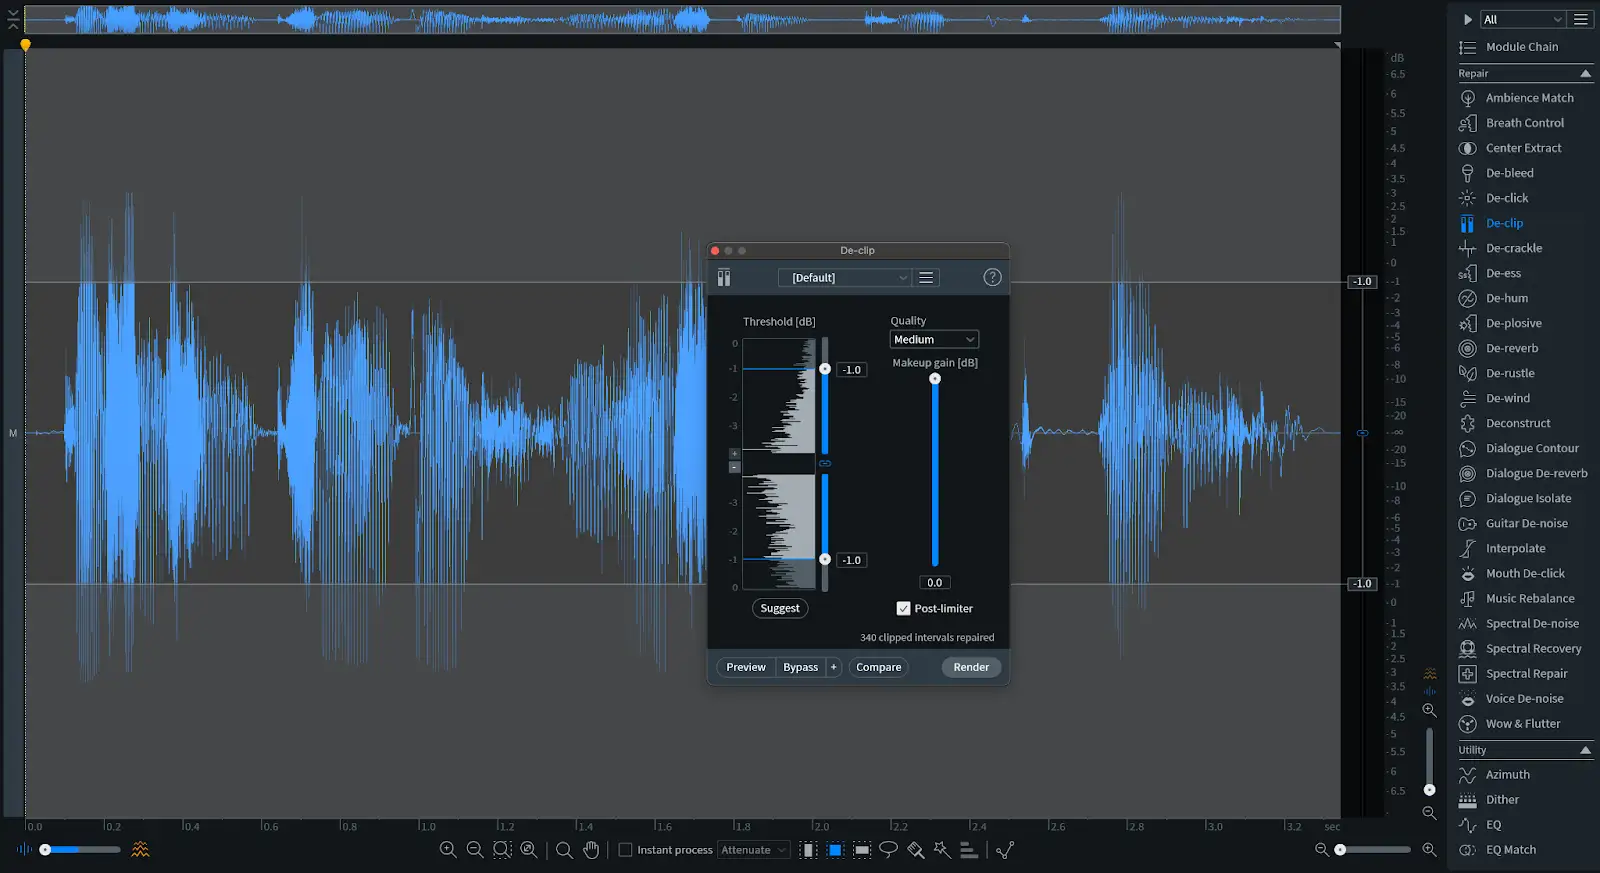
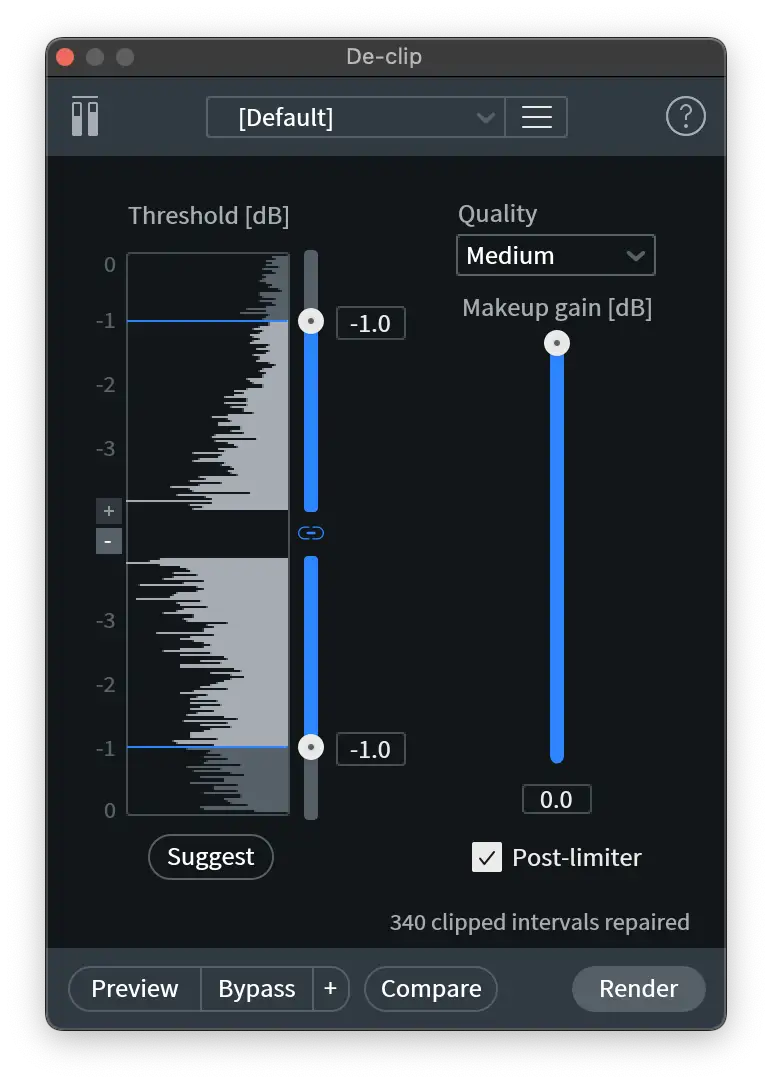
The software includes various ways to control the quality of the output, including a post-limiter to prevent clipping on the repaired waveform. The preview button allows you to listen to adjustments in real time as you fine tune everything. There's also a helpful 'Suggest' button which will take some of the guesswork out of things.
Here's a before and after of our nasty clipped audio so you can hear just how effective De-clip is:
Other Audio Restoration Software
Izotope isn't the only option to fix clipping though. Adobe Audition includes a DeClipper, and if you're working in Adobe Premiere Pro on a video or film you can make use of this tool to fix bad audio in post.
There's also:
Free Software To Fix Clipping Audio
If you're on a really tight budget there's a couple of freebies out there that'll help with clipping audio.
- Audacity : has a de-clipper as part of it's built-in tools.
- Ocenaudio : another free audio editor which includes a tool for repairing clipping audio.
A Note On Using De-Clipping Software
While all this software is great for fixing audio clipping, it's not a perfect remedy.
Any clipping that occurs during the recording process means that part of the audio is lost forever.
The software available to fix audio clipping can only make guesstimates as to what that audio should have sounded like without the distortion. Or in marketing speak, create a 'reasonable approximation' of the missing part of the waveform.
So even with the right tools you might not get a perfect result. Better to avoid clipping in the first place.
How to Prevent Clipping in Future Recordings
Here's some quick tips to help reduce clipping occurrences in your recording process:
Set your input levels appropriately. While you want a good signal to noise ratio on any instruments or vocals you record , avoid setting the levels too high.
Use a pop filter to reduce/eliminate plosives.
Monitor levels in real time as you record. If necessary, adjust the gain and go back and do another pass. It's way better than getting to the mixing stage and dealing with poor quality audio.
Use a compressor/limiter on the input signal. If your set up allows, applying some light compression to the input signal before it reaches your DAW will prevent distortion happening.
Allow enough headroom for mastering. Yes, you may want to listen to your latest banger at full wack, but resist the temptation! Aside from suffering from ear fatigue , your mastering engineer won't be happy.
In a nutshell, watch your volume levels at every stage of the recording, production, and mixing process.
Now go forth and maketh the clip-free music!


