


A great vocal recording can make or break a song. Hence, even if you don't plan on becoming an audio engineer, learning how to record vocals is an essential skill for anyone in the music industry.
This skill can make it easier for you to record demos from home, run sessions, and make it easier for you to effectively communicate throughout the industry. Don't worry if you're not sure where to get started. In this article, we'll detail the process of recording professional-sounding vocals from anywhere and everywhere.
From gathering your equipment to running recording sessions, we'll give you a step-by-step rundown for producing professional vocals at home. Let's jump into it!
Stage 1: Gather Your Equipment
Great vocal recordings start with excellent equipment. No, that doesn't mean to shell out 1K on your first microphone in order to make great music. However, you do need some basic equipment to start recording vocals properly. Here are some of the main tools you should have in your toolbox.
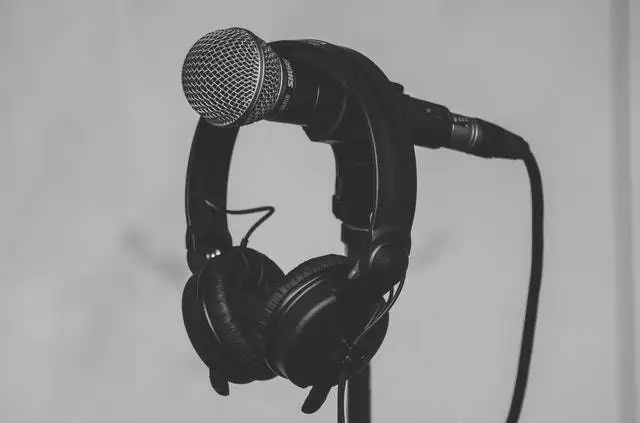
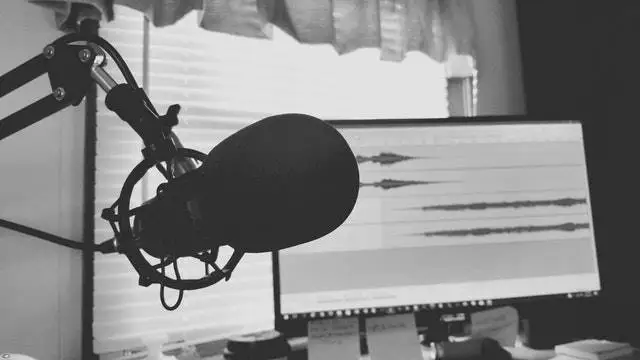
Microphone
It's no surprise that a great vocal recording begins with a high-quality microphone . However, don't confuse high quality with a high price. While it's true that you often get what you pay for, you can certainly secure a quality large-diaphragm condenser microphone for under $500.
You'll need to make sure you select the right microphone type for your needs. Here are a couple of the main microphones you'll come across:
Dynamic Mic
These are generally considered the sturdiest type of microphone. Dynamic microphones are perfect for recording more aggressive, spiking vocals and generally do not require any phantom power. Your dynamic microphone might be used to record rap or rock music, for example.
Condenser Mic
A condenser microphone is designed to capture the nuances of a singer's voice. Condenser microphones sound bright, airy, and aim to produce a natural sound to catch as many parts of the vocal as possible. These microphones usually require some source of phantom power and are commonly used in pop and pop-related genres.
Ribbon Mic
These old-school microphones are incredibly warm and delicate. They need to be treated with utmost care since their recording mechanism is so delicate. That being said, they can arguably produce the most accurate recording when compared to dynamic or condenser microphones.
Mic Stand
The mic stand helps your microphone stay put throughout the recording phase. It should also be readily adjustable so that you can easily cater the tool to your vocalist's height and parameters as needed. Your studio's mic stand should preferably be somewhat heavy-duty so that it stays firmly in place throughout the recording process .
For recording on the go, you might want something a bit more lightweight for ease of use and transport. Always make sure that your microphone is properly secured to the stand in order to prevent damaging the delicate equipment.
Shock Mount
A shock mount can help remove some of the excess "foot noise" and keep your microphone properly situated while recording. Some microphones will come with their own shock mount, but you can also purchase them separately.
Shock mounts aren't necessary for every vocal recording session but they can help produce a more isolated vocal if you have one at your disposal. Alternatively, you can use a standard microphone clip or included mount to affix your microphone to the mic stand.
Pop Shield
A pop shield or windscreen can make a huge difference while recording vocals at home. These tools are placed directly between the microphone and the vocalist and are designed to catch "plosives" or strong blasts of air that come from a vocalist's voice expressing harsh consonant sounds while singing.
Windscreens need to be catered to your specific shock mount or microphone choice, but a pop filter is anchored onto the microphone stand itself. Therefore, a great pop filter should be compatible with microphone setups, so find one that you're happy with using on a regular basis.
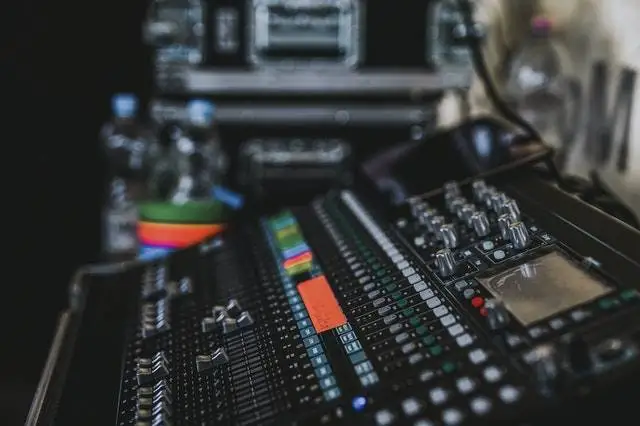
Audio Interface
An audio interface helps transmit the digital signal of your vocal directly to your digital audio workstation. This piece of equipment is essential so that you're able to capture your vocals and edit them properly throughout the mixing process.
Thankfully, you'll get a basic audio interface for less than $100. Some helpful things to consider are your input and output sources, and the portability of your interface. You'll also need to determine whether or not your interface has built-in phantom power.
Phantom power is required for a variety of microphones, so it's worth extra cost if you're hoping to record using multiple microphones. However, you can also work around this factor if needed using a phantom power pre-amp.
There are also interfaces that are more geared towards Mac and PC users. While you can always use an adapter to connect your interface to your DAW, it's best to seek out the most fitting audio interface you can find in order to reduce the risk of excess latency.
Preamp
Preamps or preamplifiers can provide sound color, gain, or necessary phantom power throughout your vocal recording chain. These tools aren't always necessary, but you may need a preamplifier with tools like condenser microphones.
More stylized preamps can also help a vocal sound warm and bring out the best in a singer's voice . Just remember that not every style of vocal needs to sound warmer than other comparable recordings, so this may just be a stylistic tool you use every once in a while.
XLR Cables
While cables are probably the least exciting purchase you'll make for recording vocals at home, they are essential ones. You may be tempted to go for the cheapest XLR cords you can find, but remember that you'll be using these cables on a regular basis. It may make a good investment to opt for high-quality cables.
Don't forget that cables are also the connector of your microphone to your DAW. A poorly constructed or damaged cable can cause unnecessary interference in your recordings, so check your equipment often.
Also, practice good basic cable management skills. Keep them stored properly coiled (not in a tangled mess) and try not to drop them on the floor. It's inevitable that most cables need to be replaced over time, but you can prolong their lifespan by taking great care of them in the meantime.
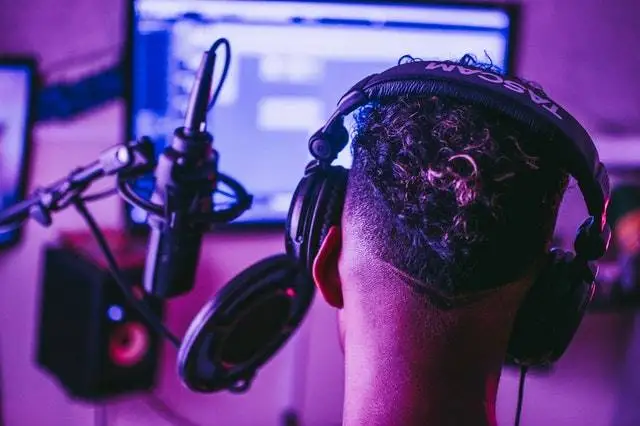
Studio Headphones
In order to produce pro vocals, you're going to need at least two sets of studio-grade headphones. Having studio headphones as opposed to earphones or headphones intended for more general listening is essential since they provide an accurate representation of the recording session.
General headphones sometimes have a bass boost or lack a flat frequency response that's needed to produce sharp studio vocals. Without this essential tool, it may be challenging for your vocalist to record studio-quality vocals when they aren't hearing an accurate representation of their voice.
It's worth investing in high-quality headphones that are comfortable for long vocal sessions. Wipe down your vocalist's headphones after every session to keep things clean and check for any signs of wear and tear.
Stage 2: Prepare Your Studio and Vocalist
In order to get the best vocal recording possible, it's essential to prepare your studio space and vocalist properly. Here are a few of the essential guidelines to keep in mind to transform your bedroom or living room into a functional vocal booth for your recordings.
Finding the Right Room
In an ideal world, you would be able to record in a professionally sound-treated room complete with proper acoustic treatment. This isn't always possible for many of us, but there are some rooms that have better natural sound treatment than others. You'll want the room to be as "dead" as possible during the recording process.
This means that your vocals should have the most natural sound possible, without any sound reflections or distortion. To achieve this, you'll want to seek out a space that doesn't have a lot of hard surfaces, or windows. This is because these spaces have more opportunity for sound waves to reflect off of one another, which could create a distorted representation of the sound.
Rooms with soft furnishings to help absorb the sound can make a great fit for recording vocals. For example, you may find that your closet full of absorbing clothes (which can act as absorbent sponges for sound waves) makes an excellent temporary vocal booth.
If you're recording singers as opposed to yourself, it may make sense to build out a professional vocal booth or isolated sound booth for your clients. In the interim, you can find a microphone shield to help you produce a good recording from home.
Acoustic Treatment
Treating your room acoustics doesn't have to be complicated. If you have the means necessary, investing in proper acoustic panels can help your vocals sound professional and polished. Alternatively, you can purchase acoustic treatment materials and scatter them throughout your recording space.
Even just having something to absorb the excess air can benefit the room acoustics significantly. If you're recording with a condenser microphone, take care to treat as much as you can behind the vocalist's head to absorb excess sound.
It's also a good idea to invest in bass traps and other acoustic treatments if you plan on producing or mixing from home. Your neighbors will thank you for this investment during the mixing stage, and you'll be able to perceive a more accurate bass response while crafting your track.
Preparing Your Microphone
As with any piece of equipment, it's important to treat your microphones with care. Condenser mics, dynamic mics, and ribbon mics all have different needs so make sure you're well versed in your particular microphone's care instructions.
Make sure you select the correct microphone for your vocalist and recording style as well. A great vocal performance starts with the right piece of equipment, and each particular voice will have its own set of needs.
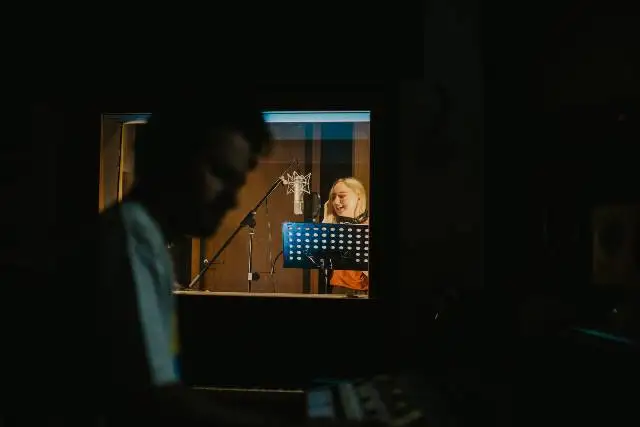
In terms of setup, your vocalist should be about 6 inches from the microphone, with the pop filter in between the microphone and the vocalist. The microphone stand should be tall enough so that the middle of the microphone's diaphragm is approximately at the vocalist's lip level.
However, if you have the time, the best way to prepare your recording session is to test out different microphone placement options . Work with your vocalist to find a balance that produces the best vocal recording, and don't forget the proximity effect.
The proximity effect states that the closer a vocalist is to the microphone, the more low-end information the microphone will pick up. You'll want your mixing engineer to have the best vocal recordings possible, so keep this in mind whether you're running a vocal recording session with dynamic mics or condenser mics.
Any audio professional should be able to adjust microphone placement as needed throughout their recording sessions. For instance, you may need to switch up mic placement if you go from recording the lead vocal to whispery vocals for the backing of the track. Skilled singers may know how to work around improper placement, but you'll want to master this skill, especially if you plan on tracking vocals at home.
Set Levels
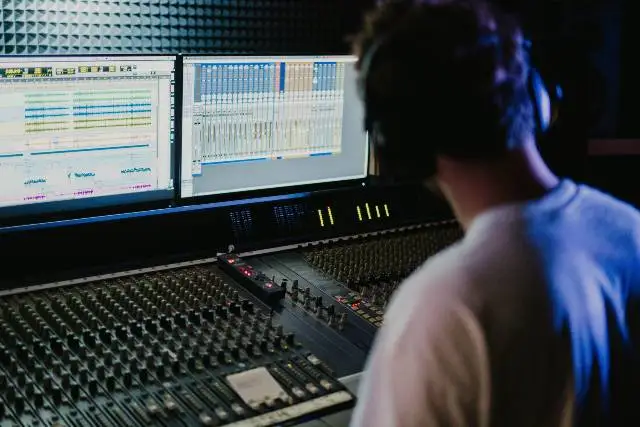
Once you've set up the hardware equipment for a good recording, it's time to check the levels on your DAW and interface. Generally, you'll want your vocals to be peaking around -10 dBs, with an average input level around -18 dB. If you're peaking higher than - 6 dB, it's time to turn down the microphone gain or adjust your vocalist's position for more balanced vocal recordings.
If your condenser mic or other equipment is coming in too quiet during the recording phase, it's possible that you may need a preamp or vocal compression to help vocal recording come through at a respectable level.
Check With Your Vocalist
As a vocal recording engineer, you are the director of your session. That means while you're setting up dynamic microphones, organizing cables, or anything in between, you're also keeping tabs on the needs of the vocalist.
Before you start recording, you should have your vocalist sing to make sure that he or she doesn't sound unnatural while on the mic. You may have to adjust your sound treatment and microphone placement through trial and error to produce the quality vocal recording you're looking for.
Ask your vocalist if they can hear themselves properly on the microphone, and offer to add a click track or a bit of reverb for them during the recording session.
The night before recording, make sure you encourage your vocalist to rest their vocal cords. Your vocalist should get plenty of sleep, stay hydrated, and have all lyrics and melodies prepared for their first session.
Stage 3: Start Recording
Now that your equipment is set up properly and ready to go, it's time to start your vocal recording process! Here are some tips to keep everyone feeling their best while tracking vocals.
Give The Vocalist Time To Warm Up
Your vocalist should have time to warm up in the booth. This could include running through the song a couple of times, breathing exercises, or anything in between. If your vocalist does want to practice the song, it's still a good idea to record the practice take.
You'll never know what may come of a practice recording, so try to get as many vocal recording options as possible. It's always better to over-record than to under-record.
Take Breaks As Needed
The art of vocal recording can be mentally and physically demanding. While you may not have as much of luxury in this regard if you're on studio time, it's a good idea to take breaks throughout your tracking process for the benefit of your vocalist and yourself. This will give you fresh ears while laying down a vocal recording, making it easier for you to offer direction for your vocalist.
Keep Your Vocalist Comfortable
One of your most important duties as a recording engineer is to offer encouragement to your vocalist and cater to their individual needs. If you have a particularly fruitful vocal recording take, let them know! Vocalists can often be somewhat nervous, so your encouragement won't just help them feel better, it can also help you end up with a better overall vocal recording.
Take It In Chunks
If your vocalist is struggling to get out full takes of the song, one option is to take the song in sections or chunks. It's ideal to record at least some full takes since this will produce the most natural vocal comp during the mixing process.
However, recording chunks can be less intimidating for vocalists who are still finding their footing in the recording booth. It can also have an excellent application for grabbing harmonies , overlapping vocals, or backing vocals of songs.
Record Multiple Full Takes
You'll want to make sure you're getting at least 3 full takes of a vocal for the best overall vocal recording experience. Sure, you could try and mitigate breath sounds using a de-esser or other tools during the post-production process, but it's always best to get a cleaner source recording than to try and overcompensate while editing a recording during the mixing stage.
You can even encourage your vocalist to try on different styles of the lead vocal while recording different takes. Get as many full takes as you can throughout your session without being overly exhaustive.
Stage 4: Check and Re-record
After tracking your vocals, make sure you scrub through to make sure you got everything you need out of your session. Here are some things to keep in mind while running through the final stages of your vocal recording session.
Check Your Rough Mix
Check the vocal takes in the context of the instrumental of the session. You might want your vocalist to opt for a different vocal tone or style based on the playback of the mix. Vocals can sound completely different isolated vs. in a session, so make sure you're able to sit down and check the takes contextually.
Review With Your Vocalist
Remember that you're working with your vocalist's baby. Take the time to sit down with your vocalist. They may have insight on how they would want a particular line to sound emotionally, for example. Make sure you honor any of their re-recording requests and provide helpful feedback if needed.
Consider Harmonies or Backing Vocals
If your vocalist is up for it, it's also a great idea to consider tracking harmonies or additional backing vocals during your session. Remember, it's always better to record something and not use it than to not have the option at all. If you feel comfortable, you can offer suggestions to your vocalist to help produce additional vocal recording options.
Rerecord As Needed
Don't be afraid to re-record a recording once and once more! Recording vocals can certainly be a tedious process, but unfortunately, there are some aspects that you simply can't fix once they've been baked into a vocal recording. It's your job as the vocal engineer to get as many recordings as possible so that your engineer (or you) has enough to work with throughout the mixing process.
5 Common Recording Mistakes To Avoid
In order to produce amazing vocal recordings, it's just as important to understand what not to do as it is to understand what you should do. Here are some common recording mistakes you'll want to avoid at all costs during your sessions.
- Don't under-record. Your mission while recording vocals is to get as many usable recording takes as possible for the next engineer. Problems only compound throughout the production process, so if you're not starting with a strong vocal recording, it can be difficult to produce a polished and professional sound. When in doubt, record more than you need just to be safe.
- Don't neglect sound treatment. Sound treatment doesn't have to be expensive. It could mean emptying out your closet to have some room for a DIY vocal booth . Make sure you're giving care to your sound treatment, even if you aren't able to afford acoustic panels or other studio-grade gear: something is always better than nothing at all.
- Take your time. Sometimes, recording vocals for one song can take multiple sessions. While this can be tedious, you certainly don't want your singer to sound strained or tense while recording a vocal. Try to be patient throughout this essential part of the process.
- Don't forget to practice. Vocal recording is a skill that can be cultivated, so take time to practice doing so on your own time. You can also volunteer at local studios to get a sense of other professional setups and some on-the-job experience.
- Don't use equipment you don't understand. Every condenser mic, preamp, etc. has its own set of intricacies that should be well understood by the engineer before being used in a tracking session. Make sure you take the time to read up on your gear and care for it appropriately.
There are exceptions to everything in music, so don't feel discouraged if you've neglected one or more of these mistakes in the past. However, whenever possible, try to avoid these mistakes to give you the best chance of creating a studio-quality vocal from the comfort of your home.
Recording Vocals FAQ
Are you still struggling to learn the art of recording vocals? Here are some frequently asked questions and answers surrounding vocal recording to expand your understanding.
Is it hard to record vocals?
Recording vocals isn’t necessarily difficult. That being said, you do need some equipment to get your studio set up for suitable recordings. It’s also essential that you learn standard recording procedures and techniques to produce professional recordings. Like any other skill, practice makes perfect.
Can you record vocals without a mic?
You may be able to record vocals without a studio microphone on your phone or otherwise for a demo or scratch recordings. That being said, you should use a professional microphone for anything you plan on releasing publicly. Thankfully, you can get a quality studio microphone for under $500 in today’s market.
How loud should I record vocals?
You should record vocals so that they are peaking right around -10dBFS. Note that every microphone will need to be finely adjusted according to the vocalist, so make sure you give yourself time to adjust your microphone’s settings before diving into the recording process.
Where can I record vocals?
Ideally, you’re recording vocals in a sound isolated environment without too many sound reflections. This means that you should be able to clap in your desired room and not hear an echo or outside noise. The best-case scenario is that you're recording in a professionally sound-treated environment, but a fairly quiet and isolated room will do in a pinch.
Can I record vocals without an audio interface?
Generally speaking, no. You’ll need an audio interface to translate your recordings to your DAW. Thankfully, you can get a high-quality audio interface for under $100. Make sure your interface of choice has any input and output features and phantom power that you may need for your microphone of choice.
Why do my vocals sound distorted?
A distorted vocal is commonly caused by the microphone gain being too high , or the singer being positioned too close to the microphone. Other common reasons may include damaged equipment or cables. Test one element at a time to determine the source of the distortion.
Should I record vocals in mono or stereo?
Main vocals should generally be recorded in mono, though there are no absolute rules on the subject. That being said, in cases where you’re recording multiple people at once, it may make sense to record in stereo. Also, check whether your microphone has stereo capabilities before committing to that process.
Do singers record vocals in one take?
Many singers are able to record vocals in a single take, but that doesn’t mean you should only record one. It’s best to get at least 3 full takes before ending your recording session. You can also record each section in chunks, though this isn’t a preferable method.
Should my vocals be louder than the beat?
This is genre-dependent. Your vocals should be loud enough for your vocalist to hear them throughout the recording process. You can always figure out the vocal balance during the mixing process. Generally speaking, you should have one or two main tracks that stand out amongst the rest of the session.
What should you do the day before recording vocals?
If you’re running the session, make sure you have all the necessary equipment set up and ready to go. As a vocalist, make sure you stay hydrated, get great sleep, and come prepared. Studio time is money so the more prepared you are ahead of time, the better.
Learning how to record vocals properly is an essential skill for any producer. Hopefully, this guide makes it easier for you to produce excellent vocal recordings from home. Happy tracking!


