


One of the most important tools for any engineer is a mastering compressor. These tools reduce a track's overall dynamic range , shortening the distance between the loudest and softest parts of a track. This allows mastering engineers to "glue" a song's individual parts together, all while maintaining the overall energy of a song.
It's easy to see why mastering compression is so essential amongst professional producers and engineers alike. However, learning how to build your mastering chain can be a complicated process, especially if you're just starting to understand the power and limits of multiband and dynamic compression.
Thankfully, we'll detail how a mastering compressor works below so that you can start pumping out a polished mix like a pro. We'll also break down different compressor plugins and explain how any compressor works so that you can add punch to any track in your mix.
What Is A Compressor and How Does It Work?
To understand mastering , you must first understand the inner workings of a compressor. Essentially, a compressor is a tool that aims to reduce the dynamic range of any particular audio signal. This means that compressing a sound brings up the amplitude of the lowest part of the track while reducing the highest amplitudes of a track through a process called gain reduction.
Gain reduction makes it possible for compressors to create a smoother, more consistent dynamic range all while avoiding unnecessary clipping, or distortion. You can use a compressor on just about any instrument. Compressors are also used in all genres of music, so they are an essential tool for mastering engineers and producers alike.
Note that individual compression plugins have different tones and characteristics, so they can be used stylistically as much as they're used technically. Compressors can help shape transients as well, so they can be a helpful sound design tool in addition to assisting with dynamic range.
There are also different types of compressors including a multiband compressor, stereo compressor, buss compressors, and tube compressors. These compressors all have similar jobs, though some types may be more powerful than others. Also, not all compressors add harmonic saturation or as much tonal quality as certain hardware compressors or tube compressors.
The Parts of A Compressor
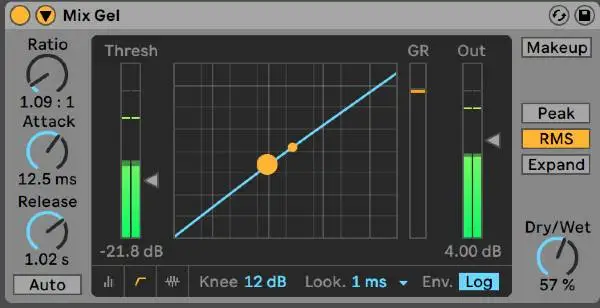
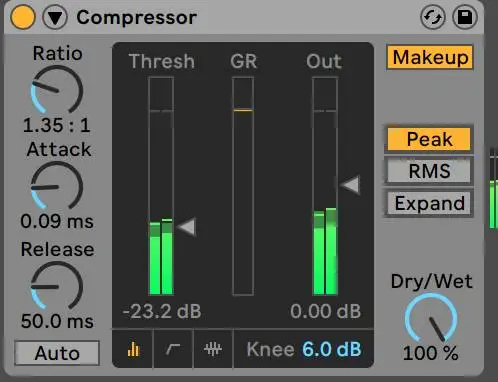
Every compressor has a couple of standard parts that control the power and depth of the compression. Here is the basic lowdown on each of those parts:
Attack: The attack determines how quickly an audio signal is affected by a compressor, or how long until the compression kicks in. A fast attack time usually creates a smoother dynamic range throughout but can be more obvious to the listener. Contrastingly, slow attack times can create a punch that works well in some sonic scenarios but may make for a less smooth listening experience. Play around with attack and release times together, since attack and release directly affect one another.
Release: The release determines how long the compressor clamps down on a particular sound. As you might have guessed, attack and release times go hand in hand, so you'll want to play around with different settings to find what works best in a particular mix.
A shorter release time can create more punch and increase loudness in a more obvious way. A longer release time can be smoother, though it can potentially take the energy out of a sound if not programmed properly. Release settings should be adjusted in conjunction with the attack since the two parameters interplay with one another.
Knee: The knee is kind of like the slope of your compressed signal, with a harder knee being more obvious to a listener. With knee settings, the softer the knee, the more subtle the compression is. A hard knee is closer to 0 while a soft knee is close to 1.0. Note that both soft knee and hard knee types have their place in the world of compression, it all just depends on what knee setting makes the most sense for your overall mix bus.
Threshold: The threshold setting of a compressor is the plugin's ceiling and sets the point at which the compression kicks in. Whenever compressed audio is above the amplitude of the threshold, it's reduced through the process of gain reduction. High thresholds will make for less compression overall since the compressor will be engaged less often. Contrastingly, a low threshold will make for a heavily compressed signal, which can sometimes create smoother compression, though you want to be careful so that your mix sound doesn't lose any of the energy of the unprocessed signal.
Ratio: A compressor's ratio determines the overall level of intensity for a compressor. Generally speaking, you'll want to shoot for a low ratio or the lowest ratio that offers you the level of dynamic control that you need. This is because low ratios are often more subtle and have a more organic sound than a high ratio. With that in mind, you'll still need to apply compression as needed to have dynamic control throughout your processed signal. High ratios aren't necessarily bd either, you just might have more transparent compression than you would have with more subtle settings.
Makeup Gain: Makeup gain is an overall increase in volume in relation to the level of gain reduction. This can be toggled on and off, and adjusted on many compressors.
Gain Reduction Meter: This shows exactly how much gain reduction is needed to compress a signal. You should generally aim to have 2 to 3 dB of gain reduction when compressing an audio file. Heavier genres of music may require more gain reduction, but generally, you want to leave more headroom so that the signal doesn't become squashed or lifeless from over-compressing a section. It also might make more sense to automate more compression in loud sections of a song.
What Is Compression In Mastering?
So, now that we understand compression, where does it take hold within the mastering chain? While not every master will require a compressor, a huge portion of mastering is compression. During the mastering stage of music production, the goal is to get the entire mix as dynamically cohesive as possible.
While you're utilizing compressors to achieve consistent dynamics throughout your track, compression on the master fader can help glue your individual tracks together, and add that extra shine that brings the project together. A sample mastering chain may include compression, multiband compression, EQ, and a limiter.
Does every song need compression in mastering?
Not all songs need compression in mastering since the original mix could very likely have full compression that glues together the tracks effectively. Virtually all mixes have some form of compression throughout the session, but a master doesn't necessarily need a compressor, per se. That being said, a case could be made that there is always some form of compression in mastering since mastering often utilizes a limiter which is in some ways, an ultra-powered compressor.
What's The Difference Between Compression and Limiting?
A compressor is essentially a weaker version of a limiter. Limiters and compressors have somewhat different settings, but only in terms of overall power. Limiters can be thought of as super-strong compressors. Therefore, a fast attack on a compressor vs. a limiter can sound incredibly different, simply because a limiter is stronger . You'll generally use fairly low ratios on limiters relative to compressors since they are such strong tools.
How Much Compression Do You Need?
The amount of compression you need is fairly subjective, but there are some general things to shoot for. Your compressor should be used to achieve a consistent level of loudness throughout your music without taking away too much of the original signal's energy. You can also use a compressor to shape the next transient in a recording or add harmonic saturation. Generally speaking, you should compress so that there's about 1 to 2 dB of gain reduction. Too much compression can leave your sound flat and dull, so experiment with your threshold, ratio, attack, and release settings to achieve a loudness balance that works for you.
Types of Compression
It's worth noting that there are different kinds of compression, each with its own specific use case. Here are the main compressor types to consider incorporating into your mixes.
Multi-Band Compression: Multi-band compression is one of the best compression types since it allows you to compress independent sections across a frequency spectrum. This added degree of control is perfect for more general processing, such as placing a compressor on your master bus. Oftentimes, multiband compressors give you a complete view of the frequency spectrum which can make it easier for you to gain a clear idea of the consistency of your track's levels.
Mid-side compression: Mid-side compression is great for more precise or subtle compression needs since a typical compressor will affect the entire stereo image of a track. In contrast, mid-side compression gives you more control over the Mid or perceived "mono" signal of a track. This type of compression is primarily used for a specific creative effect and should be used carefully- You can easily run into phasing issues by using this tool if you don't take the appropriate amount of time to understand it.
Parallel Compression: Parallel compression is also referred to as "New York" compression and is when an engineer blends an unprocessed or lightly compressed version of a track with a highly processed version of the track. Doing so can create a unique balance in which there's still the energy of the original track, but the polished dynamic consistency from the processed signal.
Sidechain Compression: Sidechain compression takes two signals and compresses one in response to another. This type of compression can be particularly useful with areas like the low mids of the frequency spectrum. These areas become muddy fast, and sidechain compression can help clean up the low end by making room for each part. For example, a bass may be sidechained to kick drum so that the bass is compressed every time the kick comes in. This makes it easier for each part to play simultaneously without overpowering the other.
When and How To Use Compression in Mastering
Compression should be used in mastering whenever you feel like you need more consistent dynamics throughout a piece of music. You're essentially using compression in mastering with the same philosophy you'd apply to using a compressor everywhere else.
A compressor should be utilized to create a consistent, cohesive sound without producing distortion or a lifeless mix. Here are some basic ways to start incorporating compression into your mastering process.
Let us start by reiterating that every mix should be approached differently since each piece of music is different. That being said, here are some basic compression settings for mastering to use as a starting point in your mixing:
- You'll want to aim for a fairly high threshold level. You should be getting 2 to 3 dB of gain reduction at the most in order to avoid obliterating your mix.
- Start with a low ratio around 1.25:1 or 1.5:1. Again, subtle changes on the master fader are essential.
- Your ears should have the final say on whether or not you need a compressor on your master fader. Use your bypass button to see if the compressor in question is truly adding value to your mix. If it isn't, you don't need it or need to adjust your settings.
5 Tips for using compression in mastering
Here are some general tips to consider while using compression throughout the mastering stage.
- Remember that there isn't one right way to master. As with any musical process, there isn't one correct way to master a song. In fact, professional mastering engineers understand that each song should be approached independently for the best results. You should consider incorporating compression into your mastering chain, but there are plenty of cases in which you may find that you don't need it. There are no hard and fast rules when it comes to mastering: Let your ears be the final judge.
- In most cases, less is more. When it comes to using compression in the mastering stage, less is often more. Mastering focuses on subtle changes to the mix that should ultimately add a final glimmer and glue to your mix. Start with a high threshold and low ratios and adjust as needed while compressing on the master bus. Don't use more compression than you need to, or it could easily translate to a lifeless mix, or worse, distortion.
- Use bypass to your advantage. When using compression on your master bus, it's particularly important to use the power of the bypass button. Doing so will make it easy for you to hear exactly what your compressor is doing to your mix, which can be challenging when compression in mastering often uses more subtle settings. Double-check your low end of the mix too as this area is notoriously hard to hear.
- Give your ears a rest. One of the trickiest parts about mastering and mixing is the inevitable complications that come with ear fatigue. If you choose to master your mix yourself, give your ears time to rest before settling on the final version of your track. You may have to go through multiple iterations of settings before finding the right compression balance for your mix and master.
- Outsource when needed. Strategically outsourcing the mastering process can make sense for a lot of producers, especially when you take into account factors like ear fatigue. There's no shame in hiring a mastering engineer or utilizing a service like Emastered to provide you with a studio-quality master within a number of minutes.

Compression Mastering FAQs
Are you still struggling to understand compression in mastering? Here are a few commonly asked questions and answers to expand your understanding.
What is master bus compression?
Essentially, mastering compression or master bus compression is unsurprisingly using a compressor on the master bus or fader. An engineer’s general goal here is to “glue” the track together, all while allowing the track to retain its original energy. Not everyone uses master bus compression, but it is a fairly common process.
Should I compress before mastering?
This is primarily a stylistic choice. Note that the mastering process is focused on compression, so you might not need to overly compress your session beforehand. Regardless, it’s key that you give your mastering engineer plenty of headroom so that they can master properly.
Should you compress every track?
There’s no need to compress every track, though there isn’t necessarily anything wrong with doing so either. Just note that most of the time, compression will be applied to the master bus, so every track will become compressed in one way or another. As long as you give your engineer headroom and you aren’t clipping, the choice is yours.
Should you EQ or compress first?
This largely depends on the audio signal you’re processing. If you need to use subtractive EQ to reduce harsh tones in a signal, that equalization should come first. However, sometimes, you’ll need to EQ after your compressor as well, since compression can easily shape the tone of any particular sound.
When should you use compression?
You should use compression whenever you need to create a fuller, smoother sound. Compressors can also add warmth and color to a signal. However, compression can be overdone, so it’s important that you’re keeping an eye on your levels while adjusting your compressor’s parameters.
How does compression affect EQ?
Compression will affect any previous processing in your effect chain and essentially amplify its processing changes. EQ can also help tame compression, so the two work hand in hand depending on where they are placed on a track. You can also bypass your compression on and off to hear the difference with a compressor and without a compressor.
What does a compressor do for live sound?
During a live performance, a compressor acts in the same way it would in a mix: It helps level out the average amplitude of a track, making for a richer, smooth performance. That being said, it should be used sparingly so that it doesn’t cause the vocalist to clip.
Can you put compression on the master bus?
It’s standard practice to add some form of compression on the master bus, albeit a limiter that essentially acts as an ultra-strong compressor. That being said, it’s important that your mix has plenty of headroom so that you have appropriate room to compress on your master bus.
Should you compress the drum bus?
It’s extremely common to add compression to a drum bus, especially if the drums are the driving feature of a particular sound. Compression can help liven up your drum sound and can also be automated through a track for creative contrast. It’s also not uncommon to utilize parallel compression directly on the drum bus.
Is compression the same as limiting?
Compression and limiting are essentially the same processes. That being said, there is a huge difference in the strength of each tool. Limiters are essentially ultra-strong compressors used to bring up the overall perceived volume of a track. Accordingly, limiters should be utilized with more subtle controls for the best results.
In short, compression in mastering can be a powerful tool though it's not always essential depending on your original mix. As with any other music production skill, a polished master takes plenty of practice. Take your time, and don't get discouraged if you run through multiple masters without any luck-- The pros do this too! Happy mastering!


