

If you're new to music production, you might come across the term limiter. While these tools are primarily used in the mastering process, they are important to understand whether you're a music producer or audio engineer.
Below, we'll detail exactly what an audio limiter is and how to use a limiter so that you can effectively implement these powerful tools into your workflow.
What Is A Limiter?
So, what is a limiter anyway? Essentially, a limiter is an ultra-powered compressor, primarily used in the mastering process. More specifically, a compressor is considered a limiter if it has a ratio equal to or more than 10:1. Just like a compressor, an audio limiter aims to reduce the dynamic range of the audio it's processing, which is usually the master bus of a piece of music.
It brings down the highest peaks and raises the lowest parts of an audio signal, creating a more consistent listening experience once properly processed. For this reason, you may find yourself using an audio limiter on individual sounds that have somewhat inconsistent peaks. For instance, limiters may be used on a vocal or drum bus.
Limiters are designed to be strong in such a way that any sound that passes their threshold is stopped at a halt. In fact, the especially potent limiters are called brick wall limiters, referring to the limiter's ability to stronghold any audio past the threshold, sometimes to an infinite ratio.
Limiter VS Compressor
Naturally, limiters and compressors share a lot of similarities. That being said, there are a couple of key differences that are important to take into consideration while figuring out the best effect chain for individual tracks or buses. Here are some key differences between the limiter and the compressor:
Compressors Place More Of An Emphasis On Color
Dynamic range compression can aim to make a more consistent average volume just like limiters, but they can also be used for the sole purpose of adding color or tonal quality to the audio that they're processing, sometimes with a low ratio. Limiters, on the other hand, have high ratios that are used to create more consistent dynamics in audio mastering .
Since the two effect types can be used for entirely different purposes, it's not uncommon for mastering engineers to utilize both in order to create a consistent audio volume with just enough soft clipping or color from a specialized compressor.
They don't have as much tonal quality, since this processing to the extreme could sound jarring. Not all compressors color the sound of their input signal, but you can certainly find ones that do whereas, in the limiting world, these plugins are few and far between.
Compressors Aren't As Strong As Limiters For Processing Dynamic Range
Compressors aren't as powerful as limiters, which naturally makes them more flexible. You could still set a high threshold with a limiter so that it's only processing a small portion of the input signal, but a limiter used on an individual audio track could lead to over-compression, producing a lifeless audio track. You can also use a compressor's precise controls to intentionally introduce soft clipping, which is a level of subtlety that is impossible with an audio limiter.
By design, an audio limiter needs to be used more sparingly than a general compressor. If you're just applying dynamic range compression to slightly tighten up a track, you're going to need to opt for a compressor . Limiters are typically used on the master output, processing the entire song during the mastering stage of the music production process.
Compressors Are More Suited To Individual Tracks
Since the signal processing of a compressor is usually less strong than a limiter, you can use them more liberally on individual tracks vs. the limiter which is focused on the master bus of a composition. If you were to use a limiter on individual tracks, you could unintentionally create hard clipping, or leave a signal feeling dull and lifeless. Audio limiters are typically used on the final mixdown track.
The Limiter's Threshold Is The Dynamic Point of No Control
One of the biggest differences between a compressor and an audio limiter is the way in which you use a limiter threshold. Whereas the compressor can have a gradual processing effect, slowly easing into gain reduction, limiters work by crushing an audio signal as soon as it passes the threshold for absolute volume control.
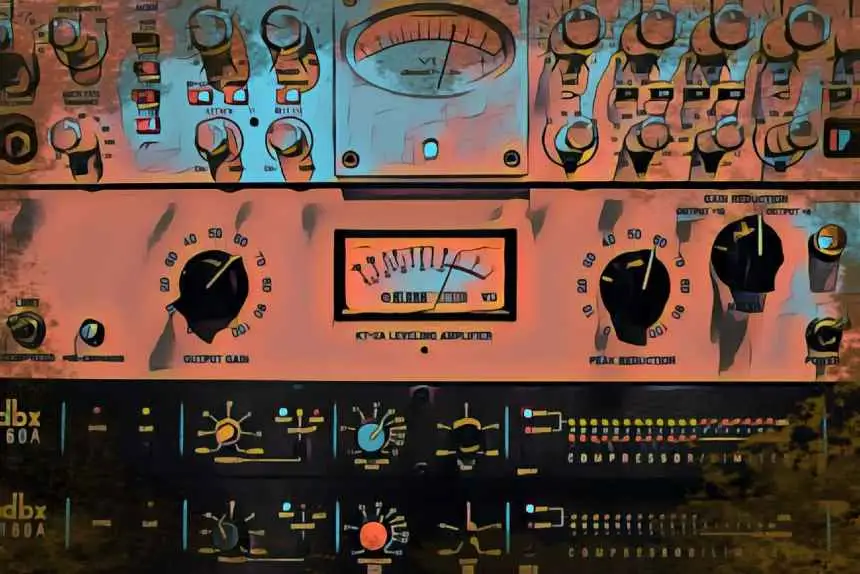
Parts of the Limiter
In order to use an audio limiter properly, it's important to understand how each of the individual parts work together and independently of one another. You'll notice that the parts of the limiter are more or less that of a compressor, but with some key differences. Pay special attention to the intricacies of a limiter's threshold and knee.
Attack
Some limiters have an attack just like a compressor which determines how quickly an audio input is affected by the audio effect . However, this can be rarer with limiters since generally, these tools are designed to clamp down while mixing music as soon as a sound reaches the threshold.
Release
The release determines how long a limiter is limiting a particular sound. A release that's too short creates a somewhat inconsistent listening experience. On the other side of the coin, a limiter with too long a release time can create an unpleasant audible pumping sound. While this is one of the many plights of the mastering engineer, trained engineers are experts in finding the sweet spot between these two extremes. The release control, hence, is one of the most important parts of the limiter.
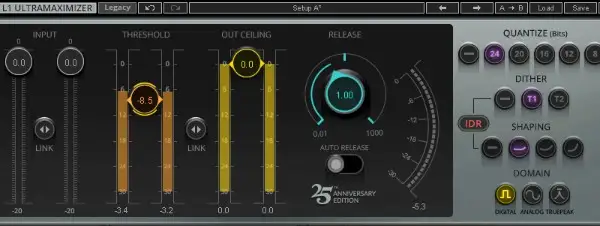
Threshold
The threshold determines at what point the signal is compressed by the limiter. It's a good idea to start with a fairly high threshold and slowly adjust until your dynamics are reigned in according to taste. This can also be referred to as the output ceiling. The dynamic range reduced won't exceed past the level of your threshold.
Input Gain
In its simplest form, input gain is how much of the signal you're feeding through a limiter. The greater your input gain, the higher your endpoint audio, though louder isn't necessarily better. Extreme volumes can lead to unpleasant hard clipping which can easily push loud parts to distortion, effectively ruining a mix. An engineer may have to adjust the input gain since different DSPs and physical outlets have various recording requirements throughout the music industry.
Make Up Gain
Make up gain is an overall increase in volume in relation to the level of gain reduction. This isn't always needed with a limiter, but you may find a similar effect with max output controls or output gain.
Gain Reduction Meter
This meter simply shows you how much a limiter is clamping down on the loudest parts of your song. Generally speaking, you should aim for somewhere between 1 and 5 dB of gain reduction on the mastering bus mix. Gain reduction starts whenever an audio signal passes the set threshold.
Knee
Occasionally, an audio limiter will have a knee which determines how subtle or sharp the limiting is applied. However, this is less common since limiters are designed to completely cut off a signal above the threshold in its tracks.
Types Of Audio Limiters
Now that we've broken down the basic parts of an audio limiter, let's take it a step further and break down the individual types of audio limiters. While all limiters more or less work the same, certain types of limiters can provide more or less flexibility in a music studio depending on the preferences of the engineer.
Full Band Limiters
Full band audio limiters don't necessarily have a visible "band" despite their name. Instead, these limiters work by processing the entire signal, which is sufficient for a lot of limiting situations since these tools are designed to be used on an entire mix of studio recordings.
Multiband Limiters
A multiband limiter, as the name suggests, provides multiple frequency bands for limiting, giving you more precise control over an individual mix. Ideally, any frequency issues are sorted out in the mixing portion of the process . However, if there's a particular range of frequencies that requires more compression over another section, these specialized limiters can make a big difference.
True Peak Limiters
A true peak limiter is designed to account for clipping that we might not account for caused by the analog to digital converter observed in our equipment. For broadcast or scenarios with tv commercial creators and other playback settings with strict loudness parameters, a true peak limiter that can detect inter-sample clipping is essential.
Brick Wall Limiters
Brick wall limiters usually refer to limiters with high ratios. These limiters stand as a "brick wall" blocking out any sound that passes the preset threshold.
How To Use An Audio Limiter
While there isn't one right way to use an audio limiter, there are a couple of tips you can keep in mind for best practices.
- Start with a high threshold. It's always a good idea to start with a high threshold and then slowly dial it back to avoid over-compressing a signal. Less is more when it comes to limiting.
- Keep DSP and playback loudness standards into account. Don't forget that different playback sites require varied loudness ranges . You should use your limiter with these parameters in mind.
- Be subtle. Limiters are incredibly powerful, so it doesn't take much to get them going. Be conservative with your adjustments so that you don't over-compress your signal.
Where To Use An Audio Limiter
So, how do you know when to use an audio limiter? Here are a couple of situations in which using an audio limiter is probably your best bet:
On A Master Bus
Overwhelmingly, audio limiters are usually used on a master bus aiming to process the full mix, giving that final volume push before export for streaming platforms.
On Vocal Buses
Sometimes, the volume level throughout different vocal takes can be incredibly inconsistent. Therefore, it's possible you might use a limiter on a vocal group. However, this probably pertains to group vocals more than anything else, since a limiter can easily flatten the power of a lead vocal due to its naturally high ratio.
On A Drum Bus
Similar to vocals, drums can have widely varying dynamic ranges. Therefore, there might be scenarios in which you use a limiter on a drum bus to reduce the peaks.

Where NOT To Use An Audio Limiter
Just as there are scenarios where using an audio limiter is ideal, there are situations in which you'd want to avoid using an audio limiter such as:
On Individual Tracks
Audio limiters are designed to be used on your master bus or a large group of tracks. Using limiters on individual tracks is a surefire path to distortion. Reserve these tools for the final reduction of group audio peaks. Use your ears as a guide as well. Chances are, a compressor is going to sound a lot better in the end, anyhow.
To Add Color To Your Mix
It's best to use compressors and other individual effects to add color and tone to your sound. Limiters are primarily used for dynamic control and aren't interchangeable with compressors. A compressor may be able to turn into a limiter, but a limiter cannot become a compressor.
As you can see, limiters are essential parts of the signal chain depending on where you are in the mixing process. Take the time to understand these tools throughout your journey in the music industry. While limiters are fairly simple, it can take someone with plenty of experience to consistently use these with absolute expertise.
These super-powered compressors are designed to level out the volume level of a whole bus or mix as one of the final touches in the mastering process.


