


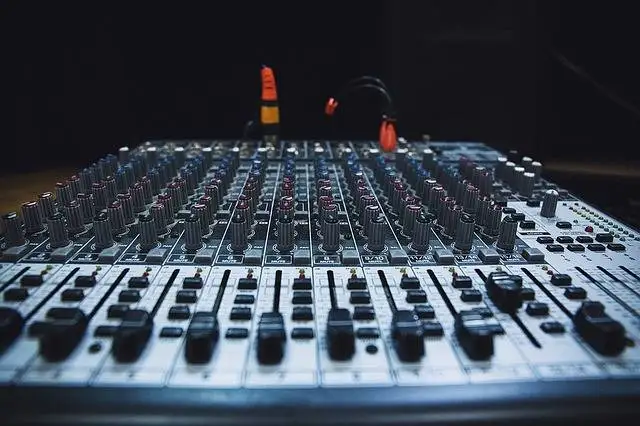
The life of a mastering engineer can be quite a technical one, as each audio production has its own unique needs to sound the best it can be. The mastering process manages the tracks' peak volume, dynamic range, and RMS levels, among others. This article will cover the differences between RMS level, LUFS, peak values, as well as how they're correlated.
What is RMS?
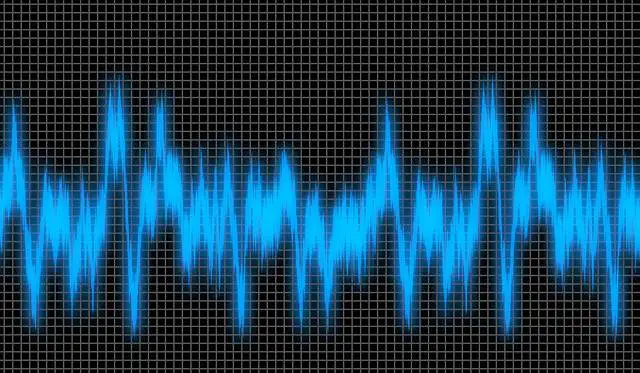
RMS, which stands for root mean square, is a metering tool that measures the average loudness of an audio track within a window of roughly 300 milliseconds. The value displayed is an average of the audio signal. The RMS value will give you a more accurate look at the perceived loudness of the music track for the average listener. Utilizing metering tools to visualize the average RMS will also help you avoid distortion, especially with loud music.
Oftentimes, music sounds different to each person but, there are many tools audio engineers can use to make sure the overall mix sounds good. Furthermore, it's also essential to understand the difference between RMS and LUFS . Although RMS is beneficial as a frame-point for the loudness of your track, it's still only an average and not a 100% accurate reading. Integrated LUFS will show you the loudness of audio files but with a more accurate representation of how our ears perceive the audio. Moreover, if you compare the LUFS and RMS levels, and they're not peaking, this is a good indication of a decent mix, and it may be time to move on to mastering .
What RMS Level Should I Master To?
One of the trickiest parts about music is how subjective its creation and final product can be. Even though this is true, there are still many metrics with mastering audio that should land within certain parameters. With a loud track that has the purpose of carrying a bold and intense sound, they should have an RMS level of roughly -7dBFS to -12dBFS. Tracks that don't have that much dynamic energy or quieter parts, would be better suited with an RMS level of -16dBFS to -18 dBFS.
Peak levels in audio can be tough to manage, and it can become even more challenging with the more tracks you have competing for the same audio space. Also, using level meters is a great way to get a better understanding of where your audio is peaking in the frequency spectrum. The dynamic range of your production has a direct correlation to your peak volume, and how these are managed in your track requires a unique approach to the particular needs of the production.
Any track that's causing the mix to have too much distortion should be managed accordingly with the rest of the mix. The proper RMS value you're looking for also varies depending on the style of song and genre and will require its own approach to the mix to achieve the wanted RMS level. Some songs require a louder or quieter approach, but it's vital to make sure your levels aren't peaking, and each track is mixed accordingly.
The Differences of RMS and Peak Values
RMS (root mean square) is an average of the loudness in the waveform as a whole. This also means that a brief, one-shot audio clip wouldn't read as high as a sustained one. An RMS meter approximates how we perceive sound, which is important as our ears don't pick up every frequency, and we need to visualize how the audio is performing. Furthermore, our ears won't pick up certain peaks, which is why we need the help of other audio metering tools to get the most accurate value reading.
In regards to peak value, this determines the highest voltage a waveform will reach. If your audio is peaking, this is where you'll start to hear clipping and distortion. Another difference between peak and RMS values is peak displays an instantaneous reading. In contrast, RMS provides a reading across a short time frame of roughly 300 milliseconds, as previously stated in this article. As a musician, nearly every creation will have a unique dynamic range, and it's important to utilize both meters to determine a peak level, average loudness, and more.
How to Manage a Peaking Mix
A common frustration amongst musicians is how easy it is to cause your mix to peak. Music can naturally be loud a lot of times, and although you want to capture that power, it still has to be managed to become a pleasurable listening experience. Fixing peaks also requires a multi-level approach with the help of plug-ins like a loudness meter, or even gain reduction tools. Reading your peak values is quite easy, and it can help you identify the source of what's causing the peak. In conjunction, checking the average loudness and integrated loudness are also essential.
Although we know how to work and read the frequency spectrum, we can't hear it all, so having a visual provided by a loudness meter is essential in further mastering an audio production. Music generally contains many different elements, all occupying their own space. Most of the time, their loudness won't be at the same level. In addition, reading the RMS, and integrated loudness values will help you determine where the mix needs work.
The way a mix sounds is a combination of frequencies, and in many cases, these frequencies collide with each other or fight for the same space. The dynamic range of each track in production must be shaped to fit with the rest of the audio. If this is neglected, it can quickly lead you to a peaking mix. Aside from using methods like gain reduction, tweaking the EQ of each track can be a reliable fix for your loudness targets. On top of the tools available in today's world of music production, it would also benefit your mixing techniques to understand the limitations of the human ear.
Perception of Audio
On the frequency spectrum, humans can hear between 20 Hz up to 20 kHz. In addition, hearing loss due to age or other factors can limit our frequency range. Considering each persons hearing abilities could be somewhat different, it's essential to keep this in mind for an optimal mix. Once again, this factor with audio perception is another reason why understanding dynamic range , peak levels, integrated LUFS, and other loudness units are paramount.
How our ears perceive audio is also a solid guide for how you should modify your EQ settings . This should be a good balance of technical skill and knowledge of psychoacoustics. Of course, technical skills can go a long way with music production, but having a grasp of psychoacoustics can take your track to the next level. In addition, with more tracks stacked on top of each other, more frequencies will start to become masked as they're fighting for the same space.
To attain a desirable mix requires the proper balance across the frequency spectrum. Although there are particular frequency parameters we can work within, this can be a subjective area to work on. Our ears can be misleading depending on the frequency range we're receiving. As we get older, the masking of frequencies can become more common with our hearing. This is another reason why a visual representation of integrated loudness, peak level, average volume, and more is so important.
The Importance of Dynamic Range
To give a quick example, the purpose of a compressor is to manipulate the dynamic range of your track, and many people don't know that compression is short for dynamic range compression. In many cases, compressors are used to control an audio signal's peak level , which will help with the average level in the dynamic range. Even though you want to utilize your dynamic range as much as possible, there's no single rule to live by for your tracks.
Another aspect of the range in dynamics is the spatial location of the sounds in the track. We have two ears, and their position allows us to hear the general or exact location of where a sound is coming from. This also affects music production and a track's dynamic range. The spatial location of the sounds in the audio will directly affect how the listener perceives the audio. Furthermore, there are many ways to expand and refine the dynamic range of your mix. Working on EQ, compression, and even stereo spread plug-ins can help shape the sound you're looking for.
How RMS and Limiters Correlate
When working on your mastering chain , there's a good bet you've applied a limiter. Although this tool can help increase the perceived volume of the audio, it's more precise than that. Chances are, your audio has reached its peak level after adding multiple instruments and plugins. Utilizing RMS and a limiter together will help you determine how you should set the parameters for the limiter. In addition, it will help you identify which frequencies are causing the peaks.
Since limiters can give your track an instant boost in loudness, it's essential to make sure it's being used appropriately and is being perceived correctly in correlation with the dynamic range of your track. A limiter will keep an audio's peak level from clipping and distorting the track. Additionally, pushing a limiter's parameters to achieve a louder playback doesn't mean the quality of your track increased as well. If the limiters' parameters, such as attack, were set too short or too long, it can harm the dynamic range and transients of the track. Using limiters on your master is a common practice in the world of music production, but their purpose and how they affect the loudness of your track are often misunderstood.
Plugins for Audio and Loudness Metering
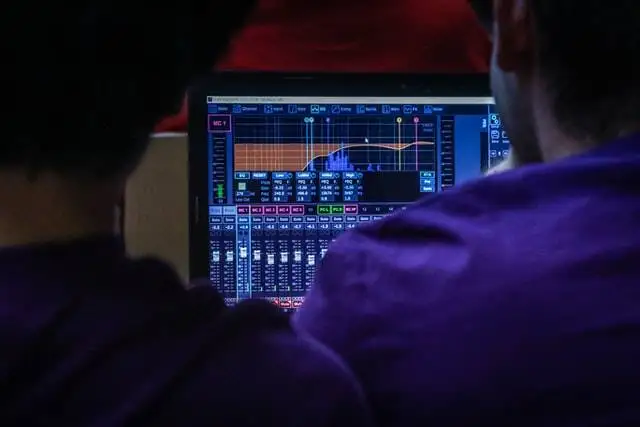
Along with tons of do's and don'ts we've covered in this article, there are many plugins to choose from that'll assist with metering the loudness of your whole track. Utilizing level meters in combination with technical knowledge will help refine your tracks and improve their quality. Below you'll find three different plugins that will meter various aspects of the loudness of your track.
BUTE Loudness Analyzer 2
This loudness meter from BUTE allows you to accurately read the whole track's integrated LUFS and loudness range. It also logs the timeline of your song so you can revisit a particular part of your song and reread the loudness. You can set the plugin to read True Peak or LUFS, and it also provides a compact mode to save CPU space.
Primary Features
- Manually switch between LUFS, True Peak, and RMS readings.
- Multiple presets for particular audio production needs can be manually adjusted and provide a solid base for adjusting parameters.
- A flexible user interface that's easy to read and a compact mode to save screen and CPU space.
- Playback log that allows you to revisit particular parts of the audio and get a new reading of its loudness.
iZotope Insight 2
When in need of thorough audio analysis, the Insight 2 plugin from iZoptope covers it all. It provides multiple modules that allow you to display meters for the loudness level of your track. This plugin measures stereo width, loudness, frequencies, and an emulator for specific listening environments that can help you adjust the audio to your target audience.
Primary Features
- Customizable user interface that allows you to view multiple level meters at the same time.
- Multiple audio metering tools from loudness range, peak, true peak, short and long-term integrated LUFS, and RMS metering.
- Many base presets for the loudness meter.
- 2D and 3D viewing options for the spectrogram module.
- Expandable and adjustable modules to further customize screen space and prioritize metering tools.
LEVELS
The LEVELS plugin by Mastering the Mix is known in the audio engineering community for its ease of use and simplicity. Providing six different audio metering tools and comes with plenty of presets to aid beginners. If you're looking to make your track sound louder, this plugin will assist you in refining your tracks' loudness, peak levels, dynamic range, and more. You can find some of this plugin's key features below.
Primary Features
- A simple user interface with self-explanatory parameters.
- Useful presets for beginner and experienced audio engineers alike.
- In-depth audio metering with six different level meters such as peak, stereo field, LUFS, LRA (loudness range), dynamic range, and bass space (low-end analyzer).
In Conclusion
The human ear is quite complex in how it perceives audio, and being able to visualize the dynamic range and loudness of your track is essential in optimizing the mix of your track as a whole. Even though music is subjective, the average loudness level in your production should always provide a pleasurable listening experience. To accurately measure loudness, you need to check your RMS, peak levels, limiter parameters, and the other handful of metering tools we spoke about in this article. Working with your ears in combination with these loudness meters will only refine your mix to its fullest potential.
FAQ
What is RMS in mastering?
This is the average output level of loudness over a short time
What level should my master be at?
In terms of RMS, for louder tracks, it's suggested to land between -7dBFS to -12dBFS and -16dBFS to -18 dBFS for quieter parts.
How do you increase RMS in mastering?
In short, you can increase the RMS in your track by decreasing the dynamic range. Modifying this parameter will allow you to adjust the louder and quieter parts of the song, leading to an increase in the RMS.
What dB should my mix be before mastering?
It's recommended to have your peaks land between -18 dB and -3dB in your mix to provide enough headspace for the mastering process.
How do you increase RMS without peaking?
There are multiple ways to achieve this outcome, but one of the main methods is to use a limiter on the master chain. You can adjust the parameters of this plugin to limit any peaking.
How do you calculate RMS?
RMS is calculated with an average of loudness levels of a period of about 300 milliseconds using a level meter.
How do you convert RMS to watts?
With the conversion ratio of 1 watt equaling 0.707 RMS, all you have to do is divide the RMS value by 0.707.
Why is RMS used instead of average?
RMS is used as it's short for root mean square, which is how the average loudness is calculated.
Are more RMS watts better?
Although having more RMS watts may deliver more power, it also comes with more distortion. So, the amount of power applied should be dependent on the needs of the audio or equipment.
Is 18 watts RMS good?
It's not whether it's good or bad; it's about knowing your thresholds. For example, 20 watts RMS is the max amount of clean power that amplifiers can deliver. In this case, anything higher than 20 watts of RMS will start to distort the audio.


