


Learning how to mix vocals is an art in itself. After all, the human voice is one of the most dynamic instruments. The vocal sound can reset in a wide range of frequencies, with every vocal performance acting as a unique one.
Since vocal tracks often serve as the glue of every track, a great vocal mix can easily separate an amateur mix from a professional one. While mixing vocals is undoubtedly intimidating, if you follow a tried and true processing method, you're sure to end up with an excellent vocal mix.
In this article, we'll share a comprehensive guide on how to mix vocals for a professional mix. We'll break down the reasoning behind certain vocal mixing techniques so that you can understand the "why"s behind each stage, and put your own spin on it. Let's dive into it!
16 Steps To Mix Vocals
Without further ado, here are the absolutely essential steps of mixing vocals. Not all vocal recordings will be processed in this particular order, but these key steps are pretty central to vocal performance processing.
- Prep Your Vocalist
- Don't Take Recording Lightly
- Organize Your Session And Create A Game Plan
- Remove Obvious Imperfections
- Create A Vocal Comp
- Pitch Correction
- Gain Automation
- Gain Staging
- Subtractive EQ
- Use a De-esser
- Compression
- Tonal EQ
- Additional Compression and Spatial Effects
- Making Room Across The Mix
- Volume Automation
- Final Touches
Step 1: Prep Your Vocalist
For starters, it's important that your vocalist understands the most effective way to sing their vocals. If someone is recording rap vocals, you're sure to have a different microphone set up than you would for someone recording operatic vocals. The main point is that every vocal mix should be approached differently, starting with the initial recording process.
If your vocalist is relatively new to studio recording, encourage them to reduce their consonant sounds during vocal delivery and show them where they should stand while singing in order for the microphone to function properly. Dynamics handling starts with proper mic and vocalist placement , so make sure your vocalist is comfortable and knows exactly what to do before reaching for the "record" button.
Are you recording your own vocals ? If so, make sure you get plenty of rest and hydration before your session to get studio-quality vocals the first time around. You'll want to make sure that you know your lyrics by heart and practice the vocal a couple of times off the mic to make sure you've honed in on your preferred vocal performance.
Step 2: Don't Take Recording Lightly
The second step of a great vocal mix is to get an excellent recording. Pre-mixing is just as important as post-mixing, so make sure you don't skimp out on these steps. Here are some general vocal mixing tips to keep in mind during the recording stage.
Remove Unwanted Background Noise
You'll want to start by isolating the vocal as much as possible. Your room should be fairly "dead", so if you were to clap, you wouldn't hear any echo , or reflections of the sound off of the panels in your DIY vocal booth. Acoustic treatment is also of great importance, but do what you can to keep the vocal sound as pure as possible. Utilizing professional sound panels, foam, bass traps, and anything you can to cut out unwanted noise is always a great approach.
Select the Right Microphone
Make sure you're selecting the right microphone based on your vocalist and session type. Ribbon microphones, condenser microphones, and dynamic microphones all have radically different sound profiles, so make sure you know your equipment. Doing so will provide better lead vocals and protect your equipment for years to come.
Don't forget to consider using hardware equipment like preamps and compressors as well. Test out your vocal chain ahead of time and adjust it as needed with your vocalist.
Get More Than What You Need
When in doubt, record another vocal take. It's always better to have more than you need, and you should aim to have at least 3 solid vocal recordings before considering moving on to the mixing stage of the process . You'll also want to take into account vocal doubling, recording takes on the left and right side of the microphone, or recording harmonies to use in a future mix.
Get as much as you can out of your vocal session to prevent having to conduct re-records in the future. Check your vocals throughout the session for signs of clipping or excessive popping. You'll need to cater the microphone and input settings to the needs of each individual vocalist.
Step 3: Organize Your Session And Create A Game Plan
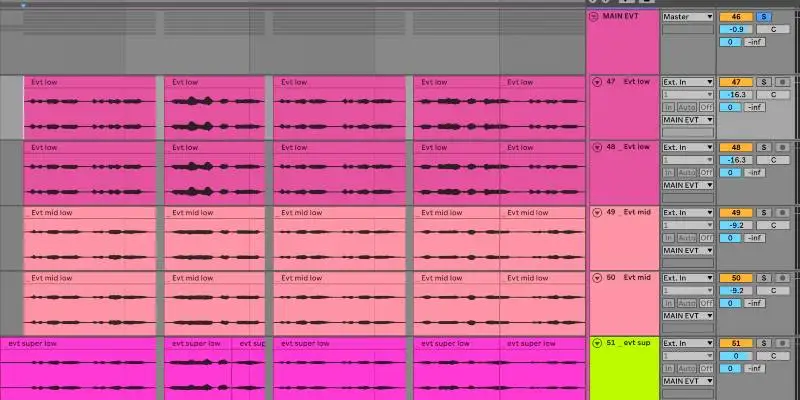
Once you've finished the recording, it's time to organize a session. Label your lead vocals, harmonies, and backing vocals accordingly and save your project as a separate session.
This should be done before manipulating the vocals in any way, in case you ever need to revert back to the original recordings. It's also a good idea to back up your original vocals on a separate drive or cloud storage space. There's no telling if your client will request them in the future, and it's also just a good idea to have them in a separate space in case you lose your local copy.
Before you start mixing, figure out your mindset for the mix as it relates to the rest of the project. While there aren't any set-in-stone rules for any vocal mix, certain genres take on specified sound characteristics that are worth keeping in mind while setting up your mixing session.
Hip Hop
Hip Hop vocals are processed to be upfront and center, with plenty of compression , and sometimes more stylistic effects like noticeable autotune or distortion. There's also a noticeable presence in certain frequencies in the upper-midrange that may be lesser so in a pop vocal.
Pop and R&B
Pop and R&B vocals aim for a crisp sound with subtle pitch correction. You'll want to have dynamically consistent vocals with lots of shine and shimmer on the top end of the frequency spectrum.
Rock and Metal
Rock and metal have a more lenient, aggressive sound with plenty of vocal compression. Depending on the style of the track, the vocal may sit further back in the mix when compared to pop.
EDM
EDM or electronic music often takes on the polished approach of a pop vocal, but with heavier, obvious processing. These vocals are tuned to perfection.
Jazz
Jazz music aims to produce a pure vocal track as much as possible. With jazz, you'll want to leave the basics dynamics intact to keep the feeling of live performance in a studio recording.
Step 4: Remove Obvious Imperfections
Now that you're organized, it's time to start scanning through your vocal tracks. Check for any obvious imperfections- This could be a loud breath, noises in a recording, or timing issues, and fix them. Try to do as much as you can to the actual audio file before reaching for an EQ or external plugin.
You can also mark any harsh sections in a vocal recording to address later. Color coordination and labeling are your best friend in this process! Make notes of what you might want to address moving forward in your mix so that you have a clear starting point.
Step 5:Create A Vocal Comp
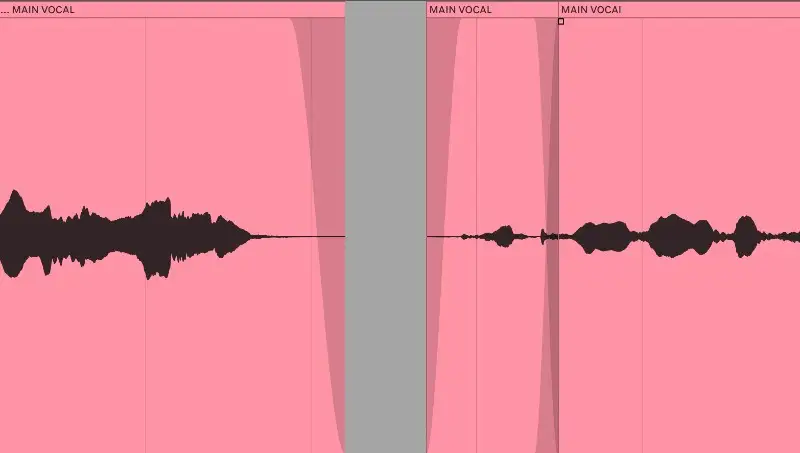
It's time to put together your vocal comp for the lead or main vocal of your track. To do this, you'll carefully listen through each vocal track to pick out the best vocal performance. It's a great idea to listen to the same 2 bars of the same section for each take instead of listening to each take in full to make your decision.
Our ears can only hold onto to so much information at once, so take your vocal evaluation one track at a time. Make sure you're listening to a dry vocal so that you're getting the most accurate representation of the vocal recordings.
Condense the vocal tracks down into a singular vocal track, which will serve as your vocal comp. Don't worry if you're noticing problematic frequencies or a busy mix on your comp: These issues will all be adressed moving forward. During this stage, you simply want your vocals cut down to the best performance possible.
You can also identify the loudest peaks in your vocal comp and engage in gain reduction for each of those individual sections. However, don't worry about doing too much of this manually. Your compressor will help with this moving forward, but using manual gain reduction on the loudest peaks in your music can make gain automation easier moving forward.
Reference Tracks
It's always a good idea to have a reference track throughout any stage of the music production process, especially while you're still training your ears. Take a mastered track that has a similar vibe to the session you're producing and bring it into your vocal mixing session.
This way, you can easily refer back to the levels and overall mix of a similar track. This is great for ear training and will make it easier for you to produce radio-ready vocals while you're still getting the hang of everything.
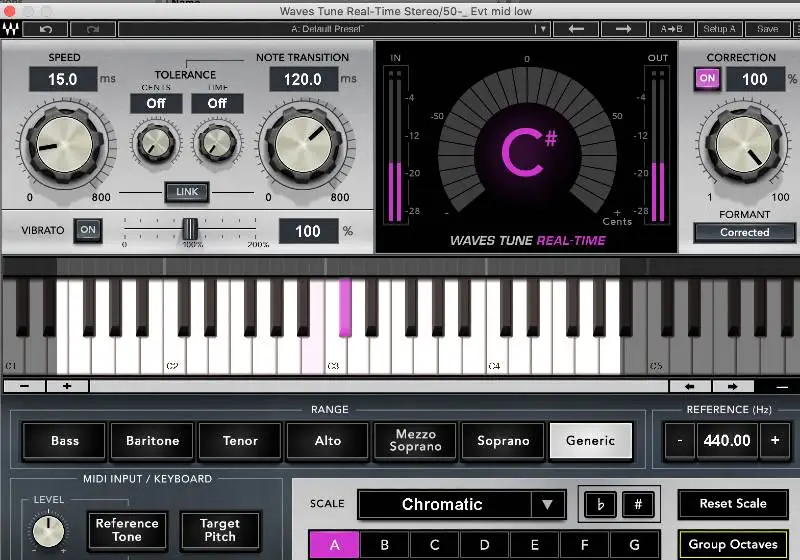
Step 6: Pitch Correction
Some form of pitch correction is used on nearly every studio recording, though on some mixes, the effect is more subtle. However, make no mistake: applying pitch correction isn't cheating. Most of the time, it's an essential part of the vocal mixing processing that transforms a great vocal comp to radio-ready vocals.
Unless you're going for a stylistic effect, utilize a plugin with subtle settings so that it doesn't remove all human characters from the vocal. I decided to use Waves Tune Real Time plugin which smooths over tonal qualities without being overly obvious. You can add pitch correction properly with any of the common autotune plugins like Autotune, Melodyne, or most recently, Metatune.
After you've processed your comped vocal through pitch correction, it may be wise to print out the vocal in order to save processing power. It's a good idea to save a separate session or create a copy of the live-tuned vocal just in case.
Step 7: Gain Automation
Gain reduction automation is one of the most important vocal processes to help reduce the dynamic range of your vocal, without taking away too much energy. Essentially, the goal of gain reduction is to create a consistent sound throughout, without too much variation in the dynamic range or perceived volume of the same track.
One of the best vocal mixing tips is to utilize a gain plugin for this process, rather than a volume fader since that will come in handy for potential volume automation going forward. Simply automate the gain plugin so that your vocal rests at more or less the same amplitude throughout.
This process can be tedious, but you can also utilize a gain plugin like Waves vocal rider to help automate the brunt of gain automation. If you find that your automation is bringing up unwanted low-level noise, use a noise gate plugin to cut off any sound below a preset threshold.
Any stock noise gate plugin should work fine for this process, but you may have to play around with the attack time to ensure that the gate isn't cutting out key parts of your vocal.

Step 8: Gain Staging
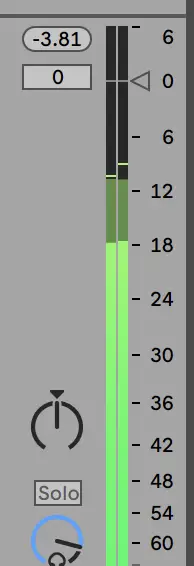
Gain staging is a fancy word for ensuring that your mix isn't peaking. What this means is setting each of your tracks at a certain level, so that your master fader doesn't go above 0 dB. Most mixing tips advise providing "headroom" so that it's easier to master your track.
Therefore, your master EQ should rest somewhere between -3 and -6 dB once you're finished with your mix. Simply bring down the faders of each track, and adjust the different tracks to taste as you go along. Just remember, your end goal should be producing a mix with an appropriate amount of headroom so that it can be mastered without issue.
Gain staging also gives you the opportunity to check in on what the most important elements in any given session are. Typically, the vocals and/or drums will be the most forward or present in a mix, so these elements might end up having some of the higher faders in your session.
Step 9: EQ
If you haven't already, it's time to use subtractive and additive EQ processes to eliminate problematic frequencies from your vocal comp. Here are some of the main tools you might use to help clean up your vocal:
Low or High Pass Filtering
These filters are used to cut out unnecessary frequencies on the upper and lower limits of the frequency spectrum. A high pass filter can be used to cut out any low rumblings that don't need to be heard on a vocal. A low pass can cut out any unnecessary air on the top end of a track.
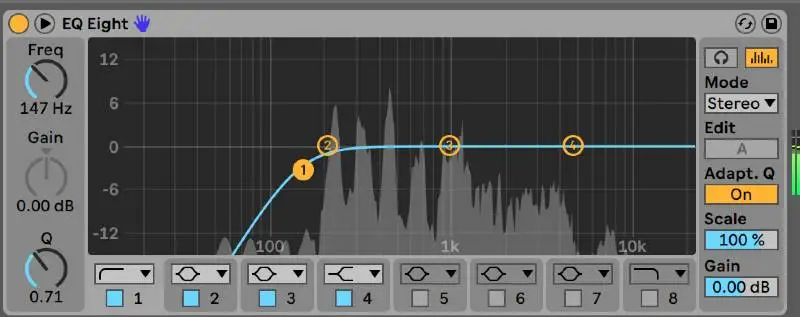
Shelf Filter
A shelf filter can be used to boost a specific frequency range, usually on the upper or lower end of the track. It might be worth utilizing a dynamic eq for these types of processing so that your filter is automated to adjust based on the frequencies at any moment in time.
EQ sweeping
EQ sweeping is designed to reduce harsh frequencies in a signal. You can adjust each frequency band to reduce unpleasant tones that may pop out in the mix. It's best to avoid aggressive settings if at all possible since even a small EQ tweak could produce an entirely different tone for your vocal.
Remember, this guide is only to be used as a starting point. Plenty of producers choose to EQ after compression, or better yet compress before and after utilizing multiple compressors. This is just a single model for vocal mixing, but as long as you use your plugins and ears to cater to your mixing goals, there's no one right way to process tracks.
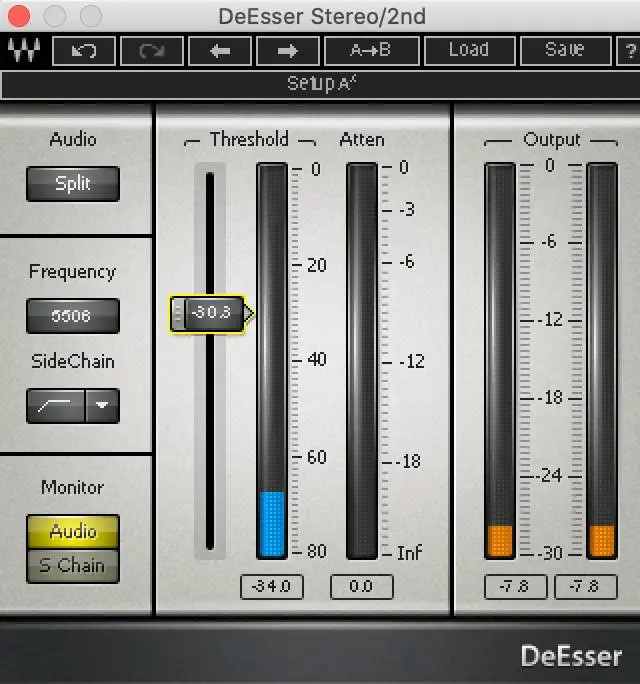
Step 10: Use a De-esser
The basic functionalities of a de-esser is to act as the first compressor target towards any remaining sibilance, or harsh consonant or "S" sounds. This first compressor only clamps down on the specified frequency range, usually on the higher end of the spectrum where these harsh noises tend to rear their sonic heads.
It's a good idea to utilize a de-essing plugin, but make sure to do so subtly. Too much could lead to an overly compressed vocal, making for a dense mix devoid of life and energy. Your de-esser should certainly reduce sibilance, but it shouldn't take away the central energy of your vocal.
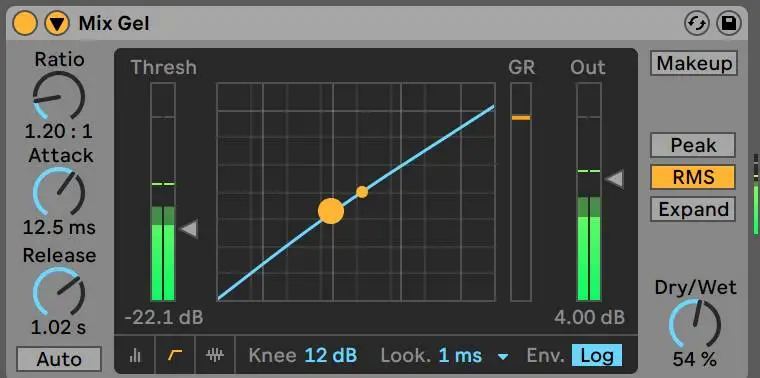
Step 11: Compression
Compression helps bring up the lower parts of your vocal, giving you a more dynamically consistent listening experience. It can also provide plenty of tonal processing, giving your vocal mix potentially more color and warmth to help it sit amongst a mix.
When you use a compressor, it's important to make subtle adjustments to the attack and release until you find that you've created a natural yet elevated sound for your vocal. You might initially have an ultra-high threshold on your compressor so that you can hear what it's doing, but make sure to reduce it down to a level that's necessary for your needs.
You definitely don't want to over-compress a vocal as this can easily remove all driving energy from your mix. Compression should help your vocal be consistent and powerful, not squashed and dull. Utilize your bypass button on your compressor so that you can notice the difference between your vocal mix with and without the plugin.
As usual, use your reference track as a guide: If your vocal seems more flattened than your goal track, it may be a sign that it's time to turn down your compression ratio.
Step 12: Tonal EQ
Plugin processing can add a lot of character to your mix. Hence, in many cases, you'll find yourself using an EQ for multiple purposes, including shaping the tone of your vocal.
You can engage in tonal EQ processes by adding subtle boosts to certain sections. For example, for a pop vocal, you may add a slight boost in the higher frequency range to add a little more presence to the vocal performance.
You might also have to correct some of the tones added through compression. Play around with your compressor first to see if you can remove unwanted frequencies from the source, but if you're finding it difficult, you can always add an EQ next in the change to mitigate that problem frequency.
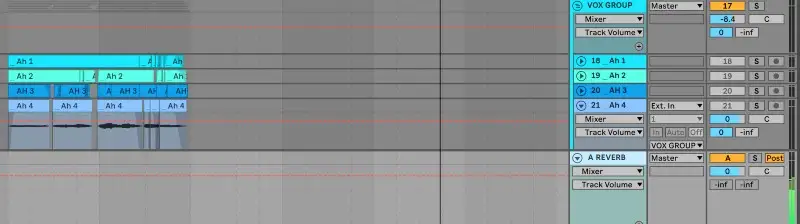
Step 13:Additional Compression and Spatial Effects
One of the final parts of vocal mixing is adding on additional compression and other effects. Serial compression is fairly common, since many compressors have their own "flavor", each subtly adding a bit of character to a vocal. You can also use compressors for different things: One might be used solely for adding a little extra warmth, while another is tasked with creating a more dynamically consistent vocal.
After your compression and EQ chain, you can consider spatial effects like reverbs, delay, phasers, etc. Keep in mind that all of these processes can drastically affect the tone of your vocal, so you may need to tweak them using the plugin's settings or a tonal EQ.
A common approach that usually yields more overall control of the vocal is called parallel processing. In this method, an effect is placed on a send track or a separate effect track rather than directly on the vocal track alone. You can still place the effect directly on the track while creating your send track, though it makes sense to have a direct track at a fairly low setting since you'll be sending most of the processing through the effect track.
The original vocal is then partially "sent" to this effect track, producing a separate processed signal alongside the original vocal. This way, the blended tracks coexist, giving you the benefits of the processed track without mitigating the energy of the unprocessed signal.
It's common practice to utilize parallel compression, reverb, a vocal doubler, or even with delays. Go ahead and experiment! Your ears are the best judge, so find what makes the most sense within the context of your mix and go for it.
Step 14: Making Room Across The Mix
Oftentimes with vocals, you have to make room for key competing frequencies in a mix. Since vocals often rest in the mid-frequency range, they are often competing with lead instruments like synthesizers, pianos, or guitars.
Sometimes, it makes sense to process these elements so that your vocal can stand out against the rest of the session. This could mean using a dynamic EQ to duck out frequencies during just the chorus of a song, or using sidechain compression to have certain elements gel more in line with the vocal.
Don't forget that sometimes your most powerful vocal mixing tool is your volume fader. If you need to bring a song more forward, raise the volume. If it's competing with the main vocal, lower the fader before trying to overcomplicate with a number of effects.
Of course, these volume adjustments should be made while still considering the importance of gain staging. Just remember that there are always multiple ways of combating a particular processing problem, so it's well worth your time to weigh your options in case one makes more sense for your session.
Step 15: Volume Automation
Volume automation can help breathe life back into your vocal after serial compression processes, or just add a little extra secret sauce to help a lead vocal land better with the listener. Simply automate your volume fader to create more energy throughout the vocal mix.
However, this should be done cautiously, and only after all other previous processes are completed. Volume automation should only amplify the effects of a well-processed vocal, and if your vocal isn't clean before automating it, it can be difficult to keep your automation intact.
Not every vocal mix will require automation, but it's certainly something to take into consideration, especially during the choruses and climaxes of your track.
Step 16: Final Touches
Now that you've perfected your lead vocal, it's time to listen, gather feedback from those you trust, and listen again. Compare your vocal to your reference track to see how you've done-- Is your vocal sitting in your mix the way you wanted it to? Is there anything you need to go back and adjust?
Unfortunately, vocal mixing can be a tedious process that requires consistent trial and error. Don't get discouraged if you find yourself going through mix after mix. Plenty of top-notch producers and engineers still find themselves going back to the drawing board again and again. If anything, it's a sign of progress if you can notice the imperfections in your mix that you would have otherwise ignored when your ears weren't as tuned.
Rinse, repeat, and record and needed.
How To Mix Vocals FAQ
Are you still struggling to understand the art of vocal mixing? Here are a couple of commonly asked questions and answers to expand your understanding.
How do professionals mix their vocals?
Just like any other stage of the mixing process, every engineer has their own secret sauce when it comes to vocal mixing. That being said, there are a number of processes that almost every engineer uses to clean up a vocal including vocal comping, gain staging, subtractive and additive EQ, de-essing, compression, and adding spatial effects like reverb.
Why do my vocals sound amateur?
Your vocals could sound amateur for any number of reasons including utilizing a poor recording process or failing to understand how to incorporate them within your mix. The good news is that it’s easy to improve your vocal mixing over time as you learn to develop critical listening skills.
How loud should vocals be in a mix?
For most types of music, your vocals should be one of the loudest elements in your mix, possibly competing with the drums. Loudness is fairly relative to the rest of your session, but your vocal certainly shouldn’t be clipping. Generally speaking, vocals should peak around -10 dB.
Should vocals be panned?
A lead vocal usually stays in the center of the mix, but that’s not to say that you can’t create vocal doubles that are hard or soft panned. Panning can also be used for stylistic effect, or on backing vocals, harmonies, or ad libs to add some more character to your mix.
How do you add warmth to vocals?
You can add warmth to your vocals by utilizing saturation. Warmth can also be achieved through tonal EQ processing and using certain microphones that can add more color and characteristics to your vocals. Certain compressors can also add warmth, especially those made to mimic analog equipment.
Should you mix before or after vocals?
Every song may require its approach logistically and stylistically. It can be helpful to record vocals before mixing since you’ll inevitably need to adjust the elements of the rest of your session in order to fit your vocal properly in the mix. That being said, you can certainly mix in vocals after your initial session if needed.
What EQ frequency is vocals?
Most of the core vocal frequencies rest between 100 and 300 Hz. However, every vocal is different, so expect the higher and lower end to fluctuate based on the vocalist. This mid-range can be particularly difficult to mix since it can compete with so many other instruments.
Should I mix vocals with the beat?
Your vocals should work in tandem with the beat. While the two elements may always compete with each other, you should decide at which point you want each element to shine and process accordingly. In more extreme cases, you might even utilize sidechain compression between the two audio files.
What is a good reverb setting for vocals?
Great reverb helps add some atmosphere to your lead vocal without causing it to lose presence within the mix. You can apply reverb directly to your vocal track, or utilize parallel processing to have more control over the reverb and the blend of it.
Are my vocals too loud in a mix?
Vocals are usually too loud in a mix if they’re peaking over -10 dB (though this isn’t a set in stone rule), or completely dominate all other sounds in your mix. It’s a good idea to utilize a reference track to give you something to reflect back on for appropriate vocal levels while actively mixing.
Don't forget that learning how to mix vocals properly takes plenty of time and training. You'll have to spend time studying the multiple stages of mixing in order to figure out your mixing style; plus, it takes time to train your ears.
However, with a little bit of practice and the help of these vocal mixing techniques, you'll be able to vocal mix like a pro in no time at all. Have fun producing radio-ready vocals!


